# Hello, we're PreQuilt!

The PreQuilt team is Gar Liu, a developer, and Laura Henneberry, a quilter. We're glad you're here!

<figure><img src="/files/6JyoM7V5zkH1UfcRWNo8" alt=""><figcaption></figcaption></figure>

## <mark style="color:blue;">What is PreQuilt?</mark>

PreQuilt is an online software application that helps you design, visualize, and make your quilts.&#x20;

Use our time saving features (like Fabric Links tags, randomization, built in solid fabric color cards, fabric calculator, printed fabric swatch importer, and more) to quickly visualize and plan your next quilt!&#x20;

Subscribers choose between the Basic or the Market subscription plans. For more information, visit [*https://app.prequilt.com/plans*](https://app.prequilt.com/plans).

***

<figure><img src="/files/UgXtlldKRX6fGydeYSXc" alt="" width="563"><figcaption><p>Gar Liu &#x26; Laura Henneberry</p></figcaption></figure>

## <mark style="color:blue;">**Who's Behind PreQuilt?**</mark>

The PreQuilt is made up of <mark style="color:blue;">**Gar Liu**</mark>, a developer, and <mark style="color:blue;">**Laura Henneberry**</mark>, a quilter, and we’ve teamed up to create PreQuilt to design and visualize quilts in fun and surprising ways.&#x20;

Gar has over 20 years of dev experience working in house and as a freelancer for some of Toronto's biggest ad agencies. He has a unique skillset of being both a full stack developer and having a graphic design education from OCAD University.

Laura starting quilting over 10 years ago and while she loves seeing where a project goes, she often wants the confidence of knowing what a quilt will look like before cutting into her fabric. She has a unique skillset of having both an Operations background as well as a design education from OCAD University.&#x20;

### <mark style="color:blue;">What's PreQuilt's Origin Story?</mark>

PreQuilt was born one night when Laura was struggling to visualize [*The Circus Tent Quilt*](https://www.etsy.com/ca/listing/613458872/circus-tent-quilt-pattern-digital-pdf?click_key=0aaf3402cd28e039dbf3d7ec23e0527594391b8d%3A613458872\&click_sum=995f9448\&ref=shop_home_feat_1) with her limited Illustrator skills. Gar looked over her shoulder and said he could code something that would speed up the design process.&#x20;

And the rest is history... Or rather it’s the start of the ever evolving web application you see here today. Come visit us at <https://prequilt.com/>*!*

***

## <mark style="color:blue;">Wanna take a peak?</mark>&#x20;

<mark style="color:blue;">**Got a minute?**</mark> Check out our quick demo video:

{% embed url="<https://www.youtube.com/watch?v=aVKg3GsdIk4>" %}

***

## <mark style="color:blue;">Get Started</mark>

Ready to dive right into your first quilt? We have a FREE Intro to PreQuilt Course to get you started. Here are also some other really helpful and essential Help Guides so you can get the most out of PreQuilt.

<table data-view="cards"><thead><tr><th></th><th></th><th data-hidden></th><th data-hidden data-card-cover data-type="files"></th><th data-hidden data-card-target data-type="content-ref"></th></tr></thead><tbody><tr><td><mark style="color:blue;"><strong>Course 01</strong></mark></td><td>Introduction to PreQuilt</td><td></td><td><a href="/files/LGlKNZJKSlkEmWho7p46">/files/LGlKNZJKSlkEmWho7p46</a></td><td><a href="https://courses.prequilt.com/youtube-courses/intro-to-prequilt-course">https://courses.prequilt.com/youtube-courses/intro-to-prequilt-course</a></td></tr><tr><td><mark style="color:blue;"><strong>Build a Block Unit</strong></mark></td><td>For the Fabric Calculator</td><td></td><td><a href="/files/4SjBJyvQXh7dwWmWX4oN">/files/4SjBJyvQXh7dwWmWX4oN</a></td><td><a href="/pages/ianJ8Sxa0Dk8Q26I1lEb">/pages/ianJ8Sxa0Dk8Q26I1lEb</a></td></tr></tbody></table>


# About this Help Guide

## <mark style="color:blue;">Disclaimers</mark>

First off, full disclosure, this is a **living document** that we'll be adding to and revising as the software evolves and changes. If you stumble across something outdated or inconsistent, please be patient with us and forgiving.&#x20;

We've done our best to create a good starting point for this Help Guide. But we're very human, so please email us (<mark style="color:blue;">**<hello@prequilt.com>**</mark>) if you get confused or if there is a big, blatant mistake that we should fix asap. We very much appreciate your willingness to alert us so that we can fix and improve this living document.&#x20;

## <mark style="color:blue;">Style Guide</mark>

We've done our best to be consistent with the formatting of this information. Here's what each of the formats mean:

* <mark style="color:blue;">**Blue & Bold**</mark> --> Call to action! Click on or do what is blue and bolded
* **Bold & Black** --> FYI - Usually an important term or something important to note.&#x20;
* *<mark style="color:blue;">Blue & Italic</mark>* --> Glossary term - Click on it for more information in the [*<mark style="color:blue;">Glossary</mark>*](/welcome-to-prequilt/about-this-help-guide/glossary).


# Glossary

## <mark style="color:blue;">PreQuilt Glossary</mark>

We understand it's always difficult to learn something new. There's always a learning curve, a new vocabulary to learn. That's where we hope this glossary will come in handy!

Below, you'll find a very visually oriented glossary of all the terms we use regularly in this PreQuilt Help Guide and in our online YouTube tutorial videos.&#x20;

If you find yourself confused because we've forgotten to include one, please don't hesitate to email us at <mark style="color:blue;">**<hello@prequilt.com>**</mark> and we'll be happy to help you out and add it here!

## <mark style="color:blue;">B</mark>

#### <mark style="color:blue;">**Block Editor**</mark>

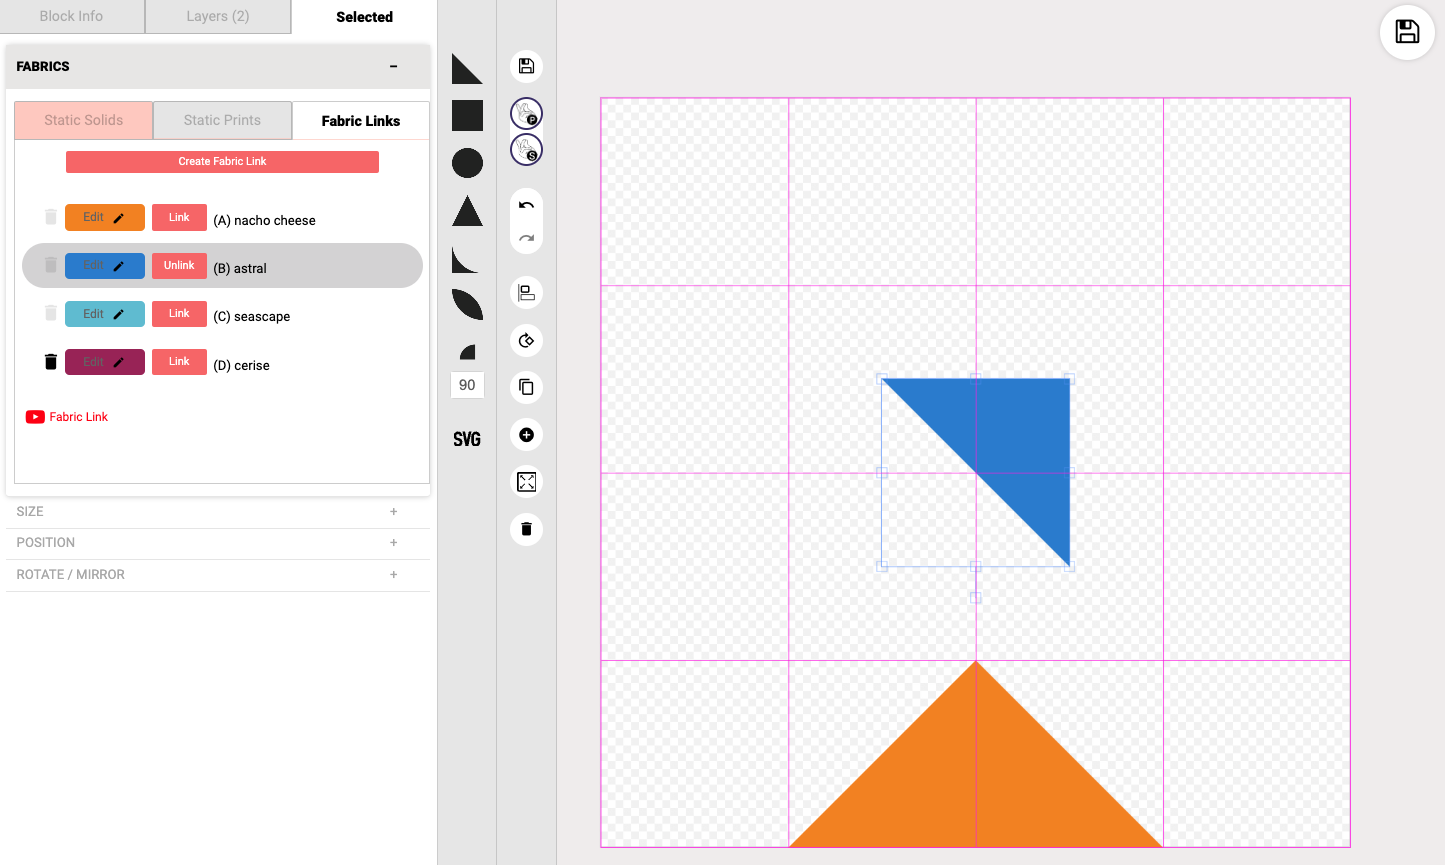
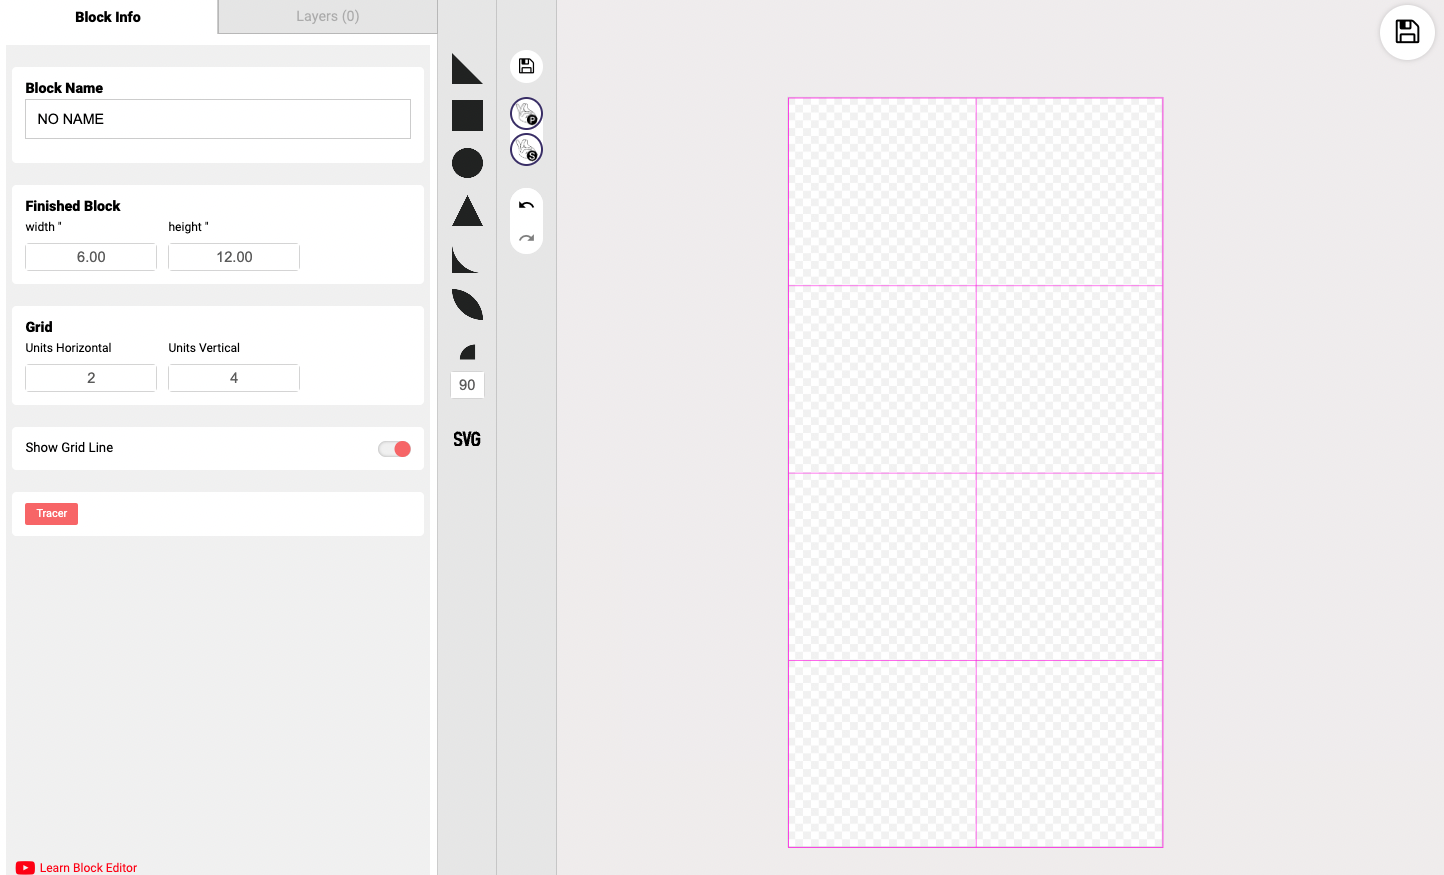
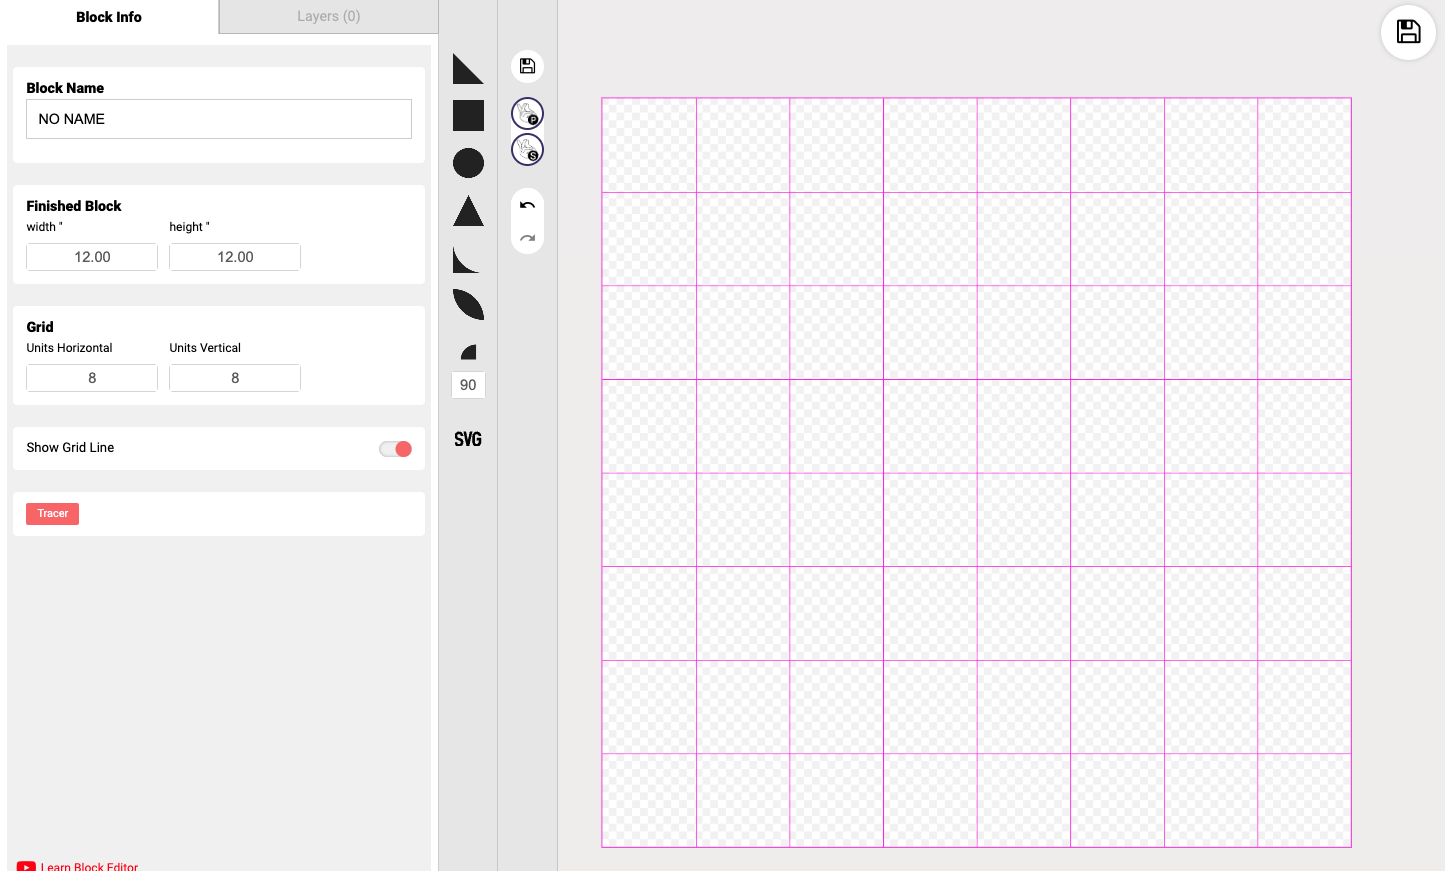
The **Block Editor** is a separate panel that is used for creating or editing quilt blocks. Within the editor, create and design custom quilt blocks. You can control the dimensions and use grid lines to help align patch shapes.

<figure><img src="/files/buY9B09GHAsKp3qtHMQI" alt=""><figcaption><p><em>The <strong>Block Editor</strong> pop-up window</em></p></figcaption></figure>

#### <mark style="color:blue;">Block Editor Canvas</mark>

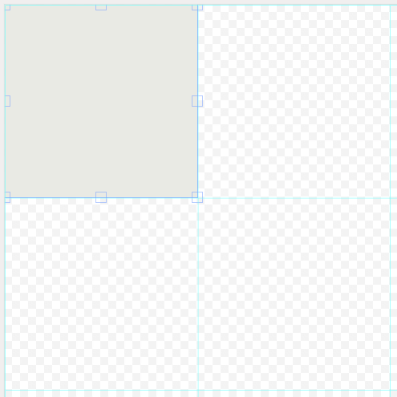
The **Block Editor Canvas** is the area upon which blocks are built and designed. It starts empty (transparent) and shapes can be added onto it to build a quilt block.

<div align="left"><figure><img src="/files/AXE0Ao2yswaHtdvyLWqC" alt=""><figcaption><p><em>An empty <strong>Block Editor Canvas</strong></em></p></figcaption></figure></div>

#### <mark style="color:blue;">Block Library</mark>

The PreQuilt **Block Library** (also called **PreQuilt Blocks**) is a collection of common, prebuilt quilt blocks that can you imported into your quilt project. This grab and go resource is meant to help you save time, since you do not need to create everything from scratch.

## <mark style="color:blue;">C</mark>

#### <mark style="color:blue;">**Cell Block**</mark>

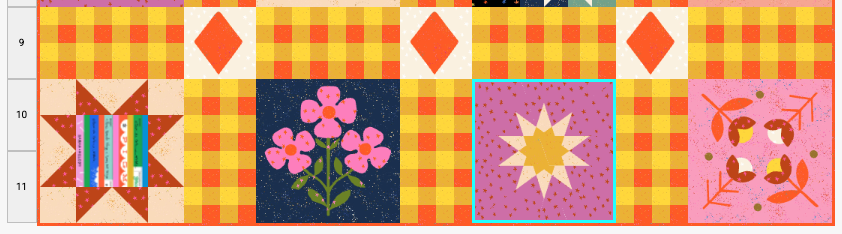
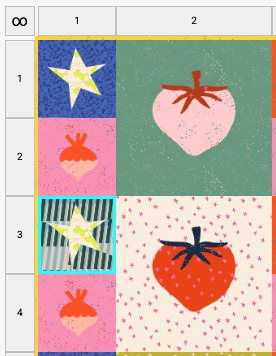
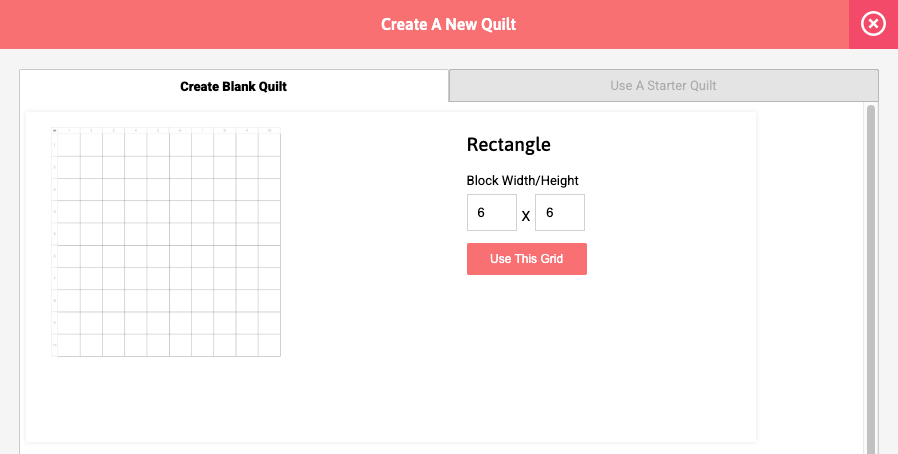
We used spreadsheets as a source of inspiration when designing PreQuilt. So, a **cell block** is one of the boxes (or cells) in the quilt. In the image, the cell block is selected, which is indicated by its blue outline around the cell.

<div align="left"><figure><img src="/files/ReiMbpoZO19GqwDaIg5r" alt=""><figcaption></figcaption></figure></div>

#### <mark style="color:blue;">Clone</mark>

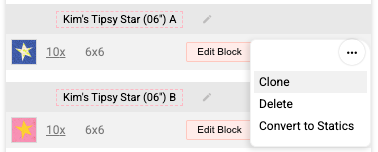
In PreQuilt, **clone** is our term for copy or duplicate. Why did we decide to use this term? The back story is that when we were quite small, we were a bit quirkier. On one of our very early betas, we used an illustration of a sheep as our copy button, and we called it the **Clone** button. Think Dolly circa 1996. Alas, people were confused - why was a sheep here? So we changed the icon, but we kept the terminology.

#### <mark style="color:blue;">Color Tags (see</mark> [*<mark style="color:blue;">Fabric Links</mark>*](https://app.gitbook.com/o/6Fz8qQccLA8HTGr0bdh3/s/PUFswdysHBJDPIJC9xe0/~/changes/268/welcome-to-prequilt/glossary#fabric-links-formerly-color-tags)<mark style="color:blue;">)</mark>

We discontinued the term Color Tags in October 2023. We apolgize for any confusion and for any instances that Color Tag is still being used instead of **Fabric Link**.

#### <mark style="color:blue;">Coloring Page (</mark>*<mark style="color:blue;">also</mark>* <mark style="color:blue;"></mark><mark style="color:blue;">Digital Coloring Page)</mark>

A **coloring page** (also known as **digital coloring page**) is a Market Plan feature that allows your customers to change the colors and fabrics for one of your quilt patterns. This customization only affects their version of your quilt and enables them to preview your quilt pattern in their fabric choices. A call to action button (CTA) directs users to your online store or website to buy the pattern.

#### <mark style="color:blue;">Control Panel</mark>

There are two types of control panels in PreQuilt. There's the **Left-Side Control Panel** that has tabs that expand. To get one to expand, click on the bar. The other tab will collapse.

<div align="left"><figure><img src="/files/wC8qHWSYCMiHQ3pAuWhS" alt=""><figcaption></figcaption></figure></div>

And there's the **Center Vertical Control Panel**, which we call the [*<mark style="color:blue;">Toolbar</mark>*](#toolbar) that has buttons. These are quick action buttons that are used often.

<div align="left"><figure><img src="/files/o2IoOPsrn6GDieIBaaS2" alt=""><figcaption></figcaption></figure></div>

#### <mark style="color:blue;">Cornerstone</mark>

**Cornerstones** are the smaller blocks that are formed when two pieces of sashing cross one another.

## <mark style="color:blue;">D</mark>

#### <mark style="color:blue;">Dashboard</mark>

The **Dashboard** in PreQuilt is main navigation page for all your custom content. There are currently 5 tabs on the dashboard: Quilts, Blocks, Fabric, Fabric Pull, and Add-Ons.

<figure><img src="/files/p6AvrF9q4ucrgjMOJV1O" alt=""><figcaption><p><em>Example of my dashboard</em></p></figcaption></figure>

## <mark style="color:blue;">F</mark>

#### <mark style="color:blue;">Fabric Dashboard</mark>

The **Fabric Dashboard** is a central location to store and organize all your printed fabric swatches. You can use folders to organize your printed fabric swatches.

<figure><img src="/files/i5GFCPJY5WC1wU74Fk5g" alt=""><figcaption><p><em>Example of a Fabric Dashboard</em></p></figcaption></figure>

#### <mark style="color:blue;">Fabric Links (formerly Color Tags)</mark>

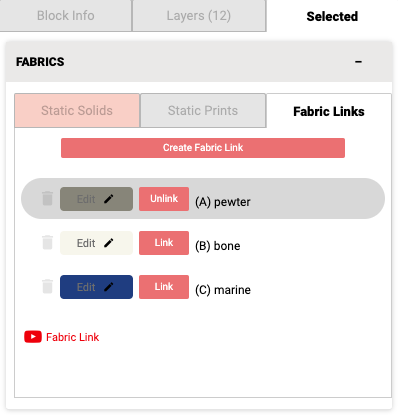
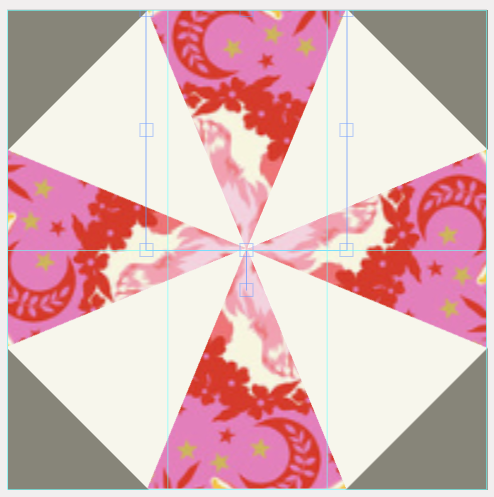
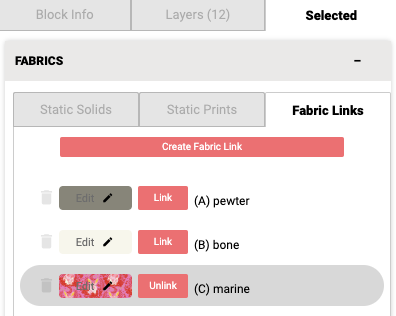
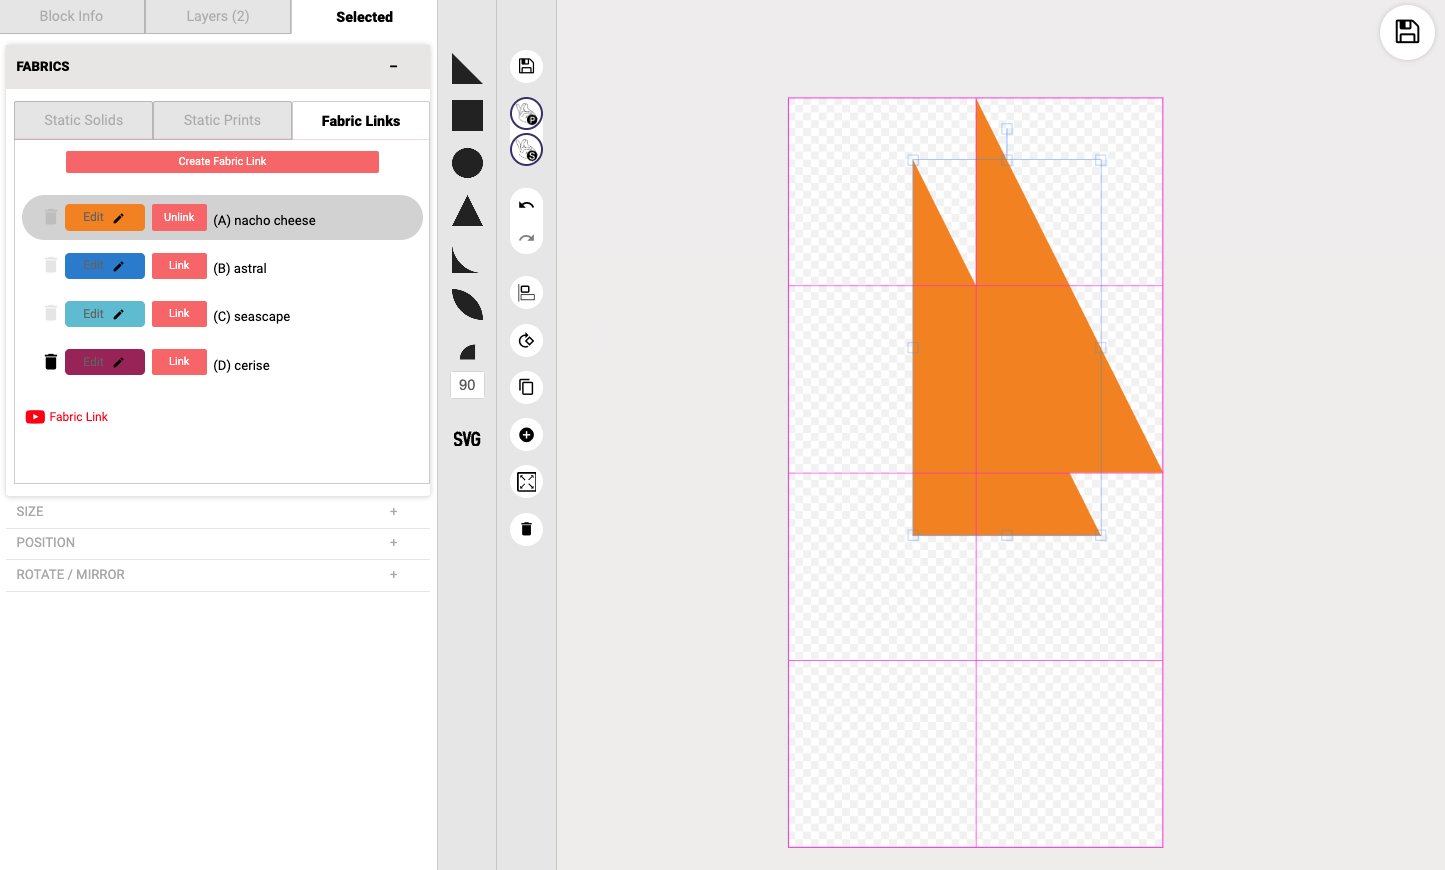
PreQuilt developed **Fabric Links** as a way to associate a color to a quilt block piece or part of a quilt. The action of tagging a block piece with a ***Fabric Link*** links that fabric to that particular block piece. If the fabric of a Fabric Link changes, the fabrics used for all pieces associated with that Fabric Link will change as well. In the example below, the **Fabric Link A** was changed from black to pink.&#x20;

<div align="left"><figure><img src="/files/Ua8HKgIipxKHVtJfbPFR" alt=""><figcaption></figcaption></figure> <figure><img src="/files/eaGdieHIFjZVmMf88iTl" alt=""><figcaption></figcaption></figure></div>

#### <mark style="color:blue;">Fabric Swatch (also Printed Fabric Swatch)</mark>

A **Fabric Swatch**, also called a **Printed Fabric Swatch**, is a digital image of fabric that can be imported into PreQuilt and applied to block designs in order to preview it. Many fabric manufacturers have digital fabric swatches available to the public on their website.

## <mark style="color:blue;">G</mark>

#### <mark style="color:blue;">Gridlines</mark>

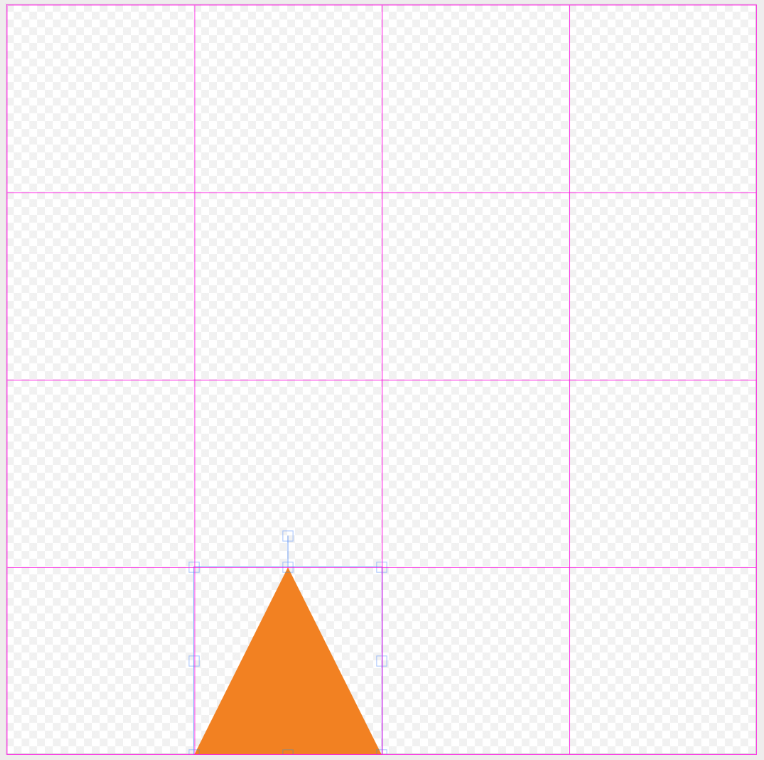
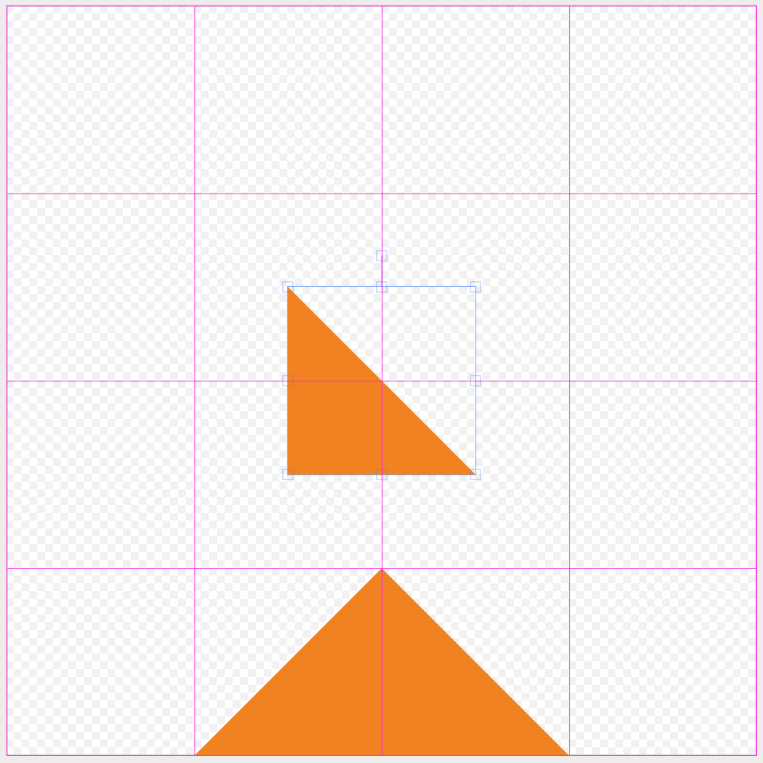
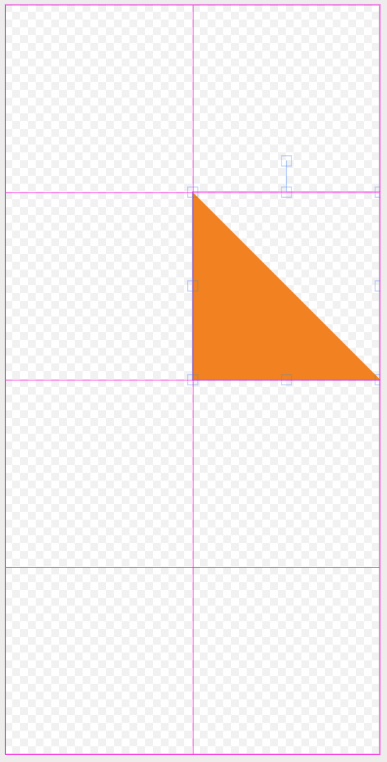
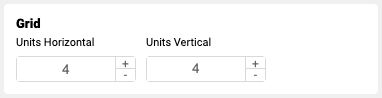
**Gridlines** are light blue guidelines that are only visible while editing or creating a quilt block. There are both horizontal and vertical grid lines that will equally divide the horizontal or vertical space in relation to the number of gridlines selected. In this example, there are 5 horizontal grid lines and 4 vertical gridlines that create equally divided rectangles in the block area.

<figure><img src="/files/z4CqUC2f9Qe8lNEq5E8P" alt=""><figcaption></figcaption></figure>

## <mark style="color:blue;">O</mark>

#### <mark style="color:blue;">Orphan Blocks</mark>

**Orphan blocks** are leftover or extra blocks that have not been used in a quilt. For a good use case for PreQuilt and your orphan blocks check out:

{% content-ref url="/pages/HUSFMAaTBcrxPIIWjBx3" %}
[Orphan Block Quilts](/prequilt-101/starter-quilts/orphan-block-quilts)
{% endcontent-ref %}

## <mark style="color:blue;">T</mark>

#### <mark style="color:blue;">Toolbar</mark>

The **Toolbar** is located next to the [*<mark style="color:blue;">Left Side Control Panel</mark>*](#control-panel) is a vertical bar of buttons. These are meant to be quickly accessible buttons for commonly used actions.

<div align="left"><figure><img src="/files/o2IoOPsrn6GDieIBaaS2" alt=""><figcaption></figcaption></figure></div>

## <mark style="color:blue;">Q</mark>

#### <mark style="color:blue;">Quilt Grid</mark>

The **quilt grid** is the area of space that contains the rows and columns of [*<mark style="color:blue;">cell blocks</mark>*](#cell-block). Currently, there are 3 different quilt grids: rectangular, on-point, and equilateral triangles.


# FREE PreQuilt Course

## <mark style="color:blue;">Moduled PreQuilt Courses</mark>

We've recently just launched a full deep dive Introduction to PreQuilt course that includes both video tutorials as well as written help guides full of screenshots and step-by-step directions.&#x20;

If you're new to PreQuilt, this is a great starting point and it might also be helpful to seasoned PreQuilters who might want to do something specific.

<table data-view="cards"><thead><tr><th></th><th></th><th data-hidden></th><th data-hidden data-card-cover data-type="files"></th><th data-hidden data-card-target data-type="content-ref"></th></tr></thead><tbody><tr><td><mark style="color:blue;"><strong>Course 01</strong></mark></td><td>Introduction to PreQuilt</td><td></td><td><a href="/files/LGlKNZJKSlkEmWho7p46">/files/LGlKNZJKSlkEmWho7p46</a></td><td><a href="https://courses.prequilt.com/youtube-courses/intro-to-prequilt-course">https://courses.prequilt.com/youtube-courses/intro-to-prequilt-course</a></td></tr></tbody></table>

&#x20;&#x20;

***

## <mark style="color:blue;">YouTube Tutorials</mark>

As we get new features launched in PreQuilt, we try our best to create a YouTube tutorial and Help Guide for it. Please check out our [YouTube channel](https://www.youtube.com/channel/UCvp7Ncrl47wDHGcBP7vac8A) for more resources.

&#x20;&#x20;


# Ruby Star Collaboration

// QuiltCon 2026 //

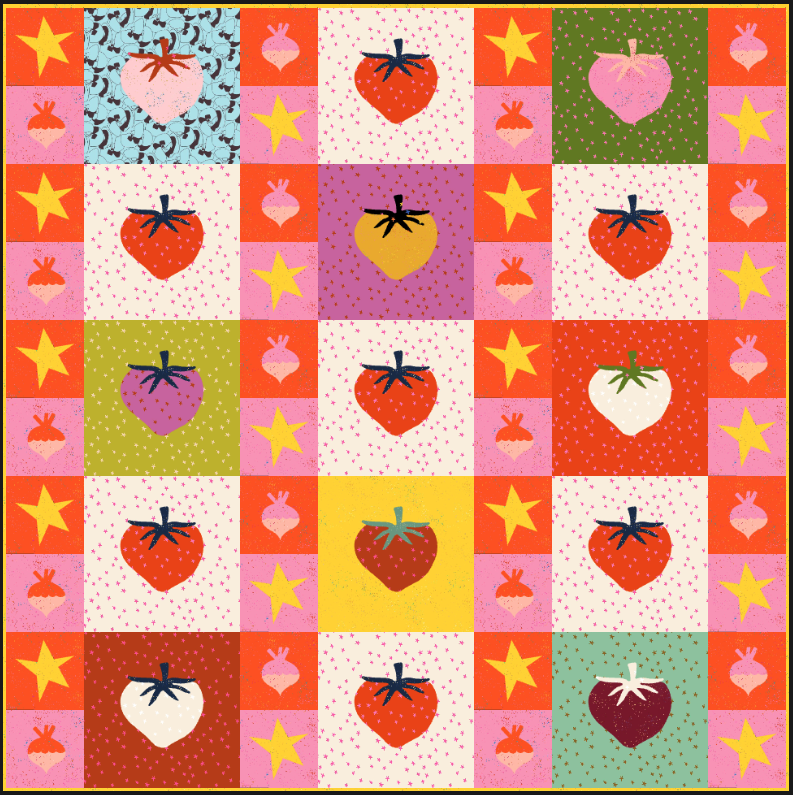
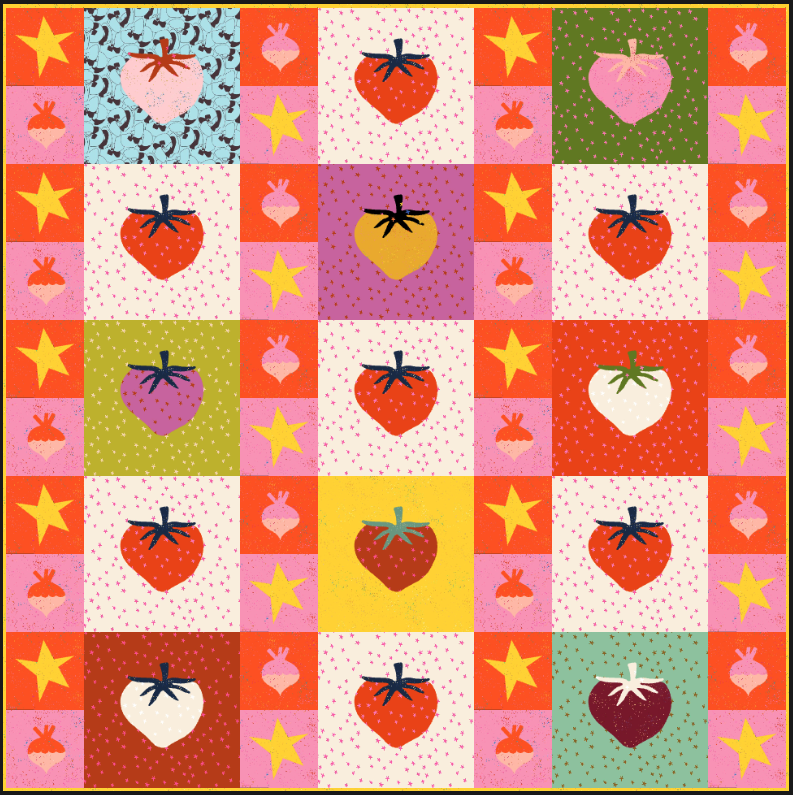
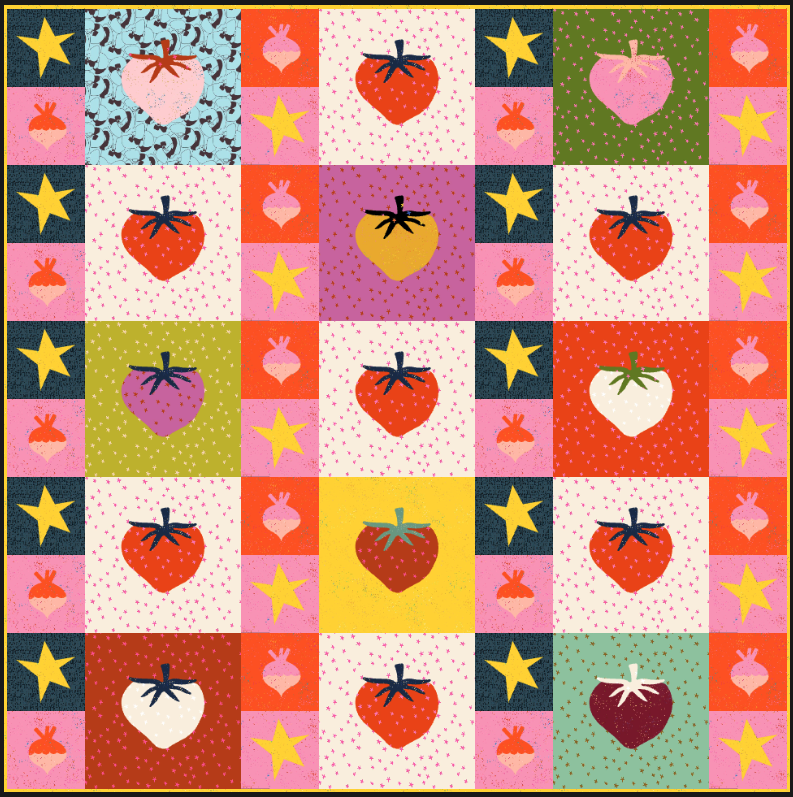
<figure><img src="/files/HehtRhtYrKU7IH0f3v5K" alt=""><figcaption></figcaption></figure>

## <mark style="color:blue;">Ruby Star Society in the House!</mark>

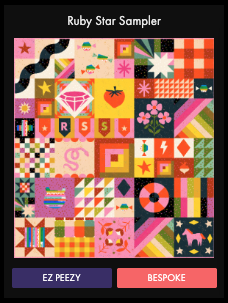
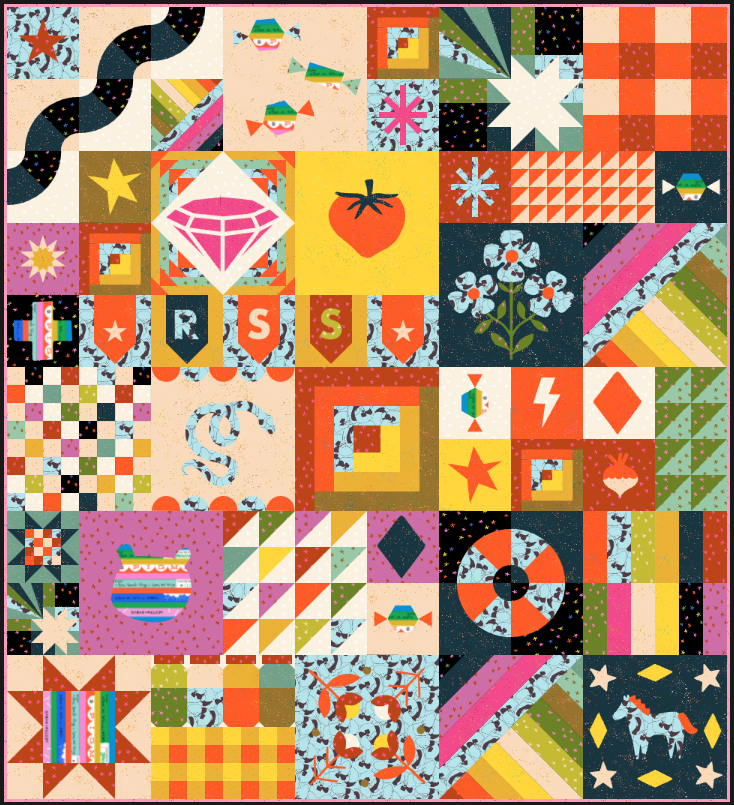
We are so excited and proud to announce that we have partnered with [**Ruby Star Society**](https://www.rubystarsociety.com/) to offer their epic [**Sampler Quilts**](https://app.prequilt.com/rss) in PreQuilt for you to mockup!

This free-to-use collaboration launched at QuiltCon in 2026 with six different sampler quilt designs and an entire Bunting Alphabet. The collaboration includes:

* EZ Peazy & Bespoke versions for each quilt
* The **ENTIRE** Ruby Star Society fabric catalog loaded into PreQuilt
* 56 quilt block catalog - 6" and 12" quilt blocks
* Block pattern library for each RSS block
* Gallery showcasing all the sampler quilts created by the community

***

## <mark style="color:blue;">Ruby Star Sampler Help Guides</mark>

Here's a collection of Help Guides to help you get the most out of this fantastic collaboration.

### All the Free Features

All the features here are available to use for free.&#x20;

<table data-view="cards"><thead><tr><th></th><th data-hidden data-card-target data-type="content-ref"></th><th data-hidden data-card-cover data-type="image">Cover image</th></tr></thead><tbody><tr><td><strong>Mock-Up the Samplers  the EZ Peezy Way</strong></td><td><a href="/pages/t1ourk8WwMshaOkXVS1n">/pages/t1ourk8WwMshaOkXVS1n</a></td><td><a href="/files/DV05SI29zQyMuRXOQ3q9">/files/DV05SI29zQyMuRXOQ3q9</a></td></tr><tr><td><strong>Customize Using the Bespoke Samplers</strong></td><td><a href="/pages/ZTMZohVcMO2CrupLm23Q">/pages/ZTMZohVcMO2CrupLm23Q</a></td><td><a href="/files/sclZQ3XAYxZCkZKuVyBl">/files/sclZQ3XAYxZCkZKuVyBl</a></td></tr><tr><td><strong>Browse the Ruby Star Society Catalog</strong></td><td><a href="/pages/LSn7jsPZqNN104tbLXq4">/pages/LSn7jsPZqNN104tbLXq4</a></td><td><a href="/files/DViiGAz8raNklZdUsqid">/files/DViiGAz8raNklZdUsqid</a></td></tr><tr><td><strong>Download Your Sampler Quilt</strong></td><td><a href="/pages/Tupgjw3dpEPaPUAkGjkw">/pages/Tupgjw3dpEPaPUAkGjkw</a></td><td><a href="/files/OTIS5gCIdTHnTRSd6dTQ">/files/OTIS5gCIdTHnTRSd6dTQ</a></td></tr><tr><td><strong>Share Your Sampler to the Community Gallery</strong></td><td><a href="/pages/18iC7DAI5BgOho6JkATJ">/pages/18iC7DAI5BgOho6JkATJ</a></td><td><a href="/files/nJwMKdlDlzvwf9tu9G0Z">/files/nJwMKdlDlzvwf9tu9G0Z</a></td></tr><tr><td><strong>Calculate  Fabric for Your Sampler</strong></td><td><a href="/pages/iLvMrKorPDhodEzdny6I">/pages/iLvMrKorPDhodEzdny6I</a></td><td><a href="/files/VjugYe8cz5fLSoATqBDZ">/files/VjugYe8cz5fLSoATqBDZ</a></td></tr><tr><td>COMING SOON - <strong>Download the Block Pattern Instructions</strong></td><td></td><td><a href="/files/ksOT4jYncdZmnPFiPc5Z">/files/ksOT4jYncdZmnPFiPc5Z</a></td></tr><tr><td><strong>Change the Binding Fabric</strong></td><td><a href="/pages/sHN1IjPMDbgEMlSKTzv9">/pages/sHN1IjPMDbgEMlSKTzv9</a></td><td><a href="/files/fTM4OWuyrvqlekwka6xI">/files/fTM4OWuyrvqlekwka6xI</a></td></tr><tr><td><strong>Create a Fabric Pull by Pinning Fabric Swatches</strong></td><td><a href="/pages/lyXoYUso2OcW21YcIPc2">/pages/lyXoYUso2OcW21YcIPc2</a></td><td><a href="/files/e4lC3QQyK9t7XlhSqHo0">/files/e4lC3QQyK9t7XlhSqHo0</a></td></tr><tr><td><strong>Add Blocks to the Ruby Star Sampler</strong></td><td><a href="/pages/DYHPADBfpMGu3d6VUBMX">/pages/DYHPADBfpMGu3d6VUBMX</a></td><td><a href="/files/DHZLyCzJyUpGPk5IafRU">/files/DHZLyCzJyUpGPk5IafRU</a></td></tr><tr><td><strong>Alternate Block Versions</strong></td><td><a href="/pages/ro8h1y2VIm67X0nv5jmJ">/pages/ro8h1y2VIm67X0nv5jmJ</a></td><td><a href="/files/eIigJrJ7ctYAuiOWIsQP">/files/eIigJrJ7ctYAuiOWIsQP</a></td></tr><tr><td><strong>Subscribe to PreQuilt</strong></td><td><a href="/pages/xxeNYNlSJx1E0GzGeVtD">/pages/xxeNYNlSJx1E0GzGeVtD</a></td><td><a href="/files/p5kq7Ruo9URLgd3nXSuG">/files/p5kq7Ruo9URLgd3nXSuG</a></td></tr></tbody></table>

### PreQuilt Subscriber Features

While the vast majority of the features for the Ruby Star Sampler are free, there are a few features available only to subscribers.

<table data-view="cards"><thead><tr><th></th><th data-hidden data-card-cover data-type="image">Cover image</th><th data-hidden data-card-target data-type="content-ref"></th></tr></thead><tbody><tr><td><strong>Save Your Ruby Star Sampler</strong></td><td><a href="/files/BhqVi2XheyHlOEe6uM8f">/files/BhqVi2XheyHlOEe6uM8f</a></td><td><a href="/pages/YuxJj1DbEco3nTy41iw2">/pages/YuxJj1DbEco3nTy41iw2</a></td></tr><tr><td><strong>Save Ruby Star Fabrics to Your Fabric Stash</strong></td><td><a href="/files/k3jdjBtiOIu5EPfusdUY">/files/k3jdjBtiOIu5EPfusdUY</a></td><td><a href="/pages/smO21rdQoskljJMVfIhY">/pages/smO21rdQoskljJMVfIhY</a></td></tr><tr><td><strong>Use Ruby Star Blocks in Other Quilts</strong></td><td><a href="/files/TNUNe8A4mDozXSNmJLte">/files/TNUNe8A4mDozXSNmJLte</a></td><td><a href="/pages/SDky8qBdQJ7XQTxI9AlR">/pages/SDky8qBdQJ7XQTxI9AlR</a></td></tr></tbody></table>


# EZ Peezy Sampler Mockups

Free Ruby Star Sampler Feature

## <mark style="color:blue;">Mocking Up Sampler Quilts the EZ Peezy Way</mark>

We've teamed up with your (and our) favorite fabric designers to bring their [**Ruby Star Sampler**](https://app.prequilt.com/rss) to life for you to mockup in PreQuilt.

There are two ways to mockup any of the sampler quilts - the EZ Peezy way and the custom bespoke way.

* **EZ Peezy:** Quickly pushes a fabric change across the entire quilt. Similar to our current digital coloring pages. Ideal method for quick and cohesive quilt mockup.
* **Bespoke:** Customize each block independently. Changing a fabric in a block will not push that change across the entire quilt. Ideal for that custom, individual touch.

Use the preloaded Ruby Star Society fabric catalog or solid fabrics to mockup your version of the Ruby Star Sampler.

***

## <mark style="color:blue;">How to Mockup the EZ Peezy Way</mark>

### YouTube Video

{% embed url="<https://youtu.be/hQM72rpni8k?si=oneiC-pIlrgJrY9r>" %}

### Written Help Guide

{% stepper %}
{% step %}
Go to [prequilt.com/rss](https://app.prequilt.com/rss)

<figure><img src="/files/X98QDbyNC7yOrJw8i40T" alt=""><figcaption></figcaption></figure>
{% endstep %}

{% step %}
Click on the <mark style="color:blue;">**EZ Peezy button**</mark> for the sampler quilt you would like to mockup.

* In this example, I'm going to mockup the main *Ruby Star Sampler*.

<div align="left"><figure><img src="/files/PyEyL1UtuSlItWl2a0ib" alt=""><figcaption></figcaption></figure></div>
{% endstep %}

{% step %}
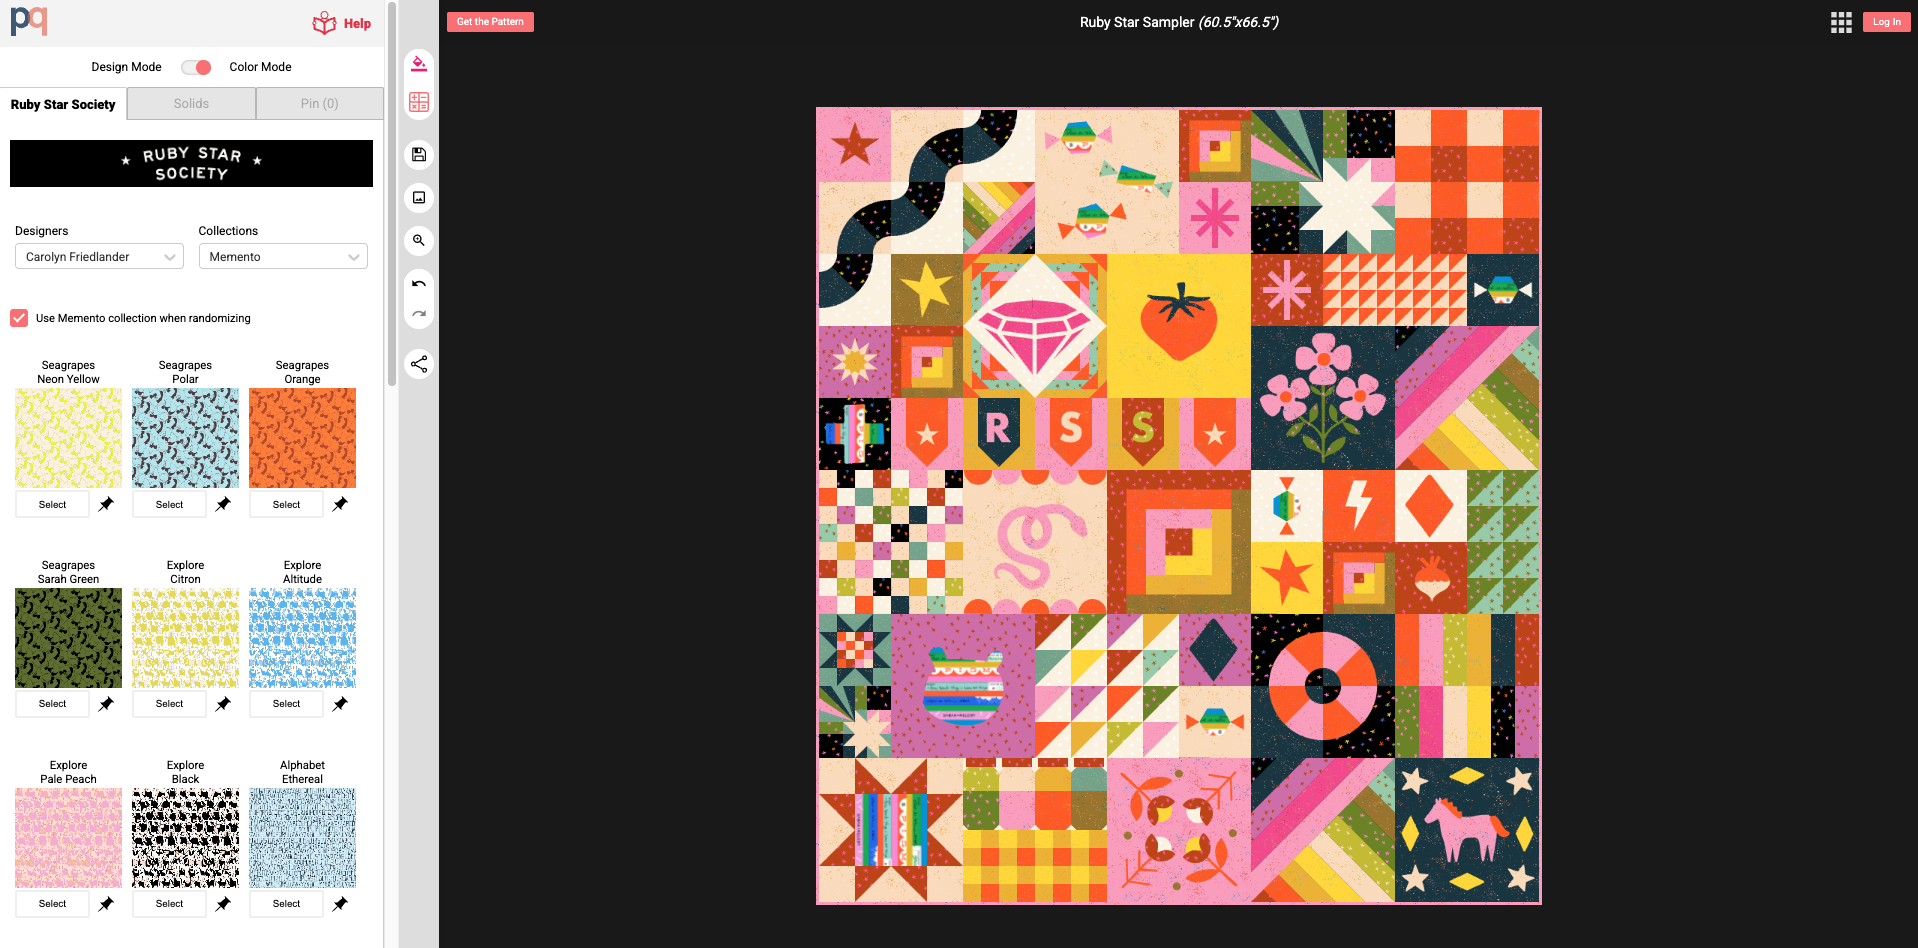
A new tab will open with the sampler quilt on the right and the control panel on the left.

<figure><img src="/files/fM9Mv3fYvcE5q5H7F34G" alt=""><figcaption></figcaption></figure>
{% endstep %}

{% step %}
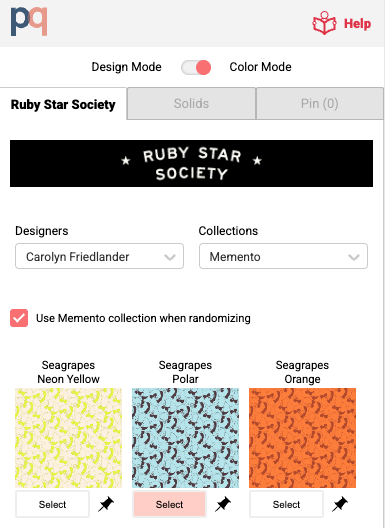
Click on the <mark style="color:blue;">**image of the fabric**</mark> that you'd like to use. The cursor will turn into a square of that fabric.&#x20;

* In this example, I'm going to use **Carolyn Friedlander's Seagrapes in Polar**.

<div align="left"><figure><img src="/files/8m3t8XBF1OdM35a67Upa" alt=""><figcaption></figcaption></figure></div>
{% endstep %}

{% step %}
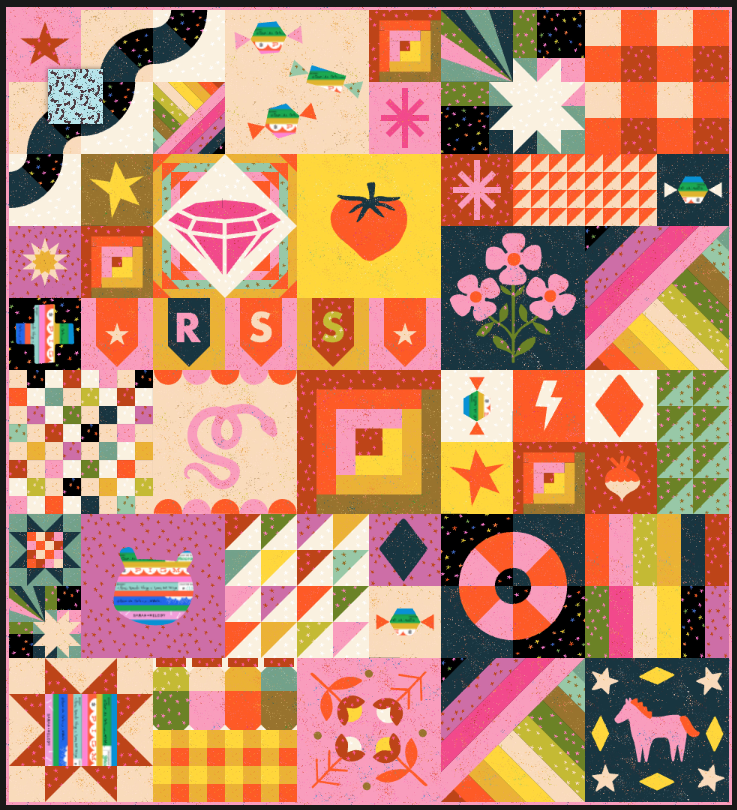
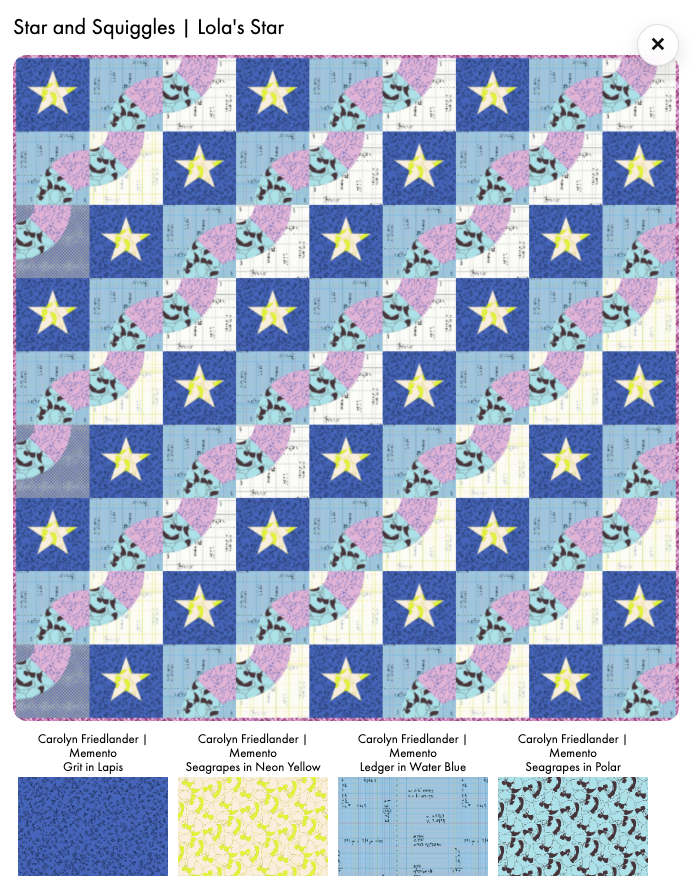
Then click on the <mark style="color:blue;">**part of the quilt**</mark> where you'd like to use the fabric. You will see everywhere that fabric was used in the quilt has now been updated to use your new fabric.

<div><figure><img src="/files/AX5POY0xxu6OEOz5DDwz" alt=""><figcaption><p>Before</p></figcaption></figure> <figure><img src="/files/DQI2WmYyXbhTQ2Q52mk9" alt=""><figcaption><p>During</p></figcaption></figure> <figure><img src="/files/5qDfwEQCCnEco488uF2K" alt=""><figcaption><p>After</p></figcaption></figure></div>
{% endstep %}

{% step %} <mark style="color:blue;">**Repeat steps 4-5**</mark> until you have your sampler quilt mocked up as desired. That's the EZ Peezy way.
{% endstep %}
{% endstepper %}

***

## <mark style="color:blue;">Subscribe to Save Your Sampler</mark>

If you'd like save your progress on your sampler, please consider subscribing to PreQuilt.

You can subscribe at any time and save your progress to your PreQuilt account. To do this:

{% stepper %}
{% step %}
Click on the <mark style="color:blue;">**Save button**</mark> on the central, vertical toolbar.

<div align="left"><figure><img src="/files/YKiwMl6PbWhjSlrtfaQh" alt=""><figcaption></figcaption></figure></div>
{% endstep %}

{% step %}
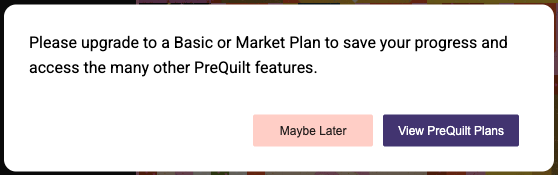
In the popup window, click on the <mark style="color:blue;">**View PreQuilt Plans button**</mark>.

<div align="left"><figure><img src="/files/h7CmdDUoe6voZWAt3mr6" alt=""><figcaption></figcaption></figure></div>
{% endstep %}

{% step %}
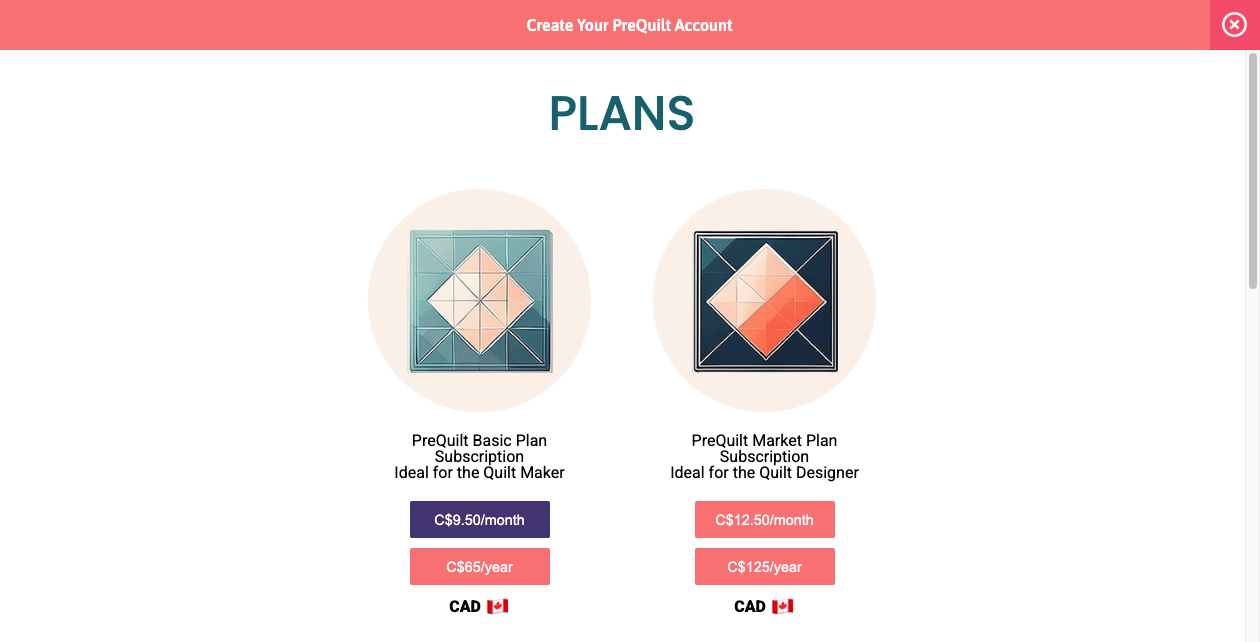
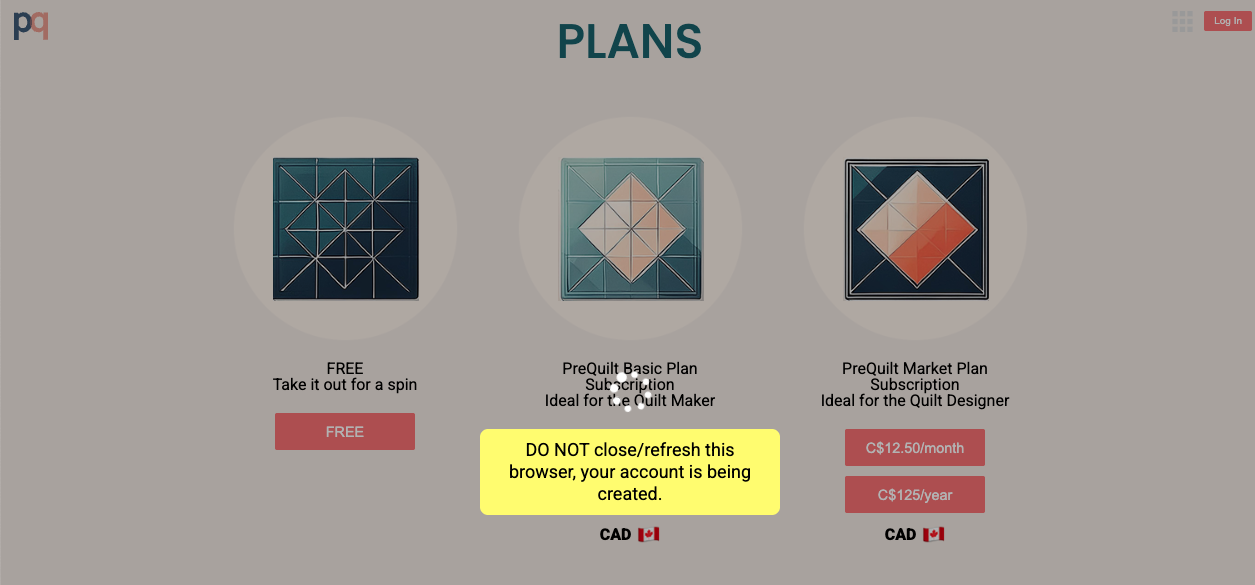
The plans page will appear. Click on the <mark style="color:blue;">**button for the subscription plan and billing cadence**</mark> that you prefer.

* **Basic Plan**: Are perfect for every and any quilter. It has everything you need to design, visualize, and plan your quilts.
* **Market Plan:** Can do everything the Basic Plan can, PLUS help you commercialize your quilt patterns with custom digital coloring pages.
* We offer monthly and annual subscriptions.
* Billing currency is based on your location. We bill in CAD, USD, GBP, and EUR.

<figure><img src="/files/z9htKAT1NfIDhNPpVMNa" alt=""><figcaption></figcaption></figure>
{% endstep %}

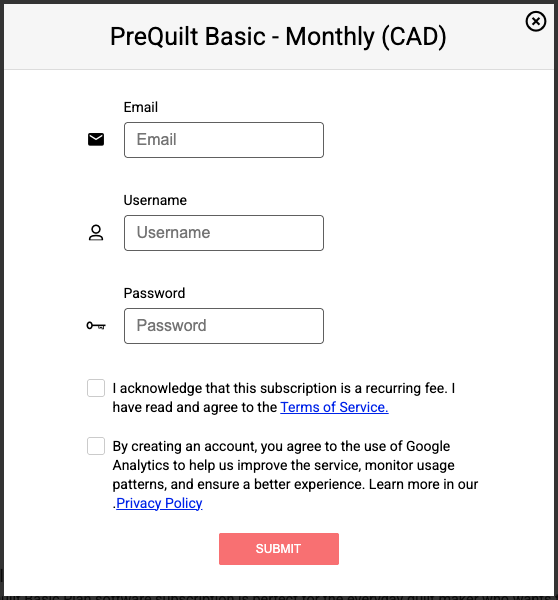
{% step %} <mark style="color:blue;">**Fill out the form**</mark> with your email address, username, and password. [<mark style="color:blue;">**Review the Terms of Service**</mark>](https://app.prequilt.com/terms) (recurring subscription) and <mark style="color:blue;">**agree to the use of**</mark> [<mark style="color:blue;">**Google Analytics**</mark>](https://prequilt.com/privacy). Click on the <mark style="color:blue;">**Submit button**</mark>.

* If you're a business, use your business name as your username. This will be a public username.

<div align="left"><figure><img src="/files/0IW8Vx24fVU7g1g3XeW9" alt="" width="419"><figcaption></figcaption></figure></div>
{% endstep %}

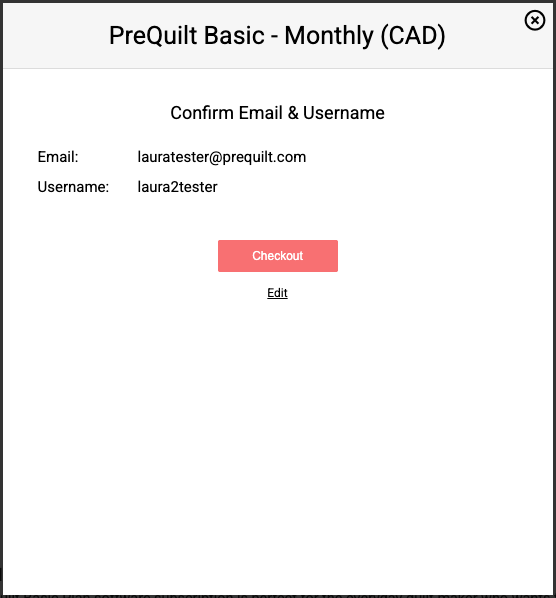
{% step %} <mark style="color:blue;">**Review**</mark> your email and username. If correct, click on the <mark style="color:blue;">**Checkout button**</mark>. If not, click on Edit and revise your information.

<div align="left"><figure><img src="/files/7KSgvGfOR9il7o4Id6h2" alt="" width="417"><figcaption></figcaption></figure></div>
{% endstep %}

{% step %}
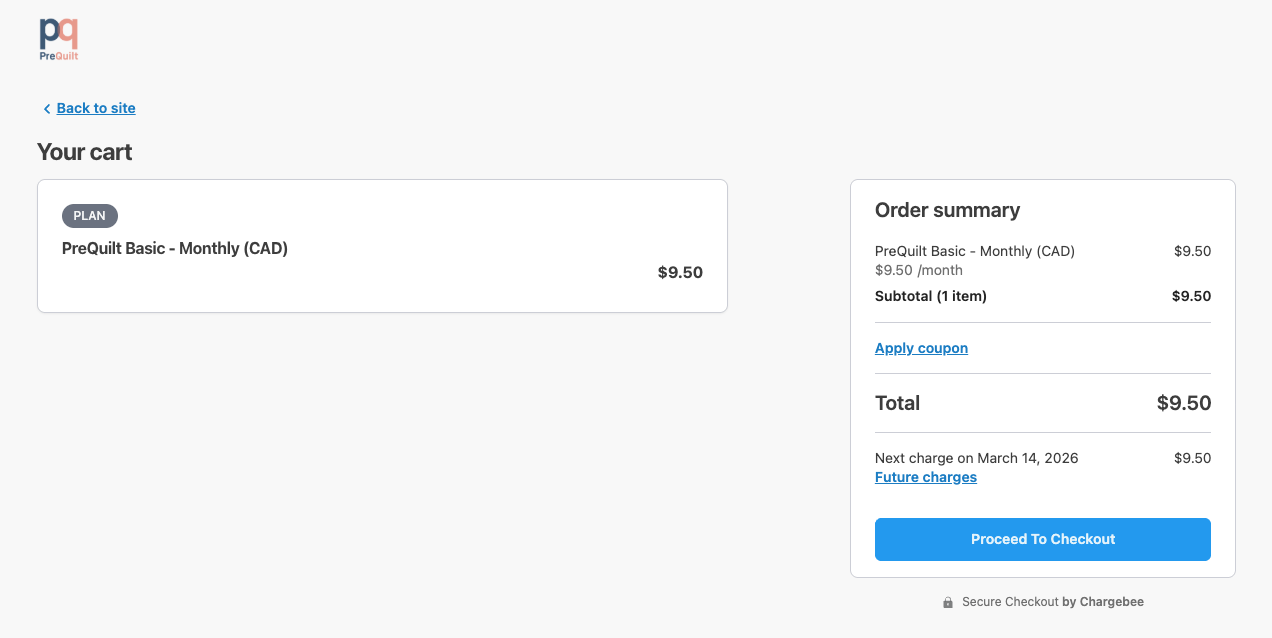
You will be directed to a payment portal.

<figure><img src="/files/b5rBIoJvRV4gIiRNCZ8v" alt=""><figcaption></figcaption></figure>
{% endstep %}

{% step %}
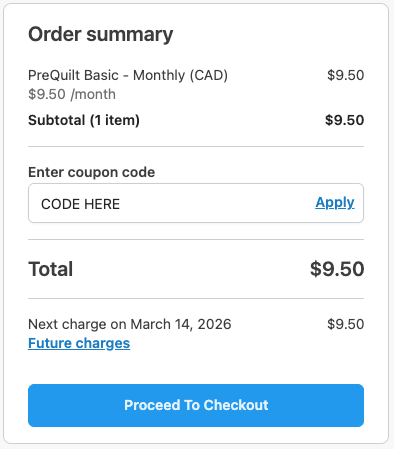
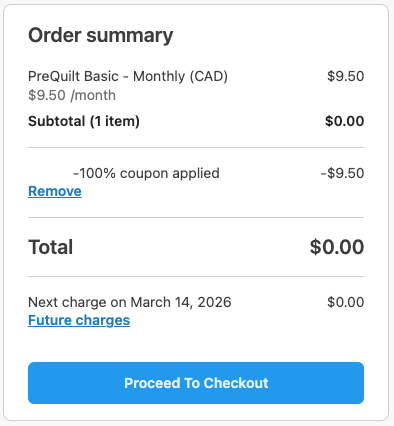
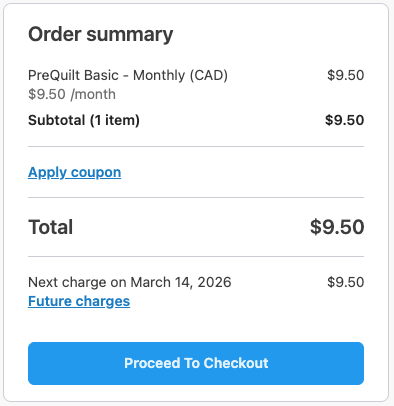
If applicable, click on the <mark style="color:blue;">**Apply coupon button**</mark>, <mark style="color:blue;">**enter your coupon code**</mark> in the box, and press the <mark style="color:blue;">**Apply button**</mark>.

<div><figure><img src="/files/byd7tYrqoordRX8soYA1" alt=""><figcaption></figcaption></figure> <figure><img src="/files/blb56rdsJG6h0sHa1lQc" alt=""><figcaption></figcaption></figure> <figure><img src="/files/MwwhfpzHXnfbCDpSNtnL" alt=""><figcaption></figcaption></figure></div>
{% endstep %}

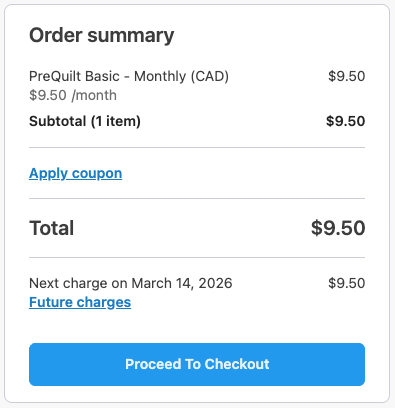
{% step %} <mark style="color:blue;">**Review**</mark> and click on the <mark style="color:blue;">**Proceed to Checkout button**</mark>.

* **Please Note:** Your next recurring payment date is detailed here for your reference.

<div align="left"><figure><img src="/files/XDzEiXpR6H7uXiJH9Lsk" alt="" width="296"><figcaption></figcaption></figure></div>
{% endstep %}

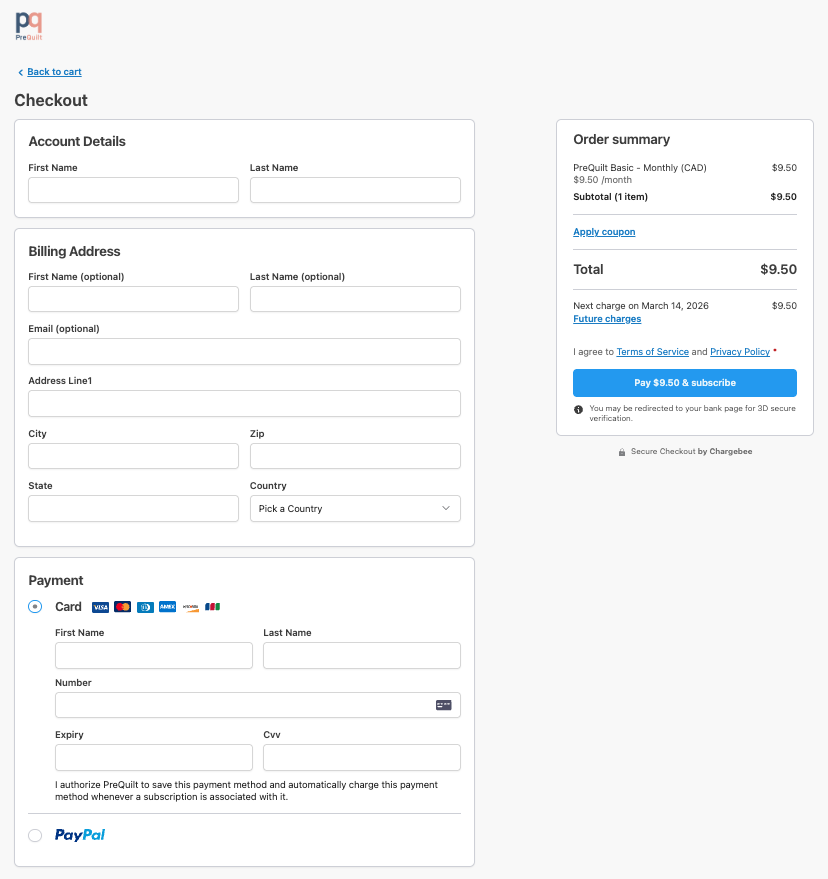
{% step %} <mark style="color:blue;">**Fill out the form**</mark> with your first name, last name, address, and payment method information. Click on the <mark style="color:blue;">**Pay & subscribe button**</mark>.

* We accept credit cards and PayPal.

<figure><img src="/files/J0PK5nIue0FC1f8z26Uv" alt=""><figcaption></figcaption></figure>
{% endstep %}

{% step %} <mark style="color:$danger;">**ATTENTION: DO NOT close or refresh the browser. This step will take time, we're creating your account.**</mark>

<figure><img src="/files/XgO10oHKDRV5bUDHmhrM" alt=""><figcaption></figcaption></figure>
{% endstep %}

{% step %}
Hooray! Your subscription has been created. You will be diverted back to your sampler quilt and it will have been saved to your account. To be on the safe side, click on the <mark style="color:blue;">**Save button**</mark>.

<div align="left"><figure><img src="/files/pu7GGDrFVFkFsmxsoqOk" alt=""><figcaption></figcaption></figure></div>
{% endstep %}
{% endstepper %}


# Custom Bespoke Samplers

Free Ruby Star Sampler Feature

## <mark style="color:blue;">Creating Custom Bespoke Sampler Quilts</mark>

We've teamed up with your (and our) favorite fabric designers to bring their [**Ruby Star Sampler**](https://app.prequilt.com/rss) to life for you to mockup in PreQuilt.

There are two ways to mockup any of the sampler quilts - the EZ Peezy way and the custom bespoke way.

* **EZ Peezy:** Quickly pushes a fabric change across the entire quilt. Similar to our current digital coloring pages. Ideal method for quick and cohesive quilt mockup.
* **Bespoke:** Customize each block independently. Changing a fabric in a block will not push that change across the entire quilt. Ideal for that custom, individual touch.

Use the preloaded Ruby Star Society fabric catalog or solid fabrics to mockup your version of the Ruby Star Sampler.

***

## <mark style="color:blue;">How to Mockup a Bespoke Sampler</mark>

### YouTube Video

{% embed url="<https://youtu.be/UQEKy8YNE3A?si=H6d7h4ymFlNCENfF>" %}

### Written Help Guide

{% stepper %}
{% step %}
Go to [prequilt.com/rss](https://app.prequilt.com/rss)

<figure><img src="/files/X98QDbyNC7yOrJw8i40T" alt=""><figcaption></figcaption></figure>
{% endstep %}

{% step %}
Click on the <mark style="color:blue;">**Bespoke button**</mark> for the sampler quilt you would like to mockup.

* In this example, I'm going to mockup *Kim's Big Quilt*.

<div align="left"><figure><img src="/files/iNl6Zhz2ESwpiPKeTmnM" alt=""><figcaption></figcaption></figure></div>
{% endstep %}

{% step %}
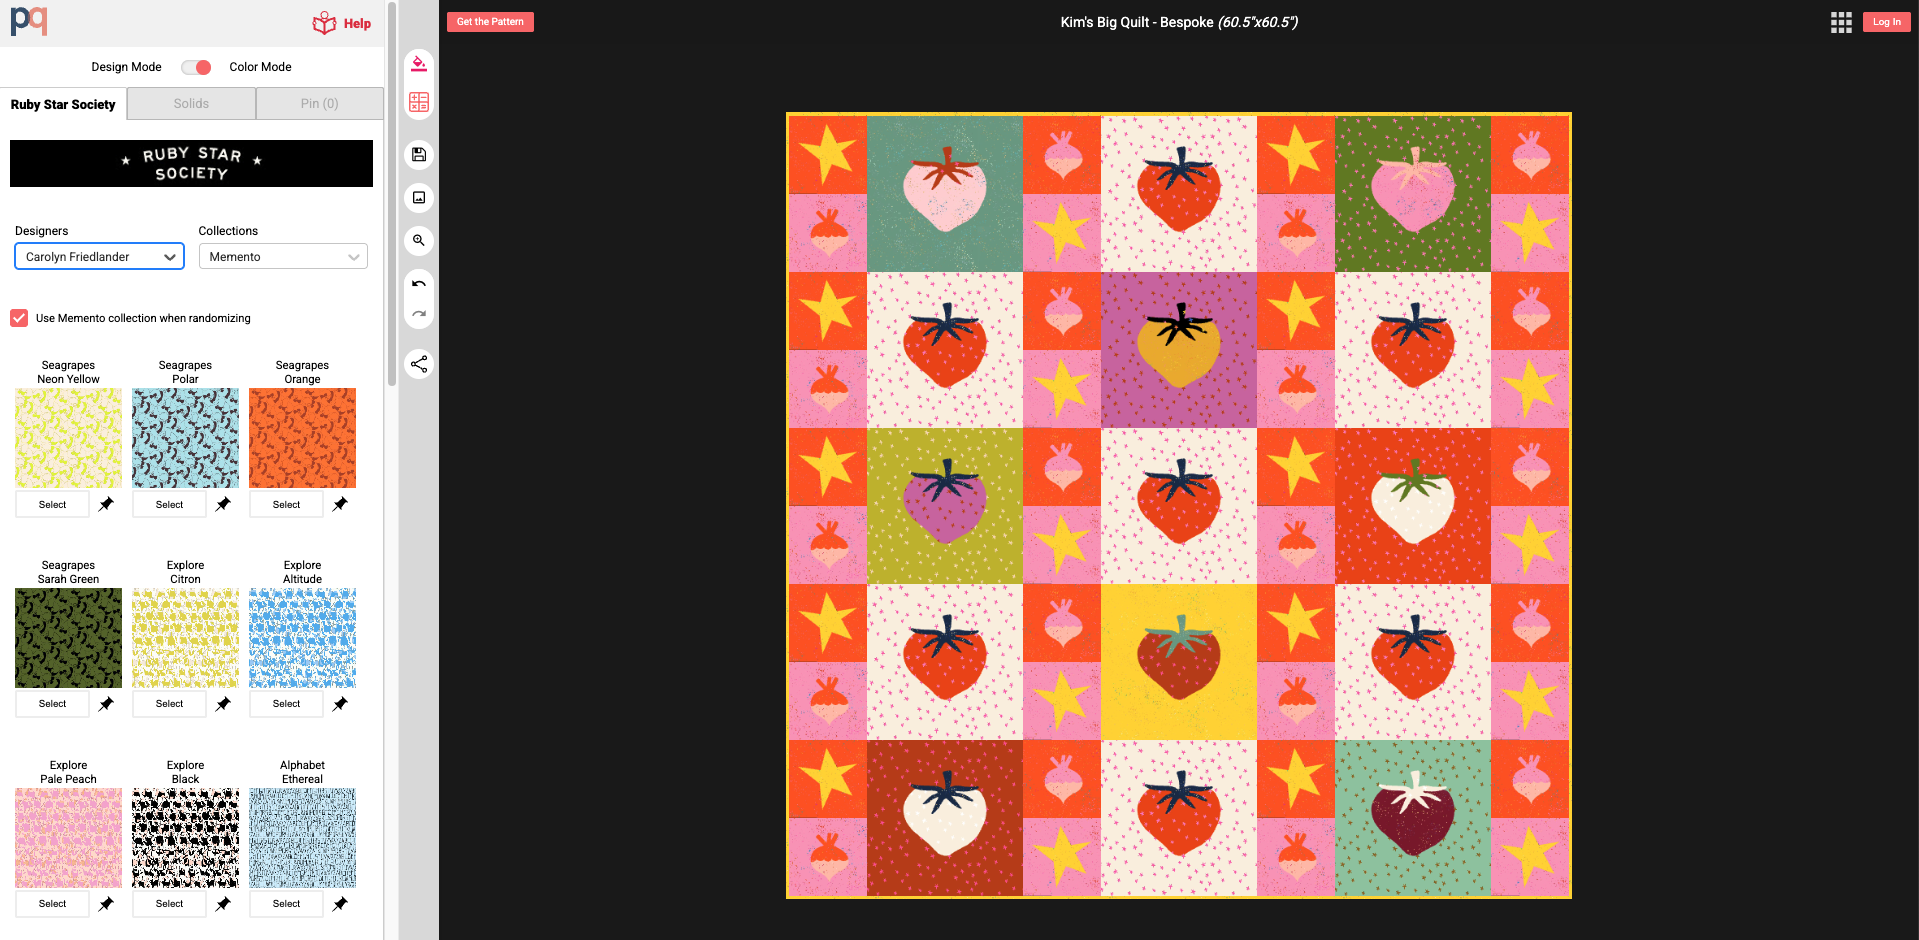
A new tab will open with the sampler quilt on the right and the control panel on the left.

<figure><img src="/files/2OZVErWrfhHdSK9mJusL" alt=""><figcaption></figcaption></figure>
{% endstep %}

{% step %}
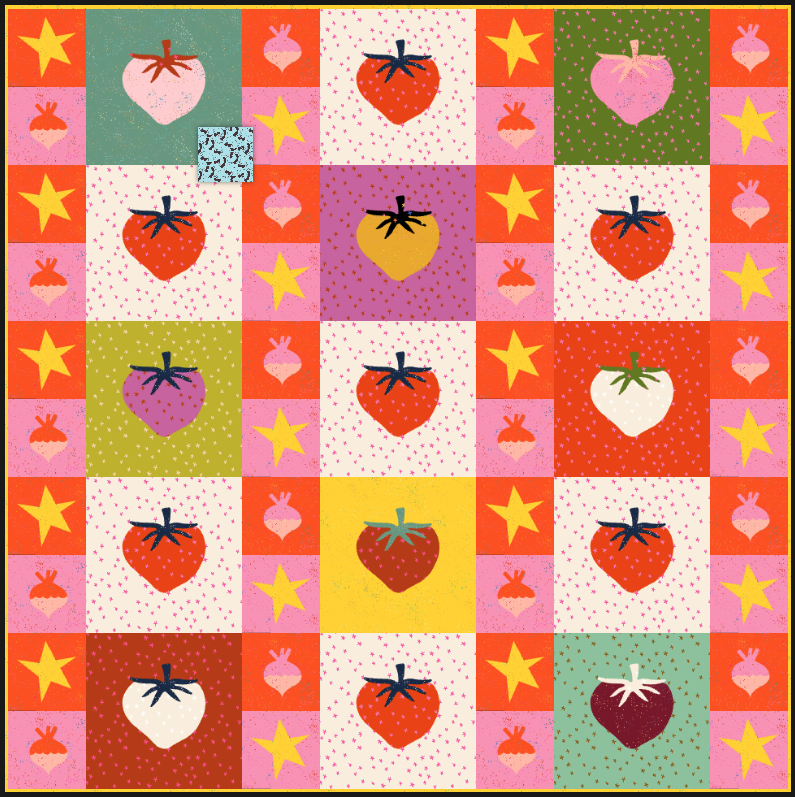
Click on the <mark style="color:blue;">**image of the fabric**</mark> that you'd like to use. The cursor will turn into a square of that fabric.&#x20;

* In this example, I'm going to use **Carolyn Friedlander's Seagrapes in Polar**.

<div align="left"><figure><img src="/files/8m3t8XBF1OdM35a67Upa" alt=""><figcaption></figcaption></figure></div>
{% endstep %}

{% step %}
Then click on the <mark style="color:blue;">**part of the quilt**</mark> where you'd like to use the fabric. You will see everywhere that fabric was used in the quilt has now been updated to use your new fabric.

<div><figure><img src="/files/RhZtbybvI5EPIEntMpyX" alt=""><figcaption><p>Before</p></figcaption></figure> <figure><img src="/files/yhm84q299BJZSA05i25k" alt=""><figcaption><p>During</p></figcaption></figure> <figure><img src="/files/OR5ZDEabnf30SR82ApZg" alt=""><figcaption><p>After</p></figcaption></figure></div>
{% endstep %}

{% step %} <mark style="color:blue;">**Repeat steps 4-5**</mark> until you have your sampler quilt mocked up as desired. That's the EZ Peezy way.
{% endstep %}
{% endstepper %}

{% hint style="warning" %}
**ALERT:** Sometimes it will seem like the fabric is being updated in multiple different places of the quilt, like what happens in the EZ Peezy method.&#x20;

But, really, what's happening is that some blocks are used more than one time in a quilt.

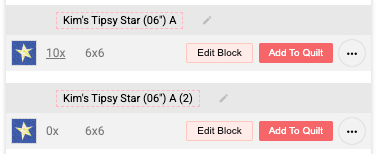
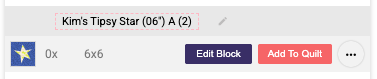
In this example, the Tipsy Star and the Turnip blocks both have two variations and each variation is used 10 times each in the quilt.
{% endhint %}

<figure><img src="/files/qDgGON6zoJbk1ZeBHJI2" alt=""><figcaption></figcaption></figure>

<div><figure><img src="/files/Ys6FiJy77SORiZ7X86bN" alt=""><figcaption><p>Before</p></figcaption></figure> <figure><img src="/files/inz3y6Rml2CN9k2mJDRi" alt=""><figcaption><p>After</p></figcaption></figure></div>

***

## <mark style="color:blue;">Subscribe to Save Your Sampler</mark>

If you'd like save your progress on your sampler, please consider subscribing to PreQuilt.

You can subscribe at any time and save your progress to your PreQuilt account. To do this:

{% stepper %}
{% step %}
Click on the <mark style="color:blue;">**Save button**</mark> on the central, vertical toolbar.

<div align="left"><figure><img src="/files/YKiwMl6PbWhjSlrtfaQh" alt=""><figcaption></figcaption></figure></div>
{% endstep %}

{% step %}
In the popup window, click on the <mark style="color:blue;">**View PreQuilt Plans button**</mark>.

<div align="left"><figure><img src="/files/h7CmdDUoe6voZWAt3mr6" alt=""><figcaption></figcaption></figure></div>
{% endstep %}

{% step %}
The plans page will appear. Click on the <mark style="color:blue;">**button for the subscription plan and billing cadence**</mark> that you prefer.

* **Basic Plan**: Are perfect for every and any quilter. It has everything you need to design, visualize, and plan your quilts.
* **Market Plan:** Can do everything the Basic Plan can, PLUS help you commercialize your quilt patterns with custom digital coloring pages.
* We offer monthly and annual subscriptions.
* Billing currency is based on your location. We bill in CAD, USD, GBP, and EUR.

<figure><img src="/files/z9htKAT1NfIDhNPpVMNa" alt=""><figcaption></figcaption></figure>
{% endstep %}

{% step %} <mark style="color:blue;">**Fill out the form**</mark> with your email address, username, and password. [<mark style="color:blue;">**Review the Terms of Service**</mark>](https://app.prequilt.com/terms) (recurring subscription) and <mark style="color:blue;">**agree to the use of**</mark> [<mark style="color:blue;">**Google Analytics**</mark>](https://prequilt.com/privacy). Click on the <mark style="color:blue;">**Submit button**</mark>.

* If you're a business, use your business name as your username. This will be a public username.

<div align="left"><figure><img src="/files/0IW8Vx24fVU7g1g3XeW9" alt="" width="419"><figcaption></figcaption></figure></div>
{% endstep %}

{% step %} <mark style="color:blue;">**Review**</mark> your email and username. If correct, click on the <mark style="color:blue;">**Checkout button**</mark>. If not, click on Edit and revise your information.

<div align="left"><figure><img src="/files/7KSgvGfOR9il7o4Id6h2" alt="" width="417"><figcaption></figcaption></figure></div>
{% endstep %}

{% step %}
You will be directed to a payment portal.

<figure><img src="/files/b5rBIoJvRV4gIiRNCZ8v" alt=""><figcaption></figcaption></figure>
{% endstep %}

{% step %}
If applicable, click on the <mark style="color:blue;">**Apply coupon button**</mark>, <mark style="color:blue;">**enter your coupon code**</mark> in the box, and press the <mark style="color:blue;">**Apply button**</mark>.

<div><figure><img src="/files/byd7tYrqoordRX8soYA1" alt=""><figcaption></figcaption></figure> <figure><img src="/files/blb56rdsJG6h0sHa1lQc" alt=""><figcaption></figcaption></figure> <figure><img src="/files/MwwhfpzHXnfbCDpSNtnL" alt=""><figcaption></figcaption></figure></div>
{% endstep %}

{% step %} <mark style="color:blue;">**Review**</mark> and click on the <mark style="color:blue;">**Proceed to Checkout button**</mark>.

* **Please Note:** Your next recurring payment date is detailed here for your reference.

<div align="left"><figure><img src="/files/XDzEiXpR6H7uXiJH9Lsk" alt="" width="296"><figcaption></figcaption></figure></div>
{% endstep %}

{% step %} <mark style="color:blue;">**Fill out the form**</mark> with your first name, last name, address, and payment method information. Click on the <mark style="color:blue;">**Pay & subscribe button**</mark>.

* We accept credit cards and PayPal.

<figure><img src="/files/J0PK5nIue0FC1f8z26Uv" alt=""><figcaption></figcaption></figure>
{% endstep %}

{% step %} <mark style="color:$danger;">**ATTENTION: DO NOT close or refresh the browser. This step will take time, we're creating your account.**</mark>

<figure><img src="/files/XgO10oHKDRV5bUDHmhrM" alt=""><figcaption></figcaption></figure>
{% endstep %}

{% step %}
Hooray! Your subscription has been created. You will be diverted back to your sampler quilt and it will have been saved to your account. To be on the safe side, click on the <mark style="color:blue;">**Save button**</mark>.

<div align="left"><figure><img src="/files/pu7GGDrFVFkFsmxsoqOk" alt=""><figcaption></figcaption></figure></div>
{% endstep %}
{% endstepper %}


# Ruby Star Fabric Catalog

PreQuilt Subscriber Feature

## <mark style="color:blue;">Browse the Ruby Star Society Fabric Collections</mark>

We're ecstatic to announce that we have *ALL\** the Ruby Star Society fabric collections loaded in PreQuilt for your viewing pleasure (for free) and for saving to your personal stash (for PreQuilt subscribers).

And, of course, all of their fabric can be used in any of the Ruby Star Samplers.&#x20;

*\*We did not load non-quilting fabrics such as chore coat, canvas, rayon, etc.*

#### Free Catalog

Anyone can browse through the Ruby Star Society fabric catalog online. Instructions are available below. Enjoy!&#x20;

#### Preloaded in PreQuilt

Subscribers can browse and save Ruby Star fabrics to their personal fabric stash when logged in. This is a great feature for tracking fabric you have in your physical stash and how much of it you have.

Additional [**Help Guide: How to Save RSS Fabrics to Your Stash**](/featured-on-prequilt/ruby-star-collaboration/save-rss-fabrics-to-your-stash)

***

## <mark style="color:blue;">How to Browse the Ruby Star Society Catalog</mark>

### YouTube Video

{% embed url="<https://youtu.be/RP6bYvqp3FI?si=OV7E4MhN0p5dRZO5>" %}

### Written Help Guide

{% stepper %}
{% step %}
Go to [prequilt.com/rss](https://app.prequilt.com/rss)

<figure><img src="/files/X98QDbyNC7yOrJw8i40T" alt=""><figcaption></figcaption></figure>
{% endstep %}

{% step %} <mark style="color:blue;">**Scroll down**</mark> or click on the <mark style="color:blue;">**Fabrics button**</mark> on the navigation menu.

<div align="left"><figure><img src="/files/LjAGR3iL2qig13HaqxfJ" alt=""><figcaption></figcaption></figure></div>
{% endstep %}

{% step %}
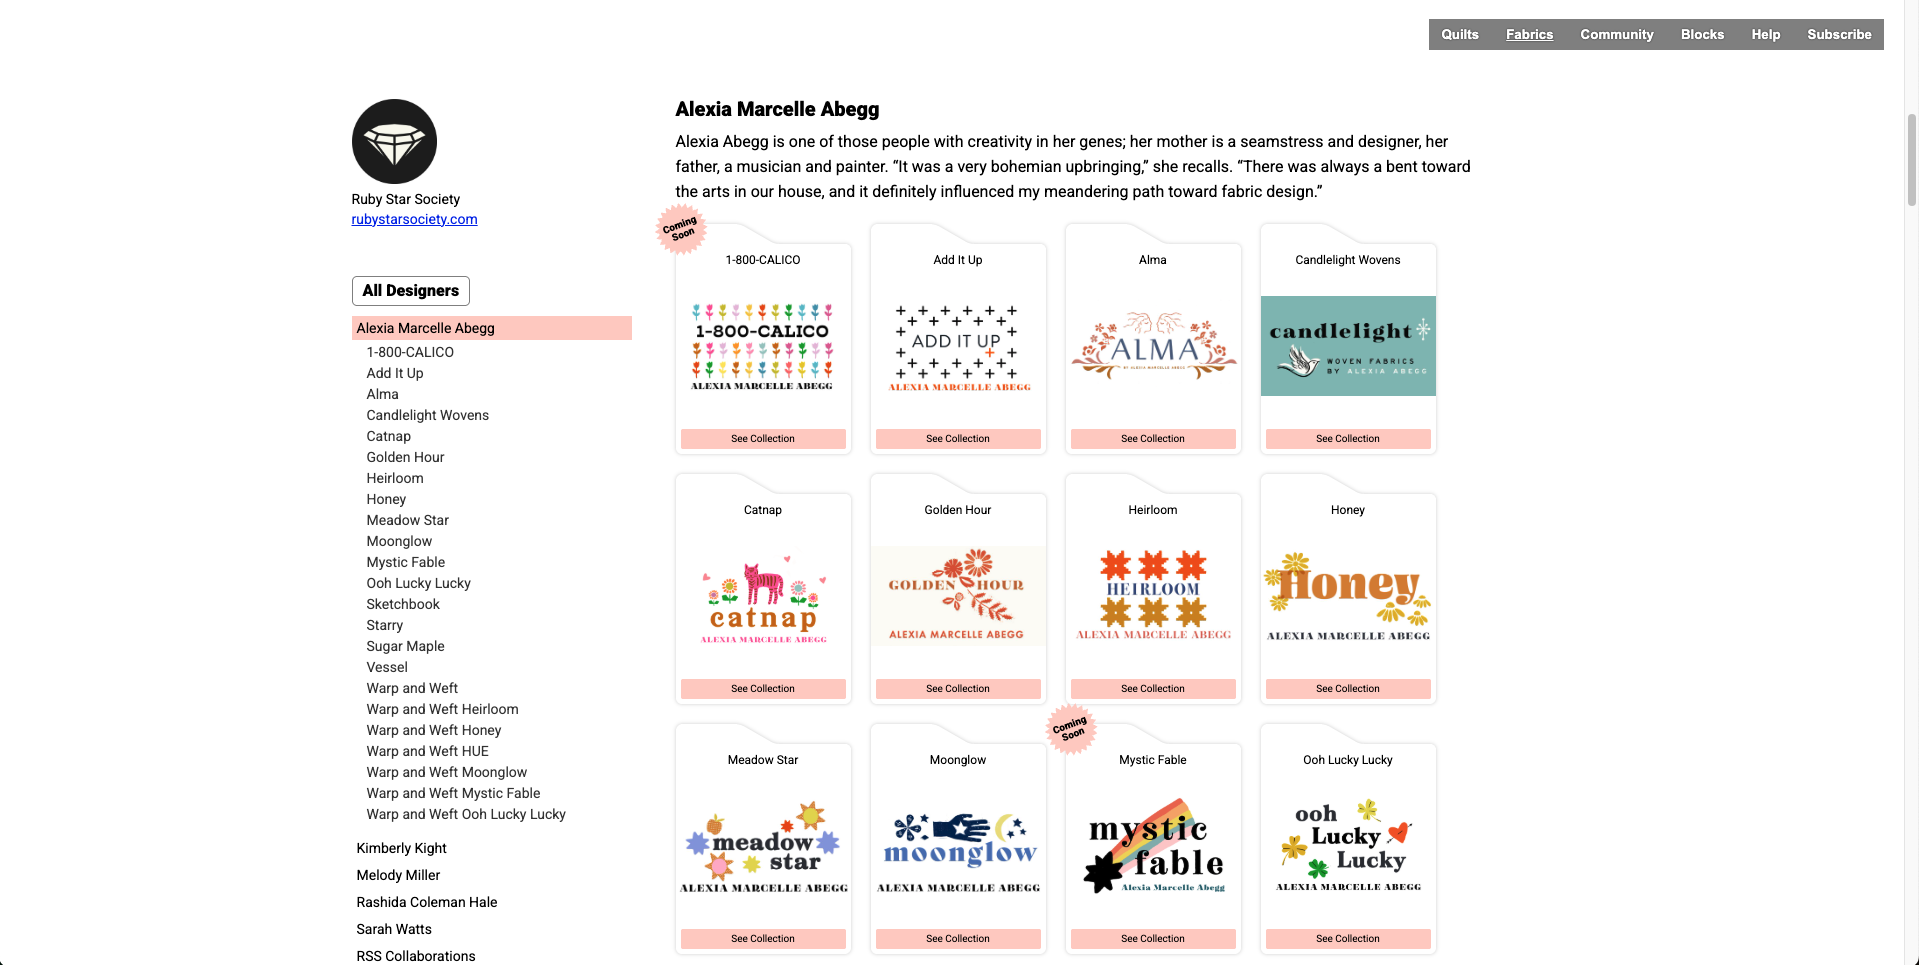
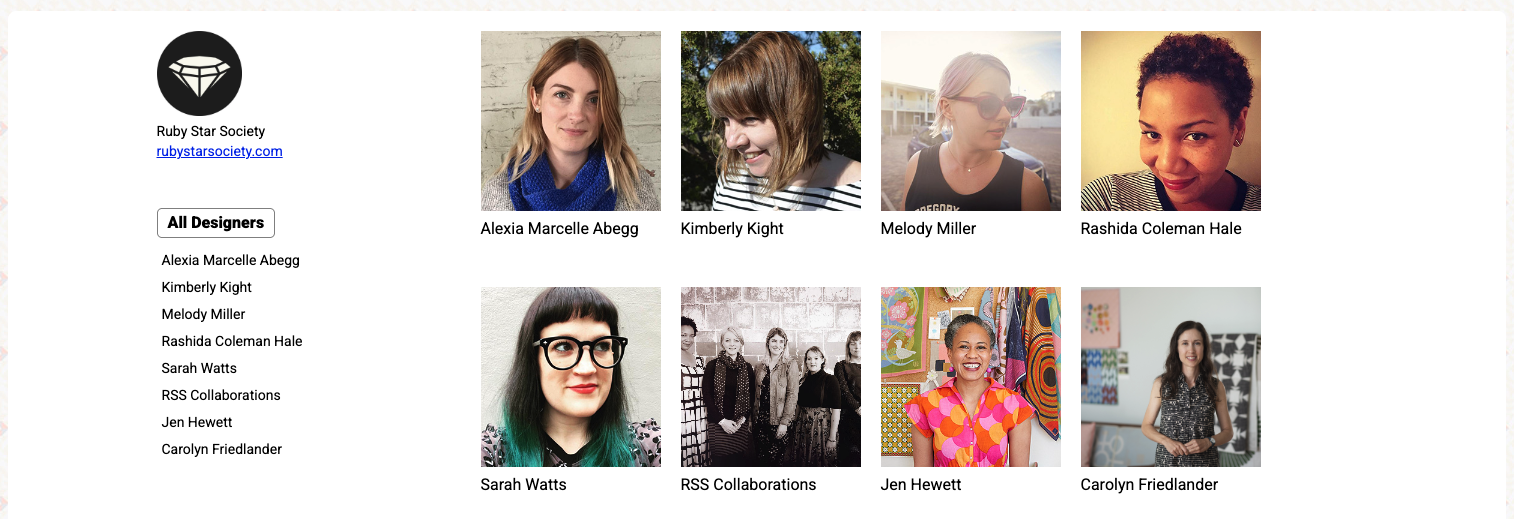
Click on the <mark style="color:blue;">**designer picture**</mark> whose fabrics you want to browse.&#x20;

* In this example, I'm going to look through **Alexia Marcelle Abegg's** fabrics.

<figure><img src="/files/Rfz3SNBtkwtZH3f3CUrR" alt=""><figcaption></figcaption></figure>
{% endstep %}

{% step %}
Alexia's fabric catalog is displayed with each collection in its own folder.

<figure><img src="/files/6h1FlRnLyfxx3Wr3KwxO" alt=""><figcaption></figcaption></figure>
{% endstep %}

{% step %}
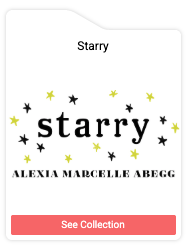
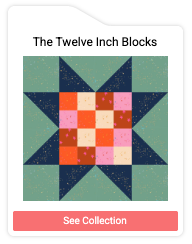
Click on either the <mark style="color:blue;">**See Collection button**</mark> on the fabric collection card **or** on the <mark style="color:blue;">**name of the collection**</mark> on the left side control panel.

* In this example, I'm going to open Alexia's **Starry** fabric collection.

<div align="left"><figure><img src="/files/CdGRIqh1vXohzU40G36o" alt=""><figcaption></figcaption></figure></div>
{% endstep %}

{% step %}
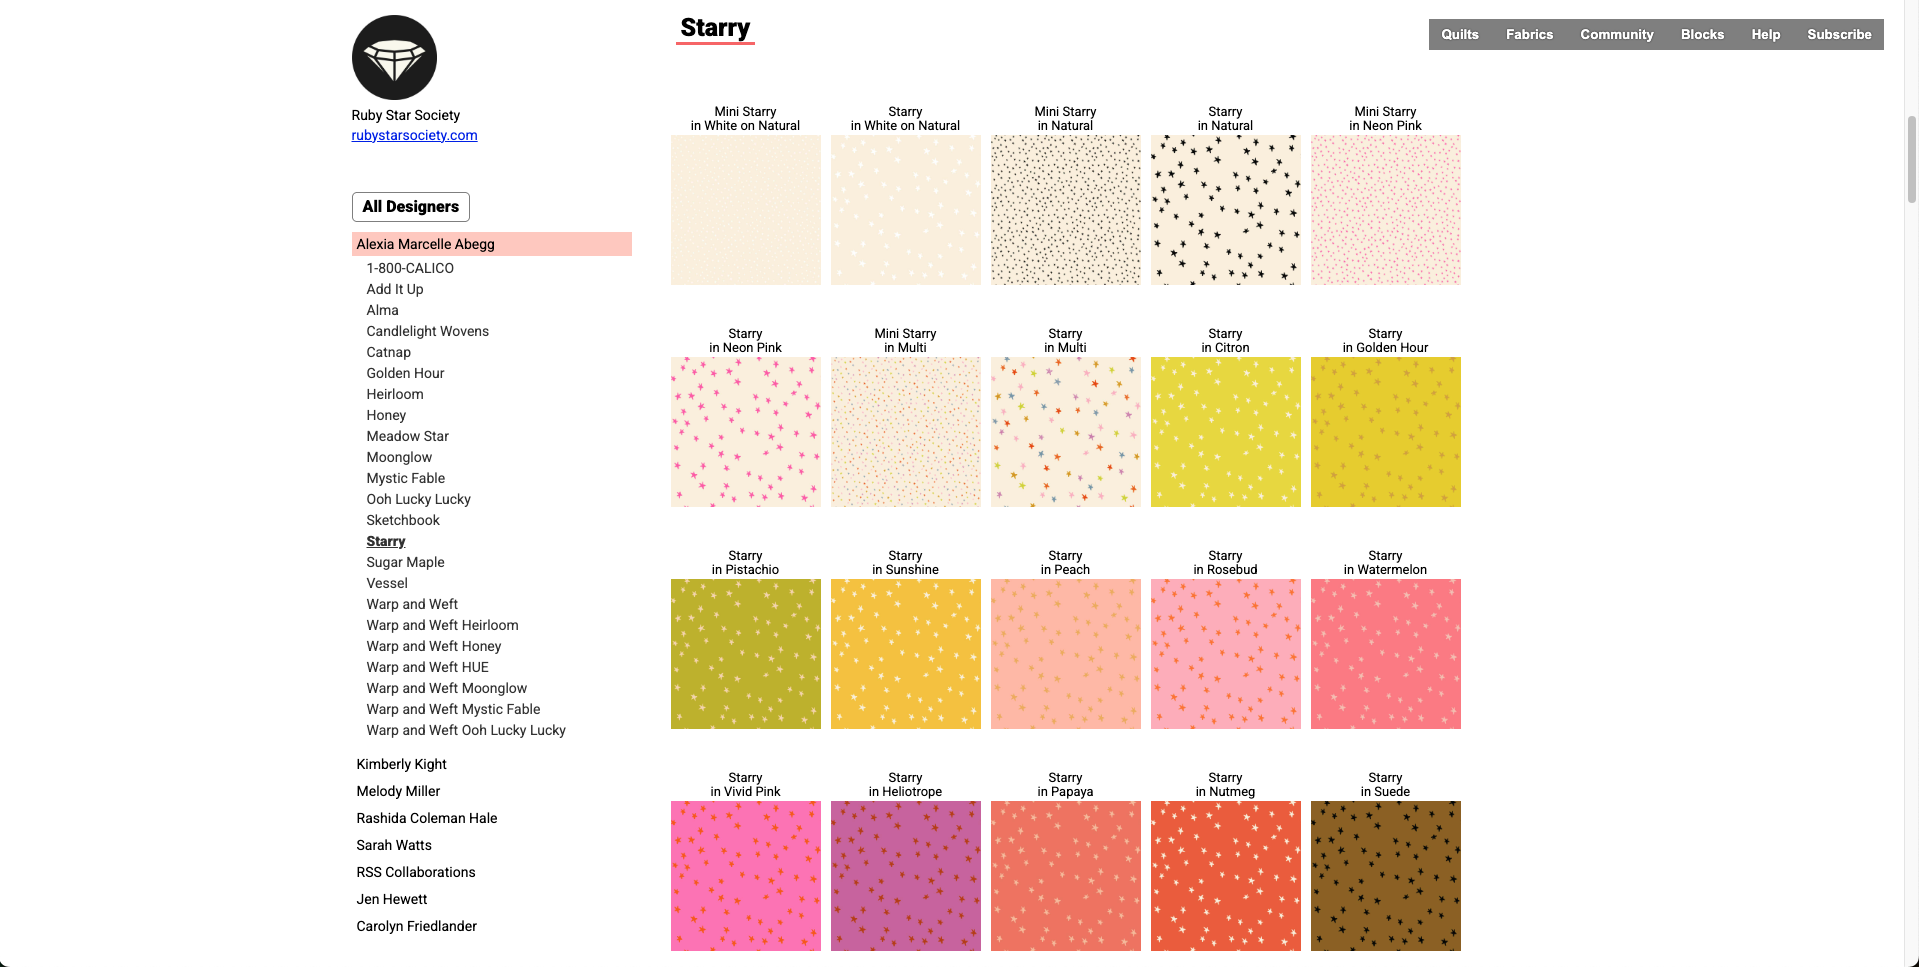
The entire collection of fabric swatches will be displayed. <mark style="color:blue;">**Scroll down**</mark> to view more swatches.

<figure><img src="/files/yrz6l0oiZ3JYbogN7Y14" alt=""><figcaption></figcaption></figure>
{% endstep %}

{% step %}
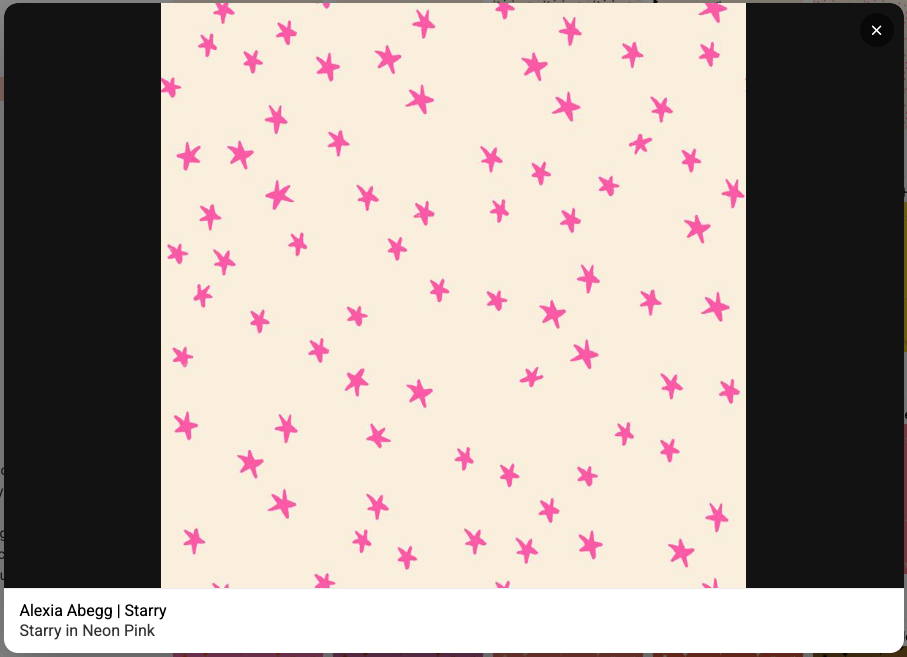
Click on <mark style="color:blue;">**one of the swatches**</mark> to view a larger image. A popup will open with a zoomed in image of the fabric. <mark style="color:blue;">**Click again**</mark> to minimize the swatch.

<div align="left"><figure><img src="/files/eF7Ux5UleO6bjIVd1anr" alt="" width="563"><figcaption></figcaption></figure></div>
{% endstep %}

{% step %}
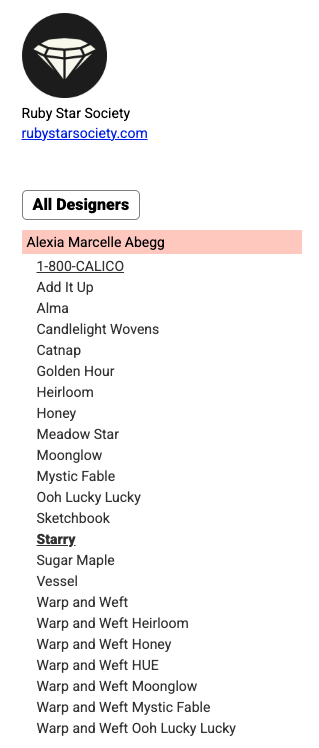
Click on the <mark style="color:blue;">**fabric collection**</mark> or <mark style="color:blue;">**designer's name**</mark> on the left side control panel to view another collection.

<div align="left"><figure><img src="/files/SvqaNPXesyuFT8fNAOeX" alt="" width="239"><figcaption></figcaption></figure></div>
{% endstep %}
{% endstepper %}

***

## <mark style="color:blue;">Subscribe to Save RSS Fabrics to Your Fabric Stash</mark>

If you'd like save your progress on your sampler, please consider subscribing to PreQuilt.

You can subscribe at any time and save your progress to your PreQuilt account. To do this:

{% stepper %}
{% step %}
Click on the <mark style="color:blue;">**Save button**</mark> on the central, vertical toolbar.

<div align="left"><figure><img src="/files/YKiwMl6PbWhjSlrtfaQh" alt=""><figcaption></figcaption></figure></div>
{% endstep %}

{% step %}
In the popup window, click on the <mark style="color:blue;">**View PreQuilt Plans button**</mark>.

<div align="left"><figure><img src="/files/h7CmdDUoe6voZWAt3mr6" alt=""><figcaption></figcaption></figure></div>
{% endstep %}

{% step %}
The plans page will appear. Click on the <mark style="color:blue;">**button for the subscription plan and billing cadence**</mark> that you prefer.

* **Basic Plan**: Are perfect for every and any quilter. It has everything you need to design, visualize, and plan your quilts.
* **Market Plan:** Can do everything the Basic Plan can, PLUS help you commercialize your quilt patterns with custom digital coloring pages.
* We offer monthly and annual subscriptions.
* Billing currency is based on your location. We bill in CAD, USD, GBP, and EUR.

<figure><img src="/files/z9htKAT1NfIDhNPpVMNa" alt=""><figcaption></figcaption></figure>
{% endstep %}

{% step %} <mark style="color:blue;">**Fill out the form**</mark> with your email address, username, and password. [<mark style="color:blue;">**Review the Terms of Service**</mark>](https://app.prequilt.com/terms) (recurring subscription) and <mark style="color:blue;">**agree to the use of**</mark> [<mark style="color:blue;">**Google Analytics**</mark>](https://prequilt.com/privacy). Click on the <mark style="color:blue;">**Submit button**</mark>.

* If you're a business, use your business name as your username. This will be a public username.

<div align="left"><figure><img src="/files/0IW8Vx24fVU7g1g3XeW9" alt="" width="419"><figcaption></figcaption></figure></div>
{% endstep %}

{% step %} <mark style="color:blue;">**Review**</mark> your email and username. If correct, click on the <mark style="color:blue;">**Checkout button**</mark>. If not, click on Edit and revise your information.

<div align="left"><figure><img src="/files/7KSgvGfOR9il7o4Id6h2" alt="" width="417"><figcaption></figcaption></figure></div>
{% endstep %}

{% step %}
You will be directed to a payment portal.

<figure><img src="/files/b5rBIoJvRV4gIiRNCZ8v" alt=""><figcaption></figcaption></figure>
{% endstep %}

{% step %}
If applicable, click on the <mark style="color:blue;">**Apply coupon button**</mark>, <mark style="color:blue;">**enter your coupon code**</mark> in the box, and press the <mark style="color:blue;">**Apply button**</mark>.

<div><figure><img src="/files/byd7tYrqoordRX8soYA1" alt=""><figcaption></figcaption></figure> <figure><img src="/files/blb56rdsJG6h0sHa1lQc" alt=""><figcaption></figcaption></figure> <figure><img src="/files/MwwhfpzHXnfbCDpSNtnL" alt=""><figcaption></figcaption></figure></div>
{% endstep %}

{% step %} <mark style="color:blue;">**Review**</mark> and click on the <mark style="color:blue;">**Proceed to Checkout button**</mark>.

* **Please Note:** Your next recurring payment date is detailed here for your reference.

<div align="left"><figure><img src="/files/XDzEiXpR6H7uXiJH9Lsk" alt="" width="296"><figcaption></figcaption></figure></div>
{% endstep %}

{% step %} <mark style="color:blue;">**Fill out the form**</mark> with your first name, last name, address, and payment method information. Click on the <mark style="color:blue;">**Pay & subscribe button**</mark>.

* We accept credit cards and PayPal.

<figure><img src="/files/J0PK5nIue0FC1f8z26Uv" alt=""><figcaption></figcaption></figure>
{% endstep %}

{% step %} <mark style="color:$danger;">**ATTENTION: DO NOT close or refresh the browser. This step will take time, we're creating your account.**</mark>

<figure><img src="/files/XgO10oHKDRV5bUDHmhrM" alt=""><figcaption></figcaption></figure>
{% endstep %}

{% step %}
Hooray! Your subscription has been created. You will be diverted back to your sampler quilt and it will have been saved to your account. To be on the safe side, click on the <mark style="color:blue;">**Save button**</mark>.

<div align="left"><figure><img src="/files/pu7GGDrFVFkFsmxsoqOk" alt=""><figcaption></figcaption></figure></div>
{% endstep %}
{% endstepper %}


# Fabric Calculations

Free Ruby Star Sampler Feature

## <mark style="color:blue;">Calculate Your Sampler's Fabric Needs</mark>

Now that you've mocked up your perfect [**Ruby Star Sampler**](https://app.prequilt.com/rss), you might be ready to start making it! Right?!?

The free block patterns have all the cutting instructions for each block, but if you're looking for a holistic calculation for the entire quilt, we got you!

Usually the Fabric Calculator is a feature only available to PreQuilt subscribers. But for this collaboration, we've made fabric calculations available for free on all the Ruby Star sampler quilts.

***

## <mark style="color:blue;">How to Use the Fabric Calculator</mark>

{% hint style="info" %}
All cutting instructions in PreQuilt match the Ruby Star Society block patterns. This means that cutting instructions are sometimes bigger than you'd expect. But this is to ensure you have enough fabric for trimming or for foundation paper piecing.
{% endhint %}

### YouTube Video

{% embed url="<https://youtu.be/NLeBYO-1TLc?si=dDndvIB3tmEPTPEh>" %}

### Written Help Guide

{% stepper %}
{% step %}
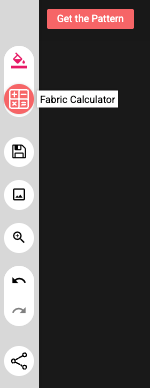
With the quilt open, click on the <mark style="color:blue;">**Fabric Calculator button**</mark> on the central, vertical toolbar.

<div align="left"><figure><img src="/files/492820b2SSde7g5tehhh" alt=""><figcaption></figcaption></figure></div>
{% endstep %}

{% step %}
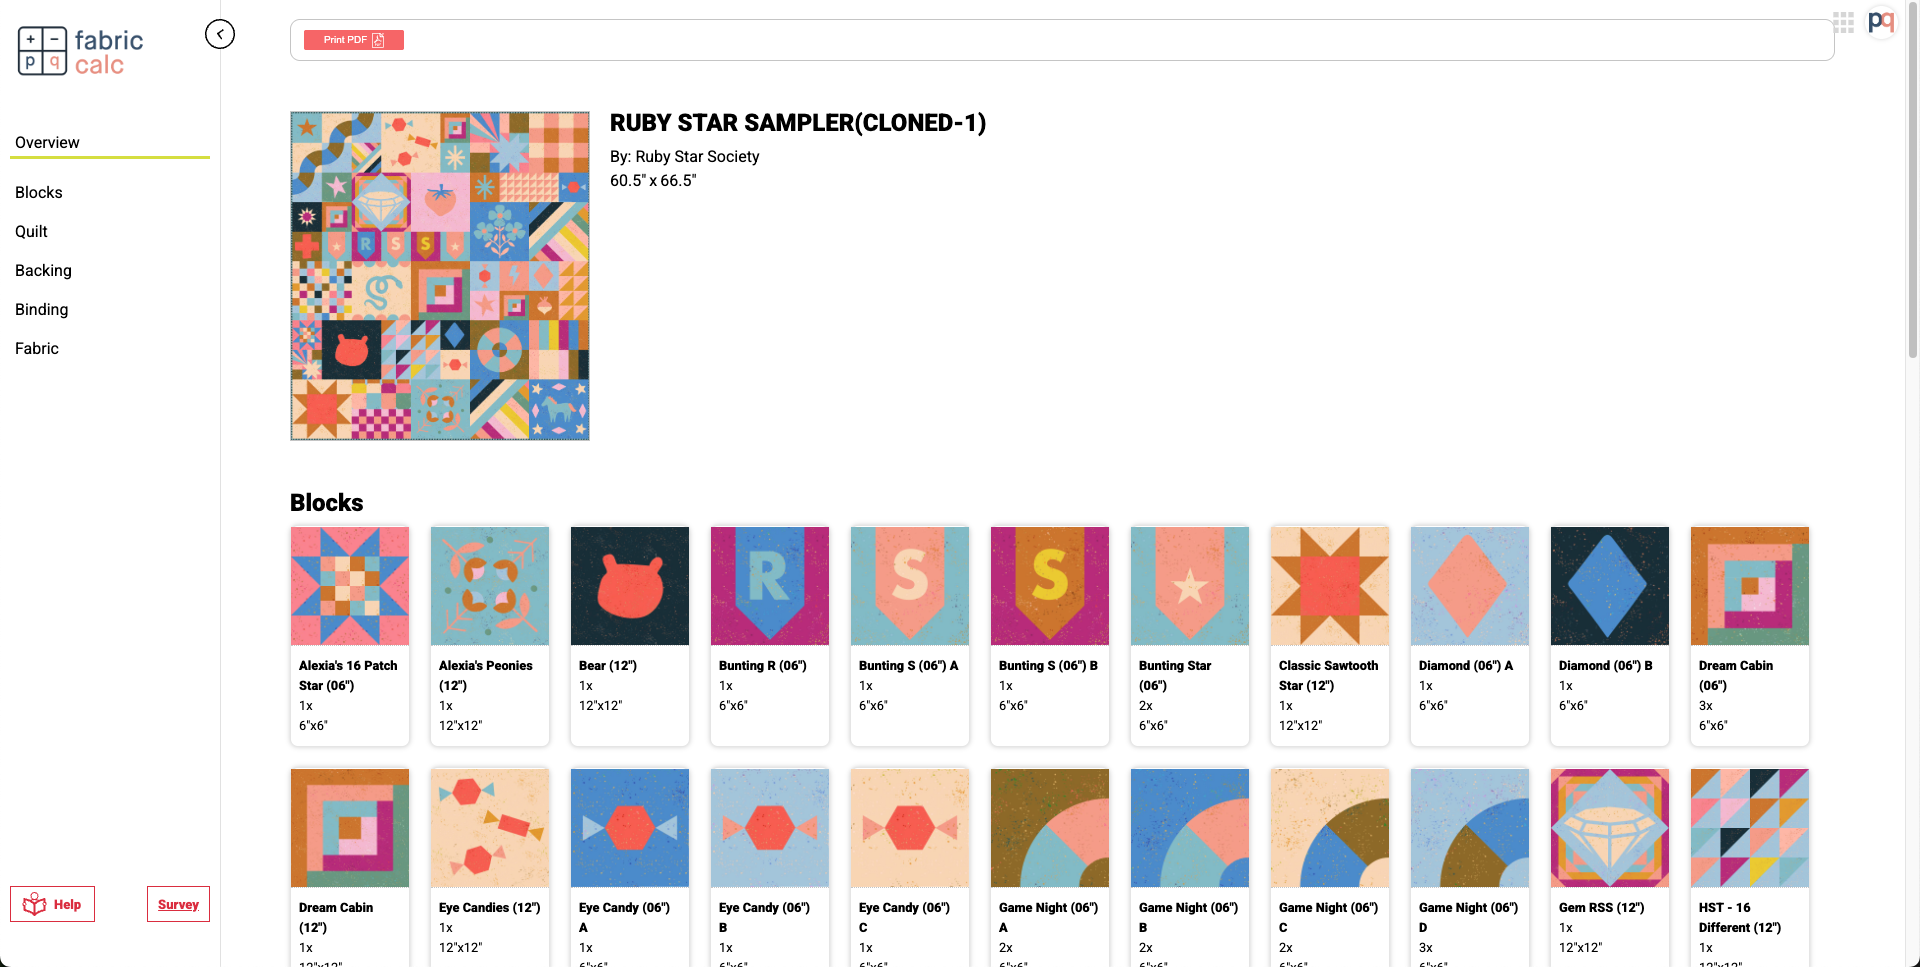
A separate tab will open for the Fabric Calculator.&#x20;

* Depending on how big the quilt is, the block images might take a little bit of time to load. Please be patient.

<div align="left"><figure><img src="/files/nCBAWJhsBuwftjMpke46" alt=""><figcaption></figcaption></figure></div>
{% endstep %}

{% step %}
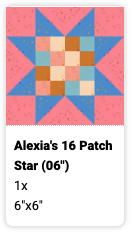
To view the fabric calculations for individual blocks, click on its <mark style="color:blue;">**block card button**</mark>.

<div align="left"><figure><img src="/files/Ioc9RTTOgdzdz0udvt79" alt=""><figcaption></figcaption></figure></div>
{% endstep %}

{% step %}
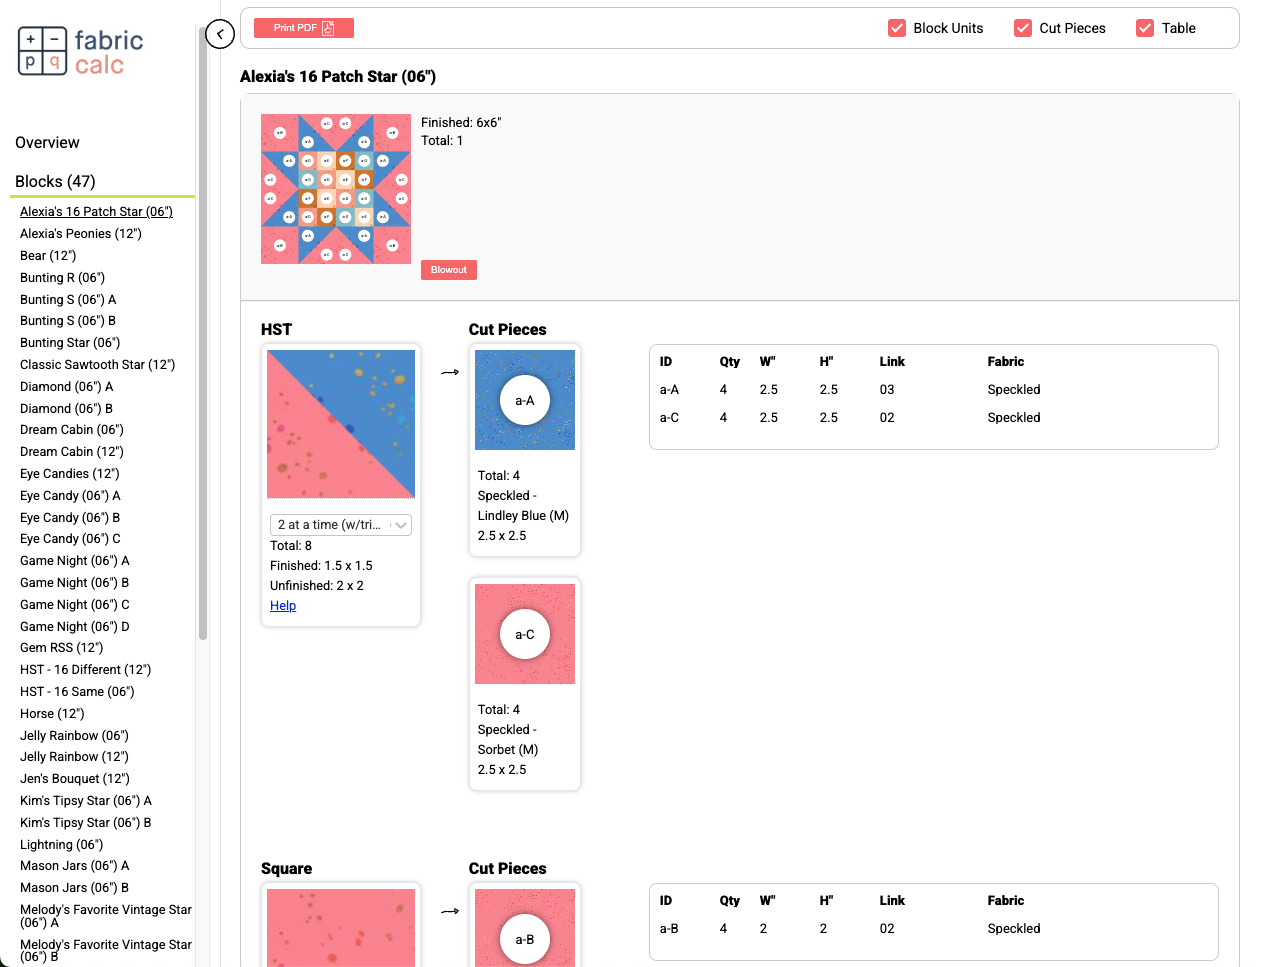
You will be redirected to that block's fabric calculation information.

<figure><img src="/files/8us34Vd4fBK4K6AxOmOX" alt=""><figcaption></figcaption></figure>
{% endstep %}

{% step %}
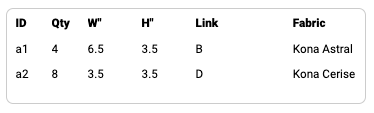
An image of the block is at the top. Click on the <mark style="color:blue;">**Blowout button**</mark> to enlarge the image.

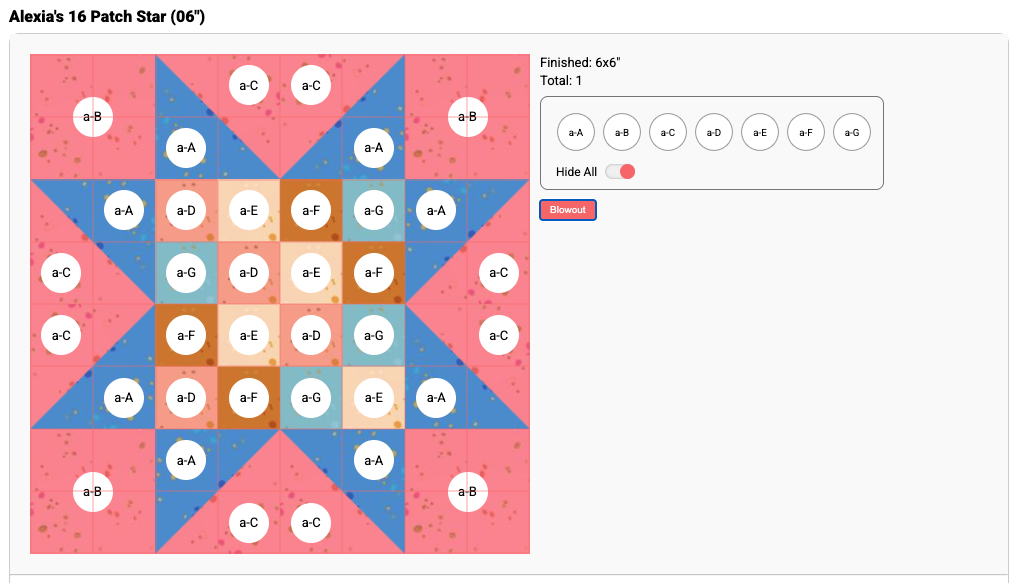
* The blowout denotes each piece of the quilt block with white circles labeling each type of cut piece of fabric in the block.

<figure><img src="/files/nUqhV53jMgvr03rOYpBp" alt=""><figcaption></figcaption></figure>

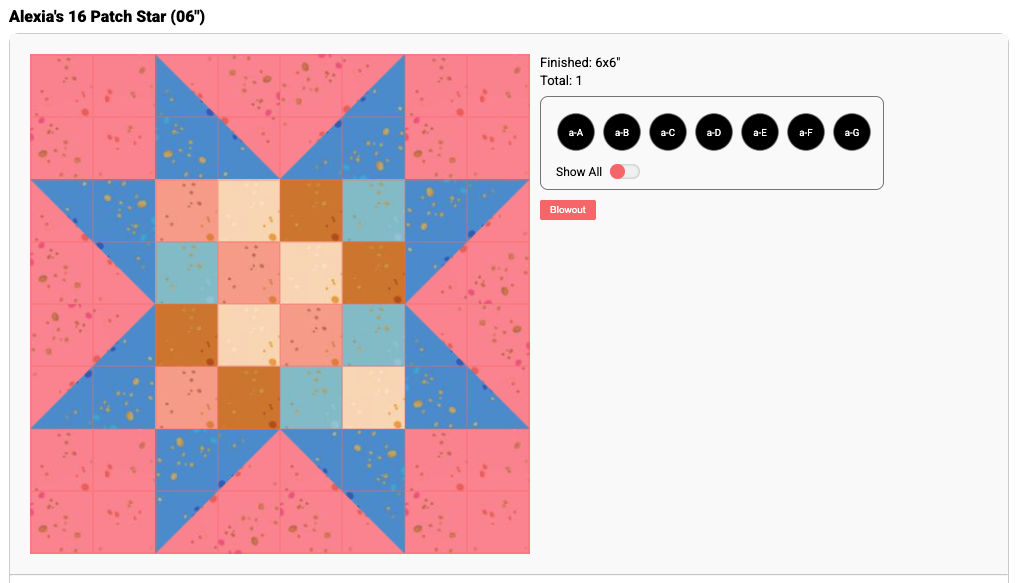
* Click on the <mark style="color:blue;">**Hide All toggle**</mark> to clear the labels.

<figure><img src="/files/6TdJfbKZjpnt6XQIBJrw" alt=""><figcaption></figcaption></figure>

* Click on the <mark style="color:blue;">**Circle Label button**</mark> in the legend to view that block piece in isolation.

<figure><img src="/files/rHMWb76vMjIdkZSzqiqS" alt=""><figcaption></figcaption></figure>
{% endstep %}

{% step %}
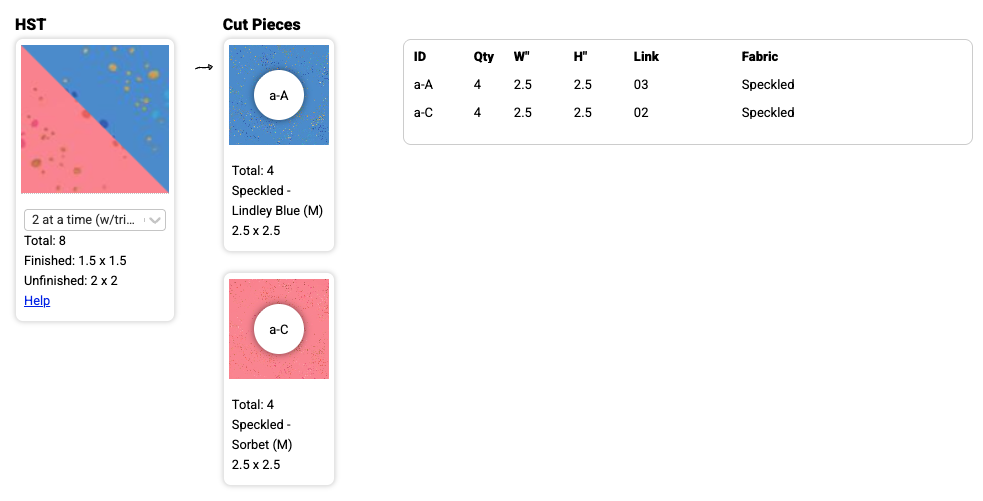
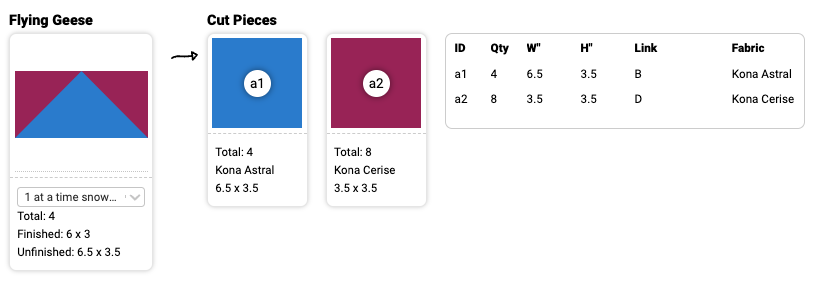
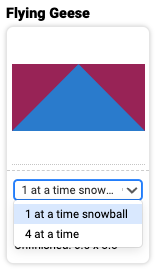
Popular block units, like **Half Square Triangles (HSTs)** have multiple construciton method options. Click on the <mark style="color:blue;">**dropdown menu**</mark> and <mark style="color:blue;">**select your prefered construction method**</mark>.

* The default for HSTs is 2 at a time with trim. This is also default for the RSS block patterns.
* When you change the construction method, the fabric calculations will dynamically update.

<figure><img src="/files/WUTVta8isrcy4kkcIuwS" alt=""><figcaption><p>Fabric calculations for 2 at a time (with trim) HST method</p></figcaption></figure>

<figure><img src="/files/l5Wy79CAqLB2pDrUCWly" alt=""><figcaption><p>Fabric calculatiosn for 8 at a time (with trim) HST method</p></figcaption></figure>
{% endstep %}

{% step %}
Click on the <mark style="color:blue;">**name of the quilt block**</mark> on the left side directory to go directly to that block's fabric calculations.

<div align="left"><figure><img src="/files/8azRHkn67XLEfcxAatCd" alt=""><figcaption></figcaption></figure></div>
{% endstep %}

{% step %}
To view cutting diagrams for each fabric, click on the <mark style="color:blue;">**Fabric header**</mark> on the left side control panel.

<div align="left"><figure><img src="/files/P69lD55r5835P4E5qWSE" alt=""><figcaption></figcaption></figure></div>
{% endstep %}

{% step %}
The fabric information will be displayed for each fabric being used in the quilt.

* You can <mark style="color:blue;">**change the number**</mark> for the width of fabric (WOF) in the little box to use different sized fabrics.&#x20;

<div align="left"><figure><img src="/files/e8pMy1CpdGodOVP3zLHt" alt=""><figcaption></figcaption></figure></div>

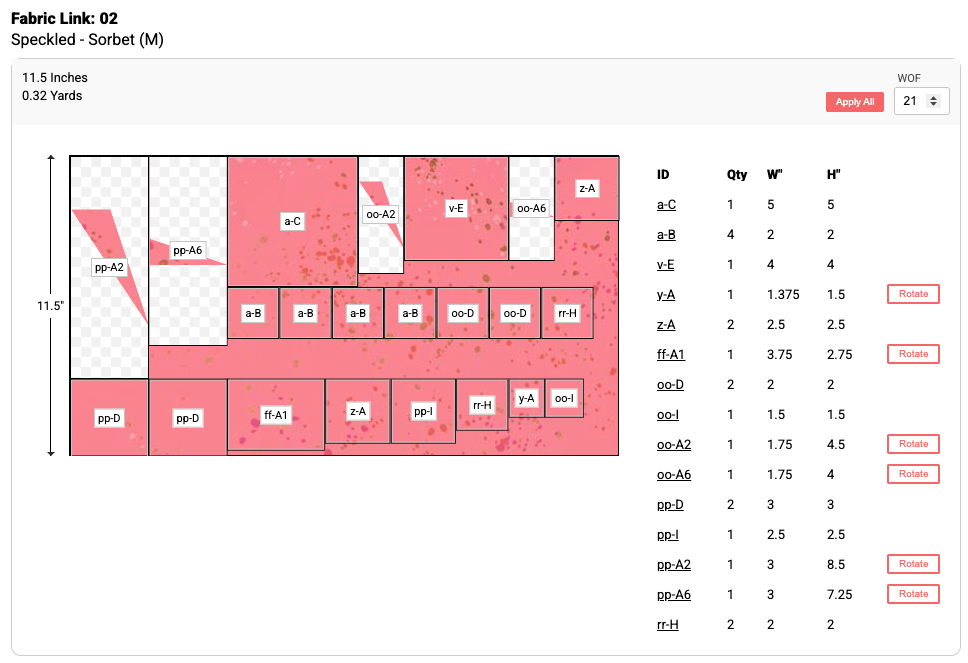
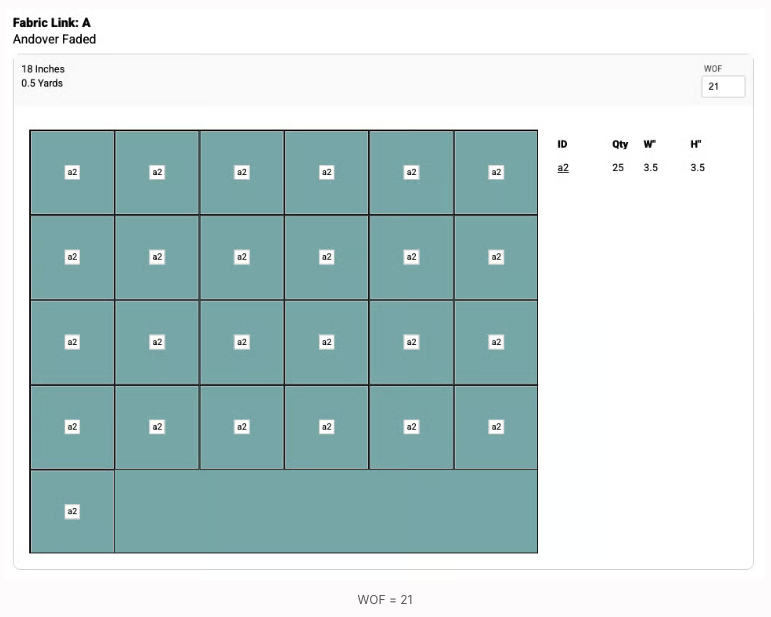
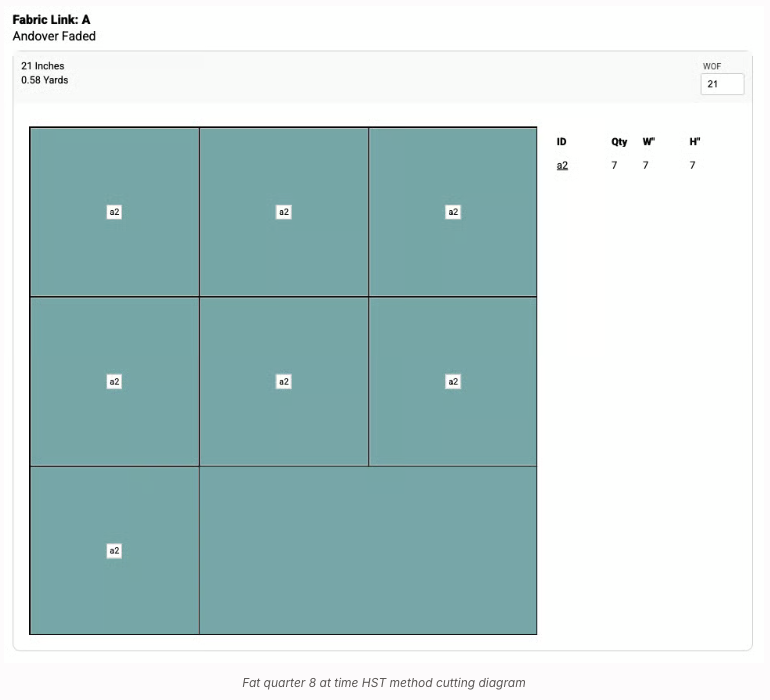
* For example, to see how to cut the fabric on a fat quarter, change the WOF to 21. The cutting diagram will dynamically update.

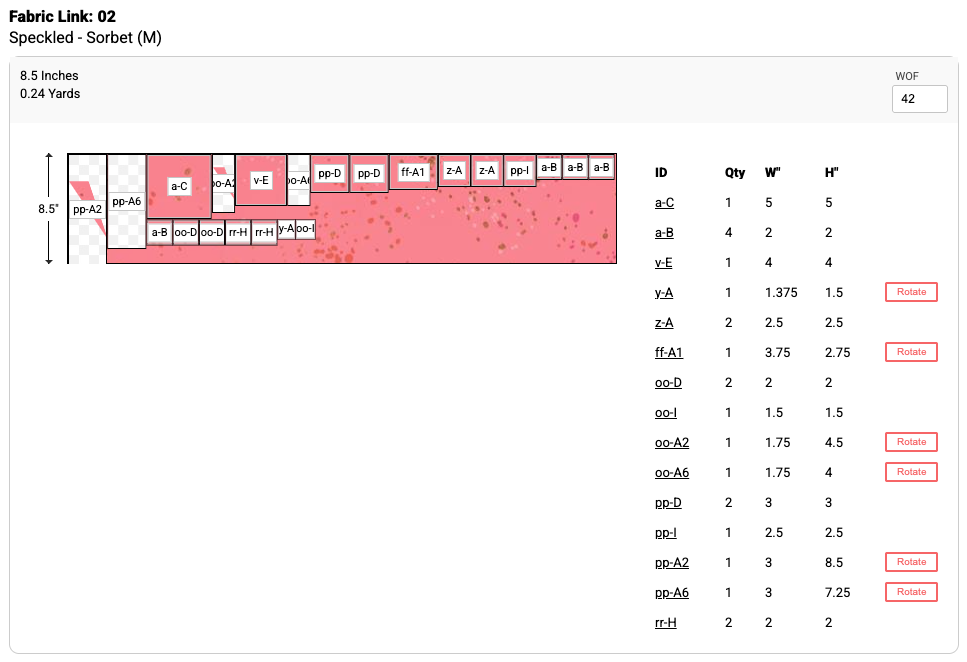
<figure><img src="/files/c9rEM9FynrH4OJjSHJzz" alt=""><figcaption><p>Cutting diagram for regular 42" width of fabric</p></figcaption></figure>

<figure><img src="/files/uIzAN3OPuBFq1R2MG336" alt=""><figcaption><p>Cutting diagram for a fat quarter (21" WOF)</p></figcaption></figure>
{% endstep %}

{% step %}
To download any of the fabric calculations, click on the <mark style="color:blue;">**Print PDF button**</mark> on the top of any of the Fabric Calculator pages.

<div align="left"><figure><img src="/files/9CCsBzY2tPzVsx5Pcb7w" alt=""><figcaption></figcaption></figure></div>
{% endstep %}
{% endstepper %}

***

### Disclaimer & Alert Info

{% hint style="warning" %}
ALERT: Some of the Ruby Star Sampler blocks have special disclaimers. You can find these highlighted in yellow on the relevant quilt blocks. Sometimes, multiple block pieces that are identical will have the same label that is different from the quilt block pattern label.
{% endhint %}

<figure><img src="/files/J41DRGyliyln133lTtc4" alt=""><figcaption></figcaption></figure>

***

## <mark style="color:blue;">Subscribe to Save Your Sampler</mark>

If you'd like save your progress on your sampler, please consider subscribing to PreQuilt.

You can subscribe at any time and save your progress to your PreQuilt account. To do this:

{% stepper %}
{% step %}
Click on the <mark style="color:blue;">**Save button**</mark> on the central, vertical toolbar.

<div align="left"><figure><img src="/files/YKiwMl6PbWhjSlrtfaQh" alt=""><figcaption></figcaption></figure></div>
{% endstep %}

{% step %}
In the popup window, click on the <mark style="color:blue;">**View PreQuilt Plans button**</mark>.

<div align="left"><figure><img src="/files/h7CmdDUoe6voZWAt3mr6" alt=""><figcaption></figcaption></figure></div>
{% endstep %}

{% step %}
The plans page will appear. Click on the <mark style="color:blue;">**button for the subscription plan and billing cadence**</mark> that you prefer.

* **Basic Plan**: Are perfect for every and any quilter. It has everything you need to design, visualize, and plan your quilts.
* **Market Plan:** Can do everything the Basic Plan can, PLUS help you commercialize your quilt patterns with custom digital coloring pages.
* We offer monthly and annual subscriptions.
* Billing currency is based on your location. We bill in CAD, USD, GBP, and EUR.

<figure><img src="/files/z9htKAT1NfIDhNPpVMNa" alt=""><figcaption></figcaption></figure>
{% endstep %}

{% step %} <mark style="color:blue;">**Fill out the form**</mark> with your email address, username, and password. [<mark style="color:blue;">**Review the Terms of Service**</mark>](https://app.prequilt.com/terms) (recurring subscription) and <mark style="color:blue;">**agree to the use of**</mark> [<mark style="color:blue;">**Google Analytics**</mark>](https://prequilt.com/privacy). Click on the <mark style="color:blue;">**Submit button**</mark>.

* If you're a business, use your business name as your username. This will be a public username.

<div align="left"><figure><img src="/files/0IW8Vx24fVU7g1g3XeW9" alt="" width="419"><figcaption></figcaption></figure></div>
{% endstep %}

{% step %} <mark style="color:blue;">**Review**</mark> your email and username. If correct, click on the <mark style="color:blue;">**Checkout button**</mark>. If not, click on Edit and revise your information.

<div align="left"><figure><img src="/files/7KSgvGfOR9il7o4Id6h2" alt="" width="417"><figcaption></figcaption></figure></div>
{% endstep %}

{% step %}
You will be directed to a payment portal.

<figure><img src="/files/b5rBIoJvRV4gIiRNCZ8v" alt=""><figcaption></figcaption></figure>
{% endstep %}

{% step %}
If applicable, click on the <mark style="color:blue;">**Apply coupon button**</mark>, <mark style="color:blue;">**enter your coupon code**</mark> in the box, and press the <mark style="color:blue;">**Apply button**</mark>.

<div><figure><img src="/files/byd7tYrqoordRX8soYA1" alt=""><figcaption></figcaption></figure> <figure><img src="/files/blb56rdsJG6h0sHa1lQc" alt=""><figcaption></figcaption></figure> <figure><img src="/files/MwwhfpzHXnfbCDpSNtnL" alt=""><figcaption></figcaption></figure></div>
{% endstep %}

{% step %} <mark style="color:blue;">**Review**</mark> and click on the <mark style="color:blue;">**Proceed to Checkout button**</mark>.

* **Please Note:** Your next recurring payment date is detailed here for your reference.

<div align="left"><figure><img src="/files/XDzEiXpR6H7uXiJH9Lsk" alt="" width="296"><figcaption></figcaption></figure></div>
{% endstep %}

{% step %} <mark style="color:blue;">**Fill out the form**</mark> with your first name, last name, address, and payment method information. Click on the <mark style="color:blue;">**Pay & subscribe button**</mark>.

* We accept credit cards and PayPal.

<figure><img src="/files/J0PK5nIue0FC1f8z26Uv" alt=""><figcaption></figcaption></figure>
{% endstep %}

{% step %} <mark style="color:$danger;">**ATTENTION: DO NOT close or refresh the browser. This step will take time, we're creating your account.**</mark>

<figure><img src="/files/XgO10oHKDRV5bUDHmhrM" alt=""><figcaption></figcaption></figure>
{% endstep %}

{% step %}
Hooray! Your subscription has been created. You will be diverted back to your sampler quilt and it will have been saved to your account. To be on the safe side, click on the <mark style="color:blue;">**Save button**</mark>.

<div align="left"><figure><img src="/files/pu7GGDrFVFkFsmxsoqOk" alt=""><figcaption></figcaption></figure></div>
{% endstep %}
{% endstepper %}


# Download Image of Your Sampler

Free Ruby Star Sampler Feature

## <mark style="color:blue;">How to Download a Picture of Your Sampler Quilt</mark>

Once you've finished creating your version of the Ruby Star Sampler, you'll probably want to save a nice copy of it.&#x20;

No problem, it's easy!

### YouTube Video

{% embed url="<https://youtu.be/1N8BsTD-xiU?si=0wK1OEhJF_maobpD>" %}

### Written Help Guide

{% stepper %}
{% step %}
With the quilt open, click on the <mark style="color:blue;">**Download Image button**</mark> on the central, vertical toolbar.

<div align="left"><figure><img src="/files/y0PP4PpND74kw5YR5coh" alt=""><figcaption></figcaption></figure></div>
{% endstep %}

{% step %}
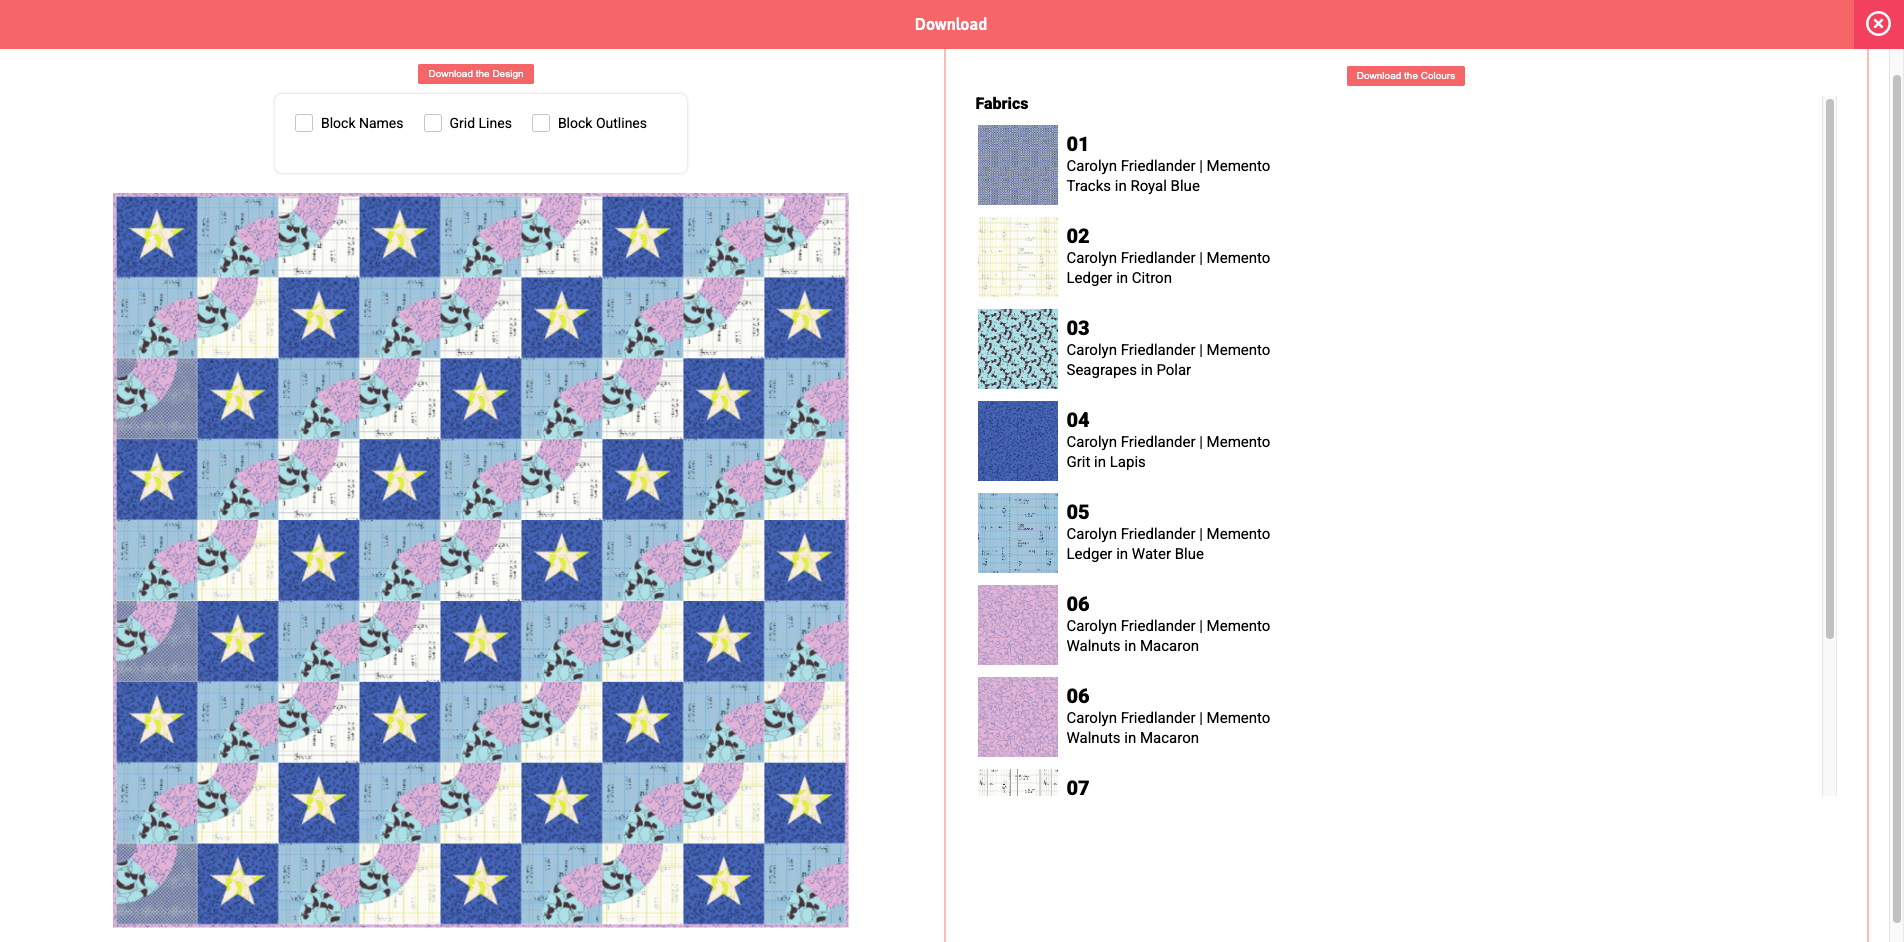
A popup window will appear.&#x20;

<figure><img src="/files/4rpcXSYLIciDnv8vHkHb" alt=""><figcaption></figcaption></figure>
{% endstep %}

{% step %}
To download a picture of your quilt, click on the <mark style="color:blue;">**Download the Design button**</mark> on the left hand side. A JPG file will be saved to your device (wherever downloaded images are saved).&#x20;

<figure><img src="/files/Apoek67UPtcjmTWblh7a" alt=""><figcaption></figcaption></figure>
{% endstep %}

{% step %}
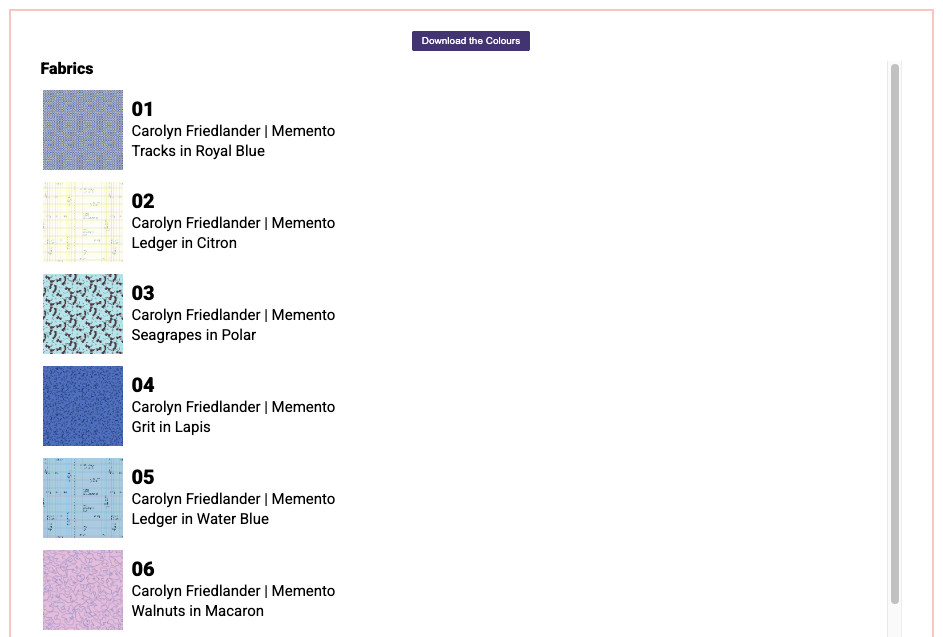
On the right hand side, you can click on the <mark style="color:blue;">**Download the Colors button**</mark> and get a list of the fabrics being used in your sampler quilt.

<figure><img src="/files/S2GAavxGlTSispTgV2uF" alt=""><figcaption></figcaption></figure>
{% endstep %}

{% step %}
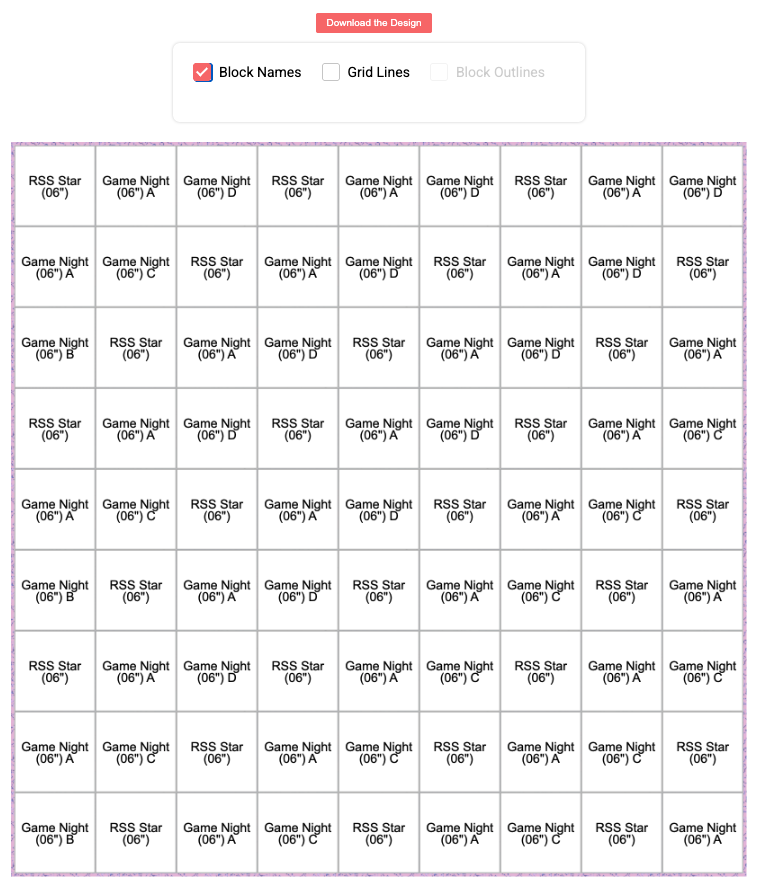
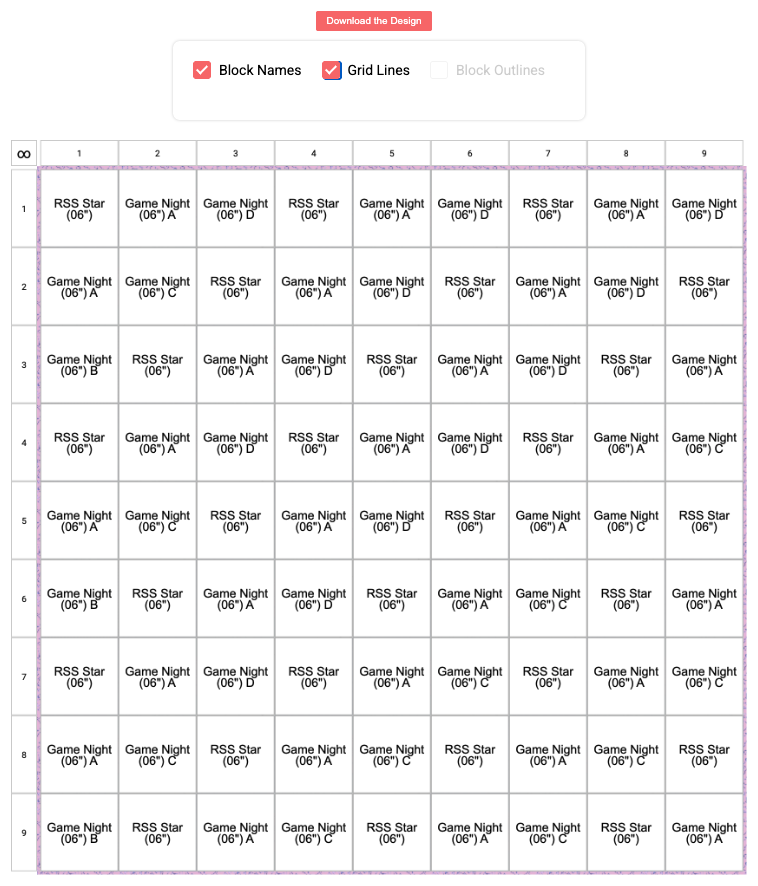
For some next level support, you can click on the <mark style="color:blue;">**checkbox next to Block Names**</mark> to view the names of each of the blocks.

* This will be helpful to not only know where the blocks go, but also the names of the quilt blocks so you know the names of which ones to download from the Ruby Star pattern library.

<div align="center"><figure><img src="/files/bqN44M5MrdF7UILdB4BX" alt="" width="563"><figcaption></figcaption></figure></div>
{% endstep %}

{% step %}
Click on the <mark style="color:blue;">**Grid Lines button**</mark> to add numbers to the columns and rows.

<figure><img src="/files/jZ6qSJop4gGxnhMTiAFn" alt="" width="563"><figcaption></figcaption></figure>
{% endstep %}
{% endstepper %}

***

## <mark style="color:blue;">Subscribe to Save Your Sampler</mark>

If you'd like save your progress on your sampler, please consider subscribing to PreQuilt.

You can subscribe at any time and save your progress to your PreQuilt account. To do this:

{% stepper %}
{% step %}
Click on the <mark style="color:blue;">**Save button**</mark> on the central, vertical toolbar.

<div align="left"><figure><img src="/files/YKiwMl6PbWhjSlrtfaQh" alt=""><figcaption></figcaption></figure></div>
{% endstep %}

{% step %}
In the popup window, click on the <mark style="color:blue;">**View PreQuilt Plans button**</mark>.

<div align="left"><figure><img src="/files/h7CmdDUoe6voZWAt3mr6" alt=""><figcaption></figcaption></figure></div>
{% endstep %}

{% step %}
The plans page will appear. Click on the <mark style="color:blue;">**button for the subscription plan and billing cadence**</mark> that you prefer.

* **Basic Plan**: Are perfect for every and any quilter. It has everything you need to design, visualize, and plan your quilts.
* **Market Plan:** Can do everything the Basic Plan can, PLUS help you commercialize your quilt patterns with custom digital coloring pages.
* We offer monthly and annual subscriptions.
* Billing currency is based on your location. We bill in CAD, USD, GBP, and EUR.

<figure><img src="/files/z9htKAT1NfIDhNPpVMNa" alt=""><figcaption></figcaption></figure>
{% endstep %}

{% step %} <mark style="color:blue;">**Fill out the form**</mark> with your email address, username, and password. [<mark style="color:blue;">**Review the Terms of Service**</mark>](https://app.prequilt.com/terms) (recurring subscription) and <mark style="color:blue;">**agree to the use of**</mark> [<mark style="color:blue;">**Google Analytics**</mark>](https://prequilt.com/privacy). Click on the <mark style="color:blue;">**Submit button**</mark>.

* If you're a business, use your business name as your username. This will be a public username.

<div align="left"><figure><img src="/files/0IW8Vx24fVU7g1g3XeW9" alt="" width="419"><figcaption></figcaption></figure></div>
{% endstep %}

{% step %} <mark style="color:blue;">**Review**</mark> your email and username. If correct, click on the <mark style="color:blue;">**Checkout button**</mark>. If not, click on Edit and revise your information.

<div align="left"><figure><img src="/files/7KSgvGfOR9il7o4Id6h2" alt="" width="417"><figcaption></figcaption></figure></div>
{% endstep %}

{% step %}
You will be directed to a payment portal.

<figure><img src="/files/b5rBIoJvRV4gIiRNCZ8v" alt=""><figcaption></figcaption></figure>
{% endstep %}

{% step %}
If applicable, click on the <mark style="color:blue;">**Apply coupon button**</mark>, <mark style="color:blue;">**enter your coupon code**</mark> in the box, and press the <mark style="color:blue;">**Apply button**</mark>.

<div><figure><img src="/files/byd7tYrqoordRX8soYA1" alt=""><figcaption></figcaption></figure> <figure><img src="/files/blb56rdsJG6h0sHa1lQc" alt=""><figcaption></figcaption></figure> <figure><img src="/files/MwwhfpzHXnfbCDpSNtnL" alt=""><figcaption></figcaption></figure></div>
{% endstep %}

{% step %} <mark style="color:blue;">**Review**</mark> and click on the <mark style="color:blue;">**Proceed to Checkout button**</mark>.

* **Please Note:** Your next recurring payment date is detailed here for your reference.

<div align="left"><figure><img src="/files/XDzEiXpR6H7uXiJH9Lsk" alt="" width="296"><figcaption></figcaption></figure></div>
{% endstep %}

{% step %} <mark style="color:blue;">**Fill out the form**</mark> with your first name, last name, address, and payment method information. Click on the <mark style="color:blue;">**Pay & subscribe button**</mark>.

* We accept credit cards and PayPal.

<figure><img src="/files/J0PK5nIue0FC1f8z26Uv" alt=""><figcaption></figcaption></figure>
{% endstep %}

{% step %} <mark style="color:$danger;">**ATTENTION: DO NOT close or refresh the browser. This step will take time, we're creating your account.**</mark>

<figure><img src="/files/XgO10oHKDRV5bUDHmhrM" alt=""><figcaption></figcaption></figure>
{% endstep %}

{% step %}
Hooray! Your subscription has been created. You will be diverted back to your sampler quilt and it will have been saved to your account. To be on the safe side, click on the <mark style="color:blue;">**Save button**</mark>.

<div align="left"><figure><img src="/files/pu7GGDrFVFkFsmxsoqOk" alt=""><figcaption></figcaption></figure></div>
{% endstep %}
{% endstepper %}


# Share in the Community Gallery

Free Ruby Star Sampler Feature

## <mark style="color:blue;">How to Share a Quilt in the Community Gallery</mark>

We have a new feature that launched with the Ruby Star Sampler. You can now share your version of any of the sampler quilts in the community gallery.

That's right, you've just made the most fantastic sampler quilt featuring all your favorite Ruby Star Society fabrics. Well done! Why not share it with the community!

### YouTube Video

{% embed url="<https://youtu.be/WV7oEofZ7bY?si=0lo0GUiB57-_82mu>" %}

### Written Help Guide

{% stepper %}
{% step %}
With the quilt open, click on the <mark style="color:blue;">**Share with Community button**</mark> on the central, vertical toolbar.

<div align="left"><figure><img src="/files/BVnB2JHNV6Wy23JzKsAM" alt=""><figcaption></figcaption></figure></div>
{% endstep %}

{% step %}
Click on <mark style="color:blue;">**Share**</mark> in the menu.

<div align="left"><figure><img src="/files/OFUo0C1y4eCyaYS0KqBj" alt=""><figcaption></figcaption></figure></div>
{% endstep %}

{% step %}
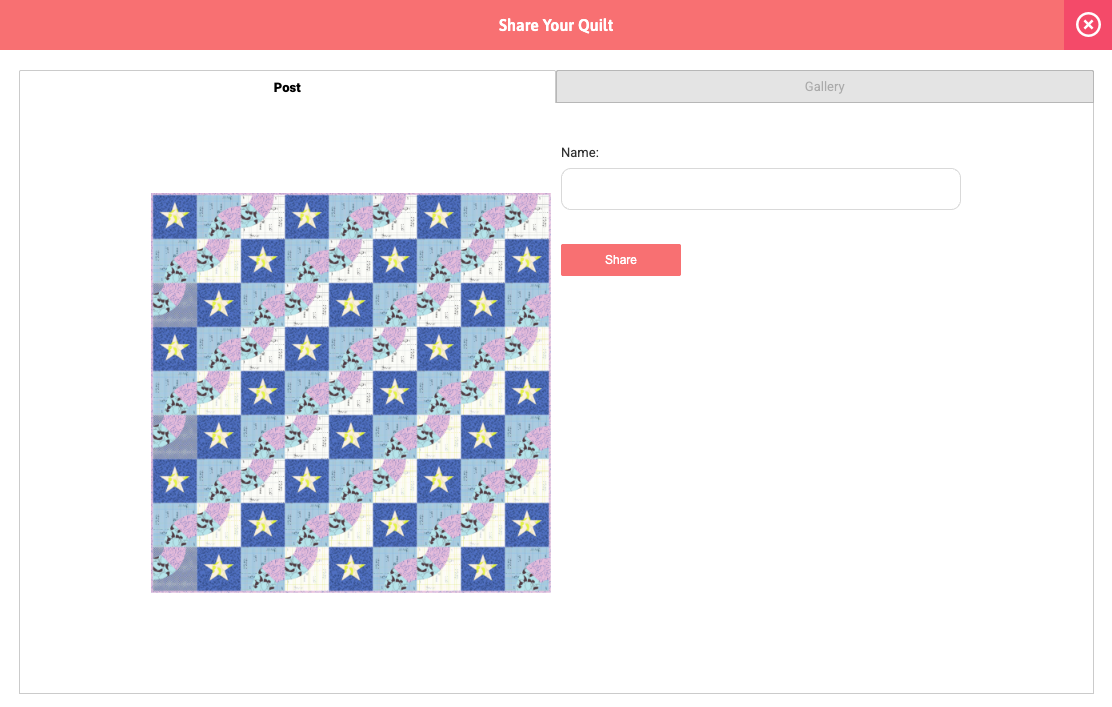
A popup window will appear.&#x20;

<figure><img src="/files/eF1Q4AffIpF8GGzZ8ZnJ" alt=""><figcaption></figcaption></figure>
{% endstep %}

{% step %}
Add a <mark style="color:blue;">**name**</mark> for your quilt. And then press the <mark style="color:blue;">**Share button**</mark>.

<figure><img src="/files/QxlRsxkcxL7sJSL9ktjq" alt=""><figcaption></figcaption></figure>
{% endstep %}

{% step %}
You will then be diverted to the **Gallery tab**. You will see your quilt there.&#x20;

<figure><img src="/files/FmuF9JWmHQupJkf0jDIE" alt=""><figcaption></figcaption></figure>
{% endstep %}

{% step %}
You can also go back to the [**Ruby Star Sampler homepage**](https://app.prequilt.com/rss) and then click on the <mark style="color:blue;">**Community button**</mark> in the navigation bar. You will see your quilt here! Congrats and thanks for sharing!

<figure><img src="/files/sXKyv7v0iz3hHc6jTmgn" alt=""><figcaption></figcaption></figure>
{% endstep %}

{% step %}
Click on any of the shared quilts. It will expand to show a larger image of the quilt with all the fabrics that were used listed beneath it.&#x20;

* This is a great place for inspiration!

<div align="left"><figure><img src="/files/QJbRD3K0YFQSR00oIoiP" alt="" width="522"><figcaption></figcaption></figure></div>
{% endstep %}
{% endstepper %}

***

## <mark style="color:blue;">Subscribe to Save Your Sampler</mark>

If you'd like save your progress on your sampler, please consider subscribing to PreQuilt.

You can subscribe at any time and save your progress to your PreQuilt account. To do this:

{% stepper %}
{% step %}
Click on the <mark style="color:blue;">**Save button**</mark> on the central, vertical toolbar.

<div align="left"><figure><img src="/files/YKiwMl6PbWhjSlrtfaQh" alt=""><figcaption></figcaption></figure></div>
{% endstep %}

{% step %}
In the popup window, click on the <mark style="color:blue;">**View PreQuilt Plans button**</mark>.

<div align="left"><figure><img src="/files/h7CmdDUoe6voZWAt3mr6" alt=""><figcaption></figcaption></figure></div>
{% endstep %}

{% step %}
The plans page will appear. Click on the <mark style="color:blue;">**button for the subscription plan and billing cadence**</mark> that you prefer.

* **Basic Plan**: Are perfect for every and any quilter. It has everything you need to design, visualize, and plan your quilts.
* **Market Plan:** Can do everything the Basic Plan can, PLUS help you commercialize your quilt patterns with custom digital coloring pages.
* We offer monthly and annual subscriptions.
* Billing currency is based on your location. We bill in CAD, USD, GBP, and EUR.

<figure><img src="/files/z9htKAT1NfIDhNPpVMNa" alt=""><figcaption></figcaption></figure>
{% endstep %}

{% step %} <mark style="color:blue;">**Fill out the form**</mark> with your email address, username, and password. [<mark style="color:blue;">**Review the Terms of Service**</mark>](https://app.prequilt.com/terms) (recurring subscription) and <mark style="color:blue;">**agree to the use of**</mark> [<mark style="color:blue;">**Google Analytics**</mark>](https://prequilt.com/privacy). Click on the <mark style="color:blue;">**Submit button**</mark>.

* If you're a business, use your business name as your username. This will be a public username.

<div align="left"><figure><img src="/files/0IW8Vx24fVU7g1g3XeW9" alt="" width="419"><figcaption></figcaption></figure></div>
{% endstep %}

{% step %} <mark style="color:blue;">**Review**</mark> your email and username. If correct, click on the <mark style="color:blue;">**Checkout button**</mark>. If not, click on Edit and revise your information.

<div align="left"><figure><img src="/files/7KSgvGfOR9il7o4Id6h2" alt="" width="417"><figcaption></figcaption></figure></div>
{% endstep %}

{% step %}
You will be directed to a payment portal.

<figure><img src="/files/b5rBIoJvRV4gIiRNCZ8v" alt=""><figcaption></figcaption></figure>
{% endstep %}

{% step %}
If applicable, click on the <mark style="color:blue;">**Apply coupon button**</mark>, <mark style="color:blue;">**enter your coupon code**</mark> in the box, and press the <mark style="color:blue;">**Apply button**</mark>.

<div><figure><img src="/files/byd7tYrqoordRX8soYA1" alt=""><figcaption></figcaption></figure> <figure><img src="/files/blb56rdsJG6h0sHa1lQc" alt=""><figcaption></figcaption></figure> <figure><img src="/files/MwwhfpzHXnfbCDpSNtnL" alt=""><figcaption></figcaption></figure></div>
{% endstep %}

{% step %} <mark style="color:blue;">**Review**</mark> and click on the <mark style="color:blue;">**Proceed to Checkout button**</mark>.

* **Please Note:** Your next recurring payment date is detailed here for your reference.

<div align="left"><figure><img src="/files/XDzEiXpR6H7uXiJH9Lsk" alt="" width="296"><figcaption></figcaption></figure></div>
{% endstep %}

{% step %} <mark style="color:blue;">**Fill out the form**</mark> with your first name, last name, address, and payment method information. Click on the <mark style="color:blue;">**Pay & subscribe button**</mark>.

* We accept credit cards and PayPal.

<figure><img src="/files/J0PK5nIue0FC1f8z26Uv" alt=""><figcaption></figcaption></figure>
{% endstep %}

{% step %} <mark style="color:$danger;">**ATTENTION: DO NOT close or refresh the browser. This step will take time, we're creating your account.**</mark>

<figure><img src="/files/XgO10oHKDRV5bUDHmhrM" alt=""><figcaption></figcaption></figure>
{% endstep %}

{% step %}
Hooray! Your subscription has been created. You will be diverted back to your sampler quilt and it will have been saved to your account. To be on the safe side, click on the <mark style="color:blue;">**Save button**</mark>.

<div align="left"><figure><img src="/files/pu7GGDrFVFkFsmxsoqOk" alt=""><figcaption></figcaption></figure></div>
{% endstep %}
{% endstepper %}


# Change the Binding Fabric

Free Ruby Star Sampler Feature

## <mark style="color:blue;">How to Change Your Binding Fabric</mark>

Did you know that each of the Ruby Star Sampler quilts have a quarter inch binding? And did you know that you can change the binding fabric in PreQuilt? No? Well, here's how you can do it.

### YouTube Video

{% embed url="<https://youtu.be/GuqP6AniWLg?si=_0oMY3eDxWmbtO1H>" %}

### Written Help Guide

{% stepper %}
{% step %}
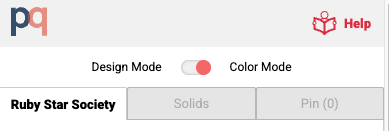
While in any of the Ruby Star Samplers, click on the <mark style="color:blue;">**toggle**</mark> to change from Color Mode to Design Mode. It's at the very top of the left hand control panel.

<div align="left"><figure><img src="/files/6L4FZ4BvF2CjHq1Z8FfO" alt=""><figcaption></figcaption></figure></div>
{% endstep %}

{% step %}
Click on the <mark style="color:blue;">**Binding tab**</mark> to get it to expand.

<div align="left"><figure><img src="/files/EvINlUjcCm6AWxAMF0ws" alt=""><figcaption></figcaption></figure></div>
{% endstep %}

{% step %}
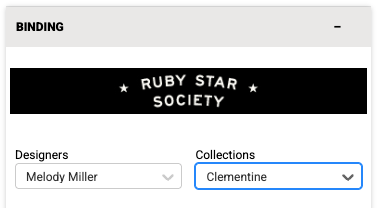
Select the <mark style="color:blue;">**Designer**</mark> and <mark style="color:blue;">**Collection**</mark> you want to browse. Click on the <mark style="color:blue;">**fabric swatch**</mark> you want to use as the binding fabric.

<div align="left"><figure><img src="/files/qZF8W9KrJKYBCCFR2qhT" alt=""><figcaption></figcaption></figure></div>
{% endstep %}

{% step %}
Click on the <mark style="color:blue;">**fabric swatch**</mark> you want to use as the binding fabric.

<div align="left"><figure><img src="/files/9NQpuaS8eIPOzQzQ4IHP" alt=""><figcaption></figcaption></figure></div>
{% endstep %}

{% step %}
You will see the binding fabric updated on the quilt.&#x20;

<div><figure><img src="/files/iYQBClXeDtZdScwr85a1" alt=""><figcaption><p>Before</p></figcaption></figure> <figure><img src="/files/ulWpDigiTXFWjvC55Fdx" alt=""><figcaption><p>After</p></figcaption></figure></div>
{% endstep %}

{% step %}
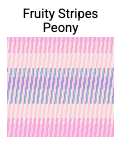
If you'd like to change the orientation of the fabric (especially for striped fabrics), <mark style="color:blue;">**hover over the binding**</mark> at the top of the quilt. Click on the Rotate button that will appear.&#x20;

* The binding fabric will rotate.

<figure><img src="/files/405F2ltxgmCQXLeBL6du" alt=""><figcaption></figcaption></figure>
{% endstep %}

{% step %} <mark style="color:blue;">**Toggle**</mark> back to Color Mode to go back to the default black background.

<figure><img src="/files/1AJSeGxZy2J75pYMZ7K3" alt=""><figcaption></figcaption></figure>
{% endstep %}
{% endstepper %}

***

## <mark style="color:blue;">Subscribe to Save Your Sampler</mark>

If you'd like save your progress on your sampler, please consider subscribing to PreQuilt.

You can subscribe at any time and save your progress to your PreQuilt account. To do this:

{% stepper %}
{% step %}
Click on the <mark style="color:blue;">**Save button**</mark> on the central, vertical toolbar.

<div align="left"><figure><img src="/files/YKiwMl6PbWhjSlrtfaQh" alt=""><figcaption></figcaption></figure></div>
{% endstep %}

{% step %}
In the popup window, click on the <mark style="color:blue;">**View PreQuilt Plans button**</mark>.

<div align="left"><figure><img src="/files/h7CmdDUoe6voZWAt3mr6" alt=""><figcaption></figcaption></figure></div>
{% endstep %}

{% step %}
The plans page will appear. Click on the <mark style="color:blue;">**button for the subscription plan and billing cadence**</mark> that you prefer.

* **Basic Plan**: Are perfect for every and any quilter. It has everything you need to design, visualize, and plan your quilts.
* **Market Plan:** Can do everything the Basic Plan can, PLUS help you commercialize your quilt patterns with custom digital coloring pages.
* We offer monthly and annual subscriptions.
* Billing currency is based on your location. We bill in CAD, USD, GBP, and EUR.

<figure><img src="/files/z9htKAT1NfIDhNPpVMNa" alt=""><figcaption></figcaption></figure>
{% endstep %}

{% step %} <mark style="color:blue;">**Fill out the form**</mark> with your email address, username, and password. [<mark style="color:blue;">**Review the Terms of Service**</mark>](https://app.prequilt.com/terms) (recurring subscription) and <mark style="color:blue;">**agree to the use of**</mark> [<mark style="color:blue;">**Google Analytics**</mark>](https://prequilt.com/privacy). Click on the <mark style="color:blue;">**Submit button**</mark>.

* If you're a business, use your business name as your username. This will be a public username.

<div align="left"><figure><img src="/files/0IW8Vx24fVU7g1g3XeW9" alt="" width="419"><figcaption></figcaption></figure></div>
{% endstep %}

{% step %} <mark style="color:blue;">**Review**</mark> your email and username. If correct, click on the <mark style="color:blue;">**Checkout button**</mark>. If not, click on Edit and revise your information.

<div align="left"><figure><img src="/files/7KSgvGfOR9il7o4Id6h2" alt="" width="417"><figcaption></figcaption></figure></div>
{% endstep %}

{% step %}
You will be directed to a payment portal.

<figure><img src="/files/b5rBIoJvRV4gIiRNCZ8v" alt=""><figcaption></figcaption></figure>
{% endstep %}

{% step %}
If applicable, click on the <mark style="color:blue;">**Apply coupon button**</mark>, <mark style="color:blue;">**enter your coupon code**</mark> in the box, and press the <mark style="color:blue;">**Apply button**</mark>.

<div><figure><img src="/files/byd7tYrqoordRX8soYA1" alt=""><figcaption></figcaption></figure> <figure><img src="/files/blb56rdsJG6h0sHa1lQc" alt=""><figcaption></figcaption></figure> <figure><img src="/files/MwwhfpzHXnfbCDpSNtnL" alt=""><figcaption></figcaption></figure></div>
{% endstep %}

{% step %} <mark style="color:blue;">**Review**</mark> and click on the <mark style="color:blue;">**Proceed to Checkout button**</mark>.

* **Please Note:** Your next recurring payment date is detailed here for your reference.

<div align="left"><figure><img src="/files/XDzEiXpR6H7uXiJH9Lsk" alt="" width="296"><figcaption></figcaption></figure></div>
{% endstep %}

{% step %} <mark style="color:blue;">**Fill out the form**</mark> with your first name, last name, address, and payment method information. Click on the <mark style="color:blue;">**Pay & subscribe button**</mark>.

* We accept credit cards and PayPal.

<figure><img src="/files/J0PK5nIue0FC1f8z26Uv" alt=""><figcaption></figcaption></figure>
{% endstep %}

{% step %} <mark style="color:$danger;">**ATTENTION: DO NOT close or refresh the browser. This step will take time, we're creating your account.**</mark>

<figure><img src="/files/XgO10oHKDRV5bUDHmhrM" alt=""><figcaption></figcaption></figure>
{% endstep %}

{% step %}
Hooray! Your subscription has been created. You will be diverted back to your sampler quilt and it will have been saved to your account. To be on the safe side, click on the <mark style="color:blue;">**Save button**</mark>.

<div align="left"><figure><img src="/files/pu7GGDrFVFkFsmxsoqOk" alt=""><figcaption></figcaption></figure></div>
{% endstep %}
{% endstepper %}


# Pinning Fabric on Samplers

Free Ruby Star Sampler Feature

{% hint style="info" %}
Subscribing to PreQuilt will enable you to not only save your quilts, but also save your pinned fabrics on the samplers you're working on.
{% endhint %}

## <mark style="color:blue;">The Value of Pinning Fabrics</mark>

Want to create a fabric pull for your Ruby Star Sampler? Want a little place to set aside some of the fantastic fabrics that you're auditioning?

You can do that by pinning all the fabrics that you're interested in. This is a great tool for when you're just not sure about a fabric and you want a quick and easy place to store it so you can keep trying it out.

## <mark style="color:blue;">How to Pin Fabrics in Sampler Quilts</mark>

### YouTube Video

{% embed url="<https://youtu.be/FZXAiQyPJCE?si=kOfOrQ1u390zeWwx>" %}

### Written Help Guide

{% stepper %}
{% step %}
On the left side control panel, select the <mark style="color:blue;">**Designer**</mark> and <mark style="color:blue;">**Collection**</mark> whose fabric you want to pin (save).&#x20;

<div align="left"><figure><img src="/files/qZF8W9KrJKYBCCFR2qhT" alt=""><figcaption></figcaption></figure></div>
{% endstep %}

{% step %}
Click on the <mark style="color:blue;">**Pin icon**</mark> beneath the fabric swatch you want to save.&#x20;

* You can do this to as many fabrics as you like, across any and all collections.&#x20;

<div align="left"><figure><img src="/files/ithqfdJXMdUVq8AZdeMR" alt=""><figcaption></figcaption></figure></div>
{% endstep %}

{% step %}
To view all your pinned fabric, click on the <mark style="color:blue;">**Pin tab**</mark> at the top of the left side control panel.

<div align="left"><figure><img src="/files/4S1U7RokDXB2beNj62Ed" alt=""><figcaption></figcaption></figure></div>
{% endstep %}

{% step %}
To delete a pinned fabric, click on the <mark style="color:blue;">**Trash icon**</mark> beneath the fabric swatch that you'd like to remove from the Pin tab.&#x20;

* Don't worry, it won't be deleted from the fabric catalog. You can always re-pin it.

<div align="left"><figure><img src="/files/hJhmEduiu6jIUBeOp9Vv" alt=""><figcaption></figcaption></figure></div>
{% endstep %}
{% endstepper %}

***

## <mark style="color:blue;">Subscribe to Save Your Sampler & Pinned Fabrics</mark>

If you'd like save your progress on your sampler, please consider subscribing to PreQuilt.

You can subscribe at any time and save your progress to your PreQuilt account. To do this:

{% stepper %}
{% step %}
Click on the <mark style="color:blue;">**Save button**</mark> on the central, vertical toolbar.

<div align="left"><figure><img src="/files/YKiwMl6PbWhjSlrtfaQh" alt=""><figcaption></figcaption></figure></div>
{% endstep %}

{% step %}
In the popup window, click on the <mark style="color:blue;">**View PreQuilt Plans button**</mark>.

<div align="left"><figure><img src="/files/h7CmdDUoe6voZWAt3mr6" alt=""><figcaption></figcaption></figure></div>
{% endstep %}

{% step %}
The plans page will appear. Click on the <mark style="color:blue;">**button for the subscription plan and billing cadence**</mark> that you prefer.

* **Basic Plan**: Are perfect for every and any quilter. It has everything you need to design, visualize, and plan your quilts.
* **Market Plan:** Can do everything the Basic Plan can, PLUS help you commercialize your quilt patterns with custom digital coloring pages.
* We offer monthly and annual subscriptions.
* Billing currency is based on your location. We bill in CAD, USD, GBP, and EUR.

<figure><img src="/files/z9htKAT1NfIDhNPpVMNa" alt=""><figcaption></figcaption></figure>
{% endstep %}

{% step %} <mark style="color:blue;">**Fill out the form**</mark> with your email address, username, and password. [<mark style="color:blue;">**Review the Terms of Service**</mark>](https://app.prequilt.com/terms) (recurring subscription) and <mark style="color:blue;">**agree to the use of**</mark> [<mark style="color:blue;">**Google Analytics**</mark>](https://prequilt.com/privacy). Click on the <mark style="color:blue;">**Submit button**</mark>.

* If you're a business, use your business name as your username. This will be a public username.

<div align="left"><figure><img src="/files/0IW8Vx24fVU7g1g3XeW9" alt="" width="419"><figcaption></figcaption></figure></div>
{% endstep %}

{% step %} <mark style="color:blue;">**Review**</mark> your email and username. If correct, click on the <mark style="color:blue;">**Checkout button**</mark>. If not, click on Edit and revise your information.

<div align="left"><figure><img src="/files/7KSgvGfOR9il7o4Id6h2" alt="" width="417"><figcaption></figcaption></figure></div>
{% endstep %}

{% step %}
You will be directed to a payment portal.

<figure><img src="/files/b5rBIoJvRV4gIiRNCZ8v" alt=""><figcaption></figcaption></figure>
{% endstep %}

{% step %}
If applicable, click on the <mark style="color:blue;">**Apply coupon button**</mark>, <mark style="color:blue;">**enter your coupon code**</mark> in the box, and press the <mark style="color:blue;">**Apply button**</mark>.

<div><figure><img src="/files/byd7tYrqoordRX8soYA1" alt=""><figcaption></figcaption></figure> <figure><img src="/files/blb56rdsJG6h0sHa1lQc" alt=""><figcaption></figcaption></figure> <figure><img src="/files/MwwhfpzHXnfbCDpSNtnL" alt=""><figcaption></figcaption></figure></div>
{% endstep %}

{% step %} <mark style="color:blue;">**Review**</mark> and click on the <mark style="color:blue;">**Proceed to Checkout button**</mark>.

* **Please Note:** Your next recurring payment date is detailed here for your reference.

<div align="left"><figure><img src="/files/XDzEiXpR6H7uXiJH9Lsk" alt="" width="296"><figcaption></figcaption></figure></div>
{% endstep %}

{% step %} <mark style="color:blue;">**Fill out the form**</mark> with your first name, last name, address, and payment method information. Click on the <mark style="color:blue;">**Pay & subscribe button**</mark>.

* We accept credit cards and PayPal.

<figure><img src="/files/J0PK5nIue0FC1f8z26Uv" alt=""><figcaption></figcaption></figure>
{% endstep %}

{% step %} <mark style="color:$danger;">**ATTENTION: DO NOT close or refresh the browser. This step will take time, we're creating your account.**</mark>

<figure><img src="/files/XgO10oHKDRV5bUDHmhrM" alt=""><figcaption></figcaption></figure>
{% endstep %}

{% step %}
Hooray! Your subscription has been created. You will be diverted back to your sampler quilt and it will have been saved to your account. To be on the safe side, click on the <mark style="color:blue;">**Save button**</mark>.

<div align="left"><figure><img src="/files/pu7GGDrFVFkFsmxsoqOk" alt=""><figcaption></figcaption></figure></div>
{% endstep %}
{% endstepper %}


# Add Different RSS Blocks

Free Ruby Star Sampler Feature

## <mark style="color:blue;">Ruby Star Sampler Blocks</mark>

There are over 100 different quilt blocks for the Ruby Star Sampler!

* 26 x 6" quilt blocks
* 30 x 12" quilt blocks
* Entire bunting alphabet in both 6" & 12" blocks

And while we have them all in PreQuilt, ready to be used, not all of them show up in the sampler quilts. But you could use any of them in your sampler.

As another way to customize your Ruby Star Sampler, you can add quilt blocks from the quilt block libraries in PreQuilt. This allows you to use the Ruby Star team's designs as a starting point for your super custom sampler quilt and build off of what is there by adding different blocks to the quilt layout.

***

## <mark style="color:blue;">How to Add a Sampler Block from the Library</mark>

### YouTube Video

{% embed url="<https://youtu.be/2G_JNu7uN60?si=VRawHHTYiFIM7rT5>" %}

### Written Help Guide

{% stepper %}
{% step %}
While in any of the Ruby Star Samplers, click on the <mark style="color:blue;">**toggle**</mark> to change from Color Mode to Design Mode. It's at the very top of the left hand control panel.

<div align="left"><figure><img src="/files/6L4FZ4BvF2CjHq1Z8FfO" alt=""><figcaption></figcaption></figure></div>
{% endstep %}

{% step %}
Click on the <mark style="color:blue;">**Blocks tab**</mark> to get it to expand and show all the blocks being used in the quilt.

* You can also see how many times each of the blocks are being used in the quilt.

<div align="left"><figure><img src="/files/TdeR9CeT8azd3il2hoLA" alt=""><figcaption></figcaption></figure></div>
{% endstep %}

{% step %}
Click on the <mark style="color:blue;">**Load Ruby Star Blocks**</mark> to open the block library.

<div align="left"><figure><img src="/files/yqtWuUdYSJWJDAnJ8ex0" alt=""><figcaption></figcaption></figure></div>
{% endstep %}

{% step %}
A popup window will appear.&#x20;

<figure><img src="/files/pLxaUMgOHstyAwFtFcfD" alt=""><figcaption></figcaption></figure>
{% endstep %}

{% step %}
Click on the <mark style="color:blue;">**See Collection button**</mark> for the block library you're interested in.

* In this example, I'm interested in the 12" blocks.

<div align="left"><figure><img src="/files/bWW80vTkdQtSLv2bbTT5" alt=""><figcaption></figcaption></figure></div>
{% endstep %}

{% step %}
Click on the <mark style="color:blue;">**Select button**</mark> beneath the quilt block that you'd like to import into the quilt.&#x20;

* You can add more than one block during this process.
* As you select blocks, they will be loaded onto the right side of the popup window.

<div align="left"><figure><img src="/files/afNLHnOWGmTWkTALk2N0" alt=""><figcaption></figcaption></figure></div>
{% endstep %}

{% step %}
Click on the <mark style="color:blue;">**Import button**</mark> to bring them into the quilt.&#x20;

<div align="left"><figure><img src="/files/kvtIKT2gVs0WNt8C2djl" alt=""><figcaption></figcaption></figure></div>
{% endstep %}

{% step %}
The new block is listed on the blocks tab. You can see it's not on the quilt, because there is a **0x** next to its image.

<div align="left"><figure><img src="/files/1HzKToODF32Vrb1r7Kio" alt=""><figcaption></figcaption></figure></div>
{% endstep %}

{% step %}
Click on the <mark style="color:blue;">**block cell on the quilt**</mark> where you want the new block to be (instead of whatever is currently being used).&#x20;

<figure><img src="/files/Wpc9doCfVFaK1IIrTG30" alt=""><figcaption></figcaption></figure>
{% endstep %}

{% step %}
Click the <mark style="color:blue;">**Add to Quilt button**</mark> for the block we want to use.

<div align="left"><figure><img src="/files/NyQRHTFZ3fmSvibU79g9" alt=""><figcaption></figcaption></figure></div>
{% endstep %}

{% step %}
You will now see the new quilt block has replaced the old quilt block.

<figure><img src="/files/A3F1TiqoNygLHHCwS29q" alt=""><figcaption></figcaption></figure>
{% endstep %}
{% endstepper %}

***

## <mark style="color:blue;">Subscribe to Save Your Sampler & Use RSS Blocks Anywhere</mark>

If you'd like save your progress on your sampler, please consider subscribing to PreQuilt.

You can subscribe at any time and save your progress to your PreQuilt account. To do this:

{% stepper %}
{% step %}
Click on the <mark style="color:blue;">**Save button**</mark> on the central, vertical toolbar.

<div align="left"><figure><img src="/files/YKiwMl6PbWhjSlrtfaQh" alt=""><figcaption></figcaption></figure></div>
{% endstep %}

{% step %}
In the popup window, click on the <mark style="color:blue;">**View PreQuilt Plans button**</mark>.

<div align="left"><figure><img src="/files/h7CmdDUoe6voZWAt3mr6" alt=""><figcaption></figcaption></figure></div>
{% endstep %}

{% step %}
The plans page will appear. Click on the <mark style="color:blue;">**button for the subscription plan and billing cadence**</mark> that you prefer.

* **Basic Plan**: Are perfect for every and any quilter. It has everything you need to design, visualize, and plan your quilts.
* **Market Plan:** Can do everything the Basic Plan can, PLUS help you commercialize your quilt patterns with custom digital coloring pages.
* We offer monthly and annual subscriptions.
* Billing currency is based on your location. We bill in CAD, USD, GBP, and EUR.

<figure><img src="/files/z9htKAT1NfIDhNPpVMNa" alt=""><figcaption></figcaption></figure>
{% endstep %}

{% step %} <mark style="color:blue;">**Fill out the form**</mark> with your email address, username, and password. [<mark style="color:blue;">**Review the Terms of Service**</mark>](https://app.prequilt.com/terms) (recurring subscription) and <mark style="color:blue;">**agree to the use of**</mark> [<mark style="color:blue;">**Google Analytics**</mark>](https://prequilt.com/privacy). Click on the <mark style="color:blue;">**Submit button**</mark>.

* If you're a business, use your business name as your username. This will be a public username.

<div align="left"><figure><img src="/files/0IW8Vx24fVU7g1g3XeW9" alt="" width="419"><figcaption></figcaption></figure></div>
{% endstep %}

{% step %} <mark style="color:blue;">**Review**</mark> your email and username. If correct, click on the <mark style="color:blue;">**Checkout button**</mark>. If not, click on Edit and revise your information.

<div align="left"><figure><img src="/files/7KSgvGfOR9il7o4Id6h2" alt="" width="417"><figcaption></figcaption></figure></div>
{% endstep %}

{% step %}
You will be directed to a payment portal.

<figure><img src="/files/b5rBIoJvRV4gIiRNCZ8v" alt=""><figcaption></figcaption></figure>
{% endstep %}

{% step %}
If applicable, click on the <mark style="color:blue;">**Apply coupon button**</mark>, <mark style="color:blue;">**enter your coupon code**</mark> in the box, and press the <mark style="color:blue;">**Apply button**</mark>.

<div><figure><img src="/files/byd7tYrqoordRX8soYA1" alt=""><figcaption></figcaption></figure> <figure><img src="/files/blb56rdsJG6h0sHa1lQc" alt=""><figcaption></figcaption></figure> <figure><img src="/files/MwwhfpzHXnfbCDpSNtnL" alt=""><figcaption></figcaption></figure></div>
{% endstep %}

{% step %} <mark style="color:blue;">**Review**</mark> and click on the <mark style="color:blue;">**Proceed to Checkout button**</mark>.

* **Please Note:** Your next recurring payment date is detailed here for your reference.

<div align="left"><figure><img src="/files/XDzEiXpR6H7uXiJH9Lsk" alt="" width="296"><figcaption></figcaption></figure></div>
{% endstep %}

{% step %} <mark style="color:blue;">**Fill out the form**</mark> with your first name, last name, address, and payment method information. Click on the <mark style="color:blue;">**Pay & subscribe button**</mark>.

* We accept credit cards and PayPal.

<figure><img src="/files/J0PK5nIue0FC1f8z26Uv" alt=""><figcaption></figcaption></figure>
{% endstep %}

{% step %} <mark style="color:$danger;">**ATTENTION: DO NOT close or refresh the browser. This step will take time, we're creating your account.**</mark>

<figure><img src="/files/XgO10oHKDRV5bUDHmhrM" alt=""><figcaption></figcaption></figure>
{% endstep %}

{% step %}
Hooray! Your subscription has been created. You will be diverted back to your sampler quilt and it will have been saved to your account. To be on the safe side, click on the <mark style="color:blue;">**Save button**</mark>.

<div align="left"><figure><img src="/files/pu7GGDrFVFkFsmxsoqOk" alt=""><figcaption></figcaption></figure></div>
{% endstep %}
{% endstepper %}


# Create Alternate Quilt Blocks

Free Ruby Star Sampler Feature

## <mark style="color:blue;">Create Alternate Versions of the RSS Blocks</mark>

You will notice that some of the quilt blocks are used more than once, but they are using different fabrics. We call these alternate blocks and you can create them by cloning (copying) the original block and editing the fabrics that are used.

This one can be a little confusing the first time, but once you get the hang of it, you can have a lot of fun creating lots of fun quilts made up of different versions of the same blocks.

***

## <mark style="color:blue;">How to Create an Alternate Version of a Block</mark>

### YouTube Video

{% embed url="<https://youtu.be/uxapOMuIFx0?si=2PERUVvOaFN-Ge5m>" %}

### Written Help Guide

{% stepper %}
{% step %}
While in any of the Ruby Star Samplers, click on the <mark style="color:blue;">**toggle**</mark> to change from Color Mode to Design Mode. It's at the very top of the left hand control panel.

<div align="left"><figure><img src="/files/6L4FZ4BvF2CjHq1Z8FfO" alt=""><figcaption></figcaption></figure></div>
{% endstep %}

{% step %}
Click on the <mark style="color:blue;">**Blocks tab**</mark> to get it to expand and show all the blocks being used in the quilt.

* You can also see how many times each of the blocks are being used in the quilt.
* In this example, we have 10 of each Tipsy Star Block (blue & pink).

<div align="left"><figure><img src="/files/PMWVUjcGVT6TCSSHzKq1" alt=""><figcaption></figcaption></figure></div>
{% endstep %}

{% step %}
Click on the <mark style="color:blue;">**Three Dots button**</mark> (![](/files/AaV2VFIG8vGRTx2PVToM))next to the block we want to create an alternate version for. Then click on <mark style="color:blue;">**Clone**</mark>.

<div align="left"><figure><img src="/files/TI9NcRIdirFjK3wRw48l" alt=""><figcaption></figcaption></figure></div>
{% endstep %}

{% step %}
You'll see that a new, identical clone (copy) of the blue Tipsy Star block has been created and added to the Blocks tab.

<div align="left"><figure><img src="/files/0sUyPLkAZmwb6Mit5BY1" alt=""><figcaption></figcaption></figure></div>
{% endstep %}

{% step %}
Click on the <mark style="color:blue;">**Edit block button**</mark> for our newly cloned block.

<div align="left"><figure><img src="/files/hkAn9IrtkJZFTSjZHxdh" alt=""><figcaption></figcaption></figure></div>
{% endstep %}

{% step %}
A popup window of the **Block Editor** will open.&#x20;

<figure><img src="/files/JhsLZpIaJ0jm5jnL0KaN" alt=""><figcaption></figcaption></figure>
{% endstep %}

{% step %}
Similar to the quilt, click on the <mark style="color:blue;">**image of the fabric**</mark> that you'd like to use. The cursor will turn into a square of that fabric.

<div align="left"><figure><img src="/files/tswCSGc8MDiRJv3NhJ3d" alt=""><figcaption></figcaption></figure></div>
{% endstep %}

{% step %}
Then click on the <mark style="color:blue;">**part of the block**</mark> where you'd like to use the fabric. You will see that fabric has now been updated to use your new fabric.

<div><figure><img src="/files/3gBtxgAVLRQ6urU99Q7f" alt=""><figcaption><p>Old fabric</p></figcaption></figure> <figure><img src="/files/skodw4QqIMC6Bd3estjH" alt=""><figcaption><p>New fabric</p></figcaption></figure></div>
{% endstep %}

{% step %}
Click on the <mark style="color:blue;">**Save to Quilt button**</mark> (in the top right corner) to save the changes and exit back to the quilt design wall.

<div align="left"><figure><img src="/files/CqKdylSFZ4CiuSHOpkWH" alt=""><figcaption></figcaption></figure></div>
{% endstep %}

{% step %}
Click on the <mark style="color:blue;">**block cell on the quilt**</mark> where you want the new block to be (instead of whatever is currently being used).&#x20;

<div align="left"><figure><img src="/files/629pBRLhZISbsf97vUQB" alt=""><figcaption></figcaption></figure></div>
{% endstep %}

{% step %}
Click the <mark style="color:blue;">**Add to Quilt button**</mark> for the block we want to use.

<div align="left"><figure><img src="/files/kdvOV1QgOmPLRhk4ipTi" alt=""><figcaption></figcaption></figure></div>
{% endstep %}

{% step %}
You will now see the new quilt block has replaced the old quilt block.

<div align="left"><figure><img src="/files/aEd3lgH3U6VpFJ9XsLOp" alt=""><figcaption></figcaption></figure></div>
{% endstep %}

{% step %}
You can see that the change was only made to that one block, not all the other 9 versions of the original quilt block.

<div align="left"><figure><img src="/files/4D58m0zP9wGS1dWnUuWz" alt="" width="563"><figcaption></figcaption></figure></div>
{% endstep %}
{% endstepper %}

***

## <mark style="color:blue;">Subscribe to Save Your Sampler & Use RSS Blocks Anywhere</mark>

If you'd like save your progress on your sampler, please consider subscribing to PreQuilt.

You can subscribe at any time and save your progress to your PreQuilt account. To do this:

{% stepper %}
{% step %}
Click on the <mark style="color:blue;">**Save button**</mark> on the central, vertical toolbar.

<div align="left"><figure><img src="/files/YKiwMl6PbWhjSlrtfaQh" alt=""><figcaption></figcaption></figure></div>
{% endstep %}

{% step %}
In the popup window, click on the <mark style="color:blue;">**View PreQuilt Plans button**</mark>.

<div align="left"><figure><img src="/files/h7CmdDUoe6voZWAt3mr6" alt=""><figcaption></figcaption></figure></div>
{% endstep %}

{% step %}
The plans page will appear. Click on the <mark style="color:blue;">**button for the subscription plan and billing cadence**</mark> that you prefer.

* **Basic Plan**: Are perfect for every and any quilter. It has everything you need to design, visualize, and plan your quilts.
* **Market Plan:** Can do everything the Basic Plan can, PLUS help you commercialize your quilt patterns with custom digital coloring pages.
* We offer monthly and annual subscriptions.
* Billing currency is based on your location. We bill in CAD, USD, GBP, and EUR.

<figure><img src="/files/z9htKAT1NfIDhNPpVMNa" alt=""><figcaption></figcaption></figure>
{% endstep %}

{% step %} <mark style="color:blue;">**Fill out the form**</mark> with your email address, username, and password. [<mark style="color:blue;">**Review the Terms of Service**</mark>](https://app.prequilt.com/terms) (recurring subscription) and <mark style="color:blue;">**agree to the use of**</mark> [<mark style="color:blue;">**Google Analytics**</mark>](https://prequilt.com/privacy). Click on the <mark style="color:blue;">**Submit button**</mark>.

* If you're a business, use your business name as your username. This will be a public username.

<div align="left"><figure><img src="/files/0IW8Vx24fVU7g1g3XeW9" alt="" width="419"><figcaption></figcaption></figure></div>
{% endstep %}

{% step %} <mark style="color:blue;">**Review**</mark> your email and username. If correct, click on the <mark style="color:blue;">**Checkout button**</mark>. If not, click on Edit and revise your information.

<div align="left"><figure><img src="/files/7KSgvGfOR9il7o4Id6h2" alt="" width="417"><figcaption></figcaption></figure></div>
{% endstep %}

{% step %}
You will be directed to a payment portal.

<figure><img src="/files/b5rBIoJvRV4gIiRNCZ8v" alt=""><figcaption></figcaption></figure>
{% endstep %}

{% step %}
If applicable, click on the <mark style="color:blue;">**Apply coupon button**</mark>, <mark style="color:blue;">**enter your coupon code**</mark> in the box, and press the <mark style="color:blue;">**Apply button**</mark>.

<div><figure><img src="/files/byd7tYrqoordRX8soYA1" alt=""><figcaption></figcaption></figure> <figure><img src="/files/blb56rdsJG6h0sHa1lQc" alt=""><figcaption></figcaption></figure> <figure><img src="/files/MwwhfpzHXnfbCDpSNtnL" alt=""><figcaption></figcaption></figure></div>
{% endstep %}

{% step %} <mark style="color:blue;">**Review**</mark> and click on the <mark style="color:blue;">**Proceed to Checkout button**</mark>.

* **Please Note:** Your next recurring payment date is detailed here for your reference.

<div align="left"><figure><img src="/files/XDzEiXpR6H7uXiJH9Lsk" alt="" width="296"><figcaption></figcaption></figure></div>
{% endstep %}

{% step %} <mark style="color:blue;">**Fill out the form**</mark> with your first name, last name, address, and payment method information. Click on the <mark style="color:blue;">**Pay & subscribe button**</mark>.

* We accept credit cards and PayPal.

<figure><img src="/files/J0PK5nIue0FC1f8z26Uv" alt=""><figcaption></figcaption></figure>
{% endstep %}

{% step %} <mark style="color:$danger;">**ATTENTION: DO NOT close or refresh the browser. This step will take time, we're creating your account.**</mark>

<figure><img src="/files/XgO10oHKDRV5bUDHmhrM" alt=""><figcaption></figcaption></figure>
{% endstep %}

{% step %}
Hooray! Your subscription has been created. You will be diverted back to your sampler quilt and it will have been saved to your account. To be on the safe side, click on the <mark style="color:blue;">**Save button**</mark>.

<div align="left"><figure><img src="/files/pu7GGDrFVFkFsmxsoqOk" alt=""><figcaption></figcaption></figure></div>
{% endstep %}
{% endstepper %}


# Subscribe to PreQuilt

Subscribe to Unlock Advanced Samper Features

## <mark style="color:blue;">The Value of Subscribing to PreQuilt</mark>

Are you really loving your sampler? If you want to save and continue to work on creating the perfect sampler, a PreQuilt subscription will be perfect for you.&#x20;

We have two different annual PreQuilt subscriptions that can be purchased:

* **Basic Annual Subscription**
  * Perfect for the everyday quilter. You can sketch your quilt ideas, audition your fabric choices, and get the quilt math calculated to make your quilts.
* **Market Annual Subscription**
  * Perfect for quilt pattern designers who want to be able to do everything the Basic Plan has to offer AND be able to create digital coloring pages of their quilt patterns. There is also a call to action (CTA) button that will direct browsers to your online shop.

You can subscribe on a monthly or annual basis and in addition to saving your Ruby Star Sampler, you also unlock all the PreQuilt features.

* Billing currency is based on your location. We bill in CAD, USD, GBP, and EUR.

***

## <mark style="color:blue;">How to Subscribe to PreQuilt</mark>

{% stepper %}
{% step %}
Click on the <mark style="color:blue;">**Save button**</mark> on the central, vertical toolbar.

<div align="left"><figure><img src="/files/YKiwMl6PbWhjSlrtfaQh" alt=""><figcaption></figcaption></figure></div>
{% endstep %}

{% step %}
In the popup window, click on the <mark style="color:blue;">**View PreQuilt Plans button**</mark>.

<div align="left"><figure><img src="/files/h7CmdDUoe6voZWAt3mr6" alt=""><figcaption></figcaption></figure></div>
{% endstep %}

{% step %}
The plans page will appear. Click on the <mark style="color:blue;">**button for the subscription plan and billing cadence**</mark> that you prefer.

* **Basic Plan**: Are perfect for every and any quilter. It has everything you need to design, visualize, and plan your quilts.
* **Market Plan:** Can do everything the Basic Plan can, PLUS help you commercialize your quilt patterns with custom digital coloring pages.
* We offer monthly and annual subscriptions.
* Billing currency is based on your location. We bill in CAD, USD, GBP, and EUR.

<figure><img src="/files/z9htKAT1NfIDhNPpVMNa" alt=""><figcaption></figcaption></figure>
{% endstep %}

{% step %} <mark style="color:blue;">**Fill out the form**</mark> with your email address, username, and password. [<mark style="color:blue;">**Review the Terms of Service**</mark>](https://app.prequilt.com/terms) (recurring subscription) and <mark style="color:blue;">**agree to the use of**</mark> [<mark style="color:blue;">**Google Analytics**</mark>](https://prequilt.com/privacy). Click on the <mark style="color:blue;">**Submit button**</mark>.

* If you're a business, use your business name as your username. This will be a public username.

<div align="left"><figure><img src="/files/0IW8Vx24fVU7g1g3XeW9" alt="" width="419"><figcaption></figcaption></figure></div>
{% endstep %}

{% step %} <mark style="color:blue;">**Review**</mark> your email and username. If correct, click on the <mark style="color:blue;">**Checkout button**</mark>. If not, click on Edit and revise your information.

<div align="left"><figure><img src="/files/7KSgvGfOR9il7o4Id6h2" alt="" width="417"><figcaption></figcaption></figure></div>
{% endstep %}

{% step %}
You will be directed to a payment portal.

<figure><img src="/files/b5rBIoJvRV4gIiRNCZ8v" alt=""><figcaption></figcaption></figure>
{% endstep %}

{% step %}
If applicable, click on the <mark style="color:blue;">**Apply coupon button**</mark>, <mark style="color:blue;">**enter your coupon code**</mark> in the box, and press the <mark style="color:blue;">**Apply button**</mark>.

<div><figure><img src="/files/byd7tYrqoordRX8soYA1" alt=""><figcaption></figcaption></figure> <figure><img src="/files/blb56rdsJG6h0sHa1lQc" alt=""><figcaption></figcaption></figure> <figure><img src="/files/MwwhfpzHXnfbCDpSNtnL" alt=""><figcaption></figcaption></figure></div>
{% endstep %}

{% step %} <mark style="color:blue;">**Review**</mark> and click on the <mark style="color:blue;">**Proceed to Checkout button**</mark>.

* **Please Note:** Your next recurring payment date is detailed here for your reference.

<div align="left"><figure><img src="/files/XDzEiXpR6H7uXiJH9Lsk" alt="" width="296"><figcaption></figcaption></figure></div>
{% endstep %}

{% step %} <mark style="color:blue;">**Fill out the form**</mark> with your first name, last name, address, and payment method information. Click on the <mark style="color:blue;">**Pay & subscribe button**</mark>.

* We accept credit cards and PayPal.

<figure><img src="/files/J0PK5nIue0FC1f8z26Uv" alt=""><figcaption></figcaption></figure>
{% endstep %}

{% step %} <mark style="color:$danger;">**ATTENTION: DO NOT close or refresh the browser. This step will take time, we're creating your account.**</mark>

<figure><img src="/files/XgO10oHKDRV5bUDHmhrM" alt=""><figcaption></figcaption></figure>
{% endstep %}

{% step %}
Hooray! Your subscription has been created. You will be diverted back to your sampler quilt and it will have been saved to your account. To be on the safe side, click on the <mark style="color:blue;">**Save button**</mark>.

<div align="left"><figure><img src="/files/pu7GGDrFVFkFsmxsoqOk" alt=""><figcaption></figcaption></figure></div>
{% endstep %}
{% endstepper %}


# Save & Revisit Your Sampler Quilt

PreQuilt Subscriber Feature

{% hint style="info" %}
This is a Subscriber feature. Click [**here**](/featured-on-prequilt/ruby-star-collaboration/subscribe-to-prequilt) to learn how to subscribe to PreQuilt.
{% endhint %}

## <mark style="color:blue;">The Value of Saving Your Sampler Quilt</mark>

You've probably fallen in love with your sampler quilt and invested a bit of time.&#x20;

Why not subscribe to PreQuilt and save it? You can always easily open the quilt again and make any edits or recall the fabric calculations for your version of the samper.

In addition to being able to save your sampler quilts, a PreQuilt subscription enables you to create quilts using the Ruby Star quilt blocks, save your favorite Ruby Star fabrics to your digital fabric stash, and all the other PreQuilt features.

For more information - Help Guide: [**Subscribe to PreQuilt**](/featured-on-prequilt/ruby-star-collaboration/subscribe-to-prequilt)

***

## <mark style="color:blue;">How to Save Your Sampler to Your PreQuilt Account</mark>

### Written Help Guide

{% stepper %}
{% step %}
First, you'll need to <mark style="color:blue;">**log into**</mark> PreQuilt.
{% endstep %}

{% step %}
Once logged in, click on the <mark style="color:blue;">**Save button**</mark> located on the central, vertical toolbar.&#x20;

<div align="left"><figure><img src="/files/pyTtbzDgF8WPLryec9O0" alt=""><figcaption></figcaption></figure></div>
{% endstep %}

{% step %}
A popup window will appear. Click on <mark style="color:blue;">**Save Quilt button**</mark>.

<div align="left"><figure><img src="/files/ljyclcBJ0XvOJN9CFbVA" alt="" width="419"><figcaption></figcaption></figure></div>
{% endstep %}

{% step %}
Your quilt will refresh. Don't worry! This action is the saving process.
{% endstep %}

{% step %}
Continue mocking up your sampler quilt. When you're finished, click on the <mark style="color:blue;">**Save button**</mark> located on the central, vertical toolbar. Then click on <mark style="color:blue;">**Save & Close (update thumbnail)**</mark>.

<div align="left"><figure><img src="/files/DBEx4TjC9ZEpAmWPcZt5" alt=""><figcaption></figcaption></figure></div>
{% endstep %}

{% step %}
You will be diverted to the **QUILTS dashboard**. There you will see your sampler quilt has been saved!

<div align="left"><figure><img src="/files/EmGIDwE7Mc5DXvVn96Ex" alt=""><figcaption></figcaption></figure></div>
{% endstep %}

{% step %}
To continue working on your quilt or to get your fabric calculations, click on the <mark style="color:blue;">**Open button**</mark> beneath your sampler quilt.

<div align="left"><figure><img src="/files/EoXjuTqfiCBEKwrbRHbI" alt=""><figcaption></figcaption></figure></div>
{% endstep %}
{% endstepper %}


# Save RSS Fabrics to Your Stash

PreQuilt Subscriber Feature

{% hint style="info" %}
This is a Subscriber feature. Click [**here**](/featured-on-prequilt/ruby-star-collaboration/subscribe-to-prequilt) to learn how to subscribe to PreQuilt.
{% endhint %}

## <mark style="color:blue;">Save Ruby Star Society Fabrics</mark>

You probably have quite a few Ruby Star Society fabrics in your actual fabric stash, I (Laura) certainly do! And I love knowing what I have and how much of it I have.&#x20;

If you're like me, you might consider adding them to your digital fabric stash on PreQuilt as well! This is a valuable feature to help remind you what you have and help you use it.

***

## <mark style="color:blue;">How to Save RSS Fabrics to Your PreQuilt Fabric Stash</mark>

### Written Help Guide

{% stepper %}
{% step %}
First, you'll need to log into PreQuilt.
{% endstep %}

{% step %}
Once logged in, click on the <mark style="color:blue;">**Fabric Dashboard tab**</mark>.&#x20;

<figure><img src="/files/c9BVA4rNJsWbCnSzaoUW" alt=""><figcaption></figcaption></figure>
{% endstep %}

{% step %}
Underneath the **Fabric Dashboard** button, there are three sub-tabs. Click on <mark style="color:blue;">**Fabric Collections tab**</mark>.

<figure><img src="/files/FD1YizXRhJfWPj36rpq9" alt=""><figcaption></figcaption></figure>
{% endstep %}

{% step %}
Click on <mark style="color:blue;">**Browse button**</mark> on the **Ruby Star Society** card.

<div align="left"><figure><img src="/files/H3wpIXk8kDfNvuRPcTqS" alt=""><figcaption></figcaption></figure></div>
{% endstep %}

{% step %}
Click on the <mark style="color:blue;">**designer picture**</mark> whose fabrics you want to browse.&#x20;

* In this example, I'm going to look through **Melody Miller's** fabrics.

<figure><img src="/files/IAd1wo7x3d83LkYl5jCz" alt=""><figcaption></figcaption></figure>
{% endstep %}

{% step %}
Click on either the <mark style="color:blue;">**See Collection button**</mark> on the fabric collection card **or** on the <mark style="color:blue;">**name of the collection**</mark> on the left side control panel.

* In this example, I'm going to open Melody's **Clementine** fabric collection.

<figure><img src="/files/JqfTX9gvxXLI7xGOrfof" alt=""><figcaption></figcaption></figure>
{% endstep %}

{% step %}
Click on the <mark style="color:blue;">**Add to Stash button**</mark> for each of the fabric swatches you want to add to your **My Fabric** section on PreQuilt.&#x20;

* The button will convert over to **Added** to signify that it's now in your stash.

<div align="left"><figure><img src="/files/YpEjUELW8ytGrdbQEI7l" alt=""><figcaption></figcaption></figure> <figure><img src="/files/4eA1JHdH0g6cilin0z5g" alt=""><figcaption></figcaption></figure></div>
{% endstep %}

{% step %}
To view your **Fabric Stash**, click on the <mark style="color:blue;">**My Fabric tab**</mark> on the sub-tab dashboard. You will now see all the fabrics we added.

<figure><img src="/files/0x3MNgKDYDEszQLVVpDp" alt=""><figcaption></figcaption></figure>
{% endstep %}

{% step %}
To add any information or tags to your fabric, click on the <mark style="color:blue;">**Open button**</mark> beneath the fabric swatch.

<div align="left"><figure><img src="/files/snctu9JvMrGhcxroHVxL" alt=""><figcaption></figcaption></figure></div>
{% endstep %}

{% step %}
A popup window will appear. Click on the <mark style="color:blue;">**Swatch Info tab**</mark> to add your yardage information or tag the fabric swatch. Click the <mark style="color:blue;">**Save button**</mark> after adding your info.

* Help Guide: [Tagging](https://help.prequilt.com/prequilt-101/all-about-fabric/printed-fabric-swatches/organize-printed-fabric-swatches#id-02-or-manage-fabric-swatches-using-tags)

<figure><img src="/files/nZuR4f3FPEHlIqp7AWQ9" alt=""><figcaption></figcaption></figure>
{% endstep %}
{% endstepper %}


# Use RSS Blocks in Other Quilts

PreQuilt Subscriber Feature

{% hint style="info" %}
This is a Subscriber feature. Click [**here**](/featured-on-prequilt/ruby-star-collaboration/subscribe-to-prequilt) to learn how to subscribe to PreQuilt.
{% endhint %}

<figure><img src="/files/8pC2G3WUMWWZsynwh8qT" alt=""><figcaption></figcaption></figure>

## <mark style="color:blue;">Import & Use the RSS Blocks in Other Quilts</mark>

There are over 100 different quilt blocks for the Ruby Star Sampler!

* 26 x 6" quilt blocks
* 30 x 12" quilt blocks
* Entire bunting alphabet in both 6" & 12" blocks

If you love the Ruby Star Sampler blocks, you just might want to be able to use them in your own quilts.&#x20;

No problem, PreQuilt subscribers can import and use any of the Ruby Star Sampler blocks in PreQuilt - including the Bunting Alphabet blocks!

***

## <mark style="color:blue;">How to Add a Sampler Block from the Library</mark>

### Written Help Guide

{% stepper %}
{% step %}
First, you'll need to <mark style="color:blue;">**log into PreQuilt**</mark>.
{% endstep %}

{% step %}
From the **QUILTS Dashboard**, click on the <mark style="color:blue;">**Create Quilt tile**</mark> to start a new quilt project.&#x20;

<div align="left"><figure><img src="/files/fsNvMT906SdKvMIR9nDt" alt=""><figcaption></figcaption></figure></div>
{% endstep %}

{% step %}
A popup window will open. Set the block width and height to <mark style="color:blue;">**6" x 6"**</mark>. Then click on the <mark style="color:blue;">**Use This Grid button**</mark>.

<figure><img src="/files/jOZDVNhMDPUnCZH6HQvW" alt=""><figcaption></figcaption></figure>
{% endstep %}

{% step %}
On the **BLOCKS tab**, click on the <mark style="color:blue;">**Show More Options button**</mark> to get it to expand. Then click on <mark style="color:blue;">**Load Blocks**</mark>.

<div align="left"><figure><img src="/files/jWXzc0us9mj0gDFCNJOb" alt=""><figcaption></figcaption></figure></div>
{% endstep %}

{% step %}
A popup window will appear. Click on the <mark style="color:blue;">**Collaborators tab**</mark>.

<figure><img src="/files/4FornnacEmyLZECYRxpd" alt=""><figcaption></figcaption></figure>
{% endstep %}

{% step %}
Click on the <mark style="color:blue;">**View All Blocks button**</mark> beneath The Ruby Star Sampler card.&#x20;

<div align="left"><figure><img src="/files/bqVG3rOVKLPAvjMRSjTo" alt=""><figcaption></figcaption></figure></div>
{% endstep %}

{% step %}
Click on the <mark style="color:blue;">**See Collection button**</mark> to view the block library.&#x20;

* In this example, I'll choose **6" Bunting Blocks.**

<div align="left"><figure><img src="/files/igg2TD42fZKgh8Z4AieT" alt=""><figcaption></figcaption></figure></div>
{% endstep %}

{% step %}
All the six inch blocks will appear below. Click on the <mark style="color:blue;">**Select button**</mark> beneath the quilt block that you'd like to import into the quilt.&#x20;

* You can add more than one block during this process.
* As you select blocks, they will be loaded onto the right side of the popup window.

<div align="left"><figure><img src="/files/k3GVY90NTPLC7x199ACE" alt=""><figcaption></figcaption></figure></div>
{% endstep %}

{% step %}
Click on the <mark style="color:blue;">**Import button**</mark> to bring them into the quilt.&#x20;

<div align="left"><figure><img src="/files/nOQq9f6545gebIBglPzI" alt=""><figcaption></figcaption></figure></div>
{% endstep %}

{% step %}
The new blocks are now listed on the blocks tab. You can see it's not on the quilt, because there is a **0x** next to its image.

* Feel free to delete the default HST starter block.

<div align="left"><figure><img src="/files/cAhsEpV0tnjOO07xp3jz" alt=""><figcaption></figcaption></figure></div>
{% endstep %}

{% step %}
Click on the <mark style="color:blue;">**block cell on the quilt**</mark> where you want the new block to be.&#x20;

<div align="left"><figure><img src="/files/MSoHmq3dh1Kw03ybo61u" alt=""><figcaption></figcaption></figure></div>
{% endstep %}

{% step %}
Click the <mark style="color:blue;">**Add to Quilt button**</mark> for the block we want to use.

<div align="left"><figure><img src="/files/z9QmNIk7bGN7xTCTWv2G" alt=""><figcaption></figcaption></figure></div>
{% endstep %}

{% step %}
You will now see the new quilt block has been added to the quilt design board.

<div align="left"><figure><img src="/files/lf9aFSpcRWIQjnt83Iit" alt=""><figcaption></figcaption></figure></div>
{% endstep %}

{% step %} <mark style="color:blue;">**Repeat steps 11-12**</mark> and design them as desired.

* NOTE: I cloned the L Bunting block so that I had two different L blocks. Learn how to do that here - [Help Guide: Create Alternate Quilt Blocks](/featured-on-prequilt/ruby-star-collaboration/create-alternate-quilt-blocks)

<div align="left"><figure><img src="/files/P87rNBMsY4nZ1IPtIXpl" alt=""><figcaption></figcaption></figure></div>
{% endstep %}
{% endstepper %}

***

## <mark style="color:blue;">Subscribe to Save Your Sampler & Use RSS Blocks Anywhere</mark>

If you'd like save your progress on your sampler, please consider subscribing to PreQuilt.

You can subscribe at any time and save your progress to your PreQuilt account. To do this:

{% stepper %}
{% step %}
Click on the <mark style="color:blue;">**Save button**</mark> on the central, vertical toolbar.

<div align="left"><figure><img src="/files/YKiwMl6PbWhjSlrtfaQh" alt=""><figcaption></figcaption></figure></div>
{% endstep %}

{% step %}
In the popup window, click on the <mark style="color:blue;">**View PreQuilt Plans button**</mark>.

<div align="left"><figure><img src="/files/h7CmdDUoe6voZWAt3mr6" alt=""><figcaption></figcaption></figure></div>
{% endstep %}

{% step %}
The plans page will appear. Click on the <mark style="color:blue;">**button for the subscription plan and billing cadence**</mark> that you prefer.

* **Basic Plan**: Are perfect for every and any quilter. It has everything you need to design, visualize, and plan your quilts.
* **Market Plan:** Can do everything the Basic Plan can, PLUS help you commercialize your quilt patterns with custom digital coloring pages.
* We offer monthly and annual subscriptions.
* Billing currency is based on your location. We bill in CAD, USD, GBP, and EUR.

<figure><img src="/files/z9htKAT1NfIDhNPpVMNa" alt=""><figcaption></figcaption></figure>
{% endstep %}

{% step %} <mark style="color:blue;">**Fill out the form**</mark> with your email address, username, and password. [<mark style="color:blue;">**Review the Terms of Service**</mark>](https://app.prequilt.com/terms) (recurring subscription) and <mark style="color:blue;">**agree to the use of**</mark> [<mark style="color:blue;">**Google Analytics**</mark>](https://prequilt.com/privacy). Click on the <mark style="color:blue;">**Submit button**</mark>.

* If you're a business, use your business name as your username. This will be a public username.

<div align="left"><figure><img src="/files/0IW8Vx24fVU7g1g3XeW9" alt="" width="419"><figcaption></figcaption></figure></div>
{% endstep %}

{% step %} <mark style="color:blue;">**Review**</mark> your email and username. If correct, click on the <mark style="color:blue;">**Checkout button**</mark>. If not, click on Edit and revise your information.

<div align="left"><figure><img src="/files/7KSgvGfOR9il7o4Id6h2" alt="" width="417"><figcaption></figcaption></figure></div>
{% endstep %}

{% step %}
You will be directed to a payment portal.

<figure><img src="/files/b5rBIoJvRV4gIiRNCZ8v" alt=""><figcaption></figcaption></figure>
{% endstep %}

{% step %}
If applicable, click on the <mark style="color:blue;">**Apply coupon button**</mark>, <mark style="color:blue;">**enter your coupon code**</mark> in the box, and press the <mark style="color:blue;">**Apply button**</mark>.

<div><figure><img src="/files/byd7tYrqoordRX8soYA1" alt=""><figcaption></figcaption></figure> <figure><img src="/files/blb56rdsJG6h0sHa1lQc" alt=""><figcaption></figcaption></figure> <figure><img src="/files/MwwhfpzHXnfbCDpSNtnL" alt=""><figcaption></figcaption></figure></div>
{% endstep %}

{% step %} <mark style="color:blue;">**Review**</mark> and click on the <mark style="color:blue;">**Proceed to Checkout button**</mark>.

* **Please Note:** Your next recurring payment date is detailed here for your reference.

<div align="left"><figure><img src="/files/XDzEiXpR6H7uXiJH9Lsk" alt="" width="296"><figcaption></figcaption></figure></div>
{% endstep %}

{% step %} <mark style="color:blue;">**Fill out the form**</mark> with your first name, last name, address, and payment method information. Click on the <mark style="color:blue;">**Pay & subscribe button**</mark>.

* We accept credit cards and PayPal.

<figure><img src="/files/J0PK5nIue0FC1f8z26Uv" alt=""><figcaption></figcaption></figure>
{% endstep %}

{% step %} <mark style="color:$danger;">**ATTENTION: DO NOT close or refresh the browser. This step will take time, we're creating your account.**</mark>

<figure><img src="/files/XgO10oHKDRV5bUDHmhrM" alt=""><figcaption></figcaption></figure>
{% endstep %}

{% step %}
Hooray! Your subscription has been created. You will be diverted back to your sampler quilt and it will have been saved to your account. To be on the safe side, click on the <mark style="color:blue;">**Save button**</mark>.

<div align="left"><figure><img src="/files/pu7GGDrFVFkFsmxsoqOk" alt=""><figcaption></figcaption></figure></div>
{% endstep %}
{% endstepper %}


# Friends of PreQuilt

While we don't engage in affiliate programs, that doesn't mean that we don't want to support some stellar companies and products out there in the quilty universe!

If you're looking for a resource, consider trying one of these great options!

### Longarm Services & Education

<table data-view="cards"><thead><tr><th></th><th></th><th></th><th data-hidden data-card-cover data-type="image">Cover image</th><th data-hidden data-card-target data-type="content-ref"></th></tr></thead><tbody><tr><td><strong>String &#x26; Story</strong></td><td>Quilting Education &#x26; Quilt Patterns</td><td><em>Georgia, US</em></td><td data-object-fit="contain"><a href="/files/7ImEnEycvHM4pZGurP6p">/files/7ImEnEycvHM4pZGurP6p</a></td><td><a href="https://www.stringandstory.com/">https://www.stringandstory.com/</a></td></tr><tr><td><strong>Jenn B Quilts</strong></td><td>Longarm Quilting, Quilting Education &#x26; Quilt Patterns</td><td></td><td data-object-fit="contain"><a href="/files/TPsmNXOVyaXvhTJlEFc7">/files/TPsmNXOVyaXvhTJlEFc7</a></td><td><a href="https://www.jennbquilts.com/">https://www.jennbquilts.com/</a></td></tr><tr><td><strong>Longarm League</strong></td><td>Quilt Business Community, Education &#x26; Pantographs</td><td><em>Iowa, US</em></td><td data-object-fit="contain"><a href="/files/5HLJuuNlECV3mz1Lxa1q">/files/5HLJuuNlECV3mz1Lxa1q</a></td><td><a href="https://www.longarmleague.com/">https://www.longarmleague.com/</a></td></tr><tr><td><strong>Ma Tante Quilting</strong></td><td>Longarm Quilting &#x26; Pantographs </td><td><em>Manitoba, Canada</em></td><td data-object-fit="contain"><a href="/files/226ytxrcQfGuIfnZdpET">/files/226ytxrcQfGuIfnZdpET</a></td><td><a href="https://matantequilting.com/">https://matantequilting.com/</a></td></tr></tbody></table>

### Tech Editing & Creating Coloring Pages

<table data-view="cards"><thead><tr><th></th><th></th><th data-hidden data-card-cover data-type="image">Cover image</th><th data-hidden data-card-target data-type="content-ref"></th></tr></thead><tbody><tr><td><strong>A Stitch &#x26; A Kiss</strong></td><td>Pattern Writing &#x26; Tech Editing</td><td data-object-fit="contain"><a href="/files/ukv7Jy8i1VCt4OVc5vjJ">/files/ukv7Jy8i1VCt4OVc5vjJ</a></td><td><a href="https://www.astitchandakiss.com/">https://www.astitchandakiss.com/</a></td></tr><tr><td><strong>The Quilty VA</strong></td><td>PreQuilt Coloring Pages &#x26; Pattern Writing</td><td data-object-fit="contain"><a href="/files/aVUfc0wIpfwrBOcKCOqN">/files/aVUfc0wIpfwrBOcKCOqN</a></td><td><a href="https://www.thequiltyva.com/">https://www.thequiltyva.com/</a></td></tr></tbody></table>


# Blog - PreQuilt Use Cases

## <mark style="color:blue;">**2025**</mark>

<table data-view="cards"><thead><tr><th></th><th></th><th data-hidden data-card-cover data-type="image">Cover image</th><th data-hidden data-card-target data-type="content-ref"></th></tr></thead><tbody><tr><td><strong>January 2025</strong></td><td>Updated Color Cards</td><td data-object-fit="cover"><a href="/files/k3LKDW5puZghmFfLe3Sv">/files/k3LKDW5puZghmFfLe3Sv</a></td><td><a href="/pages/cI3BLtjG50M0ZicSD8Tv">/pages/cI3BLtjG50M0ZicSD8Tv</a></td></tr><tr><td><strong>February 2025</strong></td><td>Designing in PreQuilt</td><td><a href="/files/vPriVBNmhWE93vR1J7Mb">/files/vPriVBNmhWE93vR1J7Mb</a></td><td><a href="/pages/J8jye8yXfgk9Ckhomt40">/pages/J8jye8yXfgk9Ckhomt40</a></td></tr><tr><td><strong>March 2025</strong></td><td>Do I Have Enough Fabric?</td><td><a href="/files/Yxs635PthYPJELYaOSsX">/files/Yxs635PthYPJELYaOSsX</a></td><td><a href="/pages/um7q5h1UBwaHmMm8PKXO">/pages/um7q5h1UBwaHmMm8PKXO</a></td></tr></tbody></table>


# January 2025 | Updated Color Cards

Color Challenge + Color Card Updates!

<figure><img src="/files/fYR9RpyEVZUKSCYZj0hz" alt="" width="563"><figcaption><p>2 x FOUR YARDS CUTS TO WIN!</p></figcaption></figure>

## <mark style="color:blue;">2025 Kona Color of the Year Challenge</mark>

We have added **Nocturne**, the 2025 Kona Color of the Year to the Kona digital color card!

And in celebration of a new year and gorgeous new colors, we are launching a PreQuilt challenge! Two lucky participants will each win **FOUR YARDS** of Kona Nocturne.&#x20;

What to win four yard of Kona Nocturne? Here's how!

* Use Kona Nocturne in one of your quilt mockups in PreQuilt
  * Mockup can be either a designer digital coloring page or an original quilt design by you!
* Post your digital mockup on Instagram or comment on our [Reddit post](https://www.reddit.com/r/PreQuiltCommunity/comments/1i6n3ic/win_four_yards_of_the_2025_kona_color_of_the_year/)&#x20;
* Tag us (@prequilt) and use the hashtag #PrequiltLovesColor&#x20;

Challenge begins today and two winners will be selected at random on March 1, 2025. Open to US and Canadian participants. (Due to the cost of shipping, broader international participation is too costly. Our apologies).

*Disclaimer*: We are not sponsored or affiliated with Robert Kaufman. Fabric prize was purchased from [Fabric Spark](https://fabricspark.com/).

#### How to find the 2025 Kona Color of the Year in PreQuilt

{% embed url="<https://www.youtube.com/watch?t=1s&v=IaELb5srzpc>" %}

***

<figure><img src="/files/k3LKDW5puZghmFfLe3Sv" alt="" width="371"><figcaption></figcaption></figure>

## <mark style="color:blue;">NEW! Riley Blake Design Confetti Cottons</mark>

Have you heard the news?!? Riley Blake Designs is adding **114 new colors** to their Confetti Cottons solid line and we're happy to announce that we've updated their digital color card in the software application. You can now find all **300** of their solid colors in PreQuilt!&#x20;

#### How to Find the Confetti Cottons Color Card in PreQuilt

{% embed url="<https://www.youtube.com/watch?v=n-eKT4N2EU0>" %}

***

<figure><img src="/files/PHBZ9imfZx5D0Ovr6tzv" alt=""><figcaption></figcaption></figure>

## <mark style="color:blue;">A Note from Laura</mark>

In the constant hustle of moving forward and getting things done, it's too easy to forget to reflect on what has been achieved. To be honest, I kind of use Instagram as a visual journal of sorts, and I'll often refer back to it for dates on when things happened.

So, according to my unreliable memory and my more reliable Instagram timeline, in 2024 I:

* Went to 9 concerts - My favorite was *The Gaslight Anthem*
* Finished 1 solo quilt & participated in 2 others
* Wrote 1 magazine article - To be published in the 2025 QuiltCon magazine
* Had countless belly laughs with my East End quilt friends
* Vended at QuiltCon in Raleigh with Gar and our boys
* Visited the Netherlands & Belgium
* Made 3 shirts with fabric from my stash

I'm hopeful that 2025 will be just as wonderful. Unfortunately there aren't as many concerts on the horizon, but there are a couple more vending trips.&#x20;

What are your goals for the new year? In 2025, I'd like to:

* Finish 2 solo quilts & participate in at least 1 group quilt
* Continue to enjoy belly laughs with my East End quilt friends
* Vend at QuiltCon, Quilt Canada & Festival of Quilts - Hope to see you at one of those shows!
* Make more handmade clothing - Especially a pair of pants!
* Run a half-marathon

In the past, I've set some pretty unrealistic resolutions for myself. But I have found that I'd much rather have some nice-to-have's for the year, rather than strict resolutions to adhere to.&#x20;

Wishing you all the best as we settle into 2025!


# February 2025 | Designing in PreQuilt

I Am Korean Adjacent & QuiltCon Events

<figure><img src="/files/vPriVBNmhWE93vR1J7Mb" alt="" width="540"><figcaption><p><em>I Am Korean Adjacent by Laura Henneberry Quilts, 2024</em></p></figcaption></figure>

## <mark style="color:blue;">How I Use PreQuilt to Design</mark>

As you might suspect, I use PreQuilt to help me design my quilts. And in this blog post, I'd like to share how I used PreQuilt to finalize my layout for my quilt, *I Am Korean Adjacent*.

This quilt is a very personal quilt and I've worked on various iterations of it over the past 8 years. I finally finished it in 2024 and I wrote about why it's so important to me in the [2025 QuiltCon Magazine](https://www.quiltingdaily.com/quilting-arts-magazine-quiltcon-2025/).&#x20;

But here, I'm going to talk about the how of it.&#x20;

#### Pre-PreQuilt Prototyping

I love to prototype, it's my favorite part of quilt making. And it's also why my quilts can take 8 years from idea to finished quilt, because I'll play with an idea for so long. But that's the journey I love. So, a lot of the quilt ideation was done hands on. I would sketch out a rough idea and then try to construct it with the materials I had on hand. Figure out what I liked and what I didn't. Re-sketch. Re-prototype. Repeat.

Through the prototyping phase, I finally settled on the quilt block, its construction method, and size. But the things I wanted to figure out, with the help of PreQuilt, were final quilt size, block layout, and fabric colors.

#### Digital Sketching in PreQuilt

I started with a grey scale digital sketch of my quilt blocks (four patch HST block and a one patch square block) in a star layout.&#x20;

<figure><img src="/files/GDXQa0nCtourja7sVIoM" alt="" width="563"><figcaption><p>Initial block layout idea</p></figcaption></figure>

The first thing I did was settle on the overall size of the quilt. This would tell me not only how big the quilt would be, but also how many of each block I'd need. I also very much wanted to use my stash without having to buy any additional material or fabric.

<div><figure><img src="/files/cJoIjjGlx18z48cldegJ" alt=""><figcaption><p>Large throw sized quilt</p></figcaption></figure> <figure><img src="/files/acvxd4gZ7p99PJhQH5YY" alt="" width="563"><figcaption><p>Wall hanging sized quilt</p></figcaption></figure></div>

#### Color Selection & Block Layout

After I settled on the size of the quilt, which would be 8 rows with 8 blocks each, I played with the block layout of the design. Did I want the center of the quilt to be "empty" one patch blocks? Or did I want there to be a star in the center instead?

Did I want different colors in the background? Or did I want it to be a two color quilt? And since I really wanted to only be offered fabric I already had in my stash, I limited my color randomizer to a [fabric pull](https://blog.prequilt.com/blog-posts/2024/january-2024-or-use-your-stash) I had of my stash.

<figure><img src="/files/YNG2qQ4NlDaGstPxlWQ4" alt=""><figcaption></figcaption></figure>

I started to move into the direction of less is more and decided to go with a two color quilt and having the star in the middle of the quilt, instead of empty one patch blocks.

But I didn't like how consistent and rhythmic the blocks looked when they were each outlined with a border. This effect is naturally created when I was sewing the organza overlay together, but what would it look like if every block wasn't outlined?

#### Altering the Block

The final two steps was selecting the final background fabric color and altering the design of the four patch and one patch blocks.&#x20;

I selected a more muted and subtle aqua color (thank you stash) and instead of each block being outlined and framed with a border, I [cloned and created alternative blocks](https://courses.prequilt.com/youtube-courses/intro-to-prequilt-course/05-or-quilt-block-variations) with only one or two sides outlined.&#x20;

And I played with the [randomization features](https://help.prequilt.com/prequilt-features/randomization) for rotating and selecting which blocks were used.&#x20;

<figure><img src="/files/N9b0M8Uwxpxkx26syryp" alt=""><figcaption></figcaption></figure>

#### Final Quilt

Through multiple playful revisions, I landed on my final layout and design! And I love it.

<figure><img src="/files/gavvWJeymgTfomXHxv5K" alt=""><figcaption></figcaption></figure>

#### About My Process

I was very lucky to be able to write about my process and personal motivators behind this quilt. You can read all about it in this year's QuiltCon Magazine!

It's on sale in shops on February 18th and available now as a [PDF magazine](https://l.instagram.com/?u=https%3A%2F%2Fwww.quiltingdaily.com%2Fproduct-category%2Fmagazines-ebooks%2Fquiltcon%2F\&e=AT0pNVti7s5ic7j9mjdqYvC_EhaFuP6scnJ3AUO6wYBf_78_OkICy0tmWnRQWeSCAfhmOJXHpG3UubkUZ9nPbs0ZPVTAOcQJaJJ5YA).

<figure><img src="/files/7PiQM0ExRXZDU4Buvt43" alt=""><figcaption></figcaption></figure>

***

##

<figure><img src="/files/8H3iQastWWtydOMkvjIb" alt="" width="563"><figcaption><p>The Workroom's Kona Colour Society</p></figcaption></figure>

## <mark style="color:blue;">NEW!!! Kona Colour Society</mark>

We're excited to be collaborating with ***Karyn Valino*** and [**The Workroom**](https://theworkroom.ca/) by providing digital support tools for their [**Kona Colour Society**](https://theworkroom.ca/collections/kona-colour-society). Over the course of 2025, members will receive:

* 6 bundles of curated Kona cotton solids (15 colours per bundle = 90 colours)
* Exclusive colour lessons & creative challenges to stretch your skills
* Design tools & resources in PreQuilt
* Connected member community with a dedicated cohort from start to finish
* Community quilt project

There are a limited number of bundles still available for 2025! So, if you're thinking of joining, don't delay!

#### How to Use the PreQuilt + Kona Colour Society Resources

{% embed url="<https://www.youtube.com/watch?list=PLaC22-LQB1W0K2h1WM_5NPW55rx-Pr_wC&v=hprJqm2n620>" %}

***

<figure><img src="/files/Qr26rA1JInWxRzFl7Kb4" alt="" width="375"><figcaption><p>Hype sticker by Heather of Creating Quilts</p></figcaption></figure>

## <mark style="color:blue;">A Note from Laura</mark>

I had a quilt hanging last year at QuiltCon and I was so busy working in the booth that I almost kind of forgot about it.

While chatting with Heather of [@creatingquilts](https://www.instagram.com/creatingquilts/) I mentioned that it was so busy that I hadn't even gotten a chance to see my quilt hanging yet. She asked me which one was mine and I told her it was Moon Pie Mood Ring and then she gave me my first ever hype sticker. It was my most treasured thing from QuiltCon that year (and probably ever).

I loved her idea behind it so much - that we should be cheering each other on. That we should be taking a moment and telling people when what they have created has brought us joy or wonder. With her permission, I created my own hype sticker and will be handing them out to all the quilts I fall in love with.

[**Moon Pie Mood Ring**](https://www.instagram.com/p/CzEbBatu2SS/) will be hanging in the [**Cut Once Quilts**](https://cutoncequilts.com/products/moon-applique-template) booth! They gave me the moon template as a gift in 2023 and I used it to make my quilt. And now it's coming full circle and they will have a special show bundle of the template and pattern for only $18!


# March 2025 | Do I Have Enough Fabric?

Working with a FQ Bundle

<figure><img src="/files/Yxs635PthYPJELYaOSsX" alt=""><figcaption></figcaption></figure>

## <mark style="color:blue;">How I Maximized a FQ Bundle</mark>

I recently got a fat quarter bundle with 5 different colored fabrics for my local quilt shop, Fabric Spark, in support of their 10 year anniversary fabric challenge. The colors are beautiful and I immediately knew what I wanted to make with it!

But I did not want to buy more of any of the fabrics. As much as I love the colors and wouldn't mind making a larger quilt, I really did not want to buy any additional fabric. I'm in my use-what-I-have era.

So, what to do?

#### PreQuilt Fabric Calculator to the Rescue

Have you ever thought to reverse engineer your quilt design to use just the fabric you had on hand? Well, you can manipulate your quilt's design and/or size until the fabric calculator outputs the correct amount of fabric that you have on hand. Here's how I did it.

#### First Design Iteration in PreQuilt

My quilt design was inspired by a mirrored pub wall at a place in Liberty Village in Toronto. I was out for drinks with some work friends and I loved the simplicity of the half square triangles. This picture was taken in 2018!

<figure><img src="/files/YR8gUWLWFwOjTSCDNMUt" alt=""><figcaption></figcaption></figure>

#### First Design Iteration in PreQuilt

This wasn't hard to recreate in PreQuilt. Once you break down the logic of the pattern, it's really just 2 alternating HST blocks.

<figure><img src="/files/anESId9e6Cvm5ZKp645O" alt="" width="563"><figcaption><p><em>Four Corners, 2025</em></p></figcaption></figure>

After running the quilt design through the PreQuilt fabric calculator feature, it told me that I'd need 1 yard of each fabric.

<figure><img src="/files/6wwOcMdRi930z7na15tA" alt=""><figcaption></figcaption></figure>

#### Using the Fabric Calculator - Change the Width of Fabric

It's important to note that the default width of fabric (WOF) is 42" in PreQuilt. And since I had a fat quarter with general dimensions of 21" x 18", I needed to know if the cut pieces I needed would fit on a fat quarter - not full width yardage.

You can dynamically update the width of fabric to 21" to view the cutting recommendations for a fat quarter.

{% stepper %}
{% step %}
Click on the <mark style="color:blue;">**WOF text box**</mark>.

<div align="left"><figure><img src="/files/tbyBQ5JraYT4ktP8FByk" alt=""><figcaption></figcaption></figure></div>
{% endstep %}

{% step %}
Enter <mark style="color:blue;">**21**</mark> and click <mark style="color:blue;">**Apply to All**</mark>.

<div align="left"><figure><img src="/files/CTx0Z0I4MwkJT0CKDlQE" alt=""><figcaption></figcaption></figure></div>
{% endstep %}
{% endstepper %}

You'll see the cutting diagram dynamically update for all the fabrics.WOF = 42WOF = 21

<figure><img src="/files/XvPelynTJNCYKVqdMYsG" alt=""><figcaption></figcaption></figure>

<figure><img src="/files/B2Uxbcx5gIF44AWAqQE4" alt=""><figcaption></figcaption></figure>

#### Altering the Quilt Design

Like I said before, I only had a fat quarter of each fabric and I didn't want to buy more. So I had to decide how I wanted to alter the design to only need a fat quarter (instead of a yard) of each fabric.&#x20;

There were two options: Make the blocks smaller or Use fewer blocks.

<div><figure><img src="/files/LSxvszAd26pmxE1pRcJI" alt=""><figcaption><p>Smaller blocks (2.5" x 2.5")</p></figcaption></figure> <figure><img src="/files/vlqsVTaGHKmFjbxB9dD0" alt=""><figcaption><p>Fewer blocks (5 x 5 grid)</p></figcaption></figure></div>

<div><figure><img src="/files/iyoL0Fk9gJjpFmwv4UbQ" alt=""><figcaption></figcaption></figure> <figure><img src="/files/6UwpL3qdc4D46FwSYJPf" alt=""><figcaption></figcaption></figure></div>

#### Final Quilt Direction

I decided to go with the first option, which was to keep the overall design layout the same, but make the blocks 2.5" x 2.5" finished HST blocks. I found the repetition of the diamonds was more in line with the original design intention.

I also decided to not cut it so close and used the 8 at a time HST method for 48 of the 50 HST blocks (21" x 14") and then use the 2 at a time HST method for the last 2 of 50 blocks (3.5" x 3.5"). That was just perfect for me to use the fat quarters I had with a bit of scrap for something fun in the future.

<figure><img src="/files/JDCV8ewb5Rnx8iCirUC6" alt=""><figcaption></figcaption></figure>

***

<figure><img src="/files/K0ZOIxQHcANp0nD5pVML" alt="" width="414"><figcaption><p>The Genesis of a Journey Collection by Genesis Hall</p></figcaption></figure>

## <mark style="color:blue;">NEW Fabric Collections in PreQuilt</mark>

We're excited to share that we have some new fabric collections preloaded in PreQuilt! What does that mean? It means, you can easily add the fabrics you like from the collections and quickly start using them in your quilt designs.
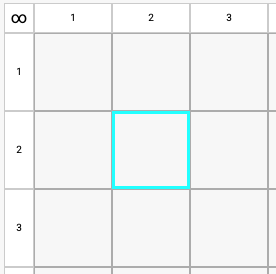
Here's what's newly added!

* The Genesis of a Journey by Genny from the Quilt Block (Riley Blake)
* Wildflower Wovens by Suzy Quilts (AGF)
* Slow Summer by Suzy Quilts (AGF)

We're adding more collections as we collaborate with fabric designers and fabric manufacturers. We hope to have more available for you over the coming year!

#### How to Find and Use the Preloaded Fabric Collections

{% embed url="<https://www.youtube.com/watch?v=gFMVAnp5c88>" %}

***

<figure><img src="/files/gpTg4yqITgeUhHxfhVGr" alt=""><figcaption></figcaption></figure>

## <mark style="color:blue;">A Note from Laura</mark>

I had the best time at QuiltCon in Phoenix this year. I love QuiltCon for the people. The quilts are great and it's nice to work the booth, but the reason why I get excited is because I get to see friends I only see at QuiltCon and I always meet new people every year that make the time so special to me.

Some of my personal and PreQuilt highlights:

* My friend, [Michelle Bartholomew](https://www.instagram.com/michellebartholomew/), won the [MQG Excellence Award](https://quiltcon.com/quiltcon-2025-winners/) for her quilt, Clamshell Jamboree! Congratulations, it was fantastic getting to cheer you on!
* Our group quilt, [Gathered](https://www.instagram.com/p/DGb3s8GyjAX/), was juried into the show and looked fantastic!
* Wednesday night dinner with new and old friends - it's a Wednesday night tradition now!
* This cookie tin pin that I got from the [Wonderfil Threads](https://www.wonderfil.ca/) team! Plus check out the [SNL skit](https://www.tiktok.com/@binge/video/7293737130726083841?lang=en) as well for extra giggles.
* Launching the **Moon Pie Mood Ring** [template by Cut Once Quilts](https://cutoncequilts.com/products/moon-pie-mood-ring-applique-template-and-wooden-jig) and [pattern](https://www.etsy.com/ca/listing/1883714505/moon-pie-mood-ring-block-pattern-pdf?ref=shop_home_active_1\&logging_key=3276bb650ef2d812db09710876e422a0a1328e0a%3A1883714505).
* Fun demo on the MQG Demo stage on Saturday. Special thanks to friends who came to support me, thank you!!

We're not sure yet what our plans for QuiltCon 2026 are going to be. Our boys are getting older and missing school has more consequences now, so we're thinking about not having a booth at the show next year. This makes me both nervous for the business and excited to be able to just participate and enjoy the time away. We'll see!


# All About Fabric

In PreQuilt, there are two different types of fabrics:

1. Solid Fabric Swatches
2. Printed Fabric Swatches

And your fabric swatches can be used dynamically or statically as:

1. Fabric Links (dynamic use)
2. Static Fabrics (static use)

What are the differences? Why so many options?!? Let's define them and please keep in mind we have separate and extensive Help Guides for each.

***

## <mark style="color:blue;">01 | Solid Fabric Swatches</mark>

Solid fabric swatches were the first digital fabric swatches we had in PreQuilt and are based on the color cards from the major solid fabric manufacturers like Robert Kaufman's Kona fabrics or Free Spirit's Designer Essential Solids. We were fortunate to have been invited to use some open source resources shared by quilters like [*<mark style="color:blue;">Steph Skardal</mark>*](https://www.stephskardalquilts.com/tools/solids-library-now-on-github) as a starting point.

We now have the solid color cards digitized and preloaded in PreQuilt for almost all the major fabric manufacturers.

* Art Gallery Fabrics - Pure Elements Solids
* American Made - Cotton Solids
* Andover - Century Solids
* Free Spirit - Designer Essential Solids
* Michael Miller - Cotton Couture
* Moda - Bella Solids
* Northcott - ColorWorks
* Paintbrush Studio - Painter's Palette Solids
* Robert Kaufman - Kona Solids
* RJR - Cotton Supremes
* Riley Blake - Confetti Cottons
* Tilda - Solids
* Windham - Ruby + Bee

We do our best to keep these up to date, but if you find we're missing something, please feel free to email us and we'll happily update it.

For the extensive <mark style="color:blue;">**Help Guide on Solid Fabric Swatches**</mark>, click on the link below:

{% content-ref url="/pages/D3ZdZ95mDzS7HRdiaWay" %}
[Solid Fabric Swatches](/prequilt-101/all-about-fabric/solid-fabric-swatches)
{% endcontent-ref %}

***

## <mark style="color:blue;">02 | Printed Fabric Swatches</mark>

Printed fabric swatches (also referred to as digital fabric swatches) are digital versions of printed fabric. They are usually square JPG images and often times they will have a ruler along the bottom to denote the width of the swatch.

<div><figure><img src="/files/vF2RuR4xjYwR4lks8dup" alt=""><figcaption><p><em>Digital printed fabric swatch without ruler</em></p></figcaption></figure> <figure><img src="/files/b3lzMtcKXEx68xFdKTk2" alt=""><figcaption><p><em>Digital printed fabric swatch with ruler</em></p></figcaption></figure></div>

PreQuilt is able to use digital fabric swatches for your printed fabric to preview your quilt ideas. If the swatch provided is smaller than the quilt piece the fabric swatch is placed in, the digital swatch will be tiled to fill the space. You are also able to reposition and rotate your digital fabric swatch as well.

In a few steps, you can import a digital fabric swatch into PreQuilt and link it to a patchwork piece in your quilt and quickly see what it'd look like.&#x20;

For the extensive <mark style="color:blue;">**Help Guide on Printed Fabric Swatches**</mark>, click on the link below:

{% content-ref url="/pages/2UmINs0YznKKsQ90jGEJ" %}
[Printed Fabric Swatches](/prequilt-101/all-about-fabric/printed-fabric-swatches)
{% endcontent-ref %}

***

## <mark style="color:blue;">03 | Fabric Links (formerly Color Tags)</mark>

PreQuilt developed **Fabric Links** (formerly *Color Tags*) as a way to connect a fabric swatch to a quilt block piece or part of a quilt. Fabric links can be connected to both solid color swatches and printed fabric swatches.&#x20;

A **Fabric Link** is used to connect a particular fabric swatch to a particular quilt block piece. So when the fabric swatch used by a Fabric Link is changed (from a solid to another solid or from a solid to a printed fabric swatch or from a printed fabric swatch to another printed fabric swatch), everything that is using that Fabric Link will also change and be updated automatically.

In the example below, the fabric swatch used by **Fabric Link A** was changed from Kona black to Kona bright pink. The change was done once and then automatically pushed to all pieces that were connected and using Fabric Link A.

<div><figure><img src="/files/O7Alwk0608pc012uncPm" alt=""><figcaption><p><em>Fabric Link A is currently black</em></p></figcaption></figure> <figure><img src="/files/lVbBR62okiGPeXJYgIyG" alt=""><figcaption><p><em>Fabric Link A has been changed to pink</em></p></figcaption></figure></div>

For the extensive <mark style="color:blue;">**Help Guide on Fabric Links**</mark>, click on the link below:

{% content-ref url="/pages/kZz1i5wOrscbkeWNjtWc" %}
[Fabric Links](/prequilt-101/all-about-fabric/fabric-links)
{% endcontent-ref %}

***

## <mark style="color:blue;">04 | Static Fabrics</mark>

A **Static Fabric** in PreQuilt is a fabric that is **not** used in a Fabric Link. A Static Fabric is used for a particular block piece and remains fixed. The block piece that uses this fabric will not dynamically be updated or changed when features like the Color Randomizer is used.&#x20;

The benefit of using a Static Fabric is that you do not need to create Fabric Links for fabrics you know you will not want to change. One example could be a panel quilt, where the panel is static and won't be effected by any dynamic changes.

If you're ever finding that a the fabric used in a quilt is not changing when you're expecting it to (like when using the color randomizer or when changing a Fabric Link), it probably is because that block piece is using a static fabric. The simple fix is to edit the quilt block and link the block piece to the desired Fabric Link.

For the extensive <mark style="color:blue;">**Help Guide on Static Fabrics**</mark>, click on the link below:

{% content-ref url="/pages/1orawvJ0ZocNzXxEEJ8z" %}
[Static Fabrics](/prequilt-101/all-about-fabric/static-fabrics)
{% endcontent-ref %}

***

## <mark style="color:blue;">05 | Fussy Cutting</mark>

**Fussy Cutting** is a term that is used to describe the targeted selection and cutting from fabric of a particular image. And in quilting, these selectively cut out pieces of fabric are then either pieced together by hand (typically English Paper Piecing) or by machine to create visually stunning quilt blocks.

One of the best by-products of our newest Fabric features (launched October 2023) is that you can now visualize precision and seamless pattern matched fussy cut blocks in PreQuilt.

For the extensive <mark style="color:blue;">**Help Guide on Fussy Cutting**</mark>, click on the link below:

{% content-ref url="/pages/UHmJh8kZc9spZ1Z50mRQ" %}
[Fussy Cutting](/prequilt-101/all-about-fabric/fussy-cutting)
{% endcontent-ref %}


# Solid Fabric Swatches

Demo, Basic & Market Feature

## <mark style="color:blue;">A Little About Solid Fabric Swatches</mark>

Solid fabric swatches were the first digital fabric swatches we had in PreQuilt and are based on the color cards from the major solid fabric manufacturers like Robert Kaufman's Kona fabrics or Free Spirit's Designer Essential Solids. We were fortunate to have been invited to use some open source resources shared by quilters like [*<mark style="color:blue;">Steph Skardal</mark>*](https://www.stephskardalquilts.com/tools/solids-library-now-on-github) as a starting point.

We now have the solid color cards digitized and preloaded in PreQuilt for almost all the major fabric manufacturers.

* Art Gallery Fabrics - Pure Elements Solids
* American Made - Cotton Solids
* Andover - Century Solids
* Free Spirit - Designer Essential Solids
* Michael Miller - Cotton Couture
* Moda - Bella Solids
* Northcott - ColorWorks
* Paintbrush Studio - Painter's Palette Solids
* Robert Kaufman - Kona Solids
* RJR - Cotton Supremes
* Riley Blake - Confetti Cottons
* Tilda - Solids
* Windham - Ruby + Bee

We do our best to keep these up to date, but if you find we're missing something, please feel free to email us and we'll happily update it.

***

## <mark style="color:blue;">Help Guide Links</mark>


# Printed Fabric Swatches

Basic & Market Plan Feature

## <mark style="color:blue;">A Little About Printed Fabric Swatches</mark>

Printed fabric swatches (also referred to as digital fabric swatches) are digital versions of printed fabric. They are usually square JPG images and often times they will have a ruler along the bottom to denote the width of the swatch.

<div><figure><img src="/files/vF2RuR4xjYwR4lks8dup" alt=""><figcaption><p><em>Digital printed fabric swatch without ruler</em></p></figcaption></figure> <figure><img src="/files/b3lzMtcKXEx68xFdKTk2" alt=""><figcaption><p><em>Digital printed fabric swatch with ruler</em></p></figcaption></figure></div>

PreQuilt is able to use digital fabric swatches for your printed fabric to preview your quilt ideas. If the swatch provided is smaller than the quilt piece the fabric swatch is placed in, the digital swatch will be tiled to fill the space. You are also able to reposition and rotate your digital fabric swatch as well.

In a few steps, you can import a digital fabric swatch into PreQuilt and link it to a patchwork piece in your quilt and quickly see what it'd look like.&#x20;

***

## <mark style="color:blue;">Help Guide Links // Printed Fabric Swatches</mark>

{% content-ref url="/pages/icE1g8UxlCoSyhqDxJmS" %}
[Printed Fabric // FAQs](/prequilt-101/all-about-fabric/printed-fabric-swatches/printed-fabric-faqs)
{% endcontent-ref %}

{% content-ref url="/pages/91VBNljbGtiCXBy8JPbF" %}
[Find Printed Fabric Swatches](/prequilt-101/all-about-fabric/printed-fabric-swatches/find-printed-fabric-swatches)
{% endcontent-ref %}

{% content-ref url="/pages/T1MeQlFqiYoQO7QPWHQC" %}
[Import Printed Fabric Swatches](/prequilt-101/all-about-fabric/printed-fabric-swatches/import-printed-fabric-swatches)
{% endcontent-ref %}

{% content-ref url="/pages/pMP7jSzukNhfKnObBgLP" %}
[Edit Printed Fabric Swatches](/prequilt-101/all-about-fabric/printed-fabric-swatches/edit-printed-fabric-swatches)
{% endcontent-ref %}

{% content-ref url="/pages/lb1OBrVlWamc7Iv6dXI7" %}
[Organize Printed Fabric Swatches](/prequilt-101/all-about-fabric/printed-fabric-swatches/organize-printed-fabric-swatches)
{% endcontent-ref %}

{% content-ref url="/pages/OrCIOEeyTXGTP9Bdgwu3" %}
[Use Printed Fabric Swatches](/prequilt-101/all-about-fabric/printed-fabric-swatches/use-printed-fabric-swatches)
{% endcontent-ref %}


# Printed Fabric // FAQs

FAQs on Digital Fabric Swatches (Printed Fabric Swatches)

PreQuilt is able to use digital fabric swatches for your printed fabric to preview your quilt ideas. In a few steps, you can import a digital fabric swatch, which is a JPG of your fabric, into PreQuilt and link it to a patchwork piece in your quilt and quickly see what it'd look like.&#x20;

Before getting started in the Help Guide, let's do a little Q\&A.

***

### <mark style="color:blue;">What is a printed fabric swatch (aka digital fabric swatch)?</mark>

A printed fabric swatch or digital fabric swatch is a digital image (usually a jpg) of fabric that can be imported into PreQuilt and applied to block and quilt components in order to preview what the quilt would look like using that fabric.&#x20;

### <mark style="color:blue;">Where can I find printed fabric swatches online?</mark>

Most fabric manufacturers have digital fabric swatches available on their website (usually organized by fabric designer and collection) available to download and you can also find digital fabric swatches at your favorite online shop.

### <mark style="color:blue;">What is the measurement of a digital fabric swatch?</mark>

Most fabric manufacturers have two versions of their digital fabric swatches - one with a ruler along the bottom of the image and one without a ruler. While the swatch without the ruler is prettier and less distracting; for use in PreQuilt, it’s more helpful to upload the digital fabric swatch that has the ruler in the image. Don’t worry though, there’s a way to hide the ruler so that it does not show up in your quilt.

<div><figure><img src="/files/giT2bNhcB4MaRa6Bdqzb" alt=""><figcaption><p><em>Digital printed fabric swatch without ruler</em></p></figcaption></figure> <figure><img src="/files/b3lzMtcKXEx68xFdKTk2" alt=""><figcaption><p><em>Digital printed fabric swatch with ruler</em></p></figcaption></figure></div>

We’ve noticed that some companies have standard dimensions for their digital fabric swatches and we’ve used that information to create a little cheat sheet for you as a starting point or best guess for the dimensions of your digital fabric swatch.\*

<figure><img src="/files/pRwp0fhrZLEylXNzJAWM" alt=""><figcaption><p><em>Swatch width suggestions</em></p></figcaption></figure>

*\*Please use as a best guess, we cannot guarantee that your digital fabric swatch is actually using these dimensions.*

### <mark style="color:blue;">What if I can’t find a digital fabric swatch for fabric I have in my stash?</mark>

Not a problem! If you’re unable to find a digital fabric swatch for a fabric that you’d like to import into PreQuilt, you can create your own by taking a picture of it. -- COMING SOON

### <mark style="color:blue;">Where are my digital fabric swatches saved in PreQuilt?</mark>

Once imported, all digital fabric swatches are saved in the FABRIC dashboard, which can be navigated to by using the tab along the top of your main dashboard. Your fabric swatches can be organized into folders or tagged into categories.

<figure><img src="/files/uPRNgCR5o4Np3QekO3VZ" alt=""><figcaption><p><em>Fabric dashboard tab</em></p></figcaption></figure>

### <mark style="color:blue;">How are the digital fabric swatches used in PreQuilt?</mark>

One of the strengths of PreQuilt is its ability to very quickly preview a quilt or block using a variety of different fabrics or colors. When a digital fabric swatch of printed fabric is imported into PreQuilt, it’s important to set the dimension of the swatch’s width.&#x20;

Once the width of the digital fabric swatch has been set, PreQuilt is able to accurately visualize the scale of that printed fabric swatch in various components of your quilt - in blocks, borders, and even quilt binding.&#x20;

If the digital fabric swatch is smaller than the space the fabric being used in a quilt, PreQuilt will not stretch the image to fill the space, but rather PreQuilt will tile\* and repeat the digital fabric swatch to fill the space. This is important so that the scale of the printed fabrics design will be accurate to the reality of the fabric itself and how it will appear in a finished quilt.

*\*Please note that tiling an image (by repeating the digital fabric swatch over and over to fill a space) often results in a seamline. Fabric manufacturers do this deliberately so that digital images cannot be used to print onto fabric. We are unable to remove these seamlines.*

<br>


# Use Preloaded Fabric Collections

Basic & Market Plan // On Fabric Dashboard

{% embed url="<https://youtu.be/Ynq9yQ7iXRU>" %}
*Video Tutorial on How to Add Suzy Quilts' Fabric Collections*
{% endembed %}

## <mark style="color:blue;">Browse & Add Preloaded Fabric Collections</mark>

We're excited to announce that we now have Suzy Quilts' fabric collections (and a selection of other fabric collections) preloaded in PreQuilt and they're ready and waiting for you to use them!&#x20;

Follow these directions to browse the fabric collections preloaded in PreQuilt and add them to your account's fabric dashboard.

1. Click on the <mark style="color:blue;">**Fabric**</mark> Dashboard.

   <figure><img src="/files/l4iXXQ9efhFvkuprfyux" alt=""><figcaption></figcaption></figure>
2. Click on the <mark style="color:blue;">**Fabric Collections sub-tab**</mark>.

   <div align="left"><figure><img src="/files/w35hOEF0vi0cBF5ibjyX" alt=""><figcaption></figcaption></figure></div>
3. Click on the <mark style="color:blue;">**Browse**</mark> button for the fabric manufacturer you'd like to look at. In this example, I'll be looking at Art Gallery Fabrics, since I know that is who manufacturers Suzy's fabric.

   <div align="left"><figure><img src="/files/Fk1xh85liEh16qafdek2" alt=""><figcaption></figcaption></figure></div>
4. The Art Gallery Fabrics landing page will appear. Since she's the first designer from AGF on PreQuilt, Suzy Quilts is automatically highlighted.&#x20;

   <div align="left"><figure><img src="/files/arQ61InxRdLMR2djbQAk" alt=""><figcaption></figcaption></figure></div>
5. Click on the <mark style="color:blue;">**folder**</mark> for the fabric collection you'd like to browse. In this example, I'm going to browse through *Duval*.&#x20;

   <div align="left"><figure><img src="/files/KjHjfKQlecgISUQGlVZV" alt=""><figcaption></figcaption></figure></div>
6. The landing page for the *Duval* collection will appear.

   <figure><img src="/files/8XG6pimnrW1h2FXODpHz" alt=""><figcaption></figcaption></figure>
7. Click on the <mark style="color:blue;">**Add**</mark> button for the fabric swatches you'd like to add to your account. Once the fabric swatch has been added to your account, the button will say **Added**.

   <div align="left"><figure><img src="/files/GFm5G9EvpUFr1TKUn0O4" alt=""><figcaption></figcaption></figure></div>
8. If you'd like to add the entire collection, click on the <mark style="color:blue;">**Add All**</mark> button.

   <div align="left"><figure><img src="/files/sUDCQZHus2d96p6wSxqz" alt=""><figcaption></figcaption></figure></div>
9. Once you're finished adding the fabric swatches, click on the <mark style="color:blue;">**x**</mark> button (<img src="/files/8UpObehJ4cytgVMZ2jHq" alt="" data-size="line">) in the top right corner.
10. You will be directed back to your fabric dashboard and you will see the fabric swatch(es) that you added to your account.

    <figure><img src="/files/kzzCucg879YiVEnqFGrn" alt=""><figcaption><p><em>Two Duval collection fabric swatches have been added to my account</em></p></figcaption></figure>

We hope you enjoy dreaming up all your quilt ideas using the printed fabric collections that are available on PreQuilt!

***

## <mark style="color:blue;">Fabric Collection not Preloaded?</mark>

If we don't have the digital fabric swatches preloaded on PreQuilt, not a problem, you can find them on the internet and add them yourself. Use the Help Guide link below:

{% content-ref url="/pages/91VBNljbGtiCXBy8JPbF" %}
[Find Printed Fabric Swatches](/prequilt-101/all-about-fabric/printed-fabric-swatches/find-printed-fabric-swatches)
{% endcontent-ref %}


# Find Printed Fabric Swatches

Online

The first step is to find good quality [*<mark style="color:blue;">digital fabric swatches</mark>*](https://glossary.prequilt.com/pq-glossary/fs#fabric-swatch-also-printed-fabric-swatch) for your printed fabrics. We recommend  visiting the fabric manufacturer's website - there are often downloadable swatches organized by fabric collection (a). But you can also download any image found online of your desired fabric to use as a digital fabric swatch (b).

### <mark style="color:blue;">a | Download a Collection of Fabric Swatches</mark>

In this example, we're going to download some Ruby Star fabrics from Moda Fabrics. The steps are similar for all downloads, so adapt these steps to your situation.

1. Go to the <mark style="color:blue;">**URL**</mark> for the digital fabric swatch. In this example, I visited <https://modafabrics.com/downloads> and filtered fabric collections by Sarah Watts.

   <figure><img src="/files/uwbsboUFqt2owfAhlGDg" alt=""><figcaption><p><em>Moda's fabric download page</em></p></figcaption></figure>
2. <mark style="color:blue;">**Download**</mark> JPG images onto your computer (<mark style="color:blue;">**click**</mark> icon in the JPG Images column). In this example, I downloaded the Firefly collection.

   <figure><img src="/files/hjNoEFGJZFYONn8J9zyl" alt=""><figcaption><p><em>Download JPGs - Keep in mind each fabric manufacturer's website looks different</em></p></figcaption></figure>
3. <mark style="color:blue;">**Move**</mark> and <mark style="color:blue;">**organize**</mark> the downloaded files on your computer.
   * **Tip:** If you're well organized, you can easily find and import your newly acquired digital fabric swatches.

### <mark style="color:blue;">b | Download Individual Fabric Images</mark>

Sometimes it's not possible to find fabric swatches on the manufacturer's website (this is especially true for older fabrics). The next best thing it so find an image of the fabric online.&#x20;

1. <mark style="color:blue;">**Google**</mark> the name of your desired fabric. It's helpful to search with as detailed of information as possible to find the correct fabric image. In this example, I searched for "*Robert Kaufman Painterly Petals purple*".

   <figure><img src="/files/vW6nSYhro97vgx6NYdfy" alt=""><figcaption><p><em>Google search results</em></p></figcaption></figure>
2. <mark style="color:blue;">**Click**</mark> on the desired fabric image to go to the website. In this example, I need to also click on <mark style="color:blue;">**Visit**</mark> to get to the online shop.

   <figure><img src="/files/Pkhlt3dMDCWzYumbFItk" alt=""><figcaption></figcaption></figure>
3. <mark style="color:blue;">**Right click**</mark> on the desired fabric's image and select <mark style="color:blue;">**Open Image in New Tab**</mark>.

   * **Note:** This will open only the fabric image in its own tab.

   <figure><img src="/files/hpVMFhmu77cXf85pA7IS" alt=""><figcaption><p><em>Select <strong>Open Image in New Tab</strong> to isolate just the image</em></p></figcaption></figure>
4. <mark style="color:blue;">**Right click**</mark> on the image and select <mark style="color:blue;">**Save Image As**</mark>.

   <figure><img src="/files/wp8sPRTXCSZHNDsNOqpo" alt=""><figcaption><p><em>Select <strong>Save Image As</strong> to save to your computer</em></p></figcaption></figure>
5. Your computer's file system will pop-up. <mark style="color:blue;">**Save**</mark> the image on your computer (where you'll be able to find it).


# Import Printed Fabric Swatches

On the Fabric Dashboard

There are four different ways that you can import digital fabric swatches into your PreQuilt account. You can:

1. Upload digital fabric swatches that are already saved on your computer
2. Add digital fabric swatches from the linked quilt stores (linked on PreQuilt)
3. Use a URL address for a digital fabric swatch that is online
4. Upload photographs of your fabric to create your own digital fabric swatch (typically from your smartphone) -- *COMING SOON*

***

## <mark style="color:blue;">01 | Import from Computer</mark>

Once you have digital fabric swatches saved on your computer, you can import and save them in your PreQuilt Fabric Dashboard.

1. Go to the main Dashboard by clicking on your <mark style="color:blue;">**Avatar**</mark> and selecting <mark style="color:blue;">**Dashboard**</mark>.

   * <mark style="color:red;">**Alert:**</mark> Don't forget to <mark style="color:blue;">**Save**</mark> your quilt if you're working on one before exiting to the Dashboard.

   <div align="left"><figure><img src="/files/G8nZlWtXWT4HrPFSH1v6" alt=""><figcaption><p><em>Dropdown under Avatar</em></p></figcaption></figure></div>
2. On the main Dashboard, click on the <mark style="color:blue;">**FABRIC**</mark> tab.

   <figure><img src="/files/WQxnKAVkeakWQpUMpET4" alt=""><figcaption><p><em>Middle tab is the <strong>Fabric Dashboard</strong></em></p></figcaption></figure>
3. Click on <mark style="color:blue;">**Bulk Upload**</mark> on the first tile.

   <div align="left"><figure><img src="/files/rHNpUJ5Rl99dPEvVnlcd" alt=""><figcaption><p><em>Upload Tile</em></p></figcaption></figure></div>
4. Your computer's file system will pop-up. <mark style="color:blue;">**Select the image(s)**</mark> you want to use and click on <mark style="color:blue;">**Open**</mark>.

   <figure><img src="/files/wgGvk5QgbbyzjWIE8S0f" alt=""><figcaption><p><em>Select the images from your computer</em></p></figcaption></figure>
5. Your selected fabric swatches are now loaded into PreQuilt.

   <figure><img src="/files/r4kwWqbH6we5CcvbdOSM" alt=""><figcaption><p><em>Your fabric swatches have now been added</em></p></figcaption></figure>

***

## <mark style="color:blue;">02 | Add via Linked Quilt Stores</mark>

1. From the main [*<mark style="color:blue;">Dashboard</mark>*](/welcome-to-prequilt/about-this-help-guide/glossary#dashboard), click on the <mark style="color:blue;">**FABRIC**</mark> tab. This will take you to the [*<mark style="color:blue;">Fabric Dashboard</mark>*](/welcome-to-prequilt/about-this-help-guide/glossary#fabric-dashboard).

   <figure><img src="/files/f8nSXtSMXetkJuLqyITt" alt=""><figcaption><p><em>Fabric Dashboard tab</em></p></figcaption></figure>
2. Click on the tile called '<mark style="color:blue;">**Import from an online store**</mark>'.

   <div align="left"><figure><img src="/files/b8KChqDg6ocUfS9K6JiO" alt=""><figcaption><p><em><strong>Import from online store tile</strong> on right</em></p></figcaption></figure></div>
3. Click on the '<mark style="color:blue;">**Browse**</mark>' button for your preferred online fabric store - I'm going to pick my local quilt shop, [*<mark style="color:blue;">Fabric Spark</mark>*](https://fabricspark.com/), for this example.

   * ***Disclaimer:*** These are free collaborations with online fabric shops. Fabric swatches seen here are pulled from online shop stock inventory. If a fabric sells out, it may be removed from the shop by the owner.
   * ***Disclaimer:*** There is no cost to use or import these digital fabric swatches. PreQuilt also does not profit from the use of these swatches.

   <figure><img src="/files/9nwWVYloP1zTuoaki9pY" alt=""><figcaption><p><em>Sample of some linked shops</em></p></figcaption></figure>
4. Click on the '<mark style="color:blue;">**Colors**</mark>' tab to search fabric by color. Then click on the <mark style="color:blue;">**name of the color**</mark> you're looking for.

   * ***Disclaimer:*** Each fabric shop organizes their fabric in different way. Not every shop has a search by color option.

   <div align="left"><figure><img src="/files/UHRtlUry9jXcDvw0CyTi" alt=""><figcaption><p><em>Color option example</em></p></figcaption></figure></div>
5. Click on the '<mark style="color:blue;">**Save**</mark>' button found under the printed fabric swatches you're interested in adding to your Fabric Dashboard. You can add as many as you'd like!

   <div align="left"><figure><img src="/files/5dVKMaAD2u9giFk41x0d" alt=""><figcaption><p><em>Swatch to be added</em></p></figcaption></figure></div>
6. When you're finished, click on the <img src="/files/1q1of3vBVAT77HexrNXf" alt="" data-size="line"> button in the top right corner to return to the Fabric Dashboard.
7. Your Fabric Dashboard will now have all your imported printed fabric swatches.

   <figure><img src="/files/M5KA04UnjUiJjHSIFs29" alt=""><figcaption><p><em>New swatch has now been added to Fabric Dashboard</em></p></figcaption></figure>

***

## <mark style="color:blue;">03 | Import using a URL address</mark>

Using this method, you do not need to save the digital fabric swatch to your computer before importing it into your Fabric Dashboard. PreQuilt will use the URL address and save the image into your account.

1. <mark style="color:blue;">**Find**</mark> your fabric online. In this example, I’ll be adding Chubby Cheeks in Clover from Tula Pink.

   <figure><img src="/files/P908sKAejYRoecXjqult" alt=""><figcaption><p><em>Example of fabric swatch found online at Free Spirit website</em></p></figcaption></figure>
2. On the fabric image, right click and select <mark style="color:blue;">**Copy image address**</mark>.

   <div align="left"><figure><img src="/files/k07AIdaCBTUZMh0bRM0r" alt="" width="367"><figcaption><p><em>Select <strong>Copy Image Address</strong></em></p></figcaption></figure></div>
3. Log into your PreQuilt account. Click on the <mark style="color:blue;">**Fabric**</mark> tab on the top of your dashboard.

   <figure><img src="/files/Q8LB0S8pUCkzo3gAOzUM" alt=""><figcaption><p><em><strong>Fabric Dashboard</strong> tab</em></p></figcaption></figure>
4. On the first tile, click on the <mark style="color:blue;">**From URL**</mark> text.

   <div align="left"><figure><img src="/files/lnMqjYvUd5txwLYHwU2K" alt=""><figcaption></figcaption></figure></div>
5. In the URL text box, enter your image’s <mark style="color:blue;">**URL address**</mark> (that you copied earlier in step 2).

   <div align="left"><figure><img src="/files/wlLh0hpwFScEf9sGxtYg" alt=""><figcaption></figcaption></figure></div>
6. A preview of your fabric will appear. Click on the <mark style="color:blue;">**Save**</mark> button.

   <div align="left"><figure><img src="/files/yB5PYC5dR8BHV9zkd7nU" alt=""><figcaption></figcaption></figure></div>
7. This digital fabric swatch has now been added to your fabric stash.

   * ***Note:*** The fabric swatch is highlighted in yellow which indicates that the width of the fabric swatch has not yet been set. Learn how to set the width in *Edit Digital Fabric Swatches*.

   <div align="left"><figure><img src="/files/KkEGpzR3KL5zxkv8AOwz" alt=""><figcaption></figcaption></figure></div>

   <br>


# Edit Printed Fabric Swatches

On the Fabric Dashboard

There are a number of properties for your digital fabric swatches that you can set that are universally applicable to every time it’s used in PreQuilt, such as the width of the digital fabric swatch and how the swatch is cropped.&#x20;

In this section, you'll learn how to edit your digital fabric swatches to optimize them for use in your quilts.

1. How to set width of your digital fabric swatch
2. How to crop your digital fabric swatch
3. How to set general information and properties for your digital fabric swatch
4. How to tag your digital fabric swatch
5. How to bulk edit multiple digital fabric swatches at one time

***

## <mark style="color:blue;">A Note on Swatch Dimensions</mark>

We’ve noticed that some companies have standard dimensions for their digital fabric swatches and we’ve used that information to create a little cheat sheet for you as a starting point or best guess for the dimensions of your digital fabric swatch.\* All widths should be entered in inches.

<figure><img src="/files/6EtoywOHAgr7YZp881Ym" alt=""><figcaption><p><em>Collapsed swatch dimension suggestion sheet</em></p></figcaption></figure>

<figure><img src="/files/B1cYdkGmfkb45DMDYpVk" alt=""><figcaption><p><em>Expanded swatch dimension suggestion sheet</em></p></figcaption></figure>

Sometimes there are no dimensions for your digital fabric swatch and that can be frustrating. Our suggestion is to use your best guess (based on quilts you've seen that used that fabric) and put that guesstimate into the swatch width.

*\*Please use as a best guess, we cannot guarantee that your digital fabric swatch is actually using these dimensions.*

***

## <mark style="color:blue;">01 | Set width for fabric swatch</mark>

{% hint style="info" %}
If you have not yet set the dimensions for your digital fabric swatch, it will be highlighted in yellow.
{% endhint %}

Once you have your digital fabric swatch uploaded to PreQuilt, it can’t be accurately used until the width of the fabric swatch has been set. Without the width of your swatch, the application will not know how to scale it appropriately into your quilt components.

1. From the Fabric Dashboard, click on the <mark style="color:blue;">**Edit**</mark> button for the digital fabric swatch that you want to set the width for.

   <div align="left"><figure><img src="/files/CiyMSUVzUiEsVDZroApV" alt=""><figcaption></figcaption></figure></div>
2. <mark style="color:blue;">**Enter**</mark> the width (in inches) of the digital fabric swatch in the top right box. In this example, we were lucky enough to have a ruler along the bottom edge of the swatch. I’ll use that dimension here.

   <figure><img src="/files/OrNrqfpL68VGPvLDMjT8" alt=""><figcaption><p><em>Enter width of swatch in the yellow box</em></p></figcaption></figure>
3. Click on the <mark style="color:blue;">**Save**</mark> button.

   <figure><img src="/files/lJqrsmG8O1wWWBUwFd6L" alt=""><figcaption><p><em>The yellow box will turn to white once dimensions have been set.</em></p></figcaption></figure>

***

## <mark style="color:blue;">02 | Crop the fabric swatch</mark>

Once the width of the digital fabric swatch is set, four separate **DRAG** buttons will appear on each side of the digital fabric swatch. These can be used to crop the digital fabric swatch.

1. <mark style="color:blue;">**Click and hold**</mark> onto the <mark style="color:blue;">**Drag**</mark> button on the bottom of the digital fabric swatch.

   <div align="left"><figure><img src="/files/h8IGyEcbiLRxjGdfqqoT" alt=""><figcaption><p><em>Drag buttons will appear on all 4 sides</em></p></figcaption></figure></div>
2. <mark style="color:blue;">**Move**</mark> the blue line from the bottom of the digital fabric swatch up until it is above the ruler. You’ll notice that the ruler will become more translucent and almost hidden.

   <div align="left"><figure><img src="/files/m9SrTMFgDInW1R8Uhqtv" alt=""><figcaption><p><em>Cropped out parts of the image will become translucent</em></p></figcaption></figure></div>
3. Make sure to click on the <mark style="color:blue;">**Save**</mark> button to retain these changes.

   <figure><img src="/files/OGKnHOhos03BuM8Gbcqr" alt=""><figcaption><p><em>Don't forget to Save any changes you make before exiting.</em></p></figcaption></figure>

***

## <mark style="color:blue;">03 | Input general information & yardage</mark>

On the Swatch Info tab, we have enabled you to keep as little or as much information about your digital fabric swatches as you’d like. The only mandatory fields are a name for the digital fabric swatch and its width.

We have fields for you to be able to input:

* Fabric Name
* Colorway
* Designer
* Collection
* Manufacturer
* SKU
* Inventory quantity (yardage or FQ)

To input general information for your digital fabric swatch and save this information:

1. Click on the <mark style="color:blue;">**Swatch Info tab**</mark> on the Fabric Swatch pop up.

   <figure><img src="/files/C1PK2ER0cRJy2nTbtQYk" alt=""><figcaption></figcaption></figure>
2. Enter the <mark style="color:blue;">**relevant information**</mark> for the fields.

   <figure><img src="/files/Fw4thcqMMUOZfOtfRcdA" alt=""><figcaption><p><em>Using information for the same example digital fabric swatch</em></p></figcaption></figure>
3. On the right side, you can enter your <mark style="color:blue;">**fabric quantity**</mark> (in yards).

   <figure><img src="/files/LmvW8JfUILYwcGgGYOEr" alt=""><figcaption><p><em>For yardage</em></p></figcaption></figure>
4. Or, if you only have a FQ, <mark style="color:blue;">**toggle the button to the right**</mark>.

   <figure><img src="/files/BEOPeucHvPdXT67swKoC" alt=""><figcaption><p><em>Push the toggle to the right to denote only having a FQ</em></p></figcaption></figure>
5. Click on the <mark style="color:blue;">**Save**</mark> button.

   <div align="left"><figure><img src="/files/NjisHHktF27ErYFODQq2" alt=""><figcaption></figcaption></figure></div>

***

## <mark style="color:blue;">04 | Tag your fabric swatches</mark>

While editing the general swatch information of your digital fabric swatch, you can also add tags (works like a label) to it. This helps filter your fabric stash when you're looking for a particular kind of fabric to use in your quilt.

You can have up to 20 different tags in your account and each fabric swatch can be tagged with up to 4 different tags.

1. Click on <mark style="color:blue;">**Show Suggested Tags**</mark> to see the default tags created in PreQuilt.

   <figure><img src="/files/9ARtYaLgQjiswe98uU8Y" alt=""><figcaption><p><em>Click on <strong>Show Suggested Tags</strong></em></p></figcaption></figure>
2. Click on the <mark style="color:blue;">**tag**</mark> that makes the most sense for the digital fabric swatch. For this example, I’ll click on **green**.

   <figure><img src="/files/GHZoms9kbxEuuiaVXxqP" alt=""><figcaption><p><em>By clicking on <strong>green</strong> this fabric will be tagged as green</em></p></figcaption></figure>
3. You can also create your own tag. To do this, <mark style="color:blue;">**type**</mark> the name of the tag and press the enter button on your keyboard. For example, I’d like to tag all my **Tula** fabric.

   <figure><img src="/files/oxPiuVnaPc4z6SXNeV6h" alt=""><figcaption><p><em>Creating a new tag called <strong>Tula</strong></em></p></figcaption></figure>
4. Don’t forget to click on the <mark style="color:blue;">**Save**</mark> button.

   <figure><img src="/files/PNxCYscU4d5Y940wwlSS" alt=""><figcaption></figcaption></figure>

***MORE INFO:*** To learn more about managing (like deleting tags), visit:

{% content-ref url="/pages/lb1OBrVlWamc7Iv6dXI7" %}
[Organize Printed Fabric Swatches](/prequilt-101/all-about-fabric/printed-fabric-swatches/organize-printed-fabric-swatches)
{% endcontent-ref %}

***

## <mark style="color:blue;">05 | Bulk edit multiple fabric swatches</mark>

Sometimes you might want to import multiple digital fabric swatches that will have some of the same general information, such as collection name, designer name, or fabric width with the ruler to be cropped out. You don’t need to repeat the same edit or crop over and over, but rather you can do a bulk edit once that will be applied to all the selected digital fabric swatches.

To edit **multiple** digital fabric swatches at the same time (bulk edit):

1. From the Fabric Dashboard, click on the <mark style="color:blue;">**toggle**</mark> button so that it's pushed toward List View.

   <figure><img src="/files/62PD5P5Fnk1hFc5TxkmF" alt=""><figcaption></figcaption></figure>
2. Click on the <mark style="color:blue;">**checkboxes**</mark> next to all the digital fabric swatches you’d like to edit at once.

   <figure><img src="/files/esG7hiyDcxOjkrHnHegw" alt="" width="521"><figcaption></figcaption></figure>
3. Then click on the <mark style="color:blue;">**Edit**</mark> button on the left side above the list of fabric swatches.

   <div align="left"><figure><img src="/files/vheUo6relZoZvHHLk0LU" alt=""><figcaption></figcaption></figure></div>
4. A pop-up window will appear. Any edits you make will apply to all the fabric swatches that were selected. This is expected and desired, since it’ll save a lot of time.

   * **NOTE:** The words **Bulk Edit x4** appear on the image of the digital fabric swatch. This is to remind you that any edits you do will be applied to all 4 of the fabrics that were selected.

   <figure><img src="/files/QaFx5UDU7LxxFLx7Y7oz" alt=""><figcaption></figcaption></figure>
5. Make the <mark style="color:blue;">**edits**</mark> you’d like. In this example, I’m going to:

   * **NOTE:** I will not enter the colorway or SKU (since they are all the same fabric design, but in different colors. To add that unique information, I’ll need to edit each individual fabric swatch separately.
   * Set the width of the digital fabric swatch to <mark style="color:blue;">**7**</mark>.
   * <mark style="color:blue;">**Crop**</mark> the image to remove the ruler.
   * On the Swatch Info tab, <mark style="color:blue;">**type**</mark> the name of the designer, collection, and manufacturer. I’ll also enter the quantity of yardage I have for each fabric (0.5 yards).

   <figure><img src="/files/wQhTPEQHcxvtyS0kG70y" alt=""><figcaption></figcaption></figure>

   <figure><img src="/files/1qLr9kR22i9ckPRWJ5WM" alt=""><figcaption></figcaption></figure>
6. Make sure you don’t forget to click on the <mark style="color:blue;">**Save**</mark> button to confirm these changes.

   <div align="left"><figure><img src="/files/Vb9Ktnb6kLvBy8ksxhag" alt=""><figcaption></figcaption></figure></div>


# Organize Printed Fabric Swatches

On the Fabric Dashboard

## <mark style="color:blue;">Organize & Manage Digital Fabric Swatches in PreQuilt</mark>

{% hint style="warning" %}
A **tag** used on digital fabric swatches are different from what we formally called a *Color Tag*, which is now called a *<mark style="color:blue;">Fabric Link</mark>*.&#x20;
{% endhint %}

{% hint style="info" %}
A *<mark style="color:blue;">**Fabric Link**</mark>* is how we buddy up, bond, or link a specific quilt component with a fabric choice (formerally called a *Color Tag*).
{% endhint %}

There are two main ways to keep your fabric organized in PreQuilt - **folders** and **tags**.\*&#x20;

**Folders** are a great way to sort digital fabric swatches into groups. There is the potential for creating hierarchies and nesting folders inside one another. However, a digital fabric swatch can only belong to one folder.

**Tags** on the other hand are like labels or keywords and can be assigned to digital fabric swatches. You can add multiple tags to a single digital fabric swatch which can allow it to be recalled or offered as an option for being used in your quilt.

***

## <mark style="color:blue;">01 | Organize Fabric Swatches into Folders</mark>

### <mark style="color:blue;">a | Put Fabric Swatches into Folders</mark>

Once a digital fabric swatch has been imported into your fabric dashboard, you can create and move it into a folder.

1. Click on the <mark style="color:blue;">**folder with the +**</mark> icon (<img src="/files/WwZiUQnHZ1du2Jik46wE" alt="" data-size="line">).

   <figure><img src="/files/SU8tzItQWbHpbD173zHu" alt=""><figcaption></figcaption></figure>
2. Enter a <mark style="color:blue;">**name**</mark> for your folder in the text box and click on the <mark style="color:blue;">**Save**</mark> button.

   <div align="left"><figure><img src="/files/XNo6dc4tSrDQZt9ylInd" alt="" width="310"><figcaption></figcaption></figure></div>
3. <mark style="color:blue;">**Click and hold**</mark> (continue pressing on the mouse button) onto the digital fabric swatch that you’d like to move. While still pressing on the digital fabric swatch, <mark style="color:blue;">**drag**</mark> it into the folder.
4. Once the swatch has been moved, you’ll notice it is no longer visible on the dashboard and the number on the folder has changed from 0 to 1.

   <div align="left"><figure><img src="/files/6VrXz13LT71t4ZDUsVMF" alt=""><figcaption></figcaption></figure> <figure><img src="/files/DhcRqHDx95qT6kRC2PXe" alt=""><figcaption></figcaption></figure></div>
5. To edit or move the digital fabric swatch, <mark style="color:blue;">**click on the folder**</mark> to open it up and see its contents.

   <figure><img src="/files/wHKB8Q3SBlMB3PZHRzDt" alt=""><figcaption></figcaption></figure>

### <mark style="color:blue;">b | Put Multiple Swatches into Folders</mark>

If you'd like to move more than one digital fabric swatch at a time into a folder, it is much faster to move them in bulk.

1. Go to the the <mark style="color:blue;">**Fabric Dashboard**</mark>.

   <div align="left"><figure><img src="/files/apjutEcVpfsuGT8uJtQ0" alt=""><figcaption></figcaption></figure></div>
2. Click on the <mark style="color:blue;">**checkmark on the tile**</mark> for each of the digital fabric swatches that you'd like to move. Once selected, the checkmark will turn pink (<img src="/files/2sglDdDCkJ4oCmIZHTFj" alt="" data-size="line">).

   <div align="left"><figure><img src="/files/MFcWG5mYapwKff1y65J3" alt=""><figcaption><p><em>All checked tiles will be moved at once</em></p></figcaption></figure></div>
3. Click on the <mark style="color:blue;">**dropdown menu**</mark> called Move to Folder and <mark style="color:blue;">**select the folder**</mark> to move the fabric swatches to. In this example, I'll select the folder called *Ruby Star*.

   <figure><img src="/files/5TOb05fsjrgbZeavaMlL" alt=""><figcaption></figcaption></figure>
4. If you want to move to a subfolder, <mark style="color:blue;">**repeat steps 2-3**</mark> but <mark style="color:blue;">**select the subfolder**</mark> instead.

   <div align="left"><figure><img src="/files/KngUcP5iKRmOIMCPd21Q" alt=""><figcaption></figcaption></figure></div>
5. The entire collection of digital fabric swatches have now been moved from the Home Folder to the Water folder (which is located inside the Ruby Star folder).

   <figure><img src="/files/CqxFkTEp1NPTBwXslVWI" alt=""><figcaption><p><em>These digital fabric swatches are now located Home Folder > Ruby Star > Water</em></p></figcaption></figure>

### <mark style="color:blue;">c | Use Folders to Find Fabric in Quilt Mode</mark>

If you have a lot of digital fabric swatches loaded in your PreQuilt account, it can be useful to use folders when searching for the fabric you're looking for.

The example below shows how you can use folders to find a digital fabric swatch in the context of editing a Fabric Link. But you can use similar steps for other use cases, like editing a Fabric Link in edit block mode or using a digital fabric swatch as a static fabric.

1. <mark style="color:blue;">**Open**</mark> the quilt you are working on.

   <div align="left"><figure><img src="/files/0MhYPszhCQL3i5FLOrIu" alt=""><figcaption></figcaption></figure></div>
2. Click on the <mark style="color:blue;">**Fabric Links**</mark> tab on the left side control panel. The tab will expand and show you the fabric links that are being used in this quilt.

   <div align="left"><figure><img src="/files/OXFxpuFySOXLWgcSfjh4" alt=""><figcaption></figcaption></figure></div>
3. Click on the <mark style="color:blue;">**Edit**</mark> button for the Fabric Link you’d like to link a digital fabric swatch to.

   <div align="left"><figure><img src="/files/qsFfJKepLMZjoSsHE6Cf" alt=""><figcaption></figcaption></figure></div>
4. An edit panel will slide out from the left side with a Solids and Prints tab for the Fabric Link you’re editing. Click on the <mark style="color:blue;">**Prints**</mark> tab.

   <div align="left"><figure><img src="/files/CBuDH85pnGDggZsm2kDt" alt=""><figcaption></figcaption></figure></div>
5. *<mark style="color:red;">**Bug found - Rest of instructions coming soon**</mark>*

***

## <mark style="color:blue;">02 | Manage Fabric Swatches using Tags</mark>

You can also label your fabric using our tagging system, which can help you organize certain fabrics into categories for easy access in PreQuilt. The benefit of tagging a fabric is that it can be informally grouped together and recalled along with other similar fabrics regardless of which folder it is saved in.

For example, imagine I’m working on a quilt and I would like to make blue and pink HST blocks. I can easily access all my blue fabrics by clicking on the blue tag in PreQuilt.&#x20;

We have some default tags - such as red, orange, blue, low volume, widebacks, etc - that can get you started. But you can also create your own. There can be a total of 20 different tags used in your account and each fabric swatch can have up to 4 different tags.

### <mark style="color:blue;">a | View Fabric Swatch Tags</mark>

1. Click on the <mark style="color:blue;">**FABRIC**</mark> tab along the top of your PreQuilt dashboard.

   <figure><img src="/files/1I4sUwnovDwVgBxla8rH" alt=""><figcaption></figcaption></figure>
2. Click on the <mark style="color:blue;">**toggle**</mark> and choose List View.

   <figure><img src="/files/rcZWB16Ed7tZcegvMzEp" alt=""><figcaption></figcaption></figure>
3. Click on the <mark style="color:blue;">**checkbox**</mark> next to Use tags to filter (<img src="/files/OiLPlvYtUlfYmGBQx052" alt="" data-size="line">).

   <figure><img src="/files/5wu1wTkLKGRNxdyOSzTj" alt=""><figcaption></figcaption></figure>
4. Click on the <mark style="color:blue;">**Manage Tags**</mark> button on the right hand side.

   <div align="left"><figure><img src="/files/1UwAvCr84gaZCp409iKU" alt=""><figcaption></figcaption></figure></div>
5. A pop-up will appear. In this pop-up window, you can create, delete and edit your digital fabric swatch tags.

   <figure><img src="/files/N6xKM4Rw13g3OT0icH2k" alt=""><figcaption><p><em>Pop-up window for Managing Tags</em></p></figcaption></figure>

### <mark style="color:blue;">b | Delete a Tag</mark>

1. Click on the <mark style="color:blue;">**Delete**</mark> button next to a fabric tag.

   <figure><img src="/files/b1WeZJmtwwJOJrtQWIpo" alt=""><figcaption></figcaption></figure>
2. An alert box will appear letting you know the quantity of fabrics that will be untagged once you delete the tag. To accept this, click <mark style="color:blue;">**Delete Tag**</mark>. To not delete the tag, click Cancel.

   <div align="left"><figure><img src="/files/3K3NbapUOQllhp9sbKY9" alt="" width="424"><figcaption></figcaption></figure></div>
3. The fabric swatch tag has been removed. To finalize, make sure to click the <mark style="color:blue;">**Save**</mark> button at the bottom of the pop-up window.

   <div align="left"><figure><img src="/files/Gx8OWwughvqqIjmNG2gl" alt=""><figcaption><p><em>Save button is at the very bottom</em></p></figcaption></figure></div>

### <mark style="color:blue;">c | Create a Tag</mark>

1. <mark style="color:blue;">**Type the name**</mark> of tag you’d like to create in the text box.

   <figure><img src="/files/8KNxNMgGsm3gmwkRfXFz" alt=""><figcaption></figcaption></figure>
2. Then click on the <mark style="color:blue;">**Create Tag**</mark> button.

   <figure><img src="/files/5eukbr7biWVz9W1JcKnP" alt=""><figcaption></figcaption></figure>
3. It’s now added to the list of digital fabric swatch tags.

   <figure><img src="/files/8wDoLQrSbDjaMm1eOye0" alt=""><figcaption></figcaption></figure>
4. Click the <mark style="color:blue;">**Save**</mark> button at the bottom of the pop-up window.

   <div align="left"><figure><img src="/files/9uoyvutfLFveKUb4Z28n" alt=""><figcaption></figcaption></figure></div>

### <mark style="color:blue;">d | Edit a Tag</mark>

1. Click on the <mark style="color:blue;">**pencil**</mark> icon next to the swatch tag you’d like to edit.

   <figure><img src="/files/0DqaHzQ1qFwM905FOjdr" alt=""><figcaption></figcaption></figure>
2. Change the text for your swatch tag and <mark style="color:blue;">**press the enter button**</mark> on your keyboard.

   <figure><img src="/files/VebmHPA66xQx2zaXE8Px" alt=""><figcaption></figcaption></figure>
3. Click the <mark style="color:blue;">**Save**</mark> button at the bottom of the pop-up window.

   <div align="left"><figure><img src="/files/uVSSqhJny8Ve5BibS39Z" alt=""><figcaption></figcaption></figure></div>

***

## <mark style="color:blue;">03 | Filter Fabric Swatches using Tags</mark>

It’s a good idea to have some kind of organization system in place for managing your digital fabric swatches, especially if you plan on uploading a lot of them. Here we'll detail how to filter tags in two situations:

* From the Fabric Dashboard
* When using digital fabric swatches in your quilts

### <mark style="color:blue;">a | Filtering from the Fabric Dashboard</mark>

If you use swatch tags to organize your fabric swatches, you can easily filter your fabric stash using swatch tags.

1. Click on the <mark style="color:blue;">**FABRIC**</mark> tab along the top of your PreQuilt dashboard.

   <figure><img src="/files/5ap7jUeEq1JmgHvyfdpO" alt=""><figcaption></figcaption></figure>
2. Click on the <mark style="color:blue;">**toggle**</mark> and choose List View.

   <figure><img src="/files/iCdbULwp0BDA5oMyhQNo" alt=""><figcaption></figcaption></figure>
3. Click on the <mark style="color:blue;">**checkbox**</mark> next to Use tags to filter (<img src="/files/YpIU2yKShiIfiZU3jr7c" alt="" data-size="line">).

   <figure><img src="/files/qB1vetwlI6JQrW0PTnKp" alt=""><figcaption></figcaption></figure>
4. Click on the <mark style="color:blue;">**toggle**</mark> and choose Deselect All.

   <div align="left"><figure><img src="/files/FUqw9zNds1a5N1giTWYa" alt=""><figcaption></figcaption></figure></div>
5. <mark style="color:blue;">**Click on the swatch tag**</mark> for the digital fabric swatches that you’d like to look at. In this example, I’ve clicked on <mark style="color:blue;">**blue**</mark> so I can see all my fabric swatches that have been tagged as *blue*.

   <figure><img src="/files/5UFtnF8X04aiiEA7e0hC" alt=""><figcaption><p><em>Only fabrics tagged 'Blue' are shown</em></p></figcaption></figure>

### <mark style="color:blue;">b | Filtering in Quilt Mode</mark>

If you have a lot of digital fabric swatches loaded in your PreQuilt account, it can be useful to use tags to filter and search for the fabric you're looking for.

The example below shows how you can use tags to filter in the context of editing a Fabric Link. But you can use similar steps for other use cases, like editing a Fabric Link in edit block mode or using a digital fabric swatch as a static fabric.

1. <mark style="color:blue;">**Open**</mark> the quilt you are working on.

   <div align="left"><figure><img src="/files/UlNhzfFaomM63LUVMz58" alt=""><figcaption></figcaption></figure></div>
2. Click on the <mark style="color:blue;">**Fabric Link**</mark> tab on the left side control panel. The tab will expand and show you the fabric links that are being used in this quilt.

   <div align="left"><figure><img src="/files/lAlWMyFX08td2bdM9eRY" alt=""><figcaption></figcaption></figure></div>
3. Click on the <mark style="color:blue;">**Edit**</mark> button for the Fabric Link you’d like to link a digital fabric swatch to.

   <div align="left"><figure><img src="/files/yexhtU3sZYQyjoE1qmyw" alt=""><figcaption></figcaption></figure></div>
4. An edit panel will slide out from the left side with a Solids and Prints tab for the Fabric Link you’re editing. Click on the <mark style="color:blue;">**Prints**</mark> tab.

   <div align="left"><figure><img src="/files/HphQgKLAqPMKQmyqM6KS" alt=""><figcaption></figcaption></figure></div>
5. At the top, you'll see all your fabric swatch tags. <mark style="color:blue;">**Click the toggle**</mark> toward the **Deselect All** side. You will now see all the tag buttons have been deselected and are white.

   <div align="left"><figure><img src="/files/YOkstlft0vC6Ch5yUetr" alt=""><figcaption></figcaption></figure></div>
6. <mark style="color:blue;">**Click on the tag button**</mark> for the type of fabric you’re looking for. In this example, I’m looking for a blue fabric. You will see that tag button highlighted and changed to the pink and you’ll see only fabrics that have been tagged “blue”.

   <div align="left"><figure><img src="/files/d4vG1Ce0ZNinkpffpdIF" alt=""><figcaption></figcaption></figure></div>
7. Click on the <mark style="color:blue;">**Select**</mark> button under the digital fabric swatch you’d like to link to your Fabric Link.

   <div align="left"><figure><img src="/files/6o1fxJZwAXAl0Rq68Gof" alt=""><figcaption></figcaption></figure></div>
8. Click on the <mark style="color:blue;">**x**</mark> (![](/files/5dgUCBrK4TBw2aiThp4h)) on the Fabric Link panel to exit.

   <div align="left"><figure><img src="/files/fIUehkHh8R8L1iAp1hBt" alt=""><figcaption></figcaption></figure></div>


# Use Printed Fabric Swatches

In Block Editor or On Quilt Design Wall

Once you’ve uploaded your digital fabric swatch(es) into PreQuilt, you can use them in a variety of ways to visualize how they’d look in your quilt. In this section, we’ll go through how to use digital fabric swatches in:

1. Fabric Links (formerly called Color Tags)
2. Quilt Blocks (Fussy Cutting)
3. Quilt Borders
4. Quilt Binding

***

## <mark style="color:blue;">01 | Use for a Fabric Link</mark>

One of the ways to use a digital fabric swatch globally in your quilt is to use it as a Fabric Link (formerly called Color Tag). Anytime a specific Fabric Link is used in that quilt, it will use the digital fabric swatch that is linked to that Fabric Link. If you change the digital fabric swatch associated to that Fabric Link, all quilt components/pieces using that Fabric Link will also be updated.

1. From the Quilt Dashboard, <mark style="color:blue;">**open**</mark> the quilt you are working on.

   <div align="left"><figure><img src="/files/8jsz0RxAIJETIbnyyKkn" alt=""><figcaption></figcaption></figure></div>
2. Click on the <mark style="color:blue;">**Fabric Link tab**</mark> on the left side control panel. The tab will expand and show you the fabric links that are being used in this quilt.

   <div><figure><img src="/files/D4LcfeRZXJNPVBJY2u0P" alt=""><figcaption><p><em>Fabric Links Tab (collapsed)</em></p></figcaption></figure> <figure><img src="/files/NupZtSx07UFEuqRUycxN" alt=""><figcaption><p><em>Fabric Links Tab (expanded)</em></p></figcaption></figure></div>
3. Click on the <mark style="color:blue;">**Edit**</mark> button for the Fabric Link you’d like to link a digital fabric swatch to.

   <div align="left"><figure><img src="/files/btsodCwIoPr3jeR8ZFDZ" alt=""><figcaption></figcaption></figure></div>
4. An edit panel will slide out from the left side with a Solids and Prints tab for the Fabric Link you’re editing. Click on the <mark style="color:blue;">**Prints tab**</mark>. This tab will show you all the digital fabric swatches you have uploaded to your PreQuilt account.

   <div align="left"><figure><img src="/files/jXZLLbFs7kbyEfY8cYUr" alt=""><figcaption></figcaption></figure></div>
5. Click on the <mark style="color:blue;">**Select**</mark> button under the digital fabric swatch you’d like to link to your Fabric Link.

   <div align="left"><figure><img src="/files/w000kImlqpMjYdAg8NAo" alt=""><figcaption></figcaption></figure></div>
6. Click on the <mark style="color:blue;">**X**</mark> (<img src="/files/RcNazlfxmcJhMcIoHpqA" alt="" data-size="line">) on the Fabric Link panel to exit.

   <div align="left"><figure><img src="/files/YNZAj3NlnNRwyF6iDkmZ" alt=""><figcaption></figcaption></figure></div>
7. All quilt components and pieces that uses Fabric Link A are now updated and using the Gingham printed fabric.

   <div><figure><img src="/files/yFtjT2mR7h6qXXpvT20Q" alt=""><figcaption><p><em>Before: Fabric Link A is a solid gray fabric</em></p></figcaption></figure> <figure><img src="/files/S7uC16T9WFs14Nff99e6" alt=""><figcaption><p><em>Before: Fabric Link A is a gray gingham fabric</em></p></figcaption></figure></div>

***

## <mark style="color:blue;">02 | Use in a Quilt Block</mark>

{% hint style="warning" %} <mark style="color:orange;">**ALERT:**</mark> Digital fabric swatch position and rotation is universal to all blocks when used in a Fabric Link. You cannot fussy cut individual blocks using the same fabric link. Changes made to the Fabric Link will affect everything that uses it.
{% endhint %}

{% hint style="info" %} <mark style="color:blue;">**TIP:**</mark> If you'd like to have different parts of a digital fabric swatch fussy cut, we'd recommend using your digital fabric swatch as a **static** fabric. Learn more [**here**](/prequilt-101/all-about-fabric/fussy-cutting).
{% endhint %}

When creating or editing a quilt block, you can manipulate your digital fabric swatch in two different ways:&#x20;

* Changing the position of your digital fabric swatch in your block piece
* Rotating the direction of your digital fabric swatch in your block piece

Please note that you can make these changes at either the Block Editor level (by editing a quilt block) or at the quilt level (by editing a Fabric Link).

* The pro of making these changes at the Block Editor level is you can really focus on the detail for a single block.
* The pro of making these changes at the Quilt Editor level is that you can see how these changes will look across the entire quilt.

### <mark style="color:blue;">a | Changing the Position of a Digital Fabric Swatch in a Quilt Block</mark>

In this example, the fabric being used has cute little bunnies that I’d like to visualize focusing on it in  a Kaleidoscope quilt. However, in my PreQuilt preview, I may not be able to see the bunny. To reposition the fabric to highlight the bunny, we’ll change the properties for the **Top** and **Left** position of the digital fabric swatch.

1. <mark style="color:blue;">**Open**</mark> the quilt you’d like to edit.

   <div align="left"><figure><img src="/files/a2wVq7p4ivuuH9qTNH7g" alt=""><figcaption></figcaption></figure></div>
2. Click <mark style="color:blue;">**BLOCKS**</mark> tab on the left side control panel.

   <div align="left"><figure><img src="/files/7O5eIOtxZc8zFUD1IFmZ" alt=""><figcaption></figcaption></figure></div>
3. Click on the <mark style="color:blue;">**Edit Block**</mark> button for the block with the fabric you’d like to fussy cut.

   <div align="left"><figure><img src="/files/XGoASAXWr96q4OAX2o4G" alt=""><figcaption></figcaption></figure></div>
4. The Block Editor panel will slide out with the block. <mark style="color:blue;">**Click on the block component**</mark> (patch or piece) that you’d like to link a digital fabric swatch to. It will be outlined in a box.

   <div align="left"><figure><img src="/files/nRm7fJn1T0nCfzRmGrSd" alt=""><figcaption></figcaption></figure></div>
5. On the left side control panel, click on the <mark style="color:blue;">**Edit**</mark> button for the Fabric Link that you’d like to change.

   <div align="left"><figure><img src="/files/l7BJXIl5ztC6YofRQlcm" alt=""><figcaption></figcaption></figure></div>
6. An edit panel will slide out from the left side with with the printed fabric swatch being used highlighted.

   <div align="left"><figure><img src="/files/6msPzWlS1MZqaaptuzAm" alt=""><figcaption></figcaption></figure></div>
7. Change the <mark style="color:blue;">**number for Move Top**</mark> and <mark style="color:blue;">**Move Left**</mark> until the bunny is visible in the quilt block piece.

   * **TIP:** If you hold the shift button and then press the up or down arrows on your keyboard, the numbers will increase or decrease in groups of ten. This will make the process a little faster.

   <div align="left"><figure><img src="/files/H7DNf9lYvLqR7PMyQDcv" alt=""><figcaption></figcaption></figure></div>

   <div align="left"><figure><img src="/files/Pqp6VB9mkPuUGEdhTJQ6" alt=""><figcaption><p><em>Before position changed</em></p></figcaption></figure> <figure><img src="/files/j7XEJ31V0wNhMEM5QpAf" alt=""><figcaption><p><em>After position changed to highlight bunny</em></p></figcaption></figure></div>
8. Once you're happy with how your fabric has been repositioned, click on the <mark style="color:blue;">**X**</mark> (<img src="/files/8xSHKFfWjvbtbQoIYGdY" alt="" data-size="line">) on the Fabric Link panel to exit back to the Block Editor.

   <div align="left"><figure><img src="/files/9RYKFVExvSt6N25NoJ7M" alt=""><figcaption></figcaption></figure></div>
9. Click on the <mark style="color:blue;">**Save to Quilt**</mark> button in the top right corner of the Block Editor to go back to the full quilt.

   <div align="left"><figure><img src="/files/3yWMvZRNBC10MvXCFOPo" alt=""><figcaption></figcaption></figure></div>
10. Here's a before and after of our quilt:

    <div align="left"><figure><img src="/files/Cwh62Ez7nyf3BFI0bDeZ" alt=""><figcaption><p><em>Before fabric position changed</em></p></figcaption></figure> <figure><img src="/files/Mn5U0YriHQ4UvsXXoneD" alt=""><figcaption><p><em>After fabric position changed</em></p></figcaption></figure></div>

### <mark style="color:blue;">b | Changing the Rotation of a Digital Fabric Swatch in a Quilt Block</mark>

Similar to repositioning a digital fabric swatch in a quilt block, we can also rotate a digital fabric swatch to change its appearance in a quilt block.&#x20;

In this Help Guide, we’ll be editing a digital fabric swatches position at the Quilt Editor (digital design wall) level.

1. On the left side control panel, click on the <mark style="color:blue;">**Fabric Links**</mark> tab.

   <div align="left"><figure><img src="/files/PfMuAT54gF3SNJucvy3I" alt=""><figcaption></figcaption></figure></div>
2. It will expand down and show you the Fabric Links used in this quilt. Click on the <mark style="color:blue;">**Edit**</mark> button next to the Fabric Link you’d like to change.

   <div align="left"><figure><img src="/files/SYhh0MhXEHjOWUdrhRRv" alt=""><figcaption></figcaption></figure></div>
3. An edit panel will slide out from the left side with with the printed fabric swatch being used highlighted.

   <div align="left"><figure><img src="/files/nPCaaybVNA8y55q5L8eQ" alt=""><figcaption></figcaption></figure></div>
4. Change the <mark style="color:blue;">**number for Rotate**</mark> until the fabric is rotated as desired.

   <div align="left"><figure><img src="/files/JS7GwSQ3NDEOUe2LUOi2" alt=""><figcaption></figcaption></figure></div>
5. Click on the <mark style="color:blue;">**x**</mark> button (![](/files/4Xr0p7duri5e5qgEax4f))to exit the Fabric Link edit panel.

   <div align="left"><figure><img src="/files/fUjdurtQB3LvZGOA3SPx" alt=""><figcaption></figcaption></figure></div>
6. Here's a before and after of our quilt:

   <div align="left"><figure><img src="/files/A0vAYIwLfoRkgbDrSONl" alt=""><figcaption><p><em>Closeup of before fabric rotation</em></p></figcaption></figure> <figure><img src="/files/dyUtg9R9BIA3o5aYaEMW" alt=""><figcaption><p><em>Closeup of after fabric rotation</em></p></figcaption></figure></div>

***

## <mark style="color:blue;">03 | Use in Quilt Borders</mark>

{% hint style="info" %}
**NOTE:** Rotating of the fabric used in the border will only affect the border itself. It will not change the digital fabric swatch settings being used in the quilt blocks.
{% endhint %}

As the default, the borders are built with the digital fabric swatch all pointing up. But a really great new feature we have is being able to rotate the direction (by 90 degrees) of a digital fabric swatch when it's being used in a quilt border. This is especially useful for when you might have striped fabric.

1. On the left hand control panel, click on the <mark style="color:blue;">**Binding/Border**</mark> tab.

   <div align="left"><figure><img src="/files/4TuL9y5LKsEyCAFZK5KU" alt=""><figcaption></figcaption></figure></div>
2. Click on the <mark style="color:blue;">**Add Border**</mark> button.

   <div align="left"><figure><img src="/files/PCk2KcE0GE1B6KoEBNV5" alt=""><figcaption></figcaption></figure></div>
3. The default border is 2.0” wide and uses Fabric A. In this example, I’m going to edit the border to be <mark style="color:blue;">**6.0”**</mark> wide and use the dropdown to <mark style="color:blue;">**select Fabric Link C**</mark>. You will see the quilt update to visualize the new border.

   * <mark style="color:blue;">**TIP:**</mark> If the fabric you want to use in the border has not yet been linked to a Fabric Link, create a new Fabric Link for it under the Fabric Link tab.

   <div align="left"><figure><img src="/files/I6OFqAJ7SKfIVM9fPNCH" alt=""><figcaption></figcaption></figure></div>

   <figure><img src="/files/Tvn7iC7f5gZTm8izRbjE" alt=""><figcaption><p><em>By default the direction for all border pieces is pointing up</em></p></figcaption></figure>
4. If you'd like to rotate the border fabric, hover over a border piece and you will see a **Rotate** button (<img src="/files/EJbDXfBYPYlZTSQG2U1z" alt="" data-size="line">) appear above the border piece. Click on the <mark style="color:blue;">**Rotate**</mark> button until the fabric is pointed in the desired direction.

   <figure><img src="/files/aTxiXnUtHAlTrZEoyIAm" alt=""><figcaption><p><em>Only right border piece has been rotated</em></p></figcaption></figure>
5. <mark style="color:blue;">**Repeat**</mark> this process for the other sides of the border that you'd like to rotate.

   <figure><img src="/files/Afym8R6tJv7rk24t6dK3" alt=""><figcaption><p><em>Rotated border pieces</em></p></figcaption></figure>

***

## <mark style="color:blue;">04 | Use in Quilt Binding</mark>

A really great new feature is that the direction of the fabric used as the quilt binding automatically turns 90 degrees around each corner of the binding (just like when you will sew your binding fabric to your quilt). This is great for when you're using striped binding!

1. On the left hand control panel, click on the <mark style="color:blue;">**Binding/Border**</mark> tab.

   <div align="left"><figure><img src="/files/SpEEr6WNIvD6Tm6wGzDH" alt=""><figcaption></figcaption></figure></div>
2. Set your <mark style="color:blue;">**desired width**</mark> of your quilt binding and <mark style="color:blue;">**select which Fabric Link**</mark> you want to use. In this example, I’m going to change the binding width to 0.5” and use Fabric Link A.

   <div align="left"><figure><img src="/files/mWaoN5lMg75R5SawiEUZ" alt=""><figcaption></figcaption></figure></div>
3. The binding automatically rotates 90 degrees around the perimeter of the quilt.

   <figure><img src="/files/Pk0r5rmD2gZyIL0tEuBE" alt=""><figcaption><p><em>Striped binding is automatically turned 90 degrees around the corners</em></p></figcaption></figure>


# Fabric Links

Demo, Basic & Market Plan

## <mark style="color:blue;">A Little About Fabric Links</mark>

PreQuilt developed **Fabric Links** (formerly *Color Tags*) as a way to connect a fabric swatch to a quilt block piece or part of a quilt. Fabric links can be connected to both solid color swatches and printed fabric swatches.&#x20;

A **Fabric Link** is used to connect a particular fabric swatch to a particular quilt block piece. So when the fabric swatch used by a Fabric Link is changed (from a solid to another solid or from a solid to a printed fabric swatch or from a printed fabric swatch to another printed fabric swatch), everything that is using that Fabric Link will also change and be updated automatically.

In the example below, the fabric swatch used by **Fabric Link A** was changed from Kona black to Kona bright pink. The change was done once and then automatically pushed to all pieces that were connected and using Fabric Link A.

<div><figure><img src="/files/O7Alwk0608pc012uncPm" alt=""><figcaption><p><em>Fabric Link A is currently black</em></p></figcaption></figure> <figure><img src="/files/lVbBR62okiGPeXJYgIyG" alt=""><figcaption><p><em>Fabric Link A has been changed to pink</em></p></figcaption></figure></div>

***

## <mark style="color:blue;">Help Guide Links // Fabric Links</mark>

{% content-ref url="/pages/HkXht9zG4RjO7Kgf846Q" %}
[Manage Fabric Links](/prequilt-101/all-about-fabric/fabric-links/manage-fabric-links)
{% endcontent-ref %}

{% content-ref url="/pages/HLTxAQ0asx6GhuuUHUVu" %}
[Use Fabric Links](/prequilt-101/all-about-fabric/fabric-links/use-fabric-links)
{% endcontent-ref %}


# Manage Fabric Links

In Quilt & Block Editor

{% hint style="info" %} <mark style="color:blue;">**FYI:**</mark> When we started PreQuilt, we only had the capability to use solid color swatches and so we named this feature '**Color Tags**'. As the application grew, that term became quite limiting, and so in 2023 we renamed the feature **Fabric Link**.
{% endhint %}

## <mark style="color:blue;">A Note on Fabric Links</mark>

Each quilt has three default **Fabric Links** (A, B, and C) that you can edit to your preference. Fabric links can be connected to either solid fabric swatches or printed fabric swatches.&#x20;

In this section, you will learn how to:

1. Create new fabric links
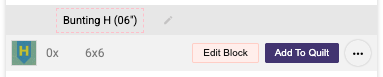
2. Change the fabric connected to a fabric link
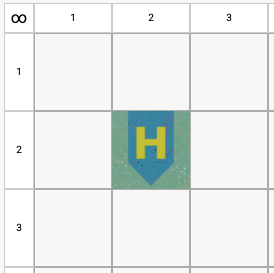
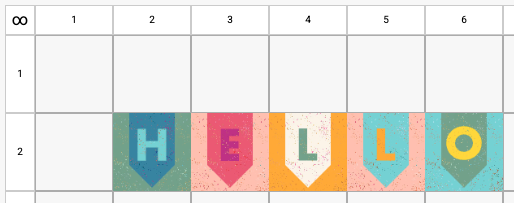
3. Change a fabric link's name
4. Delete a fabric link

&#x20;&#x20;

***

## <mark style="color:blue;">01 | Create a New Fabric Link</mark>

1. Click on the <mark style="color:blue;">**FABRIC LINKS**</mark> tab on the [*<mark style="color:blue;">left side control panel</mark>*](https://glossary.prequilt.com/pq-glossary/cs#left-side-control-panel).

   <div align="left"><figure><img src="/files/mnlt6p9mpB6n1QWwML1p" alt=""><figcaption></figcaption></figure></div>
2. Click on the <mark style="color:blue;">**Create Fabric Link**</mark> button.

   <div align="left"><figure><img src="/files/fqcoes69C2afiO0mwooU" alt=""><figcaption></figcaption></figure></div>
3. A fourth Fabric Link has been added, **Fabric Link D**, with a default color of *Kona Baby Pink*.

   <div align="left"><figure><img src="/files/rpMJYmfLYCUVY55RBoW9" alt=""><figcaption></figcaption></figure></div>

&#x20;&#x20;

***

## <mark style="color:blue;">02 | Changing a Fabric Link's Fabric Choice</mark>

Since each new Fabric Link uses the default color, *Kona Baby Pink*, you will most likely want to change it.&#x20;

Fabric links can be connected to both solid fabric swatches and printed fabric swatches.&#x20;

### <mark style="color:blue;">a | To a Solid Fabric Swatch</mark>

1. Click on the <mark style="color:blue;">**Edit**</mark> button (<img src="/files/RLuOAWoND9sRBd7xQ2J2" alt="" data-size="line">) for Fabric Link D.

   <div align="left"><figure><img src="/files/ZLgmX9YHK608ZKcR9hkx" alt=""><figcaption></figcaption></figure></div>
2. The Fabric Link panel (also called [*Fabric Library Panel*](https://glossary.prequilt.com/pq-glossary/fs#fabric-library-panel)) will slide out and by default is on the Solids tab. Using the dropdown menu, <mark style="color:blue;">**click on your preferred solid fabric manufacturer**</mark>.&#x20;

   * In this example, I'll select my favorite, <mark style="color:blue;">**Paintbrush Studio**</mark>.

   <div align="left"><figure><img src="/files/wugyK0qpsKqo23le1Xj6" alt=""><figcaption></figcaption></figure></div>
3. Click on the <mark style="color:blue;">**swatch**</mark> for Fabric Link D's new solid fabric.&#x20;

   * In this example, I'll select <mark style="color:blue;">**Blush**</mark>.

   <div align="left"><figure><img src="/files/R64FqYqMQXq24EZ8iA4I" alt=""><figcaption></figcaption></figure></div>
4. After clicking on the swatch, the panel will close and you will now see the new fabric connected to Fabric Link D.

   <div align="left"><figure><img src="/files/ixPikzF7jFgea15TubK8" alt=""><figcaption></figcaption></figure></div>

&#x20; &#x20;

### <mark style="color:blue;">b | To a Printed Fabric Swatch</mark>

{% hint style="info" %} <mark style="color:blue;">**TIP:**</mark> For more information on printed fabric swatches, we have a complete Help Guide!&#x20;
{% endhint %}

{% content-ref url="/pages/2UmINs0YznKKsQ90jGEJ" %}
[Printed Fabric Swatches](/prequilt-101/all-about-fabric/printed-fabric-swatches)
{% endcontent-ref %}

1. Click on the <mark style="color:blue;">**Edit**</mark> button (<img src="/files/RLuOAWoND9sRBd7xQ2J2" alt="" data-size="line">) for Fabric Link D.

   <div align="left"><figure><img src="/files/ZLgmX9YHK608ZKcR9hkx" alt=""><figcaption></figcaption></figure></div>
2. The Fabric Link panel (also called [*Fabric Library Panel*](https://glossary.prequilt.com/pq-glossary/fs#fabric-library-panel)) will slide out and by default is on the Solids tab. Click on the <mark style="color:blue;">**PRINTS**</mark> tab.

   <div align="left"><figure><img src="/files/bXYpdbfonhNODGy8SdfC" alt=""><figcaption></figcaption></figure></div>
3. Click on the <mark style="color:blue;">**Select**</mark> button for the printed fabric swatch that you'd like to link to Fabric Link D.

   <div align="left"><figure><img src="/files/FPUj9Fr6CS2UdE4CAJ9u" alt=""><figcaption></figcaption></figure></div>
4. Once selected, a control panel for the printed fabric swatch will be highlighted.

   <div align="left"><figure><img src="/files/OKKAiUkSyuARK4yqEG5Z" alt=""><figcaption></figcaption></figure></div>
5. To close the panel, click on the <mark style="color:blue;">**x**</mark> (![](/files/cbE4BUEku4VC7eF0WYt2)) at the top.

   <div align="left"><figure><img src="/files/aHrGJ8LaItcFGgkJXwNL" alt=""><figcaption></figcaption></figure></div>
6. You will now see the new fabric connected to Fabric Link D.

   <div align="left"><figure><img src="/files/qXdmQVC31ySGcwwbQq8E" alt=""><figcaption></figcaption></figure></div>

&#x20;&#x20;

***

## <mark style="color:blue;">03 | Change a Fabric Link's Name</mark>

The default naming convention of fabric links in PreQuilt is A, B, C, etc. But you can change the names of the fabric links at any time.&#x20;

* **NOTE**: We especially encourage designers to ensure that the fabric link naming convention matches the naming convention in their written quilt pattern. This will ensure that when someone goes to make that quilt, fabrics are not accidentally mixed up.
* **TIP**: If using a numbered naming convention (and you have 10 or more fabric links), it's suggested to add a 0 before your numbers 1-9, so that they are ordered from 01-10+.

To change a Fabric Link's name:

1. Click on the <mark style="color:blue;">**FABRIC LINKS tab**</mark> on the left side control panel.

   <div align="left"><figure><img src="/files/mkGmI1mIYcDFQtPOnGLZ" alt=""><figcaption></figcaption></figure></div>
2. Click on the <mark style="color:blue;">**Edit button**</mark> for the fabric link you'd like to rename.

   <div align="left"><figure><img src="/files/hnc09LqVzoFFMgDH7A5V" alt=""><figcaption></figcaption></figure></div>
3. The Fabric Link panel will slide out. At the top of the Fabric Link panel, click on the <mark style="color:blue;">**pencil**</mark> next the current name of the fabric link.

   <div align="left"><figure><img src="/files/JzpOoPYIxOJ2aUetAsoz" alt=""><figcaption></figcaption></figure></div>
4. The text inside the name box will be highlighted. <mark style="color:blue;">**Type in**</mark> the fabric link's new name.

   <div align="left"><figure><img src="/files/SXAtGQmRVi2EomJZnF4t" alt=""><figcaption></figcaption></figure> <figure><img src="/files/XlayKGhzFnj39eRZ9V93" alt=""><figcaption></figcaption></figure></div>
5. Click on the **x button** (<img src="/files/V1td1E96uiSN8qhlxDn4" alt="" data-size="line">) in the top right corner of the Fabric Link panel to close it.
6. You can now see that the name of the first fabric link has been changed from "A" to "01".

   <div><figure><img src="/files/RCRzFkm1FzabS5Ns0iYK" alt=""><figcaption><p>Before - Default name "A"</p></figcaption></figure> <figure><img src="/files/aP6IhCAzbTRoKHjbmkkv" alt=""><figcaption><p>After - Changed to name "01"</p></figcaption></figure></div>

&#x20;&#x20;

***

## <mark style="color:blue;">04 | Deleting a Fabric Link</mark>

{% hint style="danger" %} <mark style="color:red;">**ALERT:**</mark> Keep in mind that when you delete a Fabric Link you will disconnect block pieces that are using that Fabric Link.&#x20;

Any block piece that is disconnected will automatically use the default static fabric of *Kona Duckling*. This color is often a quick way to identify static fabrics being used unintentionally.
{% endhint %}

{% content-ref url="/pages/FCxOfibIgn49CZ50CsJj" %}
[Fix a Static Fabric](/prequilt-101/all-about-fabric/static-fabrics/fix-a-static-fabric)
{% endcontent-ref %}

1. From the Fabric Links tab, click on the <mark style="color:blue;">**three dots**</mark> button (<img src="/files/mpdIy8wwdaRov9zKzbHS" alt="" data-size="line">) next to the Fabric Link that you want to delete.

   <div align="left"><figure><img src="/files/kd1wVdn577ZIMPnehLYW" alt=""><figcaption></figcaption></figure></div>
2. From the dropdown, click on <mark style="color:blue;">**delete**</mark>.

   <div align="left"><figure><img src="/files/8CmYWfxhcDZgYNpfLzA1" alt=""><figcaption></figcaption></figure></div>
3. The Fabric Link D is now deleted.

   <div align="left"><figure><img src="/files/eFcSjjn9q97FapCV6I08" alt=""><figcaption></figcaption></figure></div>

&#x20;&#x20;


# Use Fabric Links

In Quilt & Block Editor

Once you've created the Fabric Links you'd like to use in your quilt, we can start using them in your quilt blocks and other quilt components. This Help Guide will walk you through how to use Fabric Links in:

1. Quilt blocks
2. Quilt borders
3. Quilt binding

***

## <mark style="color:blue;">01 | Use in Quilt Blocks</mark>

The essential thing to learn here is that Fabric Links can be connected (linked) to individual block pieces in your quilt blocks. This is done in the Block Editor and you can either edit an existing block or create a custom block.

In this example, I'll show you how to use Fabric Links to edit an existing block.

1. On the left side control panel, click on the <mark style="color:blue;">**BLOCKS**</mark> tab.

   <div align="left"><figure><img src="/files/Ldm2OMGFjsbyTJTfeipH" alt=""><figcaption></figcaption></figure></div>
2. Click on the <mark style="color:blue;">**Edit Block**</mark> button for the quilt block you'd like to change.

   <div align="left"><figure><img src="/files/heOjF47qjqyXgsuCJe4Q" alt=""><figcaption></figcaption></figure></div>
3. The **Block Editor** panel will slide out.

   <div align="left"><figure><img src="/files/28fsmurc8vLD4HM1Z8up" alt=""><figcaption></figcaption></figure></div>
4. Click on the <mark style="color:blue;">**block piece**</mark> that you'd like to change the Fabric Link on. When selected, there will be a light box outlining the selected block piece. The current connected Fabric Link (A) is highlighted.

   * In this example, I'd like to change the Fabric Link for all the corner pieces from gray (Fabric Link A) to pink (Fabric Link D).

   <figure><img src="/files/YioQmSU7nO1d8rFNLq7K" alt=""><figcaption></figcaption></figure>
5. On the FABRICS tab, click on the <mark style="color:blue;">**Link**</mark> button (<img src="/files/5zN6kSDGlsPBAODFa2W8" alt="" data-size="line">) next to Fabric Link D.

   * Once you click on the Link button, the corner piece will be reconnected to Fabric Link D and is pink.

   <figure><img src="/files/VO8xkhZQef4L50accoKk" alt=""><figcaption></figcaption></figure>
6. Repeat Steps 4-5 for the remaining corners.

   <div align="left"><figure><img src="/files/VDalKaRSXoXDSOzliSNl" alt=""><figcaption></figcaption></figure></div>
7. Click on the <mark style="color:blue;">**Save**</mark> button (<img src="/files/ZPanSooPSBnufFKAMdXV" alt="" data-size="line">) in the top right corner and select <mark style="color:blue;">**Save to Quilt**</mark>.

   <div align="left"><figure><img src="/files/NG3N9l6v97wMWSpKaWpP" alt=""><figcaption></figcaption></figure></div>

***

## <mark style="color:blue;">02 | Use in Quilt Borders</mark>

If you want to use the Quilt Border option from the left side control panel, you must use a Fabric Link. You can have up to 3 quick add borders.

1. Click on the <mark style="color:blue;">**BINDING/BORDER**</mark> tab from the left side control panel.

   <div align="left"><figure><img src="/files/QsipuvHRaggKAERJTWtR" alt=""><figcaption></figcaption></figure></div>
2. Click on the <mark style="color:blue;">**Add Border**</mark> button.

   <div align="left"><figure><img src="/files/SPR054BnIHJbSawnnjRh" alt=""><figcaption></figcaption></figure></div>
3. The default border width is 2" and the default fabric is Fabric Link A. <mark style="color:blue;">**Change**</mark> the <mark style="color:blue;">**border width**</mark> and <mark style="color:blue;">**fabric**</mark> as desired.

   * In this example, I selected a 3" border and Fabric Link D.

   <div align="left"><figure><img src="/files/EcdmmAYdxiYwBNXfNarO" alt=""><figcaption></figcaption></figure></div>

***

## <mark style="color:blue;">03 | Use in Quilt Binding</mark>

If you want to use the Quilt Binding option from the left side control panel, you must use a Fabric Link.

1. Click on the <mark style="color:blue;">**BINDING/BORDER**</mark> tab from the left side control panel.

   <div align="left"><figure><img src="/files/QsipuvHRaggKAERJTWtR" alt=""><figcaption></figcaption></figure></div>
2. The default binding width is 0" and the default fabric is Fabric Link A. <mark style="color:blue;">**Change**</mark> the <mark style="color:blue;">**binding width**</mark> and <mark style="color:blue;">**fabric**</mark> as desired.

   * In this example, I selected a 0.5" border and Fabric Link C.

   <div align="left"><figure><img src="/files/mqWOerPHD6SgHTVq5mbL" alt=""><figcaption></figcaption></figure></div>


# Static Fabrics

Demo, Basic & Market Plan

## <mark style="color:blue;">A Little About Static Fabrics</mark>

A **Static Fabric** in PreQuilt is a fabric that is **not** used in a Fabric Link. A Static Fabric is used in a particular block piece and remains fixed. The block piece that uses this fabric will not dynamically be updated or changed when features like the Color Randomizer is used.&#x20;

The benefit of using a Static Fabric is that you do not need to create Fabric Links for fabrics you know you will not want to change. For example:

* In a Panel Quilt: Where the panel is static and won't be effected by any dynamic changes
* In Fussy Cut Blocks: Where you want to highlight a specific part of a printed fabric swatch for a particular block, but not everywhere else the fabric is used

If you're ever finding that a the fabric used in a quilt is not changing when you're expecting it to (like when using the color randomizer or when changing a Fabric Link), it probably is because that block piece is using a static fabric. The simple fix is to edit the quilt block and relink the block piece to the desired Fabric Link.

Any block piece that is disconnected from a Fabric Link will automatically use the default static fabric of *Kona Duckling*. This color is often a quick way to identify static fabrics being used unintentionally.

<figure><img src="/files/8n2Hpj9hkP8GdLafWBoL" alt=""><figcaption><p><em>Block pieces that used the deleted Fabric Link D defaulted to a static fabric (Kona Duckling)</em></p></figcaption></figure>

***

## <mark style="color:blue;">Help Guide Links // Static Fabrics</mark>

{% content-ref url="/pages/xRggT4oFWl5Pqvre2N0F" %}
[Use a Static Fabric](/prequilt-101/all-about-fabric/static-fabrics/use-a-static-fabric)
{% endcontent-ref %}

{% content-ref url="/pages/FCxOfibIgn49CZ50CsJj" %}
[Fix a Static Fabric](/prequilt-101/all-about-fabric/static-fabrics/fix-a-static-fabric)
{% endcontent-ref %}


# Use a Static Fabric

Block Editor

## <mark style="color:blue;">A Note on Static Fabrics</mark>

It should be noted that it is not ideal to overuse static fabrics in your quilts and quilt blocks. We have created Fabric Links so that you can easily reuse the same fabric throughout a quilt in either your quilt blocks, border or binding. And these Fabric Links can be easily and rapidly updated or changed and that change will be pushed automatically to all pieces of your quilt that uses that Fabric Link.

However, if you use static fabrics, any changes you would like to make will need to be manually changed to each indiviudal piece that is static. There is no way to automatically bulk change a static fabric.

***

## <mark style="color:blue;">01 | Use in a Quilt Block</mark>

The only place you can use a static fabric is in a quilt block. In this Help Guide, we will edit an existing quilt block to use a static fabric, which can be either a solid static fabric or a static printed fabric.

### <mark style="color:blue;">a | Static Solid Fabric Swatch</mark>

In this example, we will edit an existing quilt block to use a **solid** static fabric.

1. On the left side control panel, click on the <mark style="color:blue;">**BLOCKS**</mark> tab.

   <div align="left"><figure><img src="/files/Ldm2OMGFjsbyTJTfeipH" alt=""><figcaption></figcaption></figure></div>
2. Click on the <mark style="color:blue;">**Edit Block**</mark> button for the quilt block you'd like to change.

   <div align="left"><figure><img src="/files/heOjF47qjqyXgsuCJe4Q" alt=""><figcaption></figcaption></figure></div>
3. The **Block Editor** panel will slide out.

   <div align="left"><figure><img src="/files/28fsmurc8vLD4HM1Z8up" alt=""><figcaption></figcaption></figure></div>
4. Click on the <mark style="color:blue;">**block piece**</mark> that you'd like to change to a Static Fabric. When selected, there will be a light box outlining the selected block piece. The current connected Fabric Link (A) is highlighted.

   <figure><img src="/files/YioQmSU7nO1d8rFNLq7K" alt=""><figcaption></figcaption></figure>
5. Click on the <mark style="color:blue;">**Static Solids**</mark> tab.

   <div align="left"><figure><img src="/files/tiU4IwpP7DUIxohIcKfo" alt=""><figcaption></figcaption></figure></div>
6. Click on the <mark style="color:blue;">**solid fabric swatch**</mark> you'd like to use as a solid static fabric for this block.

   * In this example, I've selected *Kona Coral*.

   <figure><img src="/files/tyLCQ80GPKR8pPU1HezX" alt=""><figcaption></figcaption></figure>
7. If you click on the Fabric Links tab, you will now see that the block piece is using *Kona Coral* and that color is not associated to any Fabric Link. Click anywhere outside the fabric panel or block area to deselect and exit.&#x20;

   <figure><img src="/files/8O4ztE5knJ01NIwxVQ9k" alt=""><figcaption></figcaption></figure>
8. Click on the <mark style="color:blue;">**Save**</mark> button (<img src="/files/ZPanSooPSBnufFKAMdXV" alt="" data-size="line">) in the top right corner and select <mark style="color:blue;">**Save to Quilt**</mark>.

   <div align="left"><figure><img src="/files/7PsdmmDQefUjVF4QobS7" alt=""><figcaption></figcaption></figure></div>

### <mark style="color:blue;">b | Static Printed Fabric Swatches</mark>

In this example, we will edit an existing quilt block to use a **printed** static fabric.

1. On the left side control panel, click on the <mark style="color:blue;">**BLOCKS**</mark> tab.

   <div align="left"><figure><img src="/files/Ldm2OMGFjsbyTJTfeipH" alt=""><figcaption></figcaption></figure></div>
2. Click on the <mark style="color:blue;">**Edit Block**</mark> button for the quilt block you'd like to change.

   <div align="left"><figure><img src="/files/heOjF47qjqyXgsuCJe4Q" alt=""><figcaption></figcaption></figure></div>
3. The **Block Editor** panel will slide out.

   <div align="left"><figure><img src="/files/28fsmurc8vLD4HM1Z8up" alt=""><figcaption></figcaption></figure></div>
4. Click on the <mark style="color:blue;">**block piece**</mark> that you'd like to change to a Static Fabric. When selected, there will be a light box outlining the selected block piece. The current connected Fabric Link (A) is highlighted.

   <figure><img src="/files/YioQmSU7nO1d8rFNLq7K" alt=""><figcaption></figcaption></figure>
5. Click on the <mark style="color:blue;">**Static Prints**</mark> tab.

   <div align="left"><figure><img src="/files/IxfmaoIPQwDkOMHBYziZ" alt=""><figcaption></figcaption></figure></div>
6. Click on the <mark style="color:blue;">**printed fabric swatch**</mark> you'd like to use as a solid static fabric for this block.

   * In this example, I've selected *Gingham Checks in Taupe*.

   <figure><img src="/files/2w01pYrX04x1vdg2vUsi" alt=""><figcaption></figcaption></figure>
7. If you click on the Fabric Links tab, you will now see that the block piece is using *Gingham Checks in Taupe* and that printed fabric swatch is not associated to any Fabric Link. Click anywhere outside the fabric panel or block area to deselect and exit.&#x20;

   <figure><img src="/files/J6abKcAvznzATMMwVhM9" alt=""><figcaption></figcaption></figure>
8. Click on the <mark style="color:blue;">**Save**</mark> button (<img src="/files/ZPanSooPSBnufFKAMdXV" alt="" data-size="line">) in the top right corner and select <mark style="color:blue;">**Save to Quilt**</mark>.

   <div align="left"><figure><img src="/files/7PsdmmDQefUjVF4QobS7" alt=""><figcaption></figcaption></figure></div>


# Fix a Static Fabric

Block Editor

## <mark style="color:blue;">A Note on a Broken Fabric Tag (Defaults to a Static Fabric)</mark>

Most of the time you will only notice that you're unintentionally using a Static Fabric when you change a Fabric Link or use the Color Randomizer and some of your block pieces stay the same color and do not automatically update.

This usually happens because you have unintentionally disconnected a block piece from its Fabric Link or never connected it to a Fabric Link to begin with.

Any block piece that is not using or is disconnected from a Fabric Link will automatically use the default static fabric of *Kona Duckling*. This color is often a quick way to identify static fabrics being used unintentionally.

In the below example, it's only when we change the solid fabric swatches connected to the quilt's Fabric Links that we notice that one block piece is not connected to Fabric Link A. On the right side, we can see that one corner block piece is static and so is not automatically being updated to the new Fabric Link A solid fabric.

<div><figure><img src="/files/FJuqs39wxnD0b0uWE3Gb" alt=""><figcaption><p><em>Original Fabric Links</em></p></figcaption></figure> <figure><img src="/files/aMoTea1RAyxGRZJVxd5t" alt=""><figcaption><p><em>New Fabric Links</em></p></figcaption></figure></div>

<div><figure><img src="/files/DuEhykIpgEY2xYTbv7bC" alt=""><figcaption><p><em>Unintentional use of a static fabric on corner block piece</em></p></figcaption></figure> <figure><img src="/files/33YaJQF98wmj5fQNGO16" alt=""><figcaption><p><em>Corner block piece did not update to new Fabric Link A</em></p></figcaption></figure></div>

***

## <mark style="color:blue;">01 | Fix a Fabric Link (from a Static Fabric)</mark>

Continuing with the example from above, I'll walk you through how you can fix the disconnected quilt block piece and relink it to its Fabric Link. This will change the connected fabric from a Static Fabric to a Fabric Link.

1. On the left side control panel, click on the <mark style="color:blue;">**BLOCKS**</mark> tab.

   <div align="left"><figure><img src="/files/Duxewb0Pd6I63l2vmJGX" alt=""><figcaption></figcaption></figure></div>
2. Click on the <mark style="color:blue;">**Edit Block**</mark> button for the quilt block you'd like to change.

   <div align="left"><figure><img src="/files/7m5RHO2RuExisNdFFsUT" alt=""><figcaption></figcaption></figure></div>
3. The **Block Editor** panel will slide out.

   <figure><img src="/files/TBTqXx5CVqHWgSv63njr" alt=""><figcaption></figcaption></figure>
4. Click on the <mark style="color:blue;">**block piece**</mark> that you'd like to change and relink to a Fabric Link. When selected, there will be a light box outlining the selected block piece.&#x20;

   * **NOTE:** You will also notice on the fabric panel that the tab Static Solids is being used, which is another indication that this piece is not linked to a Fabric Link.

   <figure><img src="/files/6nyq5oKghaMnGwKfsuPo" alt=""><figcaption></figcaption></figure>
5. Click on the <mark style="color:blue;">**Fabric Links**</mark> tab.

   <div align="left"><figure><img src="/files/kmT8KzslXNQ1LvNdJvR0" alt=""><figcaption></figcaption></figure></div>
6. Click on the <mark style="color:blue;">**Link**</mark> button (<img src="/files/UiGkeMPMdMdWFB3IQj5m" alt="" data-size="line">) next to Fabric Link A.

   <div align="left"><figure><img src="/files/DiDRT3Bbo5ZnuB1Wgee9" alt=""><figcaption></figcaption></figure></div>
7. Once relinked, you will notice that the corner block piece automatically updates to the solid fabric swatch *Kona Capri,* which confirms that it is now connected to Fabric Link A.

   <figure><img src="/files/pPSFkuWtu1RZaBsZk6Jm" alt=""><figcaption></figcaption></figure>
8. Click on the <mark style="color:blue;">**Save**</mark> button (<img src="/files/ZPanSooPSBnufFKAMdXV" alt="" data-size="line">) in the top right corner and select <mark style="color:blue;">**Save to Quilt**</mark>.

   <div align="left"><figure><img src="/files/Tl39wxlY48sJvTlJgeuH" alt=""><figcaption></figcaption></figure></div>
9. Once fixed, you will now see the updated quilt.

   <div><figure><img src="/files/a3tzSWy6Rm0iIksI9T0c" alt=""><figcaption><p><em>Static fabric used on corner block piece</em></p></figcaption></figure> <figure><img src="/files/1GsDTnTyxcjAZouxVMhn" alt=""><figcaption><p><em>Relinked Fabric Link on corner block piece</em></p></figcaption></figure></div>


# Fussy Cutting

<figure><img src="/files/jDxJxP27MHyUiZQFWByH" alt=""><figcaption><p><em>Pattern Matched Precision Fussy Cutting // Created in PreQuilt</em></p></figcaption></figure>

One of the best by-products of our newest Fabric features (launched October 2023) is that you can now visualize precision and seamless pattern matched fussy cut blocks in PreQuilt.

Stick with us here and you'll learn all about how to use PreQuilt to preview and plan your precision fussy cutting - and where you can learn how to do it!

***

## <mark style="color:blue;">What is Fussy Cutting?</mark>

**Fussy Cutting** is a term that is used to describe the targeted selection and cutting from fabric of a particular image. And in quilting, these selectively cut out pieces of fabric are then either pieced together by hand (typically English Paper Piecing) or by machine to create visually stunning quilt blocks.

If you're looking for great examples of fussy cutting in quilts, use the hashtag [#fussycutting](https://www.instagram.com/explore/tags/fussycutting/) on Instagram and your mind will be blown away by the endless possibilities.

## <mark style="color:blue;">What is Pattern Matched Precision Fussy Cutting?</mark>

*Disclaimer - I'm no expert on quilting, so please forgive me if there's a better term for this type of fussy cutting.*&#x20;

**Pattern Matched Precision Fussy Cutting** is the targeted selection and cutting from fabric of a particular design used in different colorway fabrics that when cut and stitched together forms a seamless, unified image pieced together using multiple fabrics.

## <mark style="color:blue;">How to Use PreQuilt for Precision Fussy Cutting</mark>

With the new fabric features in PreQuilt, it's possible to plan and visualize all your precision fussy cutting well before cutting into your fabrics. Because, let's be honest, it's pretty scary to cut into that Tula Pink you've been holding on to for just the right project, right?

We have a detailed **Help Guides** available (links below) to show you how you can use static fabrics to create these seemingly seamless fussy cut blocks.

{% content-ref url="/pages/5Yg2Qt4TggDJz7zHytVL" %}
[Repeating Fussy Cutting](/prequilt-101/all-about-fabric/fussy-cutting/repeating-fussy-cutting)
{% endcontent-ref %}

{% content-ref url="/pages/bLYeRSFoigcTR4baV9Cd" %}
[One Off Fussy Cutting](/prequilt-101/all-about-fabric/fussy-cutting/one-off-fussy-cutting)
{% endcontent-ref %}

{% content-ref url="/pages/cwwz4ynywlAKJ3qzPgy8" %}
[Pattern Matching Fussy Cutting](/prequilt-101/all-about-fabric/fussy-cutting/pattern-matching-fussy-cutting)
{% endcontent-ref %}

## <mark style="color:blue;">Where to Learn How to Sew Fussy Cut</mark>*<mark style="color:blue;">\*</mark>*

If you'd like to learn how to make fussy cut blocks, there are lots of options out there. Here are a couple we know of and recommend.&#x20;

### For Precision and Seamless Fussy Cutting:

[**Geeky Bobbin**](https://geekybobbin.com/)**\*** has a *Fussy Cutting Block of the Month* program called [**Fussy Fuel**](https://geekybobbin.com/fussyfuel) launching in January 2024. This workshop-supported BOM program includes 12 block patterns and monthly video tutorials that will build upon one another so that you can confidently machine piece together precise and seamless fussy cut blocks. If you're stumbling across this after January 2024, not to worry, the entire program is still available as a one-time purchase.&#x20;

For more info: <https://geekybobbin.com/fussyfuel>

<div><figure><img src="/files/dzLPArAXn4BpusWfAJrk" alt=""><figcaption><p><em>Fussy Fuel Block 7 by Geeky Bobbin</em></p></figcaption></figure> <figure><img src="/files/GtHa8klkVUnJIAsXB7LK" alt=""><figcaption><p><em>Fussy Fuel Block 9 by Geeky Bobbin</em></p></figcaption></figure></div>

### For Beginner Fussy Cutting

[**Gnome Angel**](https://www.gnomeangel.com/)**\*** is an early pioneer of Fussy Cutting and published a book called [**Fussy Cutters Club**](https://shopau.gnomeangel.com/en-ca/collections/books-patterns/products/book-fussy-cutters-club-a-boot-camp-for-mastering-fabric-play-14-projects) that teaches you everything you need to know on how to fussy cut for both English Paper Piecing and using templates.

For more info: <https://www.gnomeangel.com/fussy-cutters-club/>

*\*We are **not** affiliated with anyone and will not receive any payment or income by mentioning them here. We have shared this information out of support for our community and the great work being done.*


# Repeating Fussy Cutting

Using a Fabric Link // To repeat the same fussy cut everywhere

<figure><img src="/files/2FNHFpfR2im4An0NEQil" alt=""><figcaption><p><em>Repeated fussy cutting using a fabric link</em></p></figcaption></figure>

{% hint style="warning" %} <mark style="color:orange;">**ALERT:**</mark> When a digital fabric swatch is used as a Fabric Link, its position and rotation is universal and the same in an entire quilt. You cannot fussy cut individual blocks differently using the same fabric link. Changes made to the Fabric Link will affect everything that uses it.

<mark style="color:blue;">**TIP:**</mark> If you'd like to have different parts of a digital fabric swatch fussy cut, we'd recommend using your digital fabric swatch as a **static** fabric.
{% endhint %}

In this Help Guide, I'll show you how to fussy cut a digital fabric swatch when its being used in a Fabric Link. Because of its nature, a Fabric Link will behave the same everywhere it is used in a quilt. So by fussy cutting a digital fabric when it's being used in a Fabric Link, it repeat itself in every occurance. Sometimes this is intended (like in this example) and sometimes that's not intended. If that is not your intention - try the Help Guide for [One-Off Fussy Cutting](/prequilt-101/all-about-fabric/fussy-cutting/one-off-fussy-cutting).

***

## <mark style="color:blue;">Create Repeating Fussy Cutting</mark>

In this example, the fabric being used has cute little bunnies that I’d like to visualize fussy cutting and using in a Kaleidoscope quilt.

Since it is a going to be a repeating fussy cut (meaning I want to make the SAME fussy cut multiple times), I'll be using a Fabric Link.

However, when I first select the digital fabric swatch, I cannot see the bunny in my block. To reposition the fabric to highlight the bunny, we’ll change the properties for the **Top** and **Left** position of the digital fabric swatch.

1. <mark style="color:blue;">**Open**</mark> the quilt you’d like to edit.

   <div align="left"><figure><img src="/files/4WeCnDgAJ6DIZXx0IpIs" alt=""><figcaption></figcaption></figure></div>
2. Click <mark style="color:blue;">**BLOCKS**</mark> tab on the left side control panel.

   <div align="left"><figure><img src="/files/LtSoUCtWUjIVONj7gRk0" alt=""><figcaption></figcaption></figure></div>
3. Click on the <mark style="color:blue;">**Edit Block**</mark> button for the block with the fabric you’d like to fussy cut.

   <div align="left"><figure><img src="/files/8HWgT1McKS6o6Sz6VR0w" alt=""><figcaption></figcaption></figure></div>
4. The Block Editor panel will slide out with the block. <mark style="color:blue;">**Click on the block component**</mark> (patch or piece) that you’d like to link a digital fabric swatch to. It will be outlined in a box.

   <div align="left"><figure><img src="/files/HyM0gGNPXvuiNked3fWa" alt=""><figcaption></figcaption></figure></div>
5. On the left side control panel, click on the <mark style="color:blue;">**Edit**</mark> button for the Fabric Link that you’d like to change.

   <div align="left"><figure><img src="/files/ooOvyD9fnEFKOSH3DtvE" alt=""><figcaption></figcaption></figure></div>
6. An edit panel will slide out from the left side with with the printed fabric swatch being used highlighted.

   <div align="left"><figure><img src="/files/AthtFrATlCmmpXF1tlgT" alt=""><figcaption></figcaption></figure></div>
7. Change the <mark style="color:blue;">**number for Move Top**</mark> and <mark style="color:blue;">**Move Left**</mark> until the bunny is visible in the quilt block piece.

   * **TIP:** If you hold the shift button and then press the up or down arrows on your keyboard, the numbers will increase or decrease in groups of ten. This will make the process a little faster.
   * **NOTE:** You might also need to Rotate the digital fabric swatch to be able to find the detail you'd like to fussy cut.

   <div align="left"><figure><img src="/files/S9ldqhucSV8fg1LvjtxN" alt=""><figcaption></figcaption></figure></div>

   <div align="left"><figure><img src="/files/8Lf951LHjWe1PZBUpXdM" alt=""><figcaption><p><em>Before position changed</em></p></figcaption></figure> <figure><img src="/files/LL9ZGnDk6OCj4r97wpJy" alt=""><figcaption><p><em>After position changed to highlight bunny</em></p></figcaption></figure></div>
8. Once you're happy with how your fabric has been repositioned, click on the <mark style="color:blue;">**X**</mark> (<img src="/files/8xSHKFfWjvbtbQoIYGdY" alt="" data-size="line">) on the Fabric Link panel to exit back to the Block Editor.

   <div align="left"><figure><img src="/files/ehzb2aPfd4SkcxZYopyY" alt=""><figcaption></figcaption></figure></div>
9. Click on the <mark style="color:blue;">**Save to Quilt**</mark> button in the top right corner of the Block Editor to go back to the full quilt.

   <div align="left"><figure><img src="/files/vYj9KqQnBHW9YHZJTMS6" alt=""><figcaption></figcaption></figure></div>
10. Here's a before and after of our quilt:

    <div align="left"><figure><img src="/files/xTAMy123O9FY2HiKWu89" alt=""><figcaption><p><em>Before fabric position changed</em></p></figcaption></figure> <figure><img src="/files/zde6XK1C7Z7iVmoJyjal" alt=""><figcaption><p><em>After fabric position changed</em></p></figcaption></figure></div>


# One Off Fussy Cutting

Using a Static Print // For a one time fussy cut block piece

<figure><img src="/files/WKK2WAUxDOaXUG67LC55" alt=""><figcaption><p><em>One-Off Fussy Cutting of different parts of the same digital fabric swatch</em></p></figcaption></figure>

{% hint style="info" %} <mark style="color:blue;">**TIP**</mark>: You do not need to load multiple copies of the same digital fabric swatch in order to fussy cut different images. You can use the same digital fabric swatch multiple times (and differently) when it is used as a [**static fabric**](/prequilt-101/all-about-fabric/static-fabrics).
{% endhint %}

In this Help Guide, I'll show you how to use a digital fabric swatch as a static print (NOT a fabric link) to highlight or fussy cut a specific image in a block. Since this is a static print, the digital fabric swatch will only be positioned this way once and it this specific piece of the quilt.

If you want to make the same fussy cut multiple times, I would suggest using your digital fabric swatch as a Fabric Link so that it will repeatedly be positioned the same way (Help Guide for this found [**here**](/prequilt-101/all-about-fabric/fussy-cutting/repeating-fussy-cutting)).

***

## <mark style="color:blue;">Create One-Off Fussy Cutting</mark>

In this example, I'm going to fussy cut the same digital fabric swatch into the corner pieces of a Square in a Square block. Since I want each corner to feature a different part of my digital fabric swatch, I'm going to use a static print (and not a fabric link).

1. On the Block tab on the left side control panel, click on the <mark style="color:blue;">**Edit Block**</mark> button for the desired quilt block.

   <div align="left"><figure><img src="/files/IglFWPeSVGDk91hhGHjN" alt=""><figcaption></figcaption></figure></div>
2. The Block Editor panel will slide out. Click on the <mark style="color:blue;">**piece of the block**</mark> you want to fussy cut. Once it's selected, it will have a box outlining the piece.

   <div align="left"><figure><img src="/files/97QgVPezImV8w1poxxC2" alt="" width="367"><figcaption></figcaption></figure></div>
3. Currently, the piece is using a fabric link. Click on the <mark style="color:blue;">**Static Prints tab**</mark> under Fabrics on the left side control panel.

   <div align="left"><figure><img src="/files/OjzgViKhhgyqix2JdpKk" alt=""><figcaption></figcaption></figure></div>
4. Scroll through the digital fabric swatches that you've already loaded and click on the <mark style="color:blue;">**Select**</mark> button for the fabric you'd like to fussy cut.

   <div align="left"><figure><img src="/files/Tzl98LV76swVl5c9m04j" alt=""><figcaption></figcaption></figure></div>
5. Once selected, a control panel will be revealed so that you can manipulate the position and rotation of the fabric swatch. This is what will control the fussy cutting.

   <div align="left"><figure><img src="/files/eWk5lInNQku1fsS7OsiI" alt=""><figcaption></figcaption></figure></div>
6. Since I want the ladies to be looking toward the center of the block, I'm going to change the <mark style="color:blue;">**number for Rotate**</mark> until the lady is rotated as desired.

   <div align="left"><figure><img src="/files/ApIL6nqIojDQwB9H6l6z" alt=""><figcaption></figcaption></figure></div>

   <div><figure><img src="/files/cc1uIA3q6e9WmWRt8q6f" alt=""><figcaption><p><em>Before rotation changed</em></p></figcaption></figure> <figure><img src="/files/zJHzDtySNMrO1LGgDx5F" alt=""><figcaption><p><em>After rotation changed</em></p></figcaption></figure></div>
7. Now we can change the position to fussy cut our lady. Change the <mark style="color:blue;">**number for Move Top**</mark> and <mark style="color:blue;">**Move Left**</mark> until the lady is visible as desired in the quilt block piece.

   * **TIP:** If you hold the shift button and then press the up or down arrows on your keyboard, the numbers will increase or decrease in groups of ten. This will make the process a little faster.

   <div align="left"><figure><img src="/files/IO7GorDSua4th1Jd5uZ9" alt=""><figcaption></figcaption></figure></div>

   <div><figure><img src="/files/kWrVY4DeObNFhZludYyh" alt=""><figcaption><p><em>Before position changed</em></p></figcaption></figure> <figure><img src="/files/uEkwklt7YGUZOuF3V4WA" alt=""><figcaption><p><em>After position changed to highlight one of the ladies</em></p></figcaption></figure></div>
8. Once you're happy with how your fabric has been repositioned, deselect the piece by clicking outside the block space. Then click on the small <mark style="color:blue;">**Save**</mark> button (<img src="/files/ShaBwsQzSBE8jOA6YaqY" alt="" data-size="line">) on the central, vertical toolbar.

   * **TIP:** This is a quick save button to save your progress without having to exit the Block Editor.

   <div align="left"><figure><img src="/files/H0RbMhXWCB2J5bduPuN6" alt=""><figcaption></figcaption></figure></div>
9. <mark style="color:blue;">**Repeat steps 2-8**</mark> until all the pieces of your quilt block are fussy cut as desired.

   <div align="left"><figure><img src="/files/Z3UqbnPiLh69UMObbvI9" alt=""><figcaption><p><em>All different ladies using the same static fabric</em></p></figcaption></figure></div>
10. Click on the <mark style="color:blue;">**Save to Quilt**</mark> button in the top right corner of the Block Editor to go back to the full quilt.

    <div align="left"><figure><img src="/files/cIPFDqMIjS42S89gUHKb" alt=""><figcaption></figcaption></figure></div>


# Pattern Matching Fussy Cutting

Using a Static Print // For precise and seamless pattern matching

<figure><img src="/files/X8CPeSSgnFOTi2atL1Gb" alt=""><figcaption><p><em>Pattern Matched Precision Fussy Cutting // Created in PreQuilt</em></p></figcaption></figure>

{% hint style="info" %} <mark style="color:blue;">**TIP**</mark>: You do not need to load multiple copies of the same digital fabric swatch in order to fussy cut different images or pattern match. You can use the same digital fabric swatch multiple times (and differently) when it is used as a [**static fabric**](/prequilt-101/all-about-fabric/static-fabrics).
{% endhint %}

In this Help Guide, I'll show you how to use a digital fabric swatch as a static print (NOT a fabric link) to create seamless pattern matched fussy cutting. Since this is a static print, the digital fabric swatch will only be positioned this way once and it this specific piece of the quilt.&#x20;

**Pattern Matched Precision Fussy Cutting***\** is the targeted selection and cutting from fabric of a particular design used in different colorway fabrics that when cut and stitched together forms a seamless, unified image pieced together using multiple fabrics.&#x20;

\**Disclaimer - I'm no expert on quilting, so please forgive me if there's a better term for this type of fussy cutting.*&#x20;

***

## <mark style="color:blue;">Create Seamless Pattern Matched Fussy Cutting</mark>

In this example, I'm going to fussy cut different colorway fabric swatches of the same design to create a seamless, unified image pieced together using multiple fabrics.&#x20;

Since I want to manipulate each patchwork piece separately and not repeatedly, I'm going to use the digital fabric swatches as static prints (and not fabric links).

1. On the Block tab on the left side control panel, click on the <mark style="color:blue;">**Edit Block**</mark> button for the desired quilt block.

   <div align="left"><figure><img src="/files/AbRt6oU2g66FZdG6gEFZ" alt=""><figcaption></figcaption></figure></div>
2. The Block Editor panel will slide out. Click on the <mark style="color:blue;">**piece of the block**</mark> you want to fussy cut. Once it's selected, it will have a box outlining the piece.

   <div align="left"><figure><img src="/files/HLzCOW10J15NvbBSt5rz" alt="" width="368"><figcaption></figcaption></figure></div>
3. Currently, the piece is using a fabric link. Click on the <mark style="color:blue;">**Static Prints tab**</mark> under Fabrics on the left side control panel.

   <div align="left"><figure><img src="/files/7kb9lCQzkqRc4WwQLCQP" alt=""><figcaption></figcaption></figure></div>
4. Scroll through the digital fabric swatches that you've already loaded and click on the <mark style="color:blue;">**Select**</mark> button for the fabric you'd like to fussy cut.

   <div align="left"><figure><img src="/files/n1wgXWL4zJLC5opiIr6Q" alt=""><figcaption></figcaption></figure></div>
5. Once selected, a control panel will be revealed so that you can manipulate the position and rotation of the fabric swatch. This is what will control the fussy cutting.

   <div align="left"><figure><img src="/files/lbWNx8jx27DR8KClbJds" alt=""><figcaption></figcaption></figure></div>
6. Now we can change the position of your fabric. Change the <mark style="color:blue;">**number for Move Top**</mark> and <mark style="color:blue;">**Move Left**</mark> until the flower is visible as desired in the quilt block piece.

   * **TIP:** If you hold the shift button and then press the up or down arrows on your keyboard, the numbers will increase or decrease in groups of ten. This will make the process a little faster.
   * **NOTE:** You might also need to Rotate the digital fabric swatch to be able to find the detail you'd like to fussy cut.

   <div align="left"><figure><img src="/files/YZEqdPzc1LcZHFzvsogn" alt=""><figcaption></figcaption></figure></div>

   <div><figure><img src="/files/mK6nDQq6UCaRDBIPhpB2" alt=""><figcaption><p><em>Before position changed</em></p></figcaption></figure> <figure><img src="/files/iXxicgIHUgJTKUJMIP6G" alt=""><figcaption><p><em>After position changed to center flower</em></p></figcaption></figure></div>
7. Once you're happy with how your fabric has been repositioned, deselect the piece by clicking outside the block space. Then click on the small <mark style="color:blue;">**Save**</mark> button (<img src="/files/ShaBwsQzSBE8jOA6YaqY" alt="" data-size="line">) on the central, vertical toolbar.

   <div align="left"><figure><img src="/files/2humBwNsp13uMfNm9KyP" alt=""><figcaption></figcaption></figure></div>
8. <mark style="color:blue;">**Repeat steps 2-5**</mark> for the adjacent piece.
9. Once selected, your newly selected fabric will be used in the block piece. Now, carefully change the <mark style="color:blue;">**number for**</mark> <mark style="color:blue;">**Move Top**</mark> and <mark style="color:blue;">**Move Left**</mark> until the flower and leaves are pattern matching the first static fabric.&#x20;

   <div align="left"><figure><img src="/files/oMLv0e9QQnTX5D4nE8xG" alt=""><figcaption></figcaption></figure></div>

   <div><figure><img src="/files/58utpb3QjsuhJaJftAsa" alt=""><figcaption><p><em>Before position changed on middle bar</em></p></figcaption></figure> <figure><img src="/files/UCOekuJ2pivgqvDA187m" alt=""><figcaption><p><em>After position changed with continuous pattern matching</em></p></figcaption></figure></div>
10. <mark style="color:blue;">**Repeat steps 8-9**</mark> until all the pieces of your quilt block are fussy cut and pattern matching as desired.

    <div align="left"><figure><img src="/files/ajNjCClPuwxbyXkPbqdl" alt=""><figcaption><p><em>Continuous pattern matching across entire block</em></p></figcaption></figure></div>
11. Click on the <mark style="color:blue;">**Save to Quilt**</mark> button in the top right corner of the Block Editor to go back to the full quilt.

    <div align="left"><figure><img src="/files/MJISYY791sdKaQAV4aKR" alt=""><figcaption></figcaption></figure></div>


# Fabric Calculator

Disclaimer: We did our best to create the \*perfect\* Fabric Calculator. But you know, we're not perfect and so we ask you to please review the calculations before cutting all your fabric. Thank you!

{% embed url="<https://www.youtube.com/watch?v=6WBquY9bhtY>" %}
Fabric Calculator Walkthrough Video
{% endembed %}

## <mark style="color:blue;">All About the Fabric Calculator</mark>

We're extremely happy and proud to announce that we now have fabric calculations in PreQuilt! This feature is automatically included for both Basic and Market plan subscribers.

Fabric calculations will be available for all of **your** designed quilts. If you created it in PreQuilt, then you will be able to have PreQuilt calculate the amount of fabric you'll need. This feature will **not** work for digital coloring pages offered by pattern designers. Please buy the pattern for that information.

This 1.0 version includes the following fabric calculations:

* Overview
* Individual Block Breakdown
* Quilt Top Breakdown
* Quilt Backing
* Quilt Binding
* Fabric Cutting Diagrams

#### More information:

{% content-ref url="/pages/L1wN3WP8wD65mRAAIiSh" %}
[Do's & Don'ts](/prequilt-101/fabric-calculator/dos-and-donts)
{% endcontent-ref %}

{% content-ref url="/pages/C1OU5LtcOWSewKvul2cl" %}
[FAQ's](/prequilt-101/fabric-calculator/faqs)
{% endcontent-ref %}

#### Calculations Explained

<table data-view="cards"><thead><tr><th></th><th data-hidden data-card-target data-type="content-ref"></th><th data-hidden></th><th data-hidden></th></tr></thead><tbody><tr><td><strong>Overview</strong></td><td><a href="/pages/ELSuTODmvVJyI4THcaW7">/pages/ELSuTODmvVJyI4THcaW7</a></td><td></td><td></td></tr><tr><td><strong>Individual Blocks</strong></td><td><a href="/pages/sLkTUFw1U5G1ZEQhFfe5">/pages/sLkTUFw1U5G1ZEQhFfe5</a></td><td></td><td></td></tr><tr><td><strong>Quilt Top</strong></td><td><a href="/pages/z5YRRTsDSvBREM19FbtR">/pages/z5YRRTsDSvBREM19FbtR</a></td><td></td><td></td></tr><tr><td><strong>Backing</strong></td><td><a href="/pages/VEgLCjeaBKWp1bOO4cDH">/pages/VEgLCjeaBKWp1bOO4cDH</a></td><td></td><td></td></tr><tr><td><strong>Binding</strong></td><td><a href="/pages/c5R0D6jjxaH8VeOT1jkM">/pages/c5R0D6jjxaH8VeOT1jkM</a></td><td></td><td></td></tr><tr><td><strong>Cutting Diagrams</strong></td><td><a href="/pages/R2YKB9mHtXMobWBGMpQU">/pages/R2YKB9mHtXMobWBGMpQU</a></td><td></td><td></td></tr></tbody></table>

***

## <mark style="color:blue;">The Fabric Calculator Button</mark>

We've redesigned the central, vertical control panel to include the Fabric Calculator button. It is now located underneath the Fabric Randomizer button. Once you click on it, your fabric calculations will open on a separate tab.

<figure><img src="/files/EP6RJbAivfafVInYIyJW" alt=""><figcaption><p>Fabric Calculator button - 2nd from top on central, vertical control panel</p></figcaption></figure>

**Note**: You do not need to have the quilt top completely designed before using this feature. Feel free to peak at your fabric needs whenever you're curious.


# Do's & Don'ts

of the Fabric Calculator

## <mark style="color:blue;">The Do's</mark>

* Always build you blocks and quilts in **FINISHED** measurements. PreQuilt is always visualizing how it will look after sewn together.
* Create your quilt blocks using the recommended [**Build a Block Unit**](/prequilt-101/build-a-block-unit-for-the-fabric-calculator) instructions.
* Turn on the snapping features in the Block Editor. This will keep your shapes snug with one another and will make it easier for PreQuilt's auto recognition to identify different block units.

## <mark style="color:blue;">The Don'ts</mark>

* Do not overlap shapes when creating your quilt blocks (unless you're appliqueing), because the hidden shapes will still be added to the fabric calculator.

## <mark style="color:blue;">The Nice to Have's</mark>

* Name your quilt blocks - it keeps things organized in the Fabric Calculator
* Keep your Fabric Link names short - it makes it easier to track in the Fabric Calculator
* Use the gridlines to help divide your block up into block units - this helps keep your Block Blowout tidy.

## <mark style="color:blue;">The Won'ts</mark>

* PreQuilt's Fabric Calculator **will not** give you fabric calculations for designer coloring pages. Please support these talented designers and buy their patterns. They have clever and efficient ways to sew their quilts.
* Currently, PreQuilt does not (yet) have templates for curved block units (Drunkard's Path, orange peels, etc). We hope to launch them with 2.0.&#x20;
  * Nor do we have staggered cutting diagrams for the concave or convex pieces.
* Currently, PreQuilt does not work with SVG imported blocks. We hope to figure this out as soon as possible.&#x20;
* There are a few preloaded blocks that also will not work with the Fabric Calculator - the Clamshell and the Cathedral Window.
* Will not give you pattern instructions. This is a fabric calculator only, not instructional. However, we do have general construction instructions available in our [**Build a Block Unit**](/prequilt-101/build-a-block-unit-for-the-fabric-calculator) Help Guide.


# Calculations Explained

## <mark style="color:blue;">Fabric Calculator (1.0)</mark>

There are a variety of different fabric calculations that are included out of the box in PreQuilt. Some of these will have customization options where you can input your preferred variables.&#x20;

#### Learn more about each of the Fabric Calculator Outputs:

<table data-view="cards"><thead><tr><th></th><th data-hidden data-card-target data-type="content-ref"></th><th data-hidden></th><th data-hidden></th></tr></thead><tbody><tr><td><strong>Overview</strong></td><td><a href="/pages/ELSuTODmvVJyI4THcaW7">/pages/ELSuTODmvVJyI4THcaW7</a></td><td></td><td></td></tr><tr><td><strong>Individual Blocks</strong></td><td><a href="/pages/sLkTUFw1U5G1ZEQhFfe5">/pages/sLkTUFw1U5G1ZEQhFfe5</a></td><td></td><td></td></tr><tr><td><strong>Quilt Top</strong></td><td><a href="/pages/z5YRRTsDSvBREM19FbtR">/pages/z5YRRTsDSvBREM19FbtR</a></td><td></td><td></td></tr><tr><td><strong>Backing</strong></td><td><a href="/pages/VEgLCjeaBKWp1bOO4cDH">/pages/VEgLCjeaBKWp1bOO4cDH</a></td><td></td><td></td></tr><tr><td><strong>Binding</strong></td><td><a href="/pages/c5R0D6jjxaH8VeOT1jkM">/pages/c5R0D6jjxaH8VeOT1jkM</a></td><td></td><td></td></tr><tr><td><strong>Cutting Diagrams</strong></td><td><a href="/pages/R2YKB9mHtXMobWBGMpQU">/pages/R2YKB9mHtXMobWBGMpQU</a></td><td></td><td></td></tr></tbody></table>

***

## <mark style="color:blue;">Give Us Feedback!</mark>

We'd love to hear what you like and where we're falling short. Take our survey and help us prioritize and develop version 2.0!

<https://forms.gle/taotDhHivLEXrTnm6>


# Overview

Fabric Calculations Feature

<figure><img src="/files/ifUxubaZyrQ0AS4ZlnI0" alt=""><figcaption><p>Fabric Calculator Overview page</p></figcaption></figure>

## <mark style="color:blue;">Fabric Calculator Overview</mark>

When you visit your Fabric Calculator tab, the first thing you'll see is the Fabric Calculator Overview page. This is a high level overview of your quilt and will show you a quilt thumbnail, your quilt blocks, and your fabrics used.&#x20;

***

<div align="center"><figure><img src="/files/jeVFjMWH4JsVHD3DQ6w6" alt=""><figcaption><p>Quilt Thumbnail</p></figcaption></figure></div>

### <mark style="color:blue;">Quilt Thumbnail</mark>

The quilt thumbnail gives you a reminder of what the quilt looks like. You will also see the name of the quilt, who designed it, and the quilt dimensions.

It should always be reflective of the latest iteration of your quilt. But if you find that it hasn't been updated, follow these steps to update it.

{% stepper %}
{% step %}
Go back to the <mark style="color:blue;">**PreQuilt application tab**</mark>.

Just click on the PreQuilt tab.
{% endstep %}

{% step %}
Click on the <mark style="color:blue;">**Save**</mark> button on the vertical toolbar.
{% endstep %}

{% step %}
Click on <mark style="color:blue;">**Save & Close (Update thumbnail)**</mark> button.

<img src="/files/QFjIdUlQCH9qqQvqeoCz" alt="" data-size="original">
{% endstep %}

{% step %}
Go back to <mark style="color:blue;">**Fabric Calculator tab**</mark> and refresh the browser page.

You should now see the updated thumbail image.
{% endstep %}
{% endstepper %}

***

<figure><img src="/files/sa3XkyiDqwHK9z2tm08m" alt=""><figcaption><p>Blocks in Quilt</p></figcaption></figure>

### <mark style="color:blue;">Quilt Blocks</mark>

{% hint style="info" %}
**TIP**: It's a good idea to name your blocks, so that they are easier to identify and organize, especially in the Fabric Calculator.
{% endhint %}

All the quilt blocks in your quilt will be summarized here.&#x20;

You will  be able to note block name, the quantity of each block in the quilt, and the block's **finished** dimensions.

***

<figure><img src="/files/QukySnLUZHrDon815WIg" alt=""><figcaption><p>Fabrics in Quilt</p></figcaption></figure>

### <mark style="color:blue;">Fabrics</mark>

{% hint style="info" %}
**TIP**: It's helpful to make sure your Fabric Link IDs are tidy. This will help keep your fabrics organized. Bonus tip: The shorter, the better.
{% endhint %}

All the fabrics being used in your quilt will be summarized here.

You will be able to see your fabric's Fabric Link ID, fabric name, inches and yardage needed.

**Note**: If the Fabric Link ID is used over and over, like in Fabric Link B, this is because the same fabric is used in the border as well as the quilt blocks.


# Quilt Blocks

Fabric Calculations Feature

{% hint style="danger" %}
**ATTN**: Create your quilt blocks in PreQuilt using the [<mark style="color:blue;">**Build a Block Unit guidelines**</mark>](https://help.prequilt.com/build-a-block-unit-and-block/build-a-block-unit-for-auto-recognition)! When you build your blocks as directed, the Fabric Calculator should be able to auto-recognize the shapes and give you the intended fabric calculations.
{% endhint %}

{% hint style="warning" %}
**Disclaimer:** The block blowout and its corresponding cut pieces are pulled directly from how the quilt block is created in PreQuilt. If you have additional shapes in the background, they will be taken into consideration when calculating your fabric needs.
{% endhint %}

<figure><img src="/files/9aJowJZ2eN58X60qoFkA" alt=""><figcaption><p>Blocks Level Fabric Calculations</p></figcaption></figure>

## <mark style="color:blue;">Quilt Block Overview</mark>

On the **Blocks tab**, each individual quilt block in the quilt is broken down into the individual fabric pieces needed to make **one** iteration of the quilt block.

Each quilt block has the following information:

* Block blowout
* Block units
  * Finished & unfinished measurements
  * Cut pieces & Piece ID
  * Quantity to cut
  * Cutting measurements
  * Fabrics used

***

## <mark style="color:blue;">The Block Blowout</mark>

<figure><img src="/files/XHTPpl32d2hmVNZKNDLA" alt=""><figcaption><p>Block Blowout</p></figcaption></figure>

The **Block Blowout** is a graphic representation of your finished quilt block and the fabric piece IDs that it is composed of.

Each fabric piece will have its ID labeled inside a circle. In the example above, the Sawtooth Star is made up of a variety of different fabric pieces - a1, a2, a3, and a4. All pieces in this block will start with a. The next block will all have IDs that start with b. Etc.

***

## <mark style="color:blue;">Quilt Block Units</mark>

<div align="center"><figure><img src="/files/wW4vkMF3uJVBi4dapU2d" alt=""><figcaption><p>Flying Geese Block Unit</p></figcaption></figure></div>

The Sawtooth Star can be created in a variety of different ways. But in this example, we created it using 4 Flying Geese units, 4 small squares for the corners, and 1 larger square in the center.

Each of these block units will be separated into its individual fabric pieces. The square and rectangle block units are made up of one shape and so will only be 1 fabric piece; while the Flying Geese has 3 different fabric pieces.

<div align="left"><figure><img src="/files/vt7Mk5eLYAOkD2kOkidA" alt=""><figcaption><p>Block Unit</p></figcaption></figure></div>

Each block unit will have the following information:

* Name of block unit
* Construction method options
  * Often includes trim or no trim options
* Total quantity needed for **ONE** block
* Finished dimensions
* Unfinished dimensions

<div align="left"><figure><img src="/files/y13CcQx70Gci4s3byT8z" alt=""><figcaption><p>Block Unit Cut Pieces</p></figcaption></figure></div>

The cut pieces needed for each block unit are located to the right of the block unit. Information provided is:

* Graphic visualization of cut pieces with piece ID&#x20;
* Total quantity needed for **ONE** block
* Cutting dimensions

<div align="left"><figure><img src="/files/ev2fEKhLBDRr8pHSlxXu" alt=""><figcaption><p>Block Unit Cutting Instructions Table</p></figcaption></figure></div>

There is also a helpful table summarizing the fabric needed to cut to make the necessary quantity of this block unit and includes:

* Fabric ID
* Quantity to cut
* Width & height cutting dimensions
* Fabric Link
* Fabric name

***

<figure><img src="/files/eVycAvIlYqnl6BgE7uZ8" alt=""><figcaption><p>Construction Choices</p></figcaption></figure>

### <mark style="color:blue;">Construction Method</mark>

{% hint style="warning" %}
For some Block Units, you can choose your construction method. The fabric calculator will automatically recalculate the fabric needed if you change the construction method.&#x20;
{% endhint %}

If the Block Unit you're creating has multiple construction methods, you will be able to select your preferred method using the dropdown menu. If not noted, dimensions have overage and room to trim down.

For example, we have calculations for the Flying Geese block unit for both the 1 at a time Snowball method and the 4 at a time No Waste method.

<figure><img src="/files/4uEeH02IkHTVO2CnFgKS" alt=""><figcaption><p>Fabric Needed for 1 at a Time Snowball Method Flying Geese</p></figcaption></figure>

<figure><img src="/files/Alu3xhP4M3glnlIKz0hT" alt=""><figcaption><p>Fabric Needed for 4 at a Time No Waste Method Flying Geese</p></figcaption></figure>


# Quilt Top

Fabric Calculations Feature

{% hint style="danger" %}
**ATTN**: Create your quilt blocks in PreQuilt using the [<mark style="color:blue;">**Build a Block Unit guidelines**</mark>](https://help.prequilt.com/build-a-block-unit-and-block/build-a-block-unit-for-auto-recognition)! When you build your blocks as directed, the Fabric Calculator should be able to auto-recognize the shapes and give you the intended fabric calculations.
{% endhint %}

<figure><img src="/files/Nfg8M4A4MHCP4DTB1hO7" alt=""><figcaption><p>Entire Quilt Fabric Calculations</p></figcaption></figure>

## <mark style="color:blue;">Entire Quilt Top Overview</mark>

On the **Quilt tab**, you will see a summary of all the block units and fabric pieces needed to create the entire quilt top (instead of just one quilt block found on the Blocks tab).&#x20;

The information is organized by quilt block and has the following information:

* Block blowout
* Block units in quilt block
  * Construction method (when applicable)
  * Total quantity of block units needed
  * Finished & unfinished measurements
* Cut pieces to make all quantity of the quilt block
  * Graphic visualization of cut piece
  * Piece ID
  * Cutting dimensions
  * Table summarizing all cut pieces needed


# Backing Fabric

Fabric Calculations Feature

{% hint style="info" %}
Dimensions for the quilt back are based on the overall dimensions of your quilt from the PreQuilt application.
{% endhint %}

<figure><img src="/files/78zFhzfgQJcbHmC2QfnN" alt=""><figcaption><p>Horizontal Seam Option for Quilt Back</p></figcaption></figure>

## <mark style="color:blue;">Quilt Backing</mark>

On the **Backing tab**, you can input some preferences for your quilt back and PreQuilt will offer you two calculations - backing with a horizontal seam and backing with a vertical seam.

You can input the following variables:

* Backing width of fabric (WOF)
* Overage


# Binding Fabric

Fabric Calculations Feature

{% hint style="info" %}
Length for the quilt binding is based on the overall dimensions of your quilt binding from the PreQuilt application.
{% endhint %}

<figure><img src="/files/OJivZMrfDRTraKLofoma" alt=""><figcaption><p>Quilt Binding Cutting Diagram</p></figcaption></figure>

## <mark style="color:blue;">Quilt Binding</mark>

On the **Binding tab**, you can input some preferences for your quilt binding and PreQuilt will offer you the yardage necessary as well as a visual cutting diagram for your binding fabric.

You can input the following variables:

* Binding width of fabric (WOF)
* Width of your binding strips


# Fabric Cutting Diagrams

Fabric Calculations Feature

{% hint style="info" %}
**TIP**: Rotate your border pieces from length of fabric to width of fabric to use less yardage.&#x20;

**NOTE**: If a piece is longer than the width of fabric, PreQuilt will automatically divide it into 2 pieces and include the seam allowance necessary to piece them together.
{% endhint %}

<figure><img src="/files/i4YKAhYPEc89bjVTYuu5" alt=""><figcaption><p>Quilt Binding Cutting Diagram</p></figcaption></figure>

## <mark style="color:blue;">Fabric Cutting Diagrams</mark>

On the **Fabric tab**, you can see the summary of the cut fabric pieces needed for your quilt as well as a recommended cutting diagram for your fabric.

Please note that border pieces are defaulted to being cut along the length of fabric. If this is not your preference, you can **rotate** the border pieces. PreQuilt will automatically separate the border piece and add 1/2" seam allowance so that you have enough fabric to join the two pieces together for your border.

You can control the following variables:

* Width of fabric (WOF)
* Orientation of cut fabric pieces

***

### <mark style="color:blue;">Width of Fabric</mark>

In PreQuilt, we've defaulted the width of fabric (WOF) to 42". But we know that the width of fabric of your yardage can differ, especially if you're using something other than standard quilting cotton, so we've designed an input where you can set the WOF.&#x20;

Once you change the WOF, PreQuilt will automatically update the cutting diagram for that particular fabric.

{% stepper %}
{% step %}
Scroll to the fabric that you'd like to change the WOF for.&#x20;
{% endstep %}

{% step %}
In the top right corner of that fabric's box, use the arrows or type in the number for your width of fabric.&#x20;

<img src="/files/pQZrlq1jZWtgs8wUQEef" alt="" data-size="original">

**TIP**: If you want to set this for all fabrics, then click on the <mark style="color:blue;">**Apply All**</mark> button.
{% endstep %}
{% endstepper %}

***

### <mark style="color:blue;">Rotate Border</mark>

We've defaulted all borders to be cut along the length of fabric. However, this can often be an inefficient use of fabric.&#x20;

If you'd like to cut your borders along the width of fabric (oftentimes in multiple pieces) and sew them together, simply rotate the border pieces. We will also automatically add in the extra fabric for your seam allowance.

{% stepper %}
{% step %}
Locate the border piece you'd like to rotate in the table. Note that the dimensions for our west side border pieces is 2" x 52".

<img src="/files/RMQ3VV5dP2xO9SDH4fQe" alt="" data-size="original">
{% endstep %}

{% step %}
Click on the <mark style="color:blue;">**Rotate**</mark> button next to that piece.&#x20;

<img src="/files/Pbr2SsxG6uBM1otZq2ui" alt="" data-size="original">
{% endstep %}

{% step %}
Your border piece will be rotated to run along the width of fabric and broken into two pieces. The two pieces now have their own IDs and the total width (formerly length) is now 52.5" (38" + 14.5"). The additional 0.5" is for the seam allowance needed to join the two border pieces together.

<img src="/files/5KKiWbvZWFisrjKQrV15" alt="" data-size="original">
{% endstep %}
{% endstepper %}

***

### <mark style="color:blue;">Rotate Cut Piece</mark>

Sometimes you might want to rotate your fabric piece in order to be more efficient with your cutting plan or yardage. No problem, just like your border piece, you can rotate your cut pieces as well.

{% stepper %}
{% step %}
Locate the fabric piece you'd like to rotate in the table.&#x20;

<img src="/files/BdI6pjjMjlIs2bxQrbiL" alt="" data-size="original">
{% endstep %}

{% step %}
Click on the <mark style="color:blue;">**Rotate**</mark> button next to that piece.&#x20;

<img src="/files/FznsSXYk1xBzzqNTpp25" alt="" data-size="original">
{% endstep %}

{% step %}
You can see that the width and height dimensions have been switched.

<img src="/files/aA4Ay1B13E3mz4RuqGfN" alt="" data-size="original">
{% endstep %}
{% endstepper %}

You can see in this example that we were able to save 4" in yardage by rotating fabric piece ***b1***. And in addition to saving fabric, it also is a more pleasant cutting experience, since the height of the entire row is the same on all strips.

<figure><img src="/files/v8otb0lDSB485KTHL6Ac" alt=""><figcaption><p>Piece <strong>b1</strong> is horizontal along the WOF</p></figcaption></figure>

<figure><img src="/files/WiB2usj5x6gcn8pZiv3j" alt=""><figcaption><p>Piece <strong>b1</strong> is vertical along the WOF</p></figcaption></figure>


# Fix Fabric Calculator Errors

How to remove errors on your fabric calculations

## <mark style="color:blue;">Fabric Calculation Errors</mark>

There can be a few different oopsies that will throw off your fabric calculations. We explain them here and how to fix them.

<table data-view="cards"><thead><tr><th></th><th data-hidden></th><th data-hidden></th><th data-hidden data-card-cover data-type="files"></th><th data-hidden data-card-target data-type="content-ref"></th></tr></thead><tbody><tr><td><mark style="color:blue;"><strong>Shape is Too Big</strong></mark></td><td></td><td></td><td></td><td><a href="/pages/xxLA7Q62XYbfxJJNGsIf">/pages/xxLA7Q62XYbfxJJNGsIf</a></td></tr><tr><td><mark style="color:blue;"><strong>Phantom Shape</strong></mark></td><td></td><td></td><td></td><td><a href="/pages/WabF4KTUUxvHWpULKRWH">/pages/WabF4KTUUxvHWpULKRWH</a></td></tr></tbody></table>

## <mark style="color:blue;">Best Fix is Prevention</mark>

The best way to avoid any of these potential errors is to create your blocks using our recommended Build a Block Unit series. This helps to prevent block units not being recognized by the Fabric Calculator and any other errors that might occur.

{% embed url="<https://help.prequilt.com/prequilt-101/build-a-block-unit-for-auto-recognition>" %}


# Fix: Shape is Too Big

## <mark style="color:blue;">The Problem | Shape is Bigger than Block</mark>

A common error that throws off your fabric calculations is when a shape in your block is larger than the finished block.&#x20;

Sometimes this is intentional - perhaps you can only make a shape by trimming it later. But most of the time this is unintentional and the PreQuilt Fabric Calculator will give you calculations for the entire shape, even if it's hidden from the final quilt block.

This often results in being told you need more fabric than you do.

***

## <mark style="color:blue;">YouTube Video</mark>

{% embed url="<https://youtu.be/wkVn_kJFm0I>" %}

***

## <mark style="color:blue;">Help Guide</mark>

### <mark style="color:blue;">The Problem</mark>

In this example, the Sashing is throwing an Error Warning in the Fabric Calculator.

<div align="left"><figure><img src="/files/yuX861h9Da10bvbwmV9P" alt="" width="134"><figcaption></figcaption></figure></div>

### <mark style="color:blue;">Problem Analysis</mark>

Let's investigate what is causing the error. To do this:

{% stepper %}
{% step %}
In the design application, click on <mark style="color:blue;">**Edit Block**</mark> for the Sashing quilt block.

<div align="left"><figure><img src="/files/0F9pXf4fcE0px9NFHO4F" alt=""><figcaption></figcaption></figure></div>
{% endstep %}

{% step %}
Click on the <mark style="color:blue;">**shape**</mark> in the block editor area.

<div align="left"><figure><img src="/files/ZqEF628xQ5VEjcs3V6v1" alt="" width="563"><figcaption></figcaption></figure></div>
{% endstep %}

{% step %}
Click on the <mark style="color:blue;">**SIZE tab**</mark> on the left side control panel.

<div align="left"><figure><img src="/files/krXlFUjzswcPjDMZ1dUT" alt=""><figcaption></figcaption></figure></div>
{% endstep %}

{% step %}
Once expanded, we can see that the width of the shape is larger than the finished block. You can see that it's at 150%, when it should be at 100%.

<div align="left"><figure><img src="/files/0FIZ0YxQdKPmMdTUtxCh" alt=""><figcaption></figcaption></figure></div>
{% endstep %}
{% endstepper %}

### <mark style="color:blue;">Fix the Error & Fabric Calculations</mark>

{% stepper %}
{% step %}
In the design application, click on <mark style="color:blue;">**Edit Block**</mark> for the Sashing quilt block.

<div align="left"><figure><img src="/files/YSVyBchsZCoanN0K9nTa" alt=""><figcaption></figcaption></figure></div>
{% endstep %}

{% step %}
Click on the <mark style="color:blue;">**shape**</mark> in the block editor area.

<div align="left"><figure><img src="/files/9bV6VjGc2zTUpjUCLxl7" alt="" width="563"><figcaption></figcaption></figure></div>
{% endstep %}

{% step %}
Click on the <mark style="color:blue;">**Scale to Fit**</mark> button (![](/files/nVrLRt7Yreh1tjEIZOpC)) on the center vertical toolbar.

<div align="left"><figure><img src="/files/QN17R3d47ZIBQFTGp9Ca" alt=""><figcaption></figcaption></figure></div>
{% endstep %}

{% step %}
Click on the <mark style="color:blue;">**Save to Quilt**</mark> button in the top right corner.

<div align="left"><figure><img src="/files/GYlyuWpBmmKv3yt8peEb" alt=""><figcaption></figcaption></figure></div>
{% endstep %}

{% step %} <mark style="color:blue;">**Save**</mark> the quilt (![](/files/DWYhZlpFuB1vDsCEh8a2)) and click on the <mark style="color:blue;">**Fabric Calculator**</mark> button (![](/files/tmRBEFnmAqF9OLP1d15U)).

{% endstep %}

{% step %}
The error is now gone and the fabric calculations are corrected.

<div align="left"><figure><img src="/files/2F4hBqflsa4Xk1hiqGNY" alt=""><figcaption></figcaption></figure></div>
{% endstep %}
{% endstepper %}


# Fix: Phantom Shape

## <mark style="color:blue;">The Problem | Phantom Shape in Block</mark>

The most common error that throws off your fabric calculations is when a shape in your block is hiding behind layers or is completely outside the block area.

Even though these shapes are hidden, the PreQuilt Fabric Calculator will give you calculations for them and consequently the amount of fabric you need will be inaccurate.

This often results in being told you need more fabric than you do.

***

## <mark style="color:blue;">YouTube Video</mark>

{% embed url="<https://youtu.be/zQU8Aelbb9E>" %}

***

## <mark style="color:blue;">Help Guide</mark>

### <mark style="color:blue;">The Problem</mark>

In this example, the **Continental** block is throwing an Error Warning in the Fabric Calculator.

<div align="left"><figure><img src="/files/QUAfy2PIokpNkljfABzs" alt=""><figcaption></figcaption></figure></div>

### <mark style="color:blue;">Problem Analysis</mark>

Let's investigate what is causing the error. To do this:

{% stepper %}
{% step %}
In the design application, click on <mark style="color:blue;">**Edit Block**</mark> for the Sashing quilt block.

<div align="left"><figure><img src="/files/wefVedYlvW0lLIKF9usm" alt=""><figcaption></figcaption></figure></div>
{% endstep %}

{% step %}
At first glance we cannot see this teal HST shape, which makes sense since it's throwing the error.

<div align="left"><figure><img src="/files/gulGIOxbgcR5O74B0XlJ" alt=""><figcaption></figcaption></figure></div>
{% endstep %}

{% step %}
Click on the <mark style="color:blue;">**LAYERS tab**</mark> at the top of the left side control panel.

<div align="left"><figure><img src="/files/uNDQQRd6ZSO0w32Yi7ZG" alt=""><figcaption></figcaption></figure></div>
{% endstep %}

{% step %}
Once expanded, we can see all the shapes on individual layers. Using the thumbnail on the left side, we can try and find our phantom shape. You can also start to hide the other shapes to try and uncover the phantom shape.

<div align="left"><figure><img src="/files/UUtplZgkMLm9bt2vGRa3" alt=""><figcaption></figcaption></figure></div>
{% endstep %}

{% step %}
Here we can see that it's most likely this teal HST that has just the tip of the shape visible under many layers.

<div align="left"><figure><img src="/files/uSElEL2MZd2Qs0HSIMZv" alt=""><figcaption></figcaption></figure></div>
{% endstep %}
{% endstepper %}

### <mark style="color:blue;">Fix the Error & Fabric Calculations</mark>

{% stepper %}
{% step %}
In the design application, click on <mark style="color:blue;">**Edit Block**</mark> for the Sashing quilt block.

<div align="left"><figure><img src="/files/YSVyBchsZCoanN0K9nTa" alt=""><figcaption></figcaption></figure></div>
{% endstep %}

{% step %}
Click on the <mark style="color:blue;">**LAYERS tab**</mark> at the top of the left side control panel.

<div align="left"><figure><img src="/files/v6vVcHVzTZGXtKAPWVoD" alt=""><figcaption></figcaption></figure></div>
{% endstep %}

{% step %}
Click on the phantom shape's layer and drag it to the top of the list. We can now see it on the Block Editor space.

<div align="left"><figure><img src="/files/QhCSjm3u8uEKBK9vFiTT" alt=""><figcaption></figcaption></figure> <figure><img src="/files/ab671LRsL6mXhMhOzs9l" alt=""><figcaption></figcaption></figure></div>
{% endstep %}

{% step %}
Click on the <mark style="color:blue;">**Delete**</mark> button in the shape's layer.

<div align="left"><figure><img src="/files/VM96OZRVEovvSV8RzdXn" alt=""><figcaption></figcaption></figure></div>
{% endstep %}

{% step %}
You will now see the shape has been removed from the quilt block.

<div align="left"><figure><img src="/files/9UvncuN2h9bBRUBc2VR7" alt=""><figcaption></figcaption></figure></div>
{% endstep %}

{% step %}
Click on the <mark style="color:blue;">**Save to Quilt**</mark> button in the top right corner.

<div align="left"><figure><img src="/files/ELgEiKRSmkGmoesSqFzp" alt=""><figcaption></figcaption></figure></div>
{% endstep %}

{% step %} <mark style="color:blue;">**Save**</mark> the quilt (![](/files/DWYhZlpFuB1vDsCEh8a2)) and click on the <mark style="color:blue;">**Fabric Calculator**</mark> button (![](/files/tmRBEFnmAqF9OLP1d15U)).

{% endstep %}

{% step %}
The error is now gone and the fabric calculations are corrected.
{% endstep %}
{% endstepper %}


# FAQ's

<details>

<summary>I have a PreQuilt subscription already, do I need to upgrade to get access to the Fabric Calculator?</summary>

No! This new feature will automatically be accessible to all current and new subscribers to PreQuilt.&#x20;

It is available for both Basic and Market Plan subscribers. Enjoy!

</details>

<details>

<summary>I'm a pattern designer, will everyone be able to calculate fabric on my digital coloring pages?</summary>

NO! Never. We do our best to respect the hard work that you do. We have disabled the Fabric Calculator on all digital coloring pages.

</details>

<details>

<summary>Will the Fabric Calculator work on both solid and printed fabric?</summary>

YEP! It will even give you cutting diagrams directly on your fabric, so you can always keep things organized in your head!

</details>

<details>

<summary>Will the Fabric Calculator work on all my old quilts?</summary>

Maybe. It all depends on how you created your quilt blocks. Make sure to review our Build a Block Unit page to see if your quilt was created in a way that the Fabric Calculator can auto detect block units in order to do the calculations.

</details>

<details>

<summary>I changed my quilt, how do I get the new fabric calculations?</summary>

Simply save the quilt and refresh or relaunch the Fabric Calculator tab. The changes should automatically update.

</details>

<details>

<summary>I'm not bang on with my sewing, is there enough fabric to trim my blocks?</summary>

Yes! We have trim and no trim construction method options for most of the blocks. If we do not specify, the measurements will include enough fabric to trim down your blocks.

</details>

<details>

<summary>What seam allowance did you use in your calculator?</summary>

For now we have only empirical measurements available and all seam allowances are calculated at 1/4".

</details>

<details>

<summary>Does the Fabric Calculator also give me instructions on how to make the quilt?</summary>

No. It's a fabric calculator feature that gives you a lot of information, but it will not give you pattern instructions. You can find general sewing instructions though on our [<mark style="color:blue;">**Build a Block Unit**</mark>](/prequilt-101/build-a-block-unit-for-the-fabric-calculator) Help Guide.

</details>


# Build a Block Unit for the Fabric Calculator

Introduction to Build a Block & Best practices

## <mark style="color:blue;">About Build a Block & Auto Recognition for the Fabric Calculator</mark>

In order for our fabric requirements feature (coming soon) to be able to correctly calculate the yardage of your fabric, you will need to ensure that you build or create your blocks so that PreQuilt can identify specific block units (via auto recognition). If your block units are not recognizable, the software may not be able to recommend efficient ways to cutting and sewing your fabric.

### <mark style="color:blue;">About Block Units</mark>

You might be wondering what we mean by a block unit. We've defined a block unit as a sub-group of patchwork piecing that are usually sewn together first. Once completed, these block units are then sewn together to construct the quilt block.

<figure><img src="/files/SRDAyMcIfhSSgZ0IilgZ" alt="" width="563"><figcaption><p>Sawtooth Star Quilt Block</p></figcaption></figure>

For example, one way to make the Sawtooth Star quilt block is with these block units:

* 4 flying geese
* 4 small squares
* 1 large square

Another way though could be with these block units:

* 8 half-square triangles
* 4 small squares
* 1 large square

There is a lot of variety, so it's important to create your blocks using the same block units you'd use when sewing your quilt top.

### <mark style="color:blue;">Tips for Best Practices</mark>

Please use these best practices to create your quilt blocks or block units so that you can get the most out of the fabric requirements feature.

* Build out your block with block units that mimic the way you will sew your block together.
* Mix and match block units to build out more complicated and intricate blocks.
* Change the gridlines (in the Block Editor) to best divide your block space when building a block or block unit.
* Use the snapping features when creating your blocks so that shapes nest together - this will make it easier for PreQuilt's auto recognition to identify block units.
* Always build your blocks using **finished** measurements.

&#x20;&#x20;

***

## <mark style="color:blue;">How to Build a Block Unit</mark>&#x20;

Please note that I will walk you through how to create each of these block units in isolation. Mix and match these block units to build more intricate blocks that use multiple different block units.

### <mark style="color:blue;">Rectangular Block Units</mark>

<table data-view="cards"><thead><tr><th></th><th data-hidden data-card-cover data-type="files"></th><th data-hidden></th><th data-hidden></th><th data-hidden data-card-target data-type="content-ref"></th></tr></thead><tbody><tr><td><strong>Square</strong> </td><td><a href="/files/Jd50AqwxZSr7xM64nwqY">/files/Jd50AqwxZSr7xM64nwqY</a></td><td></td><td></td><td><a href="/pages/69dulGU1oipX3mW0tp0n">/pages/69dulGU1oipX3mW0tp0n</a></td></tr><tr><td><strong>Rectangle</strong></td><td><a href="/files/LNnRu2P7903Fulh1iSJo">/files/LNnRu2P7903Fulh1iSJo</a></td><td></td><td></td><td><a href="/pages/qRgJkIfK9Ux1O9uSTO5R">/pages/qRgJkIfK9Ux1O9uSTO5R</a></td></tr><tr><td><strong>Square in a Square</strong></td><td><a href="/files/VC0D4ujGs45fDaMy3RVE">/files/VC0D4ujGs45fDaMy3RVE</a></td><td></td><td></td><td><a href="/pages/t3HTwefJFxBzcrf5UhIy">/pages/t3HTwefJFxBzcrf5UhIy</a></td></tr></tbody></table>

### <mark style="color:blue;">Triangular Block Units</mark>

<table data-view="cards"><thead><tr><th></th><th data-hidden></th><th data-hidden></th><th data-hidden data-card-cover data-type="files"></th><th data-hidden data-card-target data-type="content-ref"></th></tr></thead><tbody><tr><td><strong>Half Square Triangle</strong> </td><td></td><td></td><td><a href="/files/pfSpXA5XLn8ZXMzaLvzE">/files/pfSpXA5XLn8ZXMzaLvzE</a></td><td><a href="/pages/Zr5gAUcuI02pxe9TBuVS">/pages/Zr5gAUcuI02pxe9TBuVS</a></td></tr><tr><td><strong>Flying Geese</strong></td><td></td><td></td><td><a href="/files/4SjBJyvQXh7dwWmWX4oN">/files/4SjBJyvQXh7dwWmWX4oN</a></td><td><a href="/pages/ykTm237aeZgfiLvjrgLd">/pages/ykTm237aeZgfiLvjrgLd</a></td></tr><tr><td><strong>Half Rectangle Triangle</strong></td><td></td><td></td><td><a href="/files/ScDaSNiL9RkNpm8cafvd">/files/ScDaSNiL9RkNpm8cafvd</a></td><td><a href="/pages/eA9th41te0F1KrjytCT6">/pages/eA9th41te0F1KrjytCT6</a></td></tr><tr><td><strong>Quarter Square Triangle</strong></td><td></td><td></td><td><a href="/files/MrdFcEMdOPEqiziH8MeG">/files/MrdFcEMdOPEqiziH8MeG</a></td><td><a href="/pages/q1z3DdDoj5TjulZMxClH">/pages/q1z3DdDoj5TjulZMxClH</a></td></tr><tr><td><strong>QST:</strong> <strong>Hourglass</strong></td><td></td><td></td><td><a href="/files/11PgZDvGaWtoriFz7jJp">/files/11PgZDvGaWtoriFz7jJp</a></td><td><a href="/pages/C5HER9Q7dw14SsgbB08N">/pages/C5HER9Q7dw14SsgbB08N</a></td></tr><tr><td><strong>QST: Hourglass Variation</strong></td><td></td><td></td><td><a href="/files/2no7c64Ni3bWs8qK9FCp">/files/2no7c64Ni3bWs8qK9FCp</a></td><td><a href="/pages/nuCmhnu1khue6ZN7MIqH">/pages/nuCmhnu1khue6ZN7MIqH</a></td></tr><tr><td><strong>Split QST</strong></td><td></td><td></td><td><a href="/files/ZDTXT2Kb78ZxKsBOmpz6">/files/ZDTXT2Kb78ZxKsBOmpz6</a></td><td><a href="/pages/piSBVGyu9KcDgEuPstSi">/pages/piSBVGyu9KcDgEuPstSi</a></td></tr><tr><td><strong>Triangle in a Square</strong></td><td></td><td></td><td><a href="/files/gMSvXApEs7IHoRNAJ02H">/files/gMSvXApEs7IHoRNAJ02H</a></td><td><a href="/pages/S5aKKB6zEsX7XfMuFOB2">/pages/S5aKKB6zEsX7XfMuFOB2</a></td></tr></tbody></table>

### <mark style="color:blue;">Circular Block Units</mark>

<table data-view="cards"><thead><tr><th></th><th data-hidden></th><th data-hidden></th><th data-hidden data-card-cover data-type="files"></th><th data-hidden data-card-target data-type="content-ref"></th></tr></thead><tbody><tr><td><strong>Circle</strong></td><td></td><td></td><td><a href="/files/D477KW8M2A2FV05EOGtT">/files/D477KW8M2A2FV05EOGtT</a></td><td><a href="/pages/rQVeQXGimszsjFl62tLn">/pages/rQVeQXGimszsjFl62tLn</a></td></tr><tr><td><strong>Half Circle</strong></td><td></td><td></td><td><a href="/files/4DFbmUYwQ8DixC16CCdr">/files/4DFbmUYwQ8DixC16CCdr</a></td><td><a href="/pages/dqIN4AfuFTcnrHEhkORt">/pages/dqIN4AfuFTcnrHEhkORt</a></td></tr><tr><td><strong>Traditional Drunkard's Path</strong></td><td></td><td></td><td><a href="/files/H16z3g0x6HgBbvOQkkzP">/files/H16z3g0x6HgBbvOQkkzP</a></td><td><a href="/pages/n3j2bMVU31eJOcvRjbN9">/pages/n3j2bMVU31eJOcvRjbN9</a></td></tr><tr><td><strong>Modern Drunkard's Path</strong></td><td></td><td></td><td><a href="/files/rInz1h7BKSPdYnHI7sCm">/files/rInz1h7BKSPdYnHI7sCm</a></td><td><a href="/pages/DmHGHYi4e8R5W36NIewN">/pages/DmHGHYi4e8R5W36NIewN</a></td></tr><tr><td><strong>Orange Peel (Appliquéd)</strong></td><td></td><td></td><td><a href="/files/fkp9Zlb2ENjau6uBZIDV">/files/fkp9Zlb2ENjau6uBZIDV</a></td><td><a href="/pages/2qX19918lHPBwDQcs6ff">/pages/2qX19918lHPBwDQcs6ff</a></td></tr><tr><td><strong>Orange Peel (Pieced)</strong></td><td></td><td></td><td><a href="/files/qiiyhWSCFVRBZIwEmM5W">/files/qiiyhWSCFVRBZIwEmM5W</a></td><td><a href="/pages/Oo7hNYeTfAoFjFo1LldI">/pages/Oo7hNYeTfAoFjFo1LldI</a></td></tr></tbody></table>


# Rectangular Units

Best Practices for Auto Recognition

## <mark style="color:blue;">Rectangular Block Units in PreQuilt</mark>

<table data-view="cards"><thead><tr><th></th><th data-hidden></th><th data-hidden></th><th data-hidden data-card-cover data-type="files"></th><th data-hidden data-card-target data-type="content-ref"></th></tr></thead><tbody><tr><td><strong>Square</strong> </td><td></td><td></td><td><a href="/files/Jd50AqwxZSr7xM64nwqY">/files/Jd50AqwxZSr7xM64nwqY</a></td><td><a href="/pages/69dulGU1oipX3mW0tp0n">/pages/69dulGU1oipX3mW0tp0n</a></td></tr><tr><td><strong>Rectangle</strong></td><td></td><td></td><td><a href="/files/LNnRu2P7903Fulh1iSJo">/files/LNnRu2P7903Fulh1iSJo</a></td><td><a href="/pages/qRgJkIfK9Ux1O9uSTO5R">/pages/qRgJkIfK9Ux1O9uSTO5R</a></td></tr><tr><td><strong>Square in a Square</strong></td><td></td><td></td><td><a href="/files/VC0D4ujGs45fDaMy3RVE">/files/VC0D4ujGs45fDaMy3RVE</a></td><td><a href="/pages/t3HTwefJFxBzcrf5UhIy">/pages/t3HTwefJFxBzcrf5UhIy</a></td></tr></tbody></table>


# Squares

Best Practices for Auto Recognition

<figure><img src="/files/2xh4J1f4MRMa5xjjBI6c" alt="" width="375"><figcaption><p>Square Block Unit</p></figcaption></figure>

## <mark style="color:blue;">Square Block Unit in PreQuilt</mark>

**Squares** are really the easiest block units in PreQuilt.

And since the idea behind this series is to build a block unit (not an entire block that is just a square), I'm going to create a 12" finished block that is made up of only square block units (like for example, the **Nine Patch** quilt block).

&#x20; &#x20;

***

### YouTube Video

*Coming soon...*

***

### Help Guide

1. Click on the <mark style="color:blue;">**BLOCKS tab**</mark> on the left side control panel.

   <div align="left"><figure><img src="/files/68Sy8IGIv0pf3slIgZAs" alt=""><figcaption></figcaption></figure></div>
2. Click on the <mark style="color:blue;">**Make Custom Block**</mark> button.

   <div align="left"><figure><img src="/files/m996ukpqAnSaJrChXBS5" alt=""><figcaption></figcaption></figure></div>
3. The **Block Editor panel** will slide out and overtake your screen. My block is set to 12" x 12" finished, but it doesn't matter, the next steps will work for all sized blocks.
4. Set your grid guidelines by changing the number for the horizontal and vertical units.

   * Since I'm going to be creating a **Nine Patch** quilt block, I'll set my gridlines to 3 horizontal and 3 vertical units.

   <div align="left"><figure><img src="/files/oE1wsu9Fb7rklrqGOd2o" alt=""><figcaption></figcaption></figure></div>

   <figure><img src="/files/9RQ1j6HdrycLCnfkBOxO" alt=""><figcaption></figcaption></figure>
5. Click on the <mark style="color:blue;">**square shape**</mark> (<img src="/files/hy2ZsHmPdS74SBFprTv2" alt="" data-size="line">) from the central control panel.
6. One square will be added to the block space. Done, we now have a square block unit!&#x20;

   <div align="left"><figure><img src="/files/pHyA4oJ9o0GxZ1iwNNLb" alt="" width="375"><figcaption><p>1 x Square block unit added to the quilt block space</p></figcaption></figure></div>
7. To continue building the Nine Patch block, click on the <mark style="color:blue;">**Clone button**</mark> (![](/files/Uhph6iWWhRGBUn4aG6gV)) on the central control panel.

   <figure><img src="/files/DmkDDfHiSQ90pWysyCPW" alt=""><figcaption></figcaption></figure>
8. <mark style="color:blue;">**Move**</mark> the new square block unit so it starts forming the Nine Patch block.

   <div><figure><img src="/files/WtAXOfGWmbk4HkMl70DG" alt=""><figcaption></figcaption></figure> <figure><img src="/files/LwthSOMwCq7yyjdTXcnf" alt=""><figcaption></figcaption></figure></div>
9. <mark style="color:blue;">**Repeat**</mark> Steps 7-8 until you have all the orange block units for our Nine Patch block.&#x20;

   <div align="left"><figure><img src="/files/fsM7YJbPOfg9Z2qtIeFu" alt="" width="375"><figcaption><p>5 orange square block units (Nine Patch block)</p></figcaption></figure></div>
10. Click on the <mark style="color:blue;">**Clone button**</mark> (![](/files/Uhph6iWWhRGBUn4aG6gV)) on the central control panel.

    <div><figure><img src="/files/Jl8CqQnV2eMSWeVfuFuM" alt=""><figcaption></figcaption></figure> <figure><img src="/files/v6otMIdAE2gIOiikeJhV" alt=""><figcaption></figcaption></figure></div>
11. Click on the <mark style="color:blue;">**Link button**</mark> for a different fabric link (so that there are now 2 different fabrics being used). In this example, I am using Fabric Link B.

    <figure><img src="/files/YqHuud5zrcSanOCQspxb" alt=""><figcaption></figcaption></figure>
12. <mark style="color:blue;">**Move**</mark> the new square block unit into one of the empty spots.

    <div><figure><img src="/files/CZhOB6t5uZljzB9lhRBH" alt=""><figcaption></figcaption></figure> <figure><img src="/files/1eNxN6jC7gixA1CGdITV" alt=""><figcaption></figcaption></figure></div>
13. &#x20;<mark style="color:blue;">**Clone**</mark> and <mark style="color:blue;">**move**</mark> 3 more blue square block units until the Nine Patch is completed.

    <div align="left"><figure><img src="/files/1eNxN6jC7gixA1CGdITV" alt=""><figcaption></figcaption></figure> <figure><img src="/files/qs3x0inEeehRWS2GZWii" alt=""><figcaption><p>Nine Patch with 9 square block units</p></figcaption></figure></div>

&#x20;   &#x20;

***

## <mark style="color:blue;">Sewing Construction Diagrams</mark>

No sewing construction diagrams necessary.&#x20;

Simply cut your square to size and it's a completed block unit ready to be used to create a larger quilt block.


# Rectangles

Best Practices for Auto Recognition

<figure><img src="/files/FmKeqoG5GiCaqbtga4Cx" alt="" width="563"><figcaption><p>Rectangle Block Unit</p></figcaption></figure>

## <mark style="color:blue;">Rectangle Block Unit in PreQuilt</mark>

**Rectangles** are manipulated squares in PreQuilt. You start with a square and stretch it either horizontally or vertically to create your rectangular block unit.

And since the idea behind this series is to build a block unit (not an entire block that is just a rectangle), I'm going to create a 12" finished block that includes rectangle block units (like for example, the **Rail Fence** quilt block).

&#x20; &#x20;

***

### YouTube Video

*Coming soon...*

***

### Help Guide

1. Click on the <mark style="color:blue;">**BLOCKS tab**</mark> on the left side control panel.

   <div align="left"><figure><img src="/files/68Sy8IGIv0pf3slIgZAs" alt=""><figcaption></figcaption></figure></div>
2. Click on the <mark style="color:blue;">**Make Custom Block**</mark> button.

   <div align="left"><figure><img src="/files/m996ukpqAnSaJrChXBS5" alt=""><figcaption></figcaption></figure></div>
3. The **Block Editor panel** will slide out and overtake your screen. My block is set to 12" x 12" finished, but it doesn't matter, the next steps will work for all sized blocks.
4. Set your grid guidelines by changing the number for the horizontal and vertical units.

   * Since I'm going to be creating the **Rail Fence** quilt block, I'll set my gridlines to 1 horizontal and 3 vertical units.

   <div align="left"><figure><img src="/files/x7ZXWpNcgJypXOELQO19" alt=""><figcaption></figcaption></figure></div>

   <figure><img src="/files/uv60Ty6LoDoFV87SM1Yi" alt=""><figcaption></figcaption></figure>
5. Click on the <mark style="color:blue;">**square shape**</mark> (<img src="/files/hy2ZsHmPdS74SBFprTv2" alt="" data-size="line">) from the central control panel.
6. One square will be added to the block space. Because the horizontal unit is 1, our square block unit will fill the entire space.&#x20;

   <div align="left"><figure><img src="/files/btMOqii7xauYcIwCIs0P" alt=""><figcaption></figcaption></figure></div>
7. To manipulate the square into a rectangle, <mark style="color:blue;">**grab**</mark> the square on the bottom side of the square and <mark style="color:blue;">**drag**</mark> it until the square fills the height of only 1 horizontal grid space.&#x20;

   * Note: If the snap to grid is turned on (default) then the shape will automatically fill the grid space.

   <div><figure><img src="/files/6O2xgtMtH2IfpCD4W8mH" alt=""><figcaption></figcaption></figure> <figure><img src="/files/zGTbK6F2IEUlOaSfk6Ux" alt=""><figcaption><p>1 x Rectangle block unit</p></figcaption></figure></div>
8. To finish the Rail Fence block, click on the <mark style="color:blue;">**Clone button**</mark> (![](/files/Uhph6iWWhRGBUn4aG6gV)) on the central control panel.

   <figure><img src="/files/xGwpA29S95zWkmAVsis5" alt=""><figcaption></figcaption></figure>
9. Click on the <mark style="color:blue;">**Link button**</mark> for a different fabric link (so that there are now 2 different fabrics being used). In this example, I am using Fabric Link B.

   <figure><img src="/files/v0TOhhrWlr3zv0VFykEc" alt=""><figcaption></figcaption></figure>
10. <mark style="color:blue;">**Move**</mark> the new rectangle block unit into one of the empty spots.

    <div><figure><img src="/files/pX9fz32PHK44kuDoWaIF" alt=""><figcaption></figcaption></figure> <figure><img src="/files/JQ31UDhpTgIRwgpwU12a" alt=""><figcaption></figcaption></figure></div>
11. &#x20;<mark style="color:blue;">**Repeat**</mark> 3 Steps 8-10 to finish the Rail Fence block.

    <div align="left"><figure><img src="/files/JQ31UDhpTgIRwgpwU12a" alt=""><figcaption></figcaption></figure> <figure><img src="/files/wamWrZVrnwlC6J78IiD8" alt=""><figcaption><p>Rail Fence with 3 rectangle block units</p></figcaption></figure></div>

&#x20;   &#x20;

***

## <mark style="color:blue;">Sewing Construction Diagrams</mark>

No sewing construction diagrams necessary.&#x20;

Simply cut your square to size and it's a completed block unit ready to be used to create a larger quilt block.


# Square in a Square

Best Practices for Auto Recognition

<figure><img src="/files/X8T9iIsKDXoxk4KL9jbh" alt="" width="375"><figcaption><p>Square in a Square Block Unit</p></figcaption></figure>

## <mark style="color:blue;">Square in a Square Block Unit in PreQuilt</mark>

**Square in a Square** can be created few different ways in PreQuilt. The easiest way to build it in PreQuilt is outlined below. This construction method will also enable PreQuilt to auto recognize this block unit and calculate your fabric for you.

And since the idea behind this series is to build a block unit (not an entire block that is just a square in a square), I'm going to create a 12" finished block that is made up of multiple square in a square block units (like for example, the **Broken Sash** quilt block).

&#x20; &#x20;

***

### YouTube Video

*Coming soon...*

***

### Help Guide

1. Click on the <mark style="color:blue;">**BLOCKS tab**</mark> on the left side control panel.

   <div align="left"><figure><img src="/files/68Sy8IGIv0pf3slIgZAs" alt=""><figcaption></figcaption></figure></div>
2. Click on the <mark style="color:blue;">**Make Custom Block**</mark> button.

   <div align="left"><figure><img src="/files/m996ukpqAnSaJrChXBS5" alt=""><figcaption></figcaption></figure></div>
3. The **Block Editor panel** will slide out and overtake your screen. My block is set to 12" x 12" finished, but it doesn't matter, the next steps will work for all sized blocks.
4. Set your grid guidelines by changing the number for the horizontal and vertical units.

   * Since I'm going to be creating a **Broken Sash** quilt block, I'll set my gridlines to 4 horizontal and 4 vertical units.

   <div align="left"><figure><img src="/files/yaW359WbxAZZtQamtyhV" alt=""><figcaption></figcaption></figure></div>

   <figure><img src="/files/2FCQC1b7pKv9LhGx0xJ0" alt=""><figcaption></figcaption></figure>
5. Click on the <mark style="color:blue;">**square shape**</mark> (<img src="/files/hy2ZsHmPdS74SBFprTv2" alt="" data-size="line">) from the central control panel.

   <figure><img src="/files/nvROv7TiqWDBJ9sTys4o" alt=""><figcaption></figcaption></figure>
6. <mark style="color:blue;">**Move**</mark> the square piece so it is in the top left corner of the quilt block.

   <div><figure><img src="/files/DFVxyBKZ3PlqwokelhTk" alt=""><figcaption></figcaption></figure> <figure><img src="/files/wa5XDlOujTKpb7leisHt" alt=""><figcaption></figcaption></figure></div>
7. To manipulate the square to enlarge it, <mark style="color:blue;">**grab**</mark> the square on one of the corners of the square and <mark style="color:blue;">**drag**</mark> it until the square fills the height and width of 2 horizontal and vertical grid spaces.&#x20;

   * Note: If the snap to grid is turned on (default) then the shape will automatically fill the grid space.

   <div><figure><img src="/files/1iNW7sMRqQBI4kRIrcHr" alt="" width="375"><figcaption></figcaption></figure> <figure><img src="/files/j2bUIi7K5ChjpQOkGLFS" alt="" width="375"><figcaption></figcaption></figure></div>
8. Click on the <mark style="color:blue;">**half square triangle shape**</mark> (<img src="/files/iPj39le0NWIilUW4GiLV" alt="" data-size="line">) from the central control panel.&#x20;

   <figure><img src="/files/tQMUSylJefJIkXlFAE6C" alt=""><figcaption></figcaption></figure>
9. Click on the <mark style="color:blue;">**Link button**</mark> for a different fabric link (so that there are now 2 different fabrics being used). In this example, I am using Fabric Link B.

   <figure><img src="/files/beu1UGtFECMKsKDaLn8k" alt=""><figcaption></figcaption></figure>
10. <mark style="color:blue;">**Move**</mark> the half square triangle piece into the bottom left corner of the square. It should cover the square.

    <div><figure><img src="/files/ffRCYPJOubvl5iAduW9D" alt=""><figcaption></figcaption></figure> <figure><img src="/files/dGisLEoTPkeCx8A6lPv8" alt=""><figcaption></figcaption></figure></div>
11. To continue building the Broke Sash block, click on the <mark style="color:blue;">**Clone button**</mark> (![](/files/Uhph6iWWhRGBUn4aG6gV)) on the central control panel.

    <figure><img src="/files/k7ZIJg4doA8iSmdzCDBG" alt=""><figcaption></figcaption></figure>
12. Click on the <mark style="color:blue;">**Rotate button**</mark> (![](/files/dAVu3YUaYXrBpxkyHrgW)) on the central control panel so that it is in the correct orientation.

    <div><figure><img src="/files/13tJqPbXpi6oVRGsGTGy" alt=""><figcaption></figcaption></figure> <figure><img src="/files/ZNElyGcSiEt0jQ5ecPh4" alt=""><figcaption></figcaption></figure></div>
13. <mark style="color:blue;">**Move**</mark> the new HST piece into one of the other corners to continue covering the square.

    <div><figure><img src="/files/ZNElyGcSiEt0jQ5ecPh4" alt=""><figcaption></figcaption></figure> <figure><img src="/files/IFUUajfAnFn8BDt2acvS" alt=""><figcaption></figcaption></figure></div>
14. &#x20;<mark style="color:blue;">**Repeat**</mark> Steps 11-13 until you have all the corners of the orange square have been covered and you have 1 Square in a Square block unit completed.

    <div align="left"><figure><img src="/files/twZZfZbKRvlsGykQaJJ3" alt=""><figcaption><p>1 x Square in a Square block unit</p></figcaption></figure> <figure><img src="/files/J4UnSqrExPJarxZUoKqg" alt=""><figcaption><p>Broken Sash Quilt Block with 4 Square in a Square block units</p></figcaption></figure></div>

&#x20;   &#x20;

***

## <mark style="color:blue;">Sewing Construction Diagrams</mark>

### <mark style="color:blue;">1 at a Time - Snowball Method</mark>

<figure><img src="/files/MNRjiYmK5UBb4J8WeWGo" alt=""><figcaption></figcaption></figure>

<figure><img src="/files/R20VyWpsxUNAu6GY0nOR" alt=""><figcaption></figcaption></figure>

{% file src="/files/dPgHqPaDr2rAaeBsJGaW" %}

### <mark style="color:blue;">1 at a Time - Subcut Method</mark>

<figure><img src="/files/uwiXzeIiURzBTmOH1dHe" alt=""><figcaption></figcaption></figure>

<figure><img src="/files/mTBKRQBpnkLXz2wHCzhV" alt=""><figcaption></figcaption></figure>

{% file src="/files/f5kO2eAzYuy6whHYvkwn" %}


# Snowballed Corner

Best Practices for Auto Recognition

<figure><img src="/files/4NBGnRWOZ0gCRWPqhkqb" alt=""><figcaption><p>Snowballed Triangle Corner Rectangle Block Unit</p></figcaption></figure>

## <mark style="color:blue;">Snowballed Block Unit in PreQuilt</mark>

A **Snowballed Corner** can be created in PreQuilt just like it is in real life when you're sewing it. Generally these snowballed triangle corners are on top of a square or rectangle.&#x20;

Unlike some of the other Block Unit help guides, this one will focus only on creating a snowballed corner rectangle block unit.

&#x20; &#x20;

***

### YouTube Video

*Coming soon...*

***

### Help Guide

1. Click on the <mark style="color:blue;">**BLOCKS tab**</mark> on the left side control panel.

   <div align="left"><figure><img src="/files/68Sy8IGIv0pf3slIgZAs" alt=""><figcaption></figcaption></figure></div>
2. Click on the <mark style="color:blue;">**Make Custom Block**</mark> button.

   <div align="left"><figure><img src="/files/m996ukpqAnSaJrChXBS5" alt=""><figcaption></figcaption></figure></div>
3. The **Block Editor panel** will slide out and overtake your screen. My block is set to 12" x 6" finished, but it doesn't matter, the next steps will work for all sized blocks.
4. Set your grid guidelines by changing the number for the horizontal and vertical units.

   * Since I'm going to be creating a rectangular quilt block, I'll set my gridlines to 2 horizontal and 1 vertical unit.

   <div align="left"><figure><img src="/files/24SIXvkGbWB8tX7ME41p" alt=""><figcaption></figcaption></figure></div>

   <figure><img src="/files/H7CYxInRYi0Jvmo1Tbpy" alt=""><figcaption></figcaption></figure>
5. Click on the <mark style="color:blue;">**square shape**</mark> (<img src="/files/hy2ZsHmPdS74SBFprTv2" alt="" data-size="line">) from the central control panel.

   <figure><img src="/files/OLDxQfSYvWdVU68bOAHv" alt=""><figcaption></figcaption></figure>
6. Click on the <mark style="color:blue;">**Size to Fit**</mark> button (![](/files/APNNXCFLKcxDD4SB6ta8)) on the central, vertical toolbar.&#x20;

   <div align="left"><figure><img src="/files/disPl0YGVXmWft5HV6bA" alt=""><figcaption></figcaption></figure></div>
7. This will enlarge the square to fill the entire space of the rectangle.

   <figure><img src="/files/3vtPPun1Lp0nF3O4d3SC" alt=""><figcaption></figcaption></figure>
8. Click on the <mark style="color:blue;">**half square triangle shape**</mark> (<img src="/files/iPj39le0NWIilUW4GiLV" alt="" data-size="line">) from the central control panel. (It might camouflage in with the rectangle behind it. You can see that there is a square bounding box for the triangle).

   <figure><img src="/files/QiI5trZa93gHMWJjDpk7" alt=""><figcaption></figcaption></figure>
9. Click on the <mark style="color:blue;">**Link button**</mark> for a different fabric link (so that there are now 2 different fabrics being used). In this example, I am using Fabric Link B.

   <figure><img src="/files/4A3WaFIIf8y7qac4TTzT" alt=""><figcaption></figcaption></figure>
10. <mark style="color:blue;">**Move**</mark> the half square triangle piece into the bottom left corner of the rectangle. It should cover the square.

    <figure><img src="/files/CsXLvCi2otwYSlydrDxV" alt=""><figcaption></figcaption></figure>
11. Click on the <mark style="color:blue;">**Rotate button**</mark> (![](/files/dAVu3YUaYXrBpxkyHrgW)) on the central control panel so that it is in the correct orientation.

    <figure><img src="/files/bcDH2Tx66bWNwJBfdwmG" alt=""><figcaption></figcaption></figure>
12. You now have a **snowballed corner on a rectangle**.&#x20;

### <mark style="color:blue;">Alternative Snowballed Corner</mark>

Unlike the example in the first Help Guide, sometimes the snowballed corner does not extend to the full height or width of the rectangle or square.&#x20;

Follow these instructions for creating a snowballed corner that is not the full height or width.

1. Click on the <mark style="color:blue;">**BLOCKS tab**</mark> on the left side control panel.

   <div align="left"><figure><img src="/files/68Sy8IGIv0pf3slIgZAs" alt=""><figcaption></figcaption></figure></div>
2. Click on the <mark style="color:blue;">**Make Custom Block**</mark> button.

   <div align="left"><figure><img src="/files/m996ukpqAnSaJrChXBS5" alt=""><figcaption></figcaption></figure></div>
3. The **Block Editor panel** will slide out and overtake your screen. My block is set to 12" x 6" finished, but it doesn't matter, the next steps will work for all sized blocks.
4. Set your grid guidelines by changing the number for the horizontal and vertical units.

   * Since I'm going to be creating a rectangular quilt block with the snowballed corner being half the height and ¼ of the width, I'll set my gridlines to 4 horizontal and 2 vertical unit.

   <div align="left"><figure><img src="/files/llEURGrVe1Lw3bX2aYb2" alt=""><figcaption></figcaption></figure></div>

   <figure><img src="/files/INTu8S5Oq6jd5HBXZoNq" alt=""><figcaption></figcaption></figure>
5. Click on the <mark style="color:blue;">**square shape**</mark> (<img src="/files/hy2ZsHmPdS74SBFprTv2" alt="" data-size="line">) from the central control panel.

   <figure><img src="/files/vft9etQOpE8XMdmYkIRa" alt=""><figcaption></figcaption></figure>
6. Click on the <mark style="color:blue;">**Size to Fit**</mark> button (![](/files/APNNXCFLKcxDD4SB6ta8)) on the central, vertical toolbar.&#x20;

   <div align="left"><figure><img src="/files/disPl0YGVXmWft5HV6bA" alt=""><figcaption></figcaption></figure></div>
7. This will enlarge the square to fill the entire space of the rectangle.

   <figure><img src="/files/EgDc66AFx4UOxbc5qqfH" alt=""><figcaption></figcaption></figure>
8. Click on the <mark style="color:blue;">**half square triangle shape**</mark> (<img src="/files/iPj39le0NWIilUW4GiLV" alt="" data-size="line">) from the central control panel. (It might camouflage in with the rectangle behind it. You can see that there is a square bounding box for the triangle).

   <figure><img src="/files/GoeADtab2W3VFxOakmQ1" alt=""><figcaption></figcaption></figure>
9. Click on the <mark style="color:blue;">**Link button**</mark> for a different fabric link (so that there are now 2 different fabrics being used). In this example, I am using Fabric Link B.

   <figure><img src="/files/FwPCUszNbYd2oOj3P7Cl" alt=""><figcaption></figcaption></figure>
10. <mark style="color:blue;">**Move**</mark> the half square triangle piece into the top left corner of the rectangle. It should cover the square.

    <figure><img src="/files/f7Tj4Vjb2YwYPrTJT8aR" alt=""><figcaption></figcaption></figure>
11. Click on the <mark style="color:blue;">**Rotate button**</mark> (![](/files/dAVu3YUaYXrBpxkyHrgW)) on the central control panel so that it is in the correct orientation.

    <figure><img src="/files/iB4SX7xK5n2YE66VojIS" alt=""><figcaption></figcaption></figure>
12. You now have a **snowballed corner on a rectangle**.&#x20;

&#x20;   &#x20;

***

## <mark style="color:blue;">Sewing Construction Diagrams</mark>

### <mark style="color:blue;">1 at a Time - Snowball Method</mark>

*Coming soon*


# Triangular Units

## <mark style="color:blue;">Triangle Block Units in PreQuilt</mark>

<table data-view="cards"><thead><tr><th></th><th data-hidden></th><th data-hidden></th><th data-hidden data-card-cover data-type="files"></th><th data-hidden data-card-target data-type="content-ref"></th></tr></thead><tbody><tr><td><strong>Half Square Triangle</strong> </td><td></td><td></td><td><a href="/files/pfSpXA5XLn8ZXMzaLvzE">/files/pfSpXA5XLn8ZXMzaLvzE</a></td><td><a href="/pages/Zr5gAUcuI02pxe9TBuVS">/pages/Zr5gAUcuI02pxe9TBuVS</a></td></tr><tr><td><strong>Flying Geese</strong></td><td></td><td></td><td><a href="/files/4SjBJyvQXh7dwWmWX4oN">/files/4SjBJyvQXh7dwWmWX4oN</a></td><td><a href="/pages/ykTm237aeZgfiLvjrgLd">/pages/ykTm237aeZgfiLvjrgLd</a></td></tr><tr><td><strong>Half Rectangle Triangle</strong></td><td></td><td></td><td><a href="/files/ScDaSNiL9RkNpm8cafvd">/files/ScDaSNiL9RkNpm8cafvd</a></td><td><a href="/pages/eA9th41te0F1KrjytCT6">/pages/eA9th41te0F1KrjytCT6</a></td></tr><tr><td><strong>Quarter Square Triangle</strong></td><td></td><td></td><td><a href="/files/MrdFcEMdOPEqiziH8MeG">/files/MrdFcEMdOPEqiziH8MeG</a></td><td><a href="/pages/q1z3DdDoj5TjulZMxClH">/pages/q1z3DdDoj5TjulZMxClH</a></td></tr><tr><td><strong>QST:</strong> <strong>Hourglass</strong></td><td></td><td></td><td><a href="/files/11PgZDvGaWtoriFz7jJp">/files/11PgZDvGaWtoriFz7jJp</a></td><td><a href="/pages/C5HER9Q7dw14SsgbB08N">/pages/C5HER9Q7dw14SsgbB08N</a></td></tr><tr><td><strong>QST: Hourglass Variation</strong></td><td></td><td></td><td><a href="/files/2no7c64Ni3bWs8qK9FCp">/files/2no7c64Ni3bWs8qK9FCp</a></td><td><a href="/pages/nuCmhnu1khue6ZN7MIqH">/pages/nuCmhnu1khue6ZN7MIqH</a></td></tr><tr><td><strong>Split QST</strong></td><td></td><td></td><td><a href="/files/ZDTXT2Kb78ZxKsBOmpz6">/files/ZDTXT2Kb78ZxKsBOmpz6</a></td><td><a href="/pages/piSBVGyu9KcDgEuPstSi">/pages/piSBVGyu9KcDgEuPstSi</a></td></tr><tr><td><strong>Triangle in a Square</strong></td><td></td><td></td><td><a href="/files/gMSvXApEs7IHoRNAJ02H">/files/gMSvXApEs7IHoRNAJ02H</a></td><td><a href="/pages/S5aKKB6zEsX7XfMuFOB2">/pages/S5aKKB6zEsX7XfMuFOB2</a></td></tr></tbody></table>

<br>


# Half Square Triangle (HST)

Best Practices for Auto Recognition

<figure><img src="/files/k5CqKOY7g03neQOGozyI" alt="" width="375"><figcaption><p>Half Square Triangle Block Unit</p></figcaption></figure>

## <mark style="color:blue;">Half Square Triangle (HST) Block Unit in PreQuilt</mark>

As a foundation block unit, it's great to nail this one down!&#x20;

And since the idea behind this series is to build a block unit (not an entire block that is just a half square triangle), I'm going to create a 12" finished block that has half square triangle block units in it (like for example, the **Shoofly** quilt block).

&#x20; &#x20;

***

### YouTube Video

*Coming soon...*

***

### Help Guide

1. Click on the <mark style="color:blue;">**BLOCKS tab**</mark> on the left side control panel.

   <div align="left"><figure><img src="/files/68Sy8IGIv0pf3slIgZAs" alt=""><figcaption></figcaption></figure></div>
2. Click on the <mark style="color:blue;">**Make Custom Block**</mark> button.

   <div align="left"><figure><img src="/files/m996ukpqAnSaJrChXBS5" alt=""><figcaption></figcaption></figure></div>
3. The **Block Editor panel** will slide out and overtake your screen. My block is set to 12" x 12" finished, but it doesn't matter, the next steps will work for all sized blocks.
4. Set your grid guidelines by changing the number for the horizontal and vertical units.

   * Since I'm going to be creating the **Shoofly** quilt block, I'll set my gridlines to 3 horizontal and 3 vertical units.

   <div align="left"><figure><img src="/files/oE1wsu9Fb7rklrqGOd2o" alt=""><figcaption></figcaption></figure></div>

   <figure><img src="/files/Dw794XvkS7EMVT4gtGbZ" alt=""><figcaption></figcaption></figure>
5. Click on the <mark style="color:blue;">**half square triangle shape**</mark> (<img src="/files/JktN06ZtsTyyjBt6Xy1M" alt="" data-size="line">) from the central control panel.
6. One half square triangle will be added to the block space. <mark style="color:blue;">**Move**</mark> it into the correct position by clicking on the shape on the block space and moving it to where it belongs.

   <div><figure><img src="/files/7OUJpj8Qk5ARHDx9EY7A" alt=""><figcaption><p>HST shape added to the quilt block space</p></figcaption></figure> <figure><img src="/files/CZ3Ha5Q4sr5MV07M0az9" alt=""><figcaption><p>HST shape moved to build the block</p></figcaption></figure></div>
7. We now have one half square triangle that fills one ninth of the quilt block.
   * Keep in mind this is only half of the block unit, the other half is empty (denoted by gingham background).
8. With the half square triangle shape selected, click on the <mark style="color:blue;">**Clone button**</mark> (![](/files/Uhph6iWWhRGBUn4aG6gV)) on the central control panel.

   <figure><img src="/files/VALjnu1tXilrecSvqNvi" alt=""><figcaption><p>Cloned HST shape - identical to the first HST (Using Fabric Link A)</p></figcaption></figure>
9. Click on the <mark style="color:blue;">**Link button**</mark> for a different fabric link (so that there are 2 different fabrics being used in your half square triangle block (unit).

   <figure><img src="/files/pguyd0ifQS4NgqUyxnjU" alt=""><figcaption><p>Cloned HST shape - now using Fabric Link C</p></figcaption></figure>
10. Click on the <mark style="color:blue;">**Rotate button**</mark> (![](/files/dAVu3YUaYXrBpxkyHrgW)) on the central control panel so that it is in the correct orientation.

    <div><figure><img src="/files/KJ7LcxsTe4qWmirU4yQa" alt=""><figcaption></figcaption></figure> <figure><img src="/files/u7kgowPHdmCG2iZkyAxW" alt=""><figcaption></figcaption></figure></div>
11. <mark style="color:blue;">**Move**</mark> the new half square triangle piece so it fills the empty half of the quilt block unit. It should snap into place and be snug with the first half square triangle piece.

    <div align="left"><figure><img src="/files/GvE3CxM50CRew4Xt1gW0" alt="" width="375"><figcaption><p>1 x HST block unit</p></figcaption></figure> <figure><img src="/files/PSBpjR9tbqpxBYdKr55V" alt="" width="375"><figcaption><p>Shoofly Block with 4 HST block units</p></figcaption></figure></div>

&#x20;   &#x20;

***

## <mark style="color:blue;">Sewing Construction Diagrams</mark>

### <mark style="color:blue;">2 at a Time Method</mark>

<figure><img src="/files/bON3o7DpDpThESvblTjB" alt=""><figcaption></figcaption></figure>

{% file src="/files/aeh6kQEIDhItAQrqrT9m" %}

### <mark style="color:blue;">4 at a Time Method</mark>

<figure><img src="/files/iEqlXbRfXpiO80GyMlnx" alt=""><figcaption></figcaption></figure>

{% file src="/files/9qhx23RB0I0r5H8rjw75" %}

### <mark style="color:blue;">8 at a Time Method</mark>

<figure><img src="/files/RGdXSwEERbejmZFfWd8A" alt=""><figcaption></figcaption></figure>

{% file src="/files/MiRB7rLqCKO9pc32EZEj" %}

### <mark style="color:blue;">32 at a Time Method</mark>

<div data-full-width="false"><figure><img src="/files/5yZqWBxC7AN0d54QmCMp" alt=""><figcaption></figcaption></figure></div>

<figure><img src="/files/rWByEC4E5jNMfnepdjy3" alt=""><figcaption></figcaption></figure>

{% file src="/files/jYHydhoY1m0kkzY1VhsW" %}


# Flying Geese

Best Practices for Auto Recognition

<figure><img src="/files/LMurMjGk9GCGBF3Y0Lae" alt=""><figcaption><p>Flying Geese Block Unit</p></figcaption></figure>

## <mark style="color:blue;">Flying Geese Block Unit in PreQuilt</mark>

The **Flying Geese** block unit is composed of a manipulated equilateral triangle and two half square triangles.&#x20;

And since the idea behind this series is to build a block unit (not an entire block of just a flying geese), I'm going to create a 12" finished block that has flying geese block units in it (like for example, the **Sawtooth Star** quilt block).

***

### YouTube Video

*Coming soon...*

***

### Help Guide

1. Click on the <mark style="color:blue;">**BLOCKS tab**</mark> on the left side control panel.

   <div align="left"><figure><img src="/files/68Sy8IGIv0pf3slIgZAs" alt=""><figcaption></figcaption></figure></div>
2. Click on the <mark style="color:blue;">**Make Custom Block**</mark> button.

   <div align="left"><figure><img src="/files/m996ukpqAnSaJrChXBS5" alt=""><figcaption></figcaption></figure></div>
3. The **Block Editor panel** will slide out and overtake your screen. My block is set to 12" x 12" finished, but it doesn't matter, the next steps will work for all sized blocks.
4. Set your grid guidelines by changing the number for the horizontal and vertical units.

   * Since I'm going to be creating the **Sawtooth Star** quilt block, I'll set my gridlines to 4 horizontal and 4 vertical units.

   <div align="left"><figure><img src="/files/dZwDHVP5LLO7JixxuZoe" alt=""><figcaption></figcaption></figure></div>

   <figure><img src="/files/SicafsOuZhVbdQ2HeTwn" alt=""><figcaption></figcaption></figure>
5. Click on the <mark style="color:blue;">**isosceles triangle shape**</mark> (<img src="/files/Whpe3suPrbTmciB9YM3b" alt="" data-size="line">) from the central control panel.
6. One isosceles triangle will be added to the block space. <mark style="color:blue;">**Move**</mark> it into the correct position by clicking on the shape on the block space and moving it to where it belongs.

   <div><figure><img src="/files/U0xosffafSDmpF4JJuVy" alt="" width="563"><figcaption><p>Isosceles triangle shape added to the quilt block space</p></figcaption></figure> <figure><img src="/files/13CWyYyhf1jyq8IMw0Gm" alt="" width="563"><figcaption><p>Isosceles triangle shape moved to create Flying Geese</p></figcaption></figure></div>
7. Now that the isosceles triangle is in place, we can now stretch it into the shape of a quarter square triangle. With the triangle selected, grab the square on the right side of the isosceles triangle and drag it until the triangle fills the width of two grid spaces. If the snap to grid is turned on (default) then the shape will automatically fill the grid space.

   * Keep in mind this is only one part of the Flying Geese, the two half square triangle pieces on either side are not there yet (empty).

   <div><figure><img src="/files/fCdj2JLuZoP5TtjXku9G" alt=""><figcaption></figcaption></figure> <figure><img src="/files/Ux4gI0d7KbaYVUHstgAA" alt=""><figcaption></figcaption></figure></div>
8. Now we can add the rest of the block unit. Click on the <mark style="color:blue;">**half square triangle shape**</mark> (<img src="/files/EEePm3rhCekaER6O6O2g" alt="" data-size="line">) from the central control panel.

   <figure><img src="/files/YqqFz14DIFdZpnn8J4Zz" alt=""><figcaption></figcaption></figure>
9. Click on the <mark style="color:blue;">**Rotate button**</mark> (![](/files/dAVu3YUaYXrBpxkyHrgW)) on the central control panel so that it is in the correct orientation. You will need to click on the Rotate button several times to get it to be upside down.

   <div><figure><img src="/files/zLI8D0cR5mOvi9NqN3AO" alt=""><figcaption></figcaption></figure> <figure><img src="/files/eYG1ZtMDcZwzSS9ldKFn" alt=""><figcaption></figcaption></figure></div>
10. lick on the <mark style="color:blue;">**Link button**</mark> for a different fabric link (so that the new QST block piece is now linked to a different Fabric Link). In this example, I've linked them to Fabric B.

    <figure><img src="/files/dxTx0yhleYJijKoKm13T" alt=""><figcaption></figcaption></figure>
11. <mark style="color:blue;">**Move**</mark> the new half square triangle piece so it is to the right of the quarter square triangle. It should snap into place.

    <div align="left"><figure><img src="/files/0lsotrI856BsMpy3Bj7a" alt="" width="375"><figcaption></figcaption></figure></div>
12. <mark style="color:blue;">**Click**</mark> on the half square triangle shape to select it and then click on the <mark style="color:blue;">**Clone button**</mark> (![](/files/Uhph6iWWhRGBUn4aG6gV)) on the central control panel.

    <div><figure><img src="/files/0lsotrI856BsMpy3Bj7a" alt=""><figcaption></figcaption></figure> <figure><img src="/files/PtUArCF8RTfqCkXxiN37" alt=""><figcaption></figcaption></figure></div>
13. Click on the <mark style="color:blue;">**Rotate button**</mark> (![](/files/dAVu3YUaYXrBpxkyHrgW)) on the central control panel so that the new HST is in the correct orientation. And move it into the position on the other side of the quarter square triangle piece.

    <div><figure><img src="/files/PtUArCF8RTfqCkXxiN37" alt=""><figcaption></figcaption></figure> <figure><img src="/files/lCJoU74MyzrZoSiEloh6" alt=""><figcaption></figcaption></figure></div>
14. <mark style="color:blue;">**Move**</mark> the HST piece so that it is to the left of the orange quarter square triangle. Now you have a completed Flying Geese block unit, which is also the bottom points of a Sawtooth Star.&#x20;

    <div align="left"><figure><img src="/files/sr6iFlWAbUESMBOtDDsR" alt=""><figcaption><p>1 x Flying Geese block unit</p></figcaption></figure> <figure><img src="/files/PTo4TCz9pXxaZBhPzsbI" alt=""><figcaption><p>Complete Sawtooth Star with 4 Flying Geese block units</p></figcaption></figure></div>

&#x20;   &#x20;

***

## <mark style="color:blue;">Sewing Construction Diagrams</mark>

### <mark style="color:blue;">1 at a Time - Snowball Method</mark>

<figure><img src="/files/QRVjEZGfXaepZ9BXzCNG" alt=""><figcaption></figcaption></figure>

<figure><img src="/files/eK7n1JgSiEb1RkSlgL0n" alt=""><figcaption></figcaption></figure>

{% file src="/files/Y2TQdRmq1z4HKYADeE0J" %}

### <mark style="color:blue;">1 at a Time - Subcut Method</mark>

<figure><img src="/files/k2FCbEaSKAneBP9gsRAb" alt=""><figcaption></figcaption></figure>

<figure><img src="/files/0ngzd0DGKjSJABnbvjXj" alt=""><figcaption></figcaption></figure>

{% file src="/files/e8YV26ukkWz8G4NDR9ql" %}

### <mark style="color:blue;">4 at a Time - No Waste Method</mark>

<figure><img src="/files/QIM664IfgiWJB07WXcYR" alt=""><figcaption></figcaption></figure>

<figure><img src="/files/Grqj1HFggC3DMXjxsTGo" alt=""><figcaption></figcaption></figure>

{% file src="/files/AujGf0h3bm17DQP31Rhs" %}


# Half Rectangle Triangle (HRT)

Best Practices for Auto Recognition

<figure><img src="/files/pzZSi6LO6W6kn6ByCzBi" alt=""><figcaption><p>Half Square Triangle Block Unit</p></figcaption></figure>

## <mark style="color:blue;">Half Rectangle Triangle (HRT) Block Unit in PreQuilt</mark>

This more intermediate or advanced block unit can be tough to nail in the sewing room. But it's pretty easy peasy in PreQuilt.

Similar to rectangles, **half rectangle triangles** are manipulated half square triangles that are stretched to fit a rectangular shape instead of a square.

And since the idea behind this series is to build a block unit (not an entire block that is just a half rectangle triangle), I'm going to create a 12" finished block that has half rectangle triangle block units in it (like for example, a simple, scrappy **Diamond** quilt block).

&#x20; &#x20;

***

### YouTube Video

*Coming soon...*

***

### Help Guide

1. Click on the <mark style="color:blue;">**BLOCKS tab**</mark> on the left side control panel.

   <div align="left"><figure><img src="/files/68Sy8IGIv0pf3slIgZAs" alt=""><figcaption></figcaption></figure></div>
2. Click on the <mark style="color:blue;">**Make Custom Block**</mark> button.

   <div align="left"><figure><img src="/files/m996ukpqAnSaJrChXBS5" alt=""><figcaption></figcaption></figure></div>
3. The **Block Editor panel** will slide out and overtake your screen. My block is set to 6" x 12" finished, but it doesn't matter, the next steps will work for all sized blocks.
4. Set your grid guidelines by changing the number for the horizontal and vertical units.

   * Since I'm going to be creating a scrappy **Diamonds** quilt block, I'll set my gridlines to 2 horizontal and 4 vertical units.

   <div align="left"><figure><img src="/files/pK11NlHuqM53LTDTxQ6P" alt=""><figcaption></figcaption></figure></div>

   <figure><img src="/files/lVsLDJBfC2ox2sqY6iZm" alt=""><figcaption></figcaption></figure>
5. Click on the <mark style="color:blue;">**half square triangle shape**</mark> (<img src="/files/JktN06ZtsTyyjBt6Xy1M" alt="" data-size="line">) from the central control panel.
6. One half square triangle will be added to the block space. <mark style="color:blue;">**Move**</mark> it into the correct position by clicking on the shape on the block space and moving it to where it belongs.
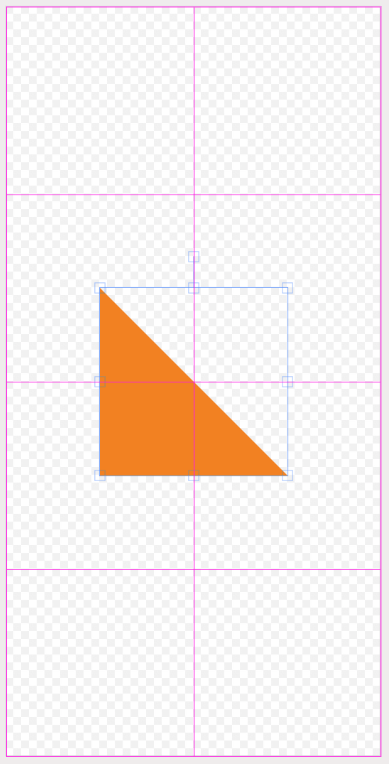
   <div><figure><img src="/files/DPSdQHfLoY15PDdeObbJ" alt=""><figcaption><p>HST shape added to the quilt block space</p></figcaption></figure> <figure><img src="/files/tdUNnpTdSahpc449Wb47" alt=""><figcaption><p>HST shape moved to build the block</p></figcaption></figure></div>
7. We now need to stretch the HST so that it's rectangular. <mark style="color:blue;">**Grab**</mark> the square on the top side of the HST and <mark style="color:blue;">**drag**</mark> it until the triangle fills the height of only 2 vertical grid spaces.&#x20;

   * Note: If the snap to grid is turned on (default) then the shape will automatically fill the grid space.

   <div><figure><img src="/files/xI7NY21CGuOX4mCzJv9w" alt=""><figcaption></figcaption></figure> <figure><img src="/files/DD1KJVGHRuhy5zM5KkBC" alt=""><figcaption></figcaption></figure></div>
8. With the half rectangle triangle shape selected, click on the <mark style="color:blue;">**Clone button**</mark> (![](/files/Uhph6iWWhRGBUn4aG6gV)) on the central control panel.

   <figure><img src="/files/fJdfTGjvRN2dCSjIf9yF" alt=""><figcaption></figcaption></figure>
9. Click on the <mark style="color:blue;">**Link button**</mark> for a different fabric link (so that there are 2 different fabrics being used in your half rectangle triangle block (unit). In this example, I'll link the new HRT to Fabric Link B.

   <figure><img src="/files/5qIoia0uH4rQ8Yd89V5s" alt=""><figcaption><p>Cloned HRT shape - now using Fabric Link B</p></figcaption></figure>
10. Click on the <mark style="color:blue;">**Rotate button**</mark> (![](/files/dAVu3YUaYXrBpxkyHrgW)) on the central control panel so that it is in the correct orientation.

    <div><figure><img src="/files/aN07ZJRoHQUjRj3VKOQX" alt=""><figcaption></figcaption></figure> <figure><img src="/files/PqvVxCASev2BoUyWztd1" alt=""><figcaption></figcaption></figure></div>
11. <mark style="color:blue;">**Move**</mark> the new half rectangle triangle piece so it fills the empty half of the quilt block unit. It should snap into place and be snug with the first half square triangle piece.

    <figure><img src="/files/jUT3gj3axEsZSGZWSv8P" alt=""><figcaption><p>1 x HRT block unit</p></figcaption></figure>
12. <mark style="color:blue;">**Repeat**</mark> Steps 5-11, but make sure to create a **mirror** version of the first half rectangle triangle.&#x20;

    <div><figure><img src="/files/uYJxAZ8wMOkLHIgQBP7g" alt=""><figcaption><p>First HRT block unit</p></figcaption></figure> <figure><img src="/files/jaj2ypfmRJWetRdbeWSh" alt=""><figcaption><p>Second HRT block unit is a <strong>MIRRORED</strong> version of the first</p></figcaption></figure></div>
13. With the **ALL** the half rectangle triangle shapes selected, click on the <mark style="color:blue;">**Clone button**</mark> (![](/files/Uhph6iWWhRGBUn4aG6gV)) on the central control panel.
14. <mark style="color:blue;">**Rotate**</mark> and <mark style="color:blue;">**move**</mark> the new half rectangle triangle block units so they fill the empty half of the scrappy Diamond quilt block. They should snap into place.

    <figure><img src="/files/BdYqDZKKFFJiE0gbeFgh" alt=""><figcaption><p>Diamond Quilt Block made from 4 x HRT block units</p></figcaption></figure>

&#x20;   &#x20;

***

## <mark style="color:blue;">Sewing Construction Diagrams</mark>

### <mark style="color:blue;">1 at a Time (Subcut) Method</mark>&#x20;

<figure><img src="/files/A3SR6r18Xy0xlUHVGfEa" alt=""><figcaption></figcaption></figure>

<figure><img src="/files/8BbqapcZD7x1zu8VIJjq" alt=""><figcaption></figcaption></figure>

{% file src="/files/Yv3FS8MUxfBrVI8ayQ7s" %}

### <mark style="color:blue;">2 at a Time Method</mark>

<figure><img src="/files/XJw5zxk1YjDmg2fOtMZj" alt=""><figcaption></figcaption></figure>

<figure><img src="/files/NlQKhv8ZCdSDDIoGT0YI" alt=""><figcaption></figcaption></figure>

<figure><img src="/files/kDpUEj5Gq6ugQwuL7SJz" alt=""><figcaption></figcaption></figure>

{% file src="/files/dUircnGTMc0GP4DJDdTB" %}


# Quarter Square Triangle (QST)

Best Practices for Auto Recognition

<figure><img src="/files/iasMzNMmb0llaUh3zeep" alt="" width="375"><figcaption><p>Quarter Square Triangle Block Unit</p></figcaption></figure>

## <mark style="color:blue;">Quarter Square Triangle (QST) Block Unit in PreQuilt</mark>

This is another foundation block that will help you create a wide variety of quilt blocks.

But it's important to note that there are 4 different **Quarter Square Triangle (QST)** block units that can be auto recognized in PreQuilt.&#x20;

It's important to make sure that you create your block unit correctly in order for the fabric requirements and cutting instructions to be accurate.

***

## <mark style="color:blue;">Quarter Triangle Block Units in PreQuilt</mark>

<table data-view="cards"><thead><tr><th></th><th data-hidden></th><th data-hidden></th><th data-hidden data-card-cover data-type="files"></th><th data-hidden data-card-target data-type="content-ref"></th></tr></thead><tbody><tr><td><strong>Quarter Square Triangle</strong></td><td></td><td></td><td><a href="/files/MrdFcEMdOPEqiziH8MeG">/files/MrdFcEMdOPEqiziH8MeG</a></td><td><a href="/pages/q1z3DdDoj5TjulZMxClH">/pages/q1z3DdDoj5TjulZMxClH</a></td></tr><tr><td><strong>QST:</strong> <strong>Hourglass</strong></td><td></td><td></td><td><a href="/files/11PgZDvGaWtoriFz7jJp">/files/11PgZDvGaWtoriFz7jJp</a></td><td><a href="/pages/C5HER9Q7dw14SsgbB08N">/pages/C5HER9Q7dw14SsgbB08N</a></td></tr><tr><td><strong>QST: Hourglass Variation</strong></td><td></td><td></td><td><a href="/files/2no7c64Ni3bWs8qK9FCp">/files/2no7c64Ni3bWs8qK9FCp</a></td><td><a href="/pages/nuCmhnu1khue6ZN7MIqH">/pages/nuCmhnu1khue6ZN7MIqH</a></td></tr><tr><td><strong>Split QST</strong></td><td></td><td></td><td><a href="/files/ZDTXT2Kb78ZxKsBOmpz6">/files/ZDTXT2Kb78ZxKsBOmpz6</a></td><td><a href="/pages/piSBVGyu9KcDgEuPstSi">/pages/piSBVGyu9KcDgEuPstSi</a></td></tr></tbody></table>


# QST: 4 Different Fabrics

Best Practices for Auto Recognition

<figure><img src="/files/zHvF8L0jwTA9NnL3YDqx" alt="" width="375"><figcaption><p>Quarter Square Triangle (QST) Block Unit</p></figcaption></figure>

## <mark style="color:blue;">QST Block Unit in PreQuilt</mark>

A common **Quarter Square Triangle** block unit is often composed of 4 different fabrics and can have a very scrappy look to it.

And since the idea behind this series is to build a block unit (not an entire block that is just a quarter square triangle), I'm going to create a 12" finished block that has a quarter square triangle block unit in it (like for example, the **Card Trick** quilt block).

***

### YouTube Video

*Coming soon...*

***

### Help Guide

1. Click on the <mark style="color:blue;">**BLOCKS tab**</mark> on the left side control panel.

   <div align="left"><figure><img src="/files/68Sy8IGIv0pf3slIgZAs" alt=""><figcaption></figcaption></figure></div>
2. Click on the <mark style="color:blue;">**Make Custom Block**</mark> button.

   <div align="left"><figure><img src="/files/m996ukpqAnSaJrChXBS5" alt=""><figcaption></figcaption></figure></div>
3. The **Block Editor panel** will slide out and overtake your screen. My block is set to 12" x 12" finished, but it doesn't matter, the next steps will work for all sized blocks.
4. Set your grid guidelines by changing the number for the horizontal and vertical units.

   * In this example, I'd like to create the **Card Trick** quilt block, so I'll set my gridlines to 6 horizontal and 6 vertical units.
   * Note: I set 6 horizontal and 6 vertical (instead of 3), because I need to have a gridline for the midpoint of each QST.

   <div align="left"><figure><img src="/files/MilQ9uyNuc3FFBv5S5LW" alt=""><figcaption></figcaption></figure></div>

   <figure><img src="/files/CaVLVG79GFU37GPAqnNz" alt=""><figcaption></figcaption></figure>
5. Click on the <mark style="color:blue;">**isosceles triangle shape**</mark> (<img src="/files/Whpe3suPrbTmciB9YM3b" alt="" data-size="line">) from the central control panel.
6. One isosceles triangle will be added to the block space. <mark style="color:blue;">**Move**</mark> it into the correct position by clicking on the shape on the block space and moving it to where it belongs.

   <div><figure><img src="/files/VpqSWW3eY9ipLS7J850R" alt=""><figcaption><p>Isosceles triangle shape added to the quilt block space</p></figcaption></figure> <figure><img src="/files/NTEoj0n3hquKYZsWEPcy" alt=""><figcaption><p>Isosceles triangle shape moved to one side of the QST</p></figcaption></figure></div>
7. Now that the isosceles triangle is in place, we can now stretch it into the shape of a quarter square triangle. With the triangle selected, grab the square on the right side of the isosceles triangle and drag it until the triangle fills the width of two grid spaces. If the snap to grid is turned on (default) then the shape will automatically fill the grid space.

   * Keep in mind this is only quarter of the block unit, the three quarters are empty (denoted by gingham background).

   <div><figure><img src="/files/fCdj2JLuZoP5TtjXku9G" alt=""><figcaption></figcaption></figure> <figure><img src="/files/Ux4gI0d7KbaYVUHstgAA" alt=""><figcaption></figcaption></figure></div>
8. With the quarter square triangle shape selected, click on the <mark style="color:blue;">**Clone button**</mark> (![](/files/Uhph6iWWhRGBUn4aG6gV)) on the central control panel.

   <figure><img src="/files/47LrRZ0SaCj6H1vwVTb8" alt=""><figcaption><p>Cloned QST shape - identical to the first QST (Using Fabric Link A)</p></figcaption></figure>
9. Click on the <mark style="color:blue;">**Rotate button**</mark> (![](/files/dAVu3YUaYXrBpxkyHrgW)) on the central control panel so that it is in the correct orientation. You will need to click on the Rotate button several times to get it to be upside down.

   <div><figure><img src="/files/LrGW2QRiMw3Yd12HAWKB" alt=""><figcaption></figcaption></figure> <figure><img src="/files/DfEndr4ctBiA1FcMc4si" alt=""><figcaption></figcaption></figure></div>
10. <mark style="color:blue;">**Move**</mark> the new quarter square triangle piece so it is opposite (and above) the first quarter square triangle. It should snap into place and the tip of the QST piece should meet perfectly at the middle of the 4 grid spaces.

    <div align="left"><figure><img src="/files/xvGrBjqL6eIWE05Zrfxx" alt="" width="375"><figcaption></figcaption></figure></div>
11. Click on the <mark style="color:blue;">**Link button**</mark> for a different fabric link (so that the new QST block piece is now linked to a different Fabric Link). In this example, I've linked them to Fabric D.

    <div><figure><img src="/files/xvGrBjqL6eIWE05Zrfxx" alt=""><figcaption><p>Before: 2 identical QST pieces</p></figcaption></figure> <figure><img src="/files/9r8yEcyusvSXhMoVb4cM" alt=""><figcaption><p>After: 2 different QST pieces</p></figcaption></figure></div>
12. <mark style="color:blue;">**Click**</mark> on one of the quarter square triangle shapes to select it and then click on the <mark style="color:blue;">**Clone button**</mark> (![](/files/Uhph6iWWhRGBUn4aG6gV)) on the central control panel.

    <div><figure><img src="/files/9r8yEcyusvSXhMoVb4cM" alt=""><figcaption><p>Before: 2 different QSTs</p></figcaption></figure> <figure><img src="/files/O2otZ9UZTm0RTuXAveyF" alt=""><figcaption><p>After: 2 different QSTs + 1 cloned copy</p></figcaption></figure></div>
13. Click on the <mark style="color:blue;">**Link button**</mark> for a different fabric link (so that the new QST block piece is now linked to a different Fabric Link). In this example, I've linked them to Fabric C.

    <figure><img src="/files/CopxbnfOme18GmKHHCaw" alt=""><figcaption><p>3 QST shapes - now all using different fabric links</p></figcaption></figure>
14. Click on the <mark style="color:blue;">**Rotate button**</mark> (![](/files/dAVu3YUaYXrBpxkyHrgW)) on the central control panel so that the new QST is in the correct orientation. And move it into the position of your choice (either left or right side of the block unit).

    <div><figure><img src="/files/nygoEZmHfDWnVNr1DVVW" alt=""><figcaption></figcaption></figure> <figure><img src="/files/qbI4e87yOdBQNxdMpXxB" alt=""><figcaption></figcaption></figure></div>
15. <mark style="color:blue;">**Repeat**</mark> Steps 12-14 for the last quarter square triangle piece so that it completes the QST block unit.

    <div align="left"><figure><img src="/files/zaVqu2cWlUJt58PvyaW0" alt=""><figcaption><p>1 x QST block unit</p></figcaption></figure> <figure><img src="/files/SWlwd4CqASrcDemDUPUs" alt=""><figcaption><p>Card Trick block with 1 center QST block unit</p></figcaption></figure></div>

&#x20;   &#x20;

***

## <mark style="color:blue;">Sewing Construction Diagrams</mark>

### <mark style="color:blue;">1 at a Time Subcut Method</mark>

This method makes 1 QST block unit at a time. But these instructions give you enough fabric to produce 4 QST units. But each QST block unit is made independently.

<figure><img src="/files/06z4tyVxcHy8iqVpOPNw" alt=""><figcaption></figcaption></figure>

<figure><img src="/files/7sSRtUWtrNLAQoCLwmei" alt=""><figcaption></figcaption></figure>

{% file src="/files/URV1KR5xLJDhblmoD4I9" %}


# QST: Hourglass or Bowtie

Best Practices for Auto Recognition

<figure><img src="/files/artIsXAIQDUzEjgxD8pD" alt="" width="375"><figcaption><p>Hourglass or Bowtie Quarter Square Triangle (QST) Block Unit</p></figcaption></figure>

## <mark style="color:blue;">Hourglass or Bowtie QST Block Unit in PreQuilt</mark>

It's important to note that the **Hourglass or Bowtie QST** has 2 different fabrics that are both opposite one another. Depending on which fabric stands out more, this block unit can look either like an hourglass or a bowtie.

There is also a [variation of the Hourglass QST](broken://pages/nuCmhnu1khue6ZN7MIqH) that uses 3 fabrics.

Since the idea behind this series is to build a block unit (not an entire block of just an Hourglass), I'm going to create a 12" finished block that has Hourglass block units in it (like for example, the **Ohio Star** quilt block).

***

### YouTube Video

*Coming soon...*

***

### Help Guide

1. Click on the <mark style="color:blue;">**BLOCKS tab**</mark> on the left side control panel.

   <div align="left"><figure><img src="/files/68Sy8IGIv0pf3slIgZAs" alt=""><figcaption></figcaption></figure></div>
2. Click on the <mark style="color:blue;">**Make Custom Block**</mark> button.

   <div align="left"><figure><img src="/files/m996ukpqAnSaJrChXBS5" alt=""><figcaption></figcaption></figure></div>
3. The **Block Editor panel** will slide out and overtake your screen. My block is set to 12" x 12" finished, but it doesn't matter, the next steps will work for all sized blocks.
4. Set your grid guidelines by changing the number for the horizontal and vertical units.

   * In this example, I'd like to create the **Ohio Star** block that has 4 identical Hourglass QST units, so I'll set my gridlines to 6 horizontal and 6 vertical units.
   * Note: I set 6 horizontal and 6 vertical (instead of 3 x 3), because I need to have a gridline for the midpoint of each QST.

   <div align="left"><figure><img src="/files/3KXwfEdyE8vUKUyPhG77" alt=""><figcaption></figcaption></figure></div>

   <figure><img src="/files/f17SGuVCKcwWosZEjslE" alt=""><figcaption></figcaption></figure>
5. Click on the <mark style="color:blue;">**isosceles triangle shape**</mark> (<img src="/files/Whpe3suPrbTmciB9YM3b" alt="" data-size="line">) from the central control panel.
6. One isosceles triangle will be added to the block space. <mark style="color:blue;">**Move**</mark> it into the correct position by clicking on the shape on the block space and moving it to where it belongs.

   <div><figure><img src="/files/X6n9YPBM5sRNza6QsWug" alt=""><figcaption><p>Isosceles triangle shape added to the quilt block space</p></figcaption></figure> <figure><img src="/files/bYwPVOrUVaEIWRckNusQ" alt=""><figcaption><p>Isosceles triangle shape moved to one side of the QST</p></figcaption></figure></div>
7. Now that the isosceles triangle is in place, we can now stretch it into the shape of a quarter square triangle. With the triangle selected, <mark style="color:blue;">**grab**</mark> the square on the right side of the isosceles triangle and drag it until the triangle fills the width of two grid spaces. If the snap to grid is turned on (default) then the shape will automatically fill the grid space.

   * Keep in mind this is only quarter of the block unit, the three quarters are empty (denoted by gingham background).

   <div><figure><img src="/files/fCdj2JLuZoP5TtjXku9G" alt=""><figcaption></figcaption></figure> <figure><img src="/files/Ux4gI0d7KbaYVUHstgAA" alt=""><figcaption></figcaption></figure></div>
8. With the quarter square triangle shape selected, click on the <mark style="color:blue;">**Clone button**</mark> (![](/files/Uhph6iWWhRGBUn4aG6gV)) on the central control panel.

   <figure><img src="/files/R46BtlAsrFZtidHHAIbj" alt=""><figcaption><p>Cloned QST shape - identical to the first QST (Using Fabric Link A)</p></figcaption></figure>
9. Click on the <mark style="color:blue;">**Rotate button**</mark> (![](/files/dAVu3YUaYXrBpxkyHrgW)) on the central control panel so that it is in the correct orientation. You will need to click on the Rotate button several times to get it to be upside down.

   <div><figure><img src="/files/Th9hs3AmWF1agZesR1Gf" alt=""><figcaption></figcaption></figure> <figure><img src="/files/c7qVGqJ65NK05G6mGNr3" alt=""><figcaption></figcaption></figure></div>
10. <mark style="color:blue;">**Move**</mark> the new quarter square triangle piece so it is opposite (and above) the first quarter square triangle. It should snap into place and the tip of the QST piece should meet perfectly at the middle of the 4 grid spaces.

    <div align="left"><figure><img src="/files/iZRxSYU94fz5aWXJQfAZ" alt="" width="367"><figcaption><p>Fabric A of the QST Hourglass Block Unit</p></figcaption></figure></div>
11. With the two quarter square triangle shapes selected, click on the <mark style="color:blue;">**Clone button**</mark> (![](/files/Uhph6iWWhRGBUn4aG6gV)) on the central control panel.

    * **Directions**: To select both shapes, click on one, hold the SHIFT button, and then click on the other.
    * **Note**: Because both of the orange quarter square triangles are selected, both of them will be copied.

    <div><figure><img src="/files/iZRxSYU94fz5aWXJQfAZ" alt=""><figcaption><p>Fabric A QSTs (total of 2)</p></figcaption></figure> <figure><img src="/files/uHkZSLyvsUHavqI8gJHe" alt=""><figcaption><p>Fabric A QSTs cloned (total of 4)</p></figcaption></figure></div>
12. Click on the <mark style="color:blue;">**Link button**</mark> for a different fabric link (so that the two new QST block pieces are now linked to a different Fabric Link). In this example, I've linked them to Fabric B.

    <figure><img src="/files/U84GdVi46JNy52h9TKqp" alt=""><figcaption><p>Cloned QST shapes - now using Fabric Link B (were formerly Fabric Link A)</p></figcaption></figure>
13. Click on the <mark style="color:blue;">**Rotate button**</mark> (![](/files/dAVu3YUaYXrBpxkyHrgW)) on the central control panel so that the two new QSTs are in the correct orientation.

    <div><figure><img src="/files/tn1LS1RyXFD91XB1tVMw" alt=""><figcaption></figcaption></figure> <figure><img src="/files/Ag2aOj1P3Jeg3FrIcprk" alt=""><figcaption></figcaption></figure></div>
14. <mark style="color:blue;">**Move**</mark> the new quarter square triangle pieces fill the empty spaces of the Hourglass block unit. It should snap into place and be snug with the orange quarter square triangle pieces.

    <div align="left"><figure><img src="/files/OWSReP8HKwkqfrM7qHWs" alt=""><figcaption><p>1 x Hourglass QST block unit</p></figcaption></figure> <figure><img src="/files/2vp9I8jSnYkNVNh1OTsu" alt=""><figcaption><p>4 x Hourglass QST block units in the Ohio Star</p></figcaption></figure></div>

&#x20;   &#x20;

***

## <mark style="color:blue;">Sewing Construction Diagrams</mark>

### <mark style="color:blue;">1 at a Time Subcut Method</mark>

<figure><img src="/files/gcfrY7o85yQppdj0rb8P" alt=""><figcaption></figcaption></figure>

<figure><img src="/files/WdjRBkCecL2bBKpssnQA" alt=""><figcaption></figcaption></figure>

{% file src="/files/YLASpAaZ16WWtwqLTjyp" %}

### <mark style="color:blue;">2 at a Time Method</mark>

This method makes 2 identical Hourglass QST block units at a time.&#x20;

<figure><img src="/files/DNZS9tWQzYdeB7ZP2D5Z" alt=""><figcaption></figcaption></figure>

<figure><img src="/files/bS50B5enZ5L9S4o9Wnzg" alt=""><figcaption></figcaption></figure>

{% file src="/files/FmWgew2c7GUJ7x9HyvMe" %}


# QST: Hourglass Variation

Best Practices for Auto Recognition

<figure><img src="/files/NNbIrM30zHA9qG3Ew7UQ" alt="" width="375"><figcaption><p>Hourglass Variation Quarter Square Triangle (QST) Block Unit</p></figcaption></figure>

## <mark style="color:blue;">Hourglass Variation QST Block Unit in PreQuilt</mark>

It's important to note that the **Hourglass Variation** block unit has 3 different fabrics. The primary fabric will have 2 QST pieces that are placed opposite each other and 1 QST each using the second and third fabrics in the remaining spots.&#x20;

There is also an [Hourglass QST](/prequilt-101/build-a-block-unit-for-the-fabric-calculator/triangular-units/quarter-square-triangle-qst/qst-hourglass-or-bowtie) that uses 2 fabrics.

Since the idea behind this series is to build a block unit (not an entire block of just an Hourglass Variation), I'm going to create a 12" finished block that has hourglass variation block units in it (like for example, the **Variable Star** quilt block).

***

### YouTube Video

*Coming soon...*

***

### Help Guide

1. Click on the <mark style="color:blue;">**BLOCKS tab**</mark> on the left side control panel.

   <div align="left"><figure><img src="/files/68Sy8IGIv0pf3slIgZAs" alt=""><figcaption></figcaption></figure></div>
2. Click on the <mark style="color:blue;">**Make Custom Block**</mark> button.

   <div align="left"><figure><img src="/files/m996ukpqAnSaJrChXBS5" alt=""><figcaption></figcaption></figure></div>
3. The **Block Editor panel** will slide out and overtake your screen. My block is set to 12" x 12" finished, but it doesn't matter, the next steps will work for all sized blocks.
4. Set your grid guidelines by changing the number for the horizontal and vertical units.

   * In this example, I'd like to create the **Variable Star** block that has 4 identical Hourglass Variation QST units, so I'll set my gridlines to 6 horizontal and 6 vertical units.
   * Note: I set 6 horizontal and 6 vertical (instead of 3 x 3), because I need to have a gridline for the midpoint of each QST.

   <div align="left"><figure><img src="/files/3KXwfEdyE8vUKUyPhG77" alt=""><figcaption></figcaption></figure></div>

   <figure><img src="/files/f17SGuVCKcwWosZEjslE" alt=""><figcaption></figcaption></figure>
5. Click on the <mark style="color:blue;">**isosceles triangle shape**</mark> (<img src="/files/Whpe3suPrbTmciB9YM3b" alt="" data-size="line">) from the central control panel.
6. One isosceles triangle will be added to the block space. <mark style="color:blue;">**Move**</mark> it into the correct position by clicking on the shape on the block space and moving it to where it belongs.

   <div><figure><img src="/files/X6n9YPBM5sRNza6QsWug" alt=""><figcaption><p>Isosceles triangle shape added to the quilt block space</p></figcaption></figure> <figure><img src="/files/bYwPVOrUVaEIWRckNusQ" alt=""><figcaption><p>Isosceles triangle shape moved to one side of the QST</p></figcaption></figure></div>
7. Now that the isosceles triangle is in place, we can now stretch it into the shape of a quarter square triangle. With the triangle selected, <mark style="color:blue;">**grab**</mark> the square on the right side of the isosceles triangle and drag it until the triangle fills the width of two grid spaces. If the snap to grid is turned on (default) then the shape will automatically fill the grid space.

   * Keep in mind this is only quarter of the block unit, the three quarters are empty (denoted by gingham background).

   <div><figure><img src="/files/fCdj2JLuZoP5TtjXku9G" alt=""><figcaption></figcaption></figure> <figure><img src="/files/Ux4gI0d7KbaYVUHstgAA" alt=""><figcaption></figcaption></figure></div>
8. With the quarter square triangle shape selected, click on the <mark style="color:blue;">**Clone button**</mark> (![](/files/Uhph6iWWhRGBUn4aG6gV)) on the central control panel.

   <figure><img src="/files/R46BtlAsrFZtidHHAIbj" alt=""><figcaption><p>Cloned QST shape - identical to the first QST (Using Fabric Link A)</p></figcaption></figure>
9. Click on the <mark style="color:blue;">**Rotate button**</mark> (![](/files/dAVu3YUaYXrBpxkyHrgW)) on the central control panel so that it is in the correct orientation. You will need to click on the Rotate button several times to get it to be upside down.

   <div><figure><img src="/files/Th9hs3AmWF1agZesR1Gf" alt=""><figcaption></figcaption></figure> <figure><img src="/files/c7qVGqJ65NK05G6mGNr3" alt=""><figcaption></figcaption></figure></div>
10. <mark style="color:blue;">**Move**</mark> the new quarter square triangle piece so it is opposite (and above) the first quarter square triangle. It should snap into place and the tip of the QST piece should meet perfectly at the middle of the 4 grid spaces.

    <div align="left"><figure><img src="/files/iZRxSYU94fz5aWXJQfAZ" alt="" width="367"><figcaption><p>Fabric A of the QST Hourglass Block Unit</p></figcaption></figure></div>
11. With the two quarter square triangle shapes selected, click on the <mark style="color:blue;">**Clone button**</mark> (![](/files/Uhph6iWWhRGBUn4aG6gV)) on the central control panel.

    * **Directions**: To select both shapes, click on one, hold the SHIFT button, and then click on the other.
    * **Note**: Because both of the orange quarter square triangles are selected, both of them will be copied.

    <div><figure><img src="/files/iZRxSYU94fz5aWXJQfAZ" alt=""><figcaption><p>Fabric A QSTs (total of 2)</p></figcaption></figure> <figure><img src="/files/uHkZSLyvsUHavqI8gJHe" alt=""><figcaption><p>Fabric A QSTs cloned (total of 4)</p></figcaption></figure></div>
12. Click on the <mark style="color:blue;">**Link button**</mark> for a different fabric link (so that the two new QST block pieces are now linked to a different Fabric Link). In this example, I've linked them to Fabric B.

    <figure><img src="/files/U84GdVi46JNy52h9TKqp" alt=""><figcaption><p>Cloned QST shapes - now using Fabric Link B (were formerly Fabric Link A)</p></figcaption></figure>
13. Click on the <mark style="color:blue;">**Rotate button**</mark> (![](/files/dAVu3YUaYXrBpxkyHrgW)) on the central control panel so that the two new QSTs are in the correct orientation.

    <div><figure><img src="/files/tn1LS1RyXFD91XB1tVMw" alt=""><figcaption></figcaption></figure> <figure><img src="/files/Ag2aOj1P3Jeg3FrIcprk" alt=""><figcaption></figcaption></figure></div>
14. <mark style="color:blue;">**Move**</mark> the new quarter square triangle pieces fill the empty spaces of the Hourglass block unit. It should snap into place and be snug with the orange quarter square triangle pieces.

    <div align="left"><figure><img src="/files/OWSReP8HKwkqfrM7qHWs" alt="" width="367"><figcaption></figcaption></figure></div>
15. <mark style="color:blue;">**Select**</mark> the bottom quarter square triangle piece. Click on the <mark style="color:blue;">**Link button**</mark> for a different fabric link (so that the two new QST block pieces are now linked to a different Fabric Link). In this example, I've linked them to Fabric B.

    <div align="left"><figure><img src="/files/Pr1oUhD5bjiEBSUeW4kx" alt=""><figcaption><p>1 x Hourglass Variation QST block unit</p></figcaption></figure> <figure><img src="/files/Bs4Z0wdVqXTNFpXK3PIv" alt=""><figcaption><p>4 x Hourglass Variation QST block units in the Variable Star</p></figcaption></figure></div>

&#x20;   &#x20;

***

## <mark style="color:blue;">Sewing Construction Diagrams</mark>

### <mark style="color:blue;">1 at a Time Subcut Method</mark>

<figure><img src="/files/eIH7av2KYK59KEUPjorq" alt=""><figcaption></figcaption></figure>

<figure><img src="/files/oTvlNq0CMSrCqWrJCVFK" alt=""><figcaption></figcaption></figure>

{% file src="/files/SdAd7bwomlR8krKM63XR" %}

### <mark style="color:blue;">4 at a Time Method</mark>

This method makes 4 identical Hourglass Variation QST block units at a time.&#x20;

<figure><img src="/files/5FqP5LB7TbPWMQcvL1o3" alt=""><figcaption></figcaption></figure>

<figure><img src="/files/4PlpcGQmzpogmF4OFEFO" alt=""><figcaption></figcaption></figure>

{% file src="/files/Nrl6PPC4ffxi0o9Gtzqd" %}


# Split QST

Best Practices for Auto Recognition

<figure><img src="/files/5KFU43YjXqOiyVyv6zkH" alt="" width="375"><figcaption><p>Split Quarter Square Triangle Block Unit</p></figcaption></figure>

## <mark style="color:blue;">Split QST Block Unit in PreQuilt</mark>

The **Split Quarter Square Triangle** block unit is a hybrid of a Half Square Triangle block unit and a Quarter Square Triangle block unit. One diagonal half of the square is made up of a half square triangle and the other diagonal half of the square is made up of 2 different quarter square triangle pieces.&#x20;

Typically Split QSTs use 3 different fabrics, but there are some interesting designs that use the same fabric for the half square triangle piece and one of the quarter square triangle pieces.

And since the idea behind this series is to build a block unit (not an entire block that is just a Split QST), I'm going to create a 12" finished block that has a Split QST block units in it (like for example, the **Card Trick** quilt block).

***

### YouTube Video

*Coming soon...*

***

### Help Guide

1. Click on the <mark style="color:blue;">**BLOCKS tab**</mark> on the left side control panel.

   <div align="left"><figure><img src="/files/68Sy8IGIv0pf3slIgZAs" alt=""><figcaption></figcaption></figure></div>
2. Click on the <mark style="color:blue;">**Make Custom Block**</mark> button.

   <div align="left"><figure><img src="/files/m996ukpqAnSaJrChXBS5" alt=""><figcaption></figcaption></figure></div>
3. The **Block Editor panel** will slide out and overtake your screen. My block is set to 12" x 12" finished, but it doesn't matter, the next steps will work for all sized blocks.
4. Set your grid guidelines by changing the number for the horizontal and vertical units.

   * In this example, I'd like to create the **Card Trick** quilt block, so I'll set my gridlines to 6 horizontal and 6 vertical units.
   * Note: I set 6 horizontal and 6 vertical (instead of 3), because I need to have a gridline for the midpoint of each QST.

   <div align="left"><figure><img src="/files/MilQ9uyNuc3FFBv5S5LW" alt=""><figcaption></figcaption></figure></div>

   <figure><img src="/files/CaVLVG79GFU37GPAqnNz" alt=""><figcaption></figcaption></figure>
5. Click on the <mark style="color:blue;">**half square triangle shape**</mark> (<img src="/files/JktN06ZtsTyyjBt6Xy1M" alt="" data-size="line">) from the central control panel.
6. One half square triangle will be added to the block space. <mark style="color:blue;">**Move**</mark> it into the correct position by clicking on the shape on the block space and moving it to where it belongs.

   <div><figure><img src="/files/CeD5RDvvZul65vY2xzRU" alt=""><figcaption><p>Half square triangle shape added to the quilt block space</p></figcaption></figure> <figure><img src="/files/IMM1HYD6YB2JeEGHyY5L" alt=""><figcaption><p>HST shape moved to one side of the Split QST</p></figcaption></figure></div>
7. Now that the half square triangle is in place, we can now scale it so that it takes up half of the square. With the triangle selected, <mark style="color:blue;">**grab**</mark> the small square on the top right side of the half square triangle and drag it until the triangle fills the width of two grid horizontal and two vertical grid spaces. If the snap to grid is turned on (default) then the shape will automatically fill the grid space.

   * NOTE: If the snap to grid is turned on (default) then the shape will automatically fill the grid space.
   * Keep in mind this is only one half of the Split QST block unit, the two quarters are empty (denoted by gingham background).

   <div><figure><img src="/files/jCL0eVdGAYjWJ0pcHBEp" alt=""><figcaption></figcaption></figure> <figure><img src="/files/8rNrdlDpRuYrISSF4jDf" alt=""><figcaption></figcaption></figure></div>
8. Click on the <mark style="color:blue;">**isosceles triangle shape**</mark> (<img src="/files/xQLukWJcpkqtek99ZPjS" alt="" data-size="line">) from the central control panel. One isosceles triangle will be added to the block space.&#x20;
9. Click on the <mark style="color:blue;">**Link button**</mark> for a different fabric link (so that the new QST block piece is now linked to a different Fabric Link). In this example, I've linked them to Fabric F.

   <figure><img src="/files/2QqR5xJUa2saJMOYdXHH" alt=""><figcaption></figcaption></figure>
10. Click on the <mark style="color:blue;">**Rotate button**</mark> (![](/files/dAVu3YUaYXrBpxkyHrgW)) on the central control panel so that it is in the correct orientation. You will need to click on the Rotate button several times to get it to be upside down.

    <div><figure><img src="/files/k4lZL5mvvrQYzVW01Hcq" alt=""><figcaption></figcaption></figure> <figure><img src="/files/tGBhvY3BtanyiEeH5ham" alt=""><figcaption></figcaption></figure></div>
11. <mark style="color:blue;">**Move**</mark> it into the correct position by clicking on the shape on the block space and moving it to where it belongs.

    <div><figure><img src="/files/c59RiTWMOTTlZ7Tw1dnP" alt=""><figcaption></figcaption></figure> <figure><img src="/files/8iNaptwT3qT6PBStzXC3" alt=""><figcaption></figcaption></figure></div>
12. Now that the isosceles triangle is in place, we can now stretch it into the shape of a quarter square triangle. With the triangle selected, <mark style="color:blue;">**grab**</mark> the square on the right side of the equilateral triangle and drag it until the triangle fills the width of two grid spaces. If the snap to grid is turned on (default) then the shape will automatically fill the grid space.

    <div><figure><img src="/files/uuGohwPMaf0yyNb6x2dH" alt=""><figcaption></figcaption></figure> <figure><img src="/files/iw8Y7i50XgzrbA9mRvRo" alt=""><figcaption></figcaption></figure></div>
13. With the quarter square triangle shape selected, click on the <mark style="color:blue;">**Clone button**</mark> (![](/files/Uhph6iWWhRGBUn4aG6gV)) on the central control panel.

    <figure><img src="/files/10z6xYKMNllIqOTaykZF" alt=""><figcaption><p>Cloned QST shape - identical to the first QST (Using Fabric Link C)</p></figcaption></figure>
14. Click on the <mark style="color:blue;">**Link button**</mark> for a different fabric link (so that the new QST block piece is now linked to a different Fabric Link). In this example, I've linked them to Fabric D.

    <figure><img src="/files/PpDrbOFoRrBwrt7eUtsM" alt=""><figcaption></figcaption></figure>
15. Click on the <mark style="color:blue;">**Rotate button**</mark> (![](/files/dAVu3YUaYXrBpxkyHrgW)) on the central control panel so that it is in the correct orientation and <mark style="color:blue;">**move**</mark> it into the correct position. You will need to click on the Rotate button several times to get it to be upside down.

    <div><figure><img src="/files/ozW0Nj6Pd6FdQsj04u5i" alt=""><figcaption><p>1 x Split QST Block Unit</p></figcaption></figure> <figure><img src="/files/z9eOoEESyQF9ZN4a31Ua" alt=""><figcaption><p>4 x Split QST block units in the Card Trick block</p></figcaption></figure></div>

&#x20;   &#x20;

***

## <mark style="color:blue;">Sewing Construction Diagrams</mark>

### <mark style="color:blue;">1 at a Time Subcut Method</mark>

This method makes 1 Split QST block unit at a time. But these instructions give you enough fabric to produce 2 or 4 Split QST units. But each Split QST block unit is made independently.

<figure><img src="/files/EcbcmRb4sNPdLDoeOoKu" alt=""><figcaption></figcaption></figure>

<figure><img src="/files/WK05wVyL9OnUGf2nEkvN" alt=""><figcaption></figcaption></figure>

{% file src="/files/INDYMDSzE34k8koccTqX" %}


# Triangle in a Square (Tri Rec)

Best Practices for Auto Recognition

<figure><img src="/files/axSbiphUF5ycw99CDTNA" alt="" width="375"><figcaption><p>Triangle in a Square Block Unit</p></figcaption></figure>

## <mark style="color:blue;">Triangle in a Square (Tri Rec) Block Unit in PreQuilt</mark>

This more intermediate or advanced block unit can be tough to nail in the sewing room. But it's pretty easy peasy in PreQuilt.

**Triangle in a Square** block units are constructed using one isosceles triangle with a half rectangle triangle on either side of it. Overall, these three shapes within the overall square shape.

This shape is also sometimes referred to as a **Tri Rec** (and if you know why, please let me know!).

And since the idea behind this series is to build a block unit that can be used to create a larger block,  I'm going to create a 12" finished block that has Triangle in a Square block units in it (like for example, the **Sun Rays** quilt block).

&#x20; &#x20;

***

### YouTube Video

*Coming soon...*

***

### Help Guide

1. Click on the <mark style="color:blue;">**BLOCKS tab**</mark> on the left side control panel.

   <div align="left"><figure><img src="/files/68Sy8IGIv0pf3slIgZAs" alt=""><figcaption></figcaption></figure></div>
2. Click on the <mark style="color:blue;">**Make Custom Block**</mark> button.

   <div align="left"><figure><img src="/files/m996ukpqAnSaJrChXBS5" alt=""><figcaption></figcaption></figure></div>
3. The **Block Editor panel** will slide out and overtake your screen. My block is set to 12" x 12" finished, but it doesn't matter, the next steps will work for all sized blocks.
4. Set your grid guidelines by changing the number for the horizontal and vertical units.

   * Since I'm going to be creating the **Sun Rays** quilt block, I'll set my gridlines to 6 horizontal and 6 vertical units.

   <div align="left"><figure><img src="/files/V4W59XMX6cpTI42jKYqk" alt=""><figcaption></figcaption></figure></div>

   <figure><img src="/files/WS3Zx1y6hktLmhZdW1Dq" alt=""><figcaption></figcaption></figure>
5. Click on the <mark style="color:blue;">**half square triangle shape**</mark> (<img src="/files/JktN06ZtsTyyjBt6Xy1M" alt="" data-size="line">) from the central control panel.
6. One half square triangle will be added to the block space. <mark style="color:blue;">**Move**</mark> it into the correct position by clicking on the shape on the block space and moving it to where it belongs.

   <div><figure><img src="/files/2trtsc7BE15gskhyTjlK" alt=""><figcaption><p>HST shape added to the quilt block space</p></figcaption></figure> <figure><img src="/files/5XxmVYkt7KpI4IuTPbk2" alt=""><figcaption><p>HST shape moved to build the block</p></figcaption></figure></div>
7. We now need to stretch the HST so that it's rectangular. <mark style="color:blue;">**Grab**</mark> the square on the top side of the HST and <mark style="color:blue;">**drag**</mark> it until the triangle fills the height of only 2 vertical grid spaces.&#x20;

   * Note: If the snap to grid is turned on (default) then the shape will automatically fill the grid space.

   <div><figure><img src="/files/xI7NY21CGuOX4mCzJv9w" alt=""><figcaption></figcaption></figure> <figure><img src="/files/DD1KJVGHRuhy5zM5KkBC" alt=""><figcaption></figcaption></figure></div>
8. Click on the <mark style="color:blue;">**half square triangle shape**</mark> (<img src="/files/JktN06ZtsTyyjBt6Xy1M" alt="" data-size="line">) from the central control panel.

   <figure><img src="/files/wEzSOfSfxuYbPbFQLniN" alt=""><figcaption></figcaption></figure>
9. Click on the <mark style="color:blue;">**Rotate button**</mark> (![](/files/dAVu3YUaYXrBpxkyHrgW)) on the central control panel so that the half square triangle is oriented in the opposite direction as the first one was.

   * Note: You will need to click on the rotate button a few times to get it in the right orientation.

   <figure><img src="/files/SMB2CBpdC4OjW6YyQZR3" alt=""><figcaption></figcaption></figure>
10. <mark style="color:blue;">**Repeat**</mark> Steps 6-7, but make sure to create a mirror version of the first half rectangle triangle.&#x20;

    <figure><img src="/files/3PHkCccJW47ZXmhoER5U" alt=""><figcaption></figcaption></figure>
11. Click on the <mark style="color:blue;">**isosceles triangle**</mark> (<img src="/files/R044wPxGQBI834v3Hx4C" alt="" data-size="line">) from the central control panel.

    <figure><img src="/files/XkZPnj82CuWGrZ5DAXK4" alt=""><figcaption></figcaption></figure>
12. Click on the <mark style="color:blue;">**Link button**</mark> for a different fabric link (so that there are 2 different fabrics being used in your half square triangle block (unit). In this example, I'm linking to Fabric Link C.

    <figure><img src="/files/I4kiSrPtyR1tmdvu8N3h" alt=""><figcaption></figcaption></figure>
13. Click on the <mark style="color:blue;">**Rotate button**</mark> (![](/files/dAVu3YUaYXrBpxkyHrgW)) on the central control panel so that it is in the correct orientation.

    <div><figure><img src="/files/Ad0TyGuMnLGJTM4drMu6" alt=""><figcaption></figcaption></figure> <figure><img src="/files/bwTBrwLkGqedgx2jaEl9" alt=""><figcaption></figcaption></figure></div>
14. <mark style="color:blue;">**Move**</mark> and <mark style="color:blue;">**drag**</mark> the new triangle piece so it fills the empty space of the triangle in a square block unit. It should snap into place and be snug between the 2 half rectangle triangles.

    <div><figure><img src="/files/xjq26lNYvNIF8BybZlEW" alt=""><figcaption></figcaption></figure> <figure><img src="/files/gyMr0JOzFQYSzcK9mZJs" alt=""><figcaption><p>1 x Triangle in a Square block unit</p></figcaption></figure></div>
15. <mark style="color:blue;">**Create**</mark> the remaining block units to complete the Sun Rays quilt block.

    <div align="left"><figure><img src="/files/gyMr0JOzFQYSzcK9mZJs" alt=""><figcaption><p>1 x Triangle in a Square block unit</p></figcaption></figure> <figure><img src="/files/hQKjzbUnqno2KYZ57p0S" alt=""><figcaption><p>Sun Rays Block with 4 Triangle in a Square block units</p></figcaption></figure></div>

&#x20;   &#x20;

***

## <mark style="color:blue;">Sewing Construction Diagrams</mark>

### <mark style="color:blue;">1 at a Time Method</mark>

This subcut method has left over fabric. Add another Fabric A square to make another identical block unit.

<figure><img src="/files/n7EkeArw2twRI3lqOabi" alt=""><figcaption></figcaption></figure>

<figure><img src="/files/suEjwkPiYrMVv8fxlPF4" alt=""><figcaption></figcaption></figure>

{% file src="/files/0gUXByQEgmYmrjwce9WE" %}


# Curved Units

## <mark style="color:blue;">Curved Block Units in PreQuilt</mark>

<table data-view="cards"><thead><tr><th></th><th data-hidden></th><th data-hidden></th><th data-hidden data-card-cover data-type="files"></th><th data-hidden data-card-target data-type="content-ref"></th></tr></thead><tbody><tr><td><strong>Circle</strong></td><td></td><td></td><td><a href="/files/D477KW8M2A2FV05EOGtT">/files/D477KW8M2A2FV05EOGtT</a></td><td><a href="/pages/rQVeQXGimszsjFl62tLn">/pages/rQVeQXGimszsjFl62tLn</a></td></tr><tr><td><strong>Half Circle</strong></td><td></td><td></td><td><a href="/files/4DFbmUYwQ8DixC16CCdr">/files/4DFbmUYwQ8DixC16CCdr</a></td><td><a href="/pages/dqIN4AfuFTcnrHEhkORt">/pages/dqIN4AfuFTcnrHEhkORt</a></td></tr><tr><td><strong>Traditional Drunkard's Path</strong></td><td></td><td></td><td><a href="/files/H16z3g0x6HgBbvOQkkzP">/files/H16z3g0x6HgBbvOQkkzP</a></td><td><a href="/pages/n3j2bMVU31eJOcvRjbN9">/pages/n3j2bMVU31eJOcvRjbN9</a></td></tr><tr><td><strong>Modern Drunkard's Path</strong></td><td></td><td></td><td><a href="/files/rInz1h7BKSPdYnHI7sCm">/files/rInz1h7BKSPdYnHI7sCm</a></td><td><a href="/pages/DmHGHYi4e8R5W36NIewN">/pages/DmHGHYi4e8R5W36NIewN</a></td></tr><tr><td><strong>Orange Peel (Appliquéd)</strong></td><td></td><td></td><td><a href="/files/fkp9Zlb2ENjau6uBZIDV">/files/fkp9Zlb2ENjau6uBZIDV</a></td><td><a href="/pages/2qX19918lHPBwDQcs6ff">/pages/2qX19918lHPBwDQcs6ff</a></td></tr><tr><td><strong>Orange Peel (Pieced)</strong></td><td></td><td></td><td><a href="/files/qiiyhWSCFVRBZIwEmM5W">/files/qiiyhWSCFVRBZIwEmM5W</a></td><td><a href="/pages/Oo7hNYeTfAoFjFo1LldI">/pages/Oo7hNYeTfAoFjFo1LldI</a></td></tr></tbody></table>


# Circles

Best Practices for Auto Recognition

<figure><img src="/files/AcHo9HIkvO8166lFSHsV" alt="" width="375"><figcaption><p>Circle Block Unit</p></figcaption></figure>

## <mark style="color:blue;">Circle Block Unit in PreQuilt</mark>

**Circles** are another of the easiest block units in PreQuilt.&#x20;

And since the idea behind this series is to build a block unit (not an entire block that is just a circle), I'm going to create a 12" finished block that has a few circle block units.

&#x20; &#x20;

***

### YouTube Video

*Coming soon...*

***

### Help Guide

1. Click on the <mark style="color:blue;">**BLOCKS tab**</mark> on the left side control panel.

   <div align="left"><figure><img src="/files/68Sy8IGIv0pf3slIgZAs" alt=""><figcaption></figcaption></figure></div>
2. Click on the <mark style="color:blue;">**Make Custom Block**</mark> button.

   <div align="left"><figure><img src="/files/m996ukpqAnSaJrChXBS5" alt=""><figcaption></figcaption></figure></div>
3. The **Block Editor panel** will slide out and overtake your screen. My block is set to 12" x 12" finished, but it doesn't matter, the next steps will work for all sized blocks.
4. Set your grid guidelines by changing the number for the horizontal and vertical units.

   * I'll set my gridlines to 8 horizontal and 8 vertical units. I want to be able to center my circles into their respective squares.

   <div align="left"><figure><img src="/files/aZ84G58Ueplhk2D1r3d1" alt=""><figcaption></figcaption></figure></div>

   <figure><img src="/files/hEpOGl7dUXEu3tynGOmz" alt=""><figcaption></figcaption></figure>
5. Click on the <mark style="color:blue;">**square shape**</mark> (<img src="/files/hy2ZsHmPdS74SBFprTv2" alt="" data-size="line">) from the central control panel. It will be our background fabric behind the circle.

   <figure><img src="/files/cx7GVqU2anRQGcoREEK1" alt=""><figcaption></figcaption></figure>
6. <mark style="color:blue;">**Move**</mark> the new square block unit so it is in the top left corner of the quilt block.

   <div><figure><img src="/files/wvlrqvRt0ftWRFuoxusA" alt=""><figcaption></figcaption></figure> <figure><img src="/files/CtiaQk2uY5iwVIMqEp39" alt=""><figcaption></figcaption></figure></div>
7. To manipulate the square to enlarge it, <mark style="color:blue;">**grab**</mark> the square on one of the corners of the square and <mark style="color:blue;">**drag**</mark> it until the square fills the height and width of 4 grid spaces.&#x20;

   * Note: If the snap to grid is turned on (default) then the shape will automatically fill the grid space.

   <div><figure><img src="/files/FPU88afdfx0gg8zGYTk0" alt=""><figcaption></figcaption></figure> <figure><img src="/files/wKLw9lrob5sthLOmuy7m" alt=""><figcaption></figcaption></figure></div>
8. Click on the <mark style="color:blue;">**circle shape**</mark> (<img src="/files/wq12gRDNrDmBGXk7t9Pf" alt="" data-size="line">) from the central control panel.&#x20;

   <figure><img src="/files/8Yi5PYFbVlruF2YCnx1J" alt=""><figcaption></figcaption></figure>
9. Click on the <mark style="color:blue;">**Link button**</mark> for a different fabric link (so that there are now 2 different fabrics being used). In this example, I am using Fabric Link B.

   <figure><img src="/files/Yq5AiR454wFLe7EgIC1D" alt=""><figcaption><p>Circle now using Fabric Link B</p></figcaption></figure>
10. <mark style="color:blue;">**Move**</mark> the circle piece into one of the middle grid spaces in the center of the square.

    <div><figure><img src="/files/sMJB3FPgjLPEEdO90CGh" alt=""><figcaption></figcaption></figure> <figure><img src="/files/HYnQgTdMZ9i8OyelqkWt" alt=""><figcaption></figcaption></figure></div>
11. &#x20;To manipulate the circle to enlarge it, <mark style="color:blue;">**grab**</mark> the square on one of the corners of the circle's bounding box and <mark style="color:blue;">**drag**</mark> it until the circle fills the height and width of 2 grid spaces.

    <div><figure><img src="/files/4kPCQBYR4Q7KGZQuvXQS" alt=""><figcaption></figcaption></figure> <figure><img src="/files/GcKZ9rt02jn1y96i79N4" alt=""><figcaption><p>1 x Circle block unit with background</p></figcaption></figure></div>
12. <mark style="color:blue;">**Clone**</mark> and <mark style="color:blue;">**move**</mark> 3 more circle block units to complete the quilt block. If you'd like, you can add and use additional Fabric Links.

    <div align="left"><figure><img src="/files/W9rPeV8eDZeHbCHwr1he" alt="" width="375"><figcaption><p>Quilt block with 4 x circle block units</p></figcaption></figure></div>

&#x20;     &#x20;


# Half Circles

Best Practices for Auto Recognition

<figure><img src="/files/UgVzAGAy7WRuxm57Rsvi" alt="" width="563"><figcaption><p>Half Circle Block Unit</p></figcaption></figure>

## <mark style="color:blue;">Circle Block Unit in PreQuilt</mark>

**Half circles** are another one of the easiest block units in PreQuilt.&#x20;

And since the idea behind this series is to build a block unit (not an entire block that is just a circle), I'm going to create a 12" finished block that has a couple half circle block units.

&#x20; &#x20;

***

### YouTube Video

*Coming soon...*

***

### Help Guide

1. Click on the <mark style="color:blue;">**BLOCKS tab**</mark> on the left side control panel.

   <div align="left"><figure><img src="/files/68Sy8IGIv0pf3slIgZAs" alt=""><figcaption></figcaption></figure></div>
2. Click on the <mark style="color:blue;">**Make Custom Block**</mark> button.

   <div align="left"><figure><img src="/files/m996ukpqAnSaJrChXBS5" alt=""><figcaption></figcaption></figure></div>
3. The **Block Editor panel** will slide out and overtake your screen. My block is set to 12" x 12" finished, but it doesn't matter, the next steps will work for all sized blocks.
4. Set your grid guidelines by changing the number for the horizontal and vertical units.

   * I'll set my gridlines to 8 horizontal and 8 vertical units. I want to be able to center my circles into their respective squares.

   <div align="left"><figure><img src="/files/3Ew2H2jdN9NHd8rP7KRg" alt=""><figcaption></figcaption></figure></div>

   <figure><img src="/files/AJHozPhvpAS3NXrY83D8" alt=""><figcaption></figcaption></figure>
5. Click on the <mark style="color:blue;">**square shape**</mark> (<img src="/files/hy2ZsHmPdS74SBFprTv2" alt="" data-size="line">) from the central control panel. It will be our background fabric behind the half circle.
6. One square will be added to the block space. Because the horizontal unit is 1, our square block unit will fill the entire space.&#x20;

   <figure><img src="/files/Lp36TYZXnRPvhUEGpbip" alt=""><figcaption></figcaption></figure>
7. To manipulate the square into a rectangle, <mark style="color:blue;">**grab**</mark> the square on the bottom side of the square and <mark style="color:blue;">**drag**</mark> it until the square fills the height of only 1 vertical grid space.&#x20;

   * Note: If the snap to grid is turned on (default) then the shape will automatically fill the grid space.

   <div><figure><img src="/files/zB6LpHU9m80eH4YVGvW5" alt=""><figcaption></figcaption></figure> <figure><img src="/files/b9uCIBe98hDqN12mxxYe" alt=""><figcaption></figcaption></figure></div>
8. <mark style="color:blue;">**Enter the number 180**</mark> in the number box underneath the quarter square shape from the central control panel. This changes the shape from a quarter circle to a half circle.

   <div align="left"><figure><img src="/files/vUViUkwF4VT6Av88vzQH" alt=""><figcaption></figcaption></figure> <figure><img src="/files/O1k9r42d2H2gTPnMVe2o" alt=""><figcaption></figcaption></figure></div>
9. Click on the <mark style="color:blue;">**half circle shape**</mark> (<img src="/files/zvZWIIZ4xMGIsBgKrNOm" alt="" data-size="line">) from the central control panel.&#x20;

   <figure><img src="/files/jFV2wPhYKwOJCXIsQJdI" alt=""><figcaption></figcaption></figure>
10. Click on the <mark style="color:blue;">**Link button**</mark> for a different fabric link (so that there are now 2 different fabrics being used). In this example, I am using Fabric Link B.

    <figure><img src="/files/FCqg97Dr4MPwNBm4L7Ds" alt=""><figcaption><p>Circle now using Fabric Link B</p></figcaption></figure>
11. Click on the <mark style="color:blue;">**Rotate button**</mark> (![](/files/dAVu3YUaYXrBpxkyHrgW)) on the central control panel until it aligns with the rectangle.&#x20;

    <div><figure><img src="/files/3HiStiePEYkCxhBiJT27" alt=""><figcaption></figcaption></figure> <figure><img src="/files/y4L40AFKyO9ndGO07FHj" alt=""><figcaption></figcaption></figure></div>
12. &#x20;To quickly force the half circle to fit into the screen, click on the <mark style="color:blue;">**Fit to Screen button**</mark> (![](/files/gh1M59WptomquGUcRXTH)) on the central control panel.&#x20;

    <div><figure><img src="/files/y4L40AFKyO9ndGO07FHj" alt=""><figcaption></figcaption></figure> <figure><img src="/files/DokCMj0I6xuJqcfplLaH" alt=""><figcaption></figcaption></figure></div>
13. To manipulate the shape that looks like a hill into a half circle, <mark style="color:blue;">**grab**</mark> the square on the bottom side of the shape and <mark style="color:blue;">**drag**</mark> it up until the shape fills the height of only 1 horizontal grid space.&#x20;

    <div><figure><img src="/files/KRxJ5P3D3Zsq1nbrG4md" alt=""><figcaption></figcaption></figure> <figure><img src="/files/ZyGEGP9U7MI2bKqo1p0e" alt=""><figcaption><p>1 x half circle block unit with background</p></figcaption></figure></div>
14. <mark style="color:blue;">**Clone**</mark> and <mark style="color:blue;">**move**</mark> 1 more half circle block unit to complete the quilt block. If you'd like, you can add and use additional Fabric Links.

    <div align="left"><figure><img src="/files/g4R9A3h7AWJijaFy0Hb2" alt="" width="375"><figcaption><p>Quilt block with 2 x half circle block units</p></figcaption></figure></div>

&#x20;     &#x20;


# Drunkard's Path

<div align="center"><figure><img src="/files/qhN1I6L2OuEliuIbJ88p" alt=""><figcaption><p>Traditional Drunkard's Path block unit</p></figcaption></figure> <figure><img src="/files/8UvrMLOuUDvh2quHxpDn" alt=""><figcaption><p>Modern Drunkard's Path block unit</p></figcaption></figure></div>

## <mark style="color:blue;">The Two Drunkard's Path Block Units</mark>

**Drunkard's Path** block units can be traditional or modern. For now, each type will need to be constructed differently in PreQuilt in order for it to auto recognize them for fabric calculations.

There are two curved pieces that make up both versions of the Drunkard's Path blocks: a convex piece and a concave piece.&#x20;

Once pieced, the convex piece of the **traditional Drunkard's Path** block unit does not fully overlap the concave piece or fill the square bounding box of the block. In the **modern Drunkard's Path** block unit, the convex piece will extend all the way to the edge of the finished block (with the edges of the concave piece hidden in the seam allowance once pieced to its neighboring blocks).

<div align="left"><figure><img src="/files/TcYe709YgxLRgiiTsk2M" alt="" width="375"><figcaption><p>Traditional Drunkard's Path block unit</p></figcaption></figure> <figure><img src="/files/DPNXWm5yxaTnULmCQ7cg" alt="" width="375"><figcaption><p>Modern Drunkard's Path block unit</p></figcaption></figure></div>

***

## <mark style="color:blue;">Build a Drunkard's Path Block Unit in PreQuilt</mark>

<table data-view="cards"><thead><tr><th></th><th data-hidden></th><th data-hidden></th><th data-hidden data-card-cover data-type="files"></th><th data-hidden data-card-target data-type="content-ref"></th></tr></thead><tbody><tr><td><strong>Traditional Drunkard's Path</strong></td><td></td><td></td><td><a href="/files/H16z3g0x6HgBbvOQkkzP">/files/H16z3g0x6HgBbvOQkkzP</a></td><td><a href="/pages/n3j2bMVU31eJOcvRjbN9">/pages/n3j2bMVU31eJOcvRjbN9</a></td></tr><tr><td><strong>Modern Drunkard's Path</strong></td><td></td><td></td><td><a href="/files/rInz1h7BKSPdYnHI7sCm">/files/rInz1h7BKSPdYnHI7sCm</a></td><td><a href="/pages/DmHGHYi4e8R5W36NIewN">/pages/DmHGHYi4e8R5W36NIewN</a></td></tr></tbody></table>


# Traditional Drunkard's Path

Best Practices for Auto Recognition

<figure><img src="/files/qhN1I6L2OuEliuIbJ88p" alt="" width="375"><figcaption><p>Drunkard's Path Block Unit</p></figcaption></figure>

## <mark style="color:blue;">Traditional Drunkard's Path Block Unit in PreQuilt</mark>

There are two curved pieces that make up both versions of the **Drunkard's Path** blocks: a convex piece and a concave piece.&#x20;

Once pieced, the convex piece of the **traditional Drunkard's Path** block unit does not fully overlap the concave piece on the squre sides of the block or fill the square bounding box of the block.&#x20;

<div align="left"><figure><img src="/files/TcYe709YgxLRgiiTsk2M" alt="" width="375"><figcaption><p>Traditional Drunkard's Path block unit</p></figcaption></figure></div>

Since the idea behind this series is to build a block unit (not an entire block that is just a Drunkard's Path), I'm going to create a 12" finished block that has a few Drunkard's Path block units.

&#x20; &#x20;

***

### YouTube Video

*Coming soon...*

***

### Help Guide

1. Click on the <mark style="color:blue;">**BLOCKS tab**</mark> on the left side control panel.

   <div align="left"><figure><img src="/files/68Sy8IGIv0pf3slIgZAs" alt=""><figcaption></figcaption></figure></div>
2. Click on the <mark style="color:blue;">**Make Custom Block**</mark> button.

   <div align="left"><figure><img src="/files/m996ukpqAnSaJrChXBS5" alt=""><figcaption></figcaption></figure></div>
3. The **Block Editor panel** will slide out and overtake your screen. My block is set to 12" x 12" finished, but it doesn't matter, the next steps will work for all sized blocks.
4. Set your grid guidelines by changing the number for the horizontal and vertical units.

   * I'll set my gridlines to 8 horizontal and 8 vertical units. I want my convex piece of my Drunkard's Path block units to be 3/4 of the height and width of the concave piece.

   <div align="left"><figure><img src="/files/aZ84G58Ueplhk2D1r3d1" alt=""><figcaption></figcaption></figure></div>

   <figure><img src="/files/hEpOGl7dUXEu3tynGOmz" alt=""><figcaption></figcaption></figure>
5. Click on the <mark style="color:blue;">**square shape**</mark> (<img src="/files/hy2ZsHmPdS74SBFprTv2" alt="" data-size="line">) from the central control panel. It will be our background fabric behind the circle.
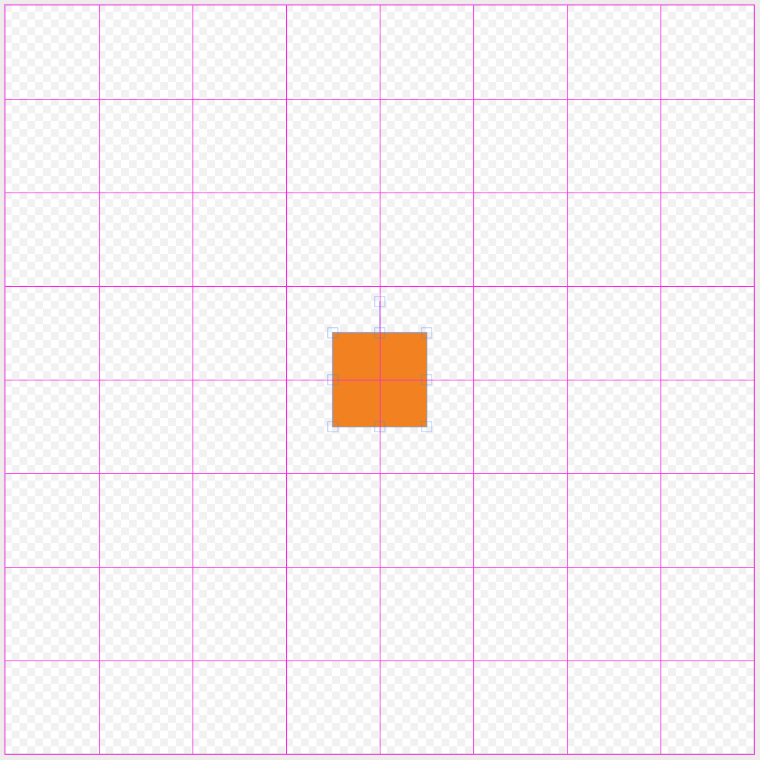
   <figure><img src="/files/cx7GVqU2anRQGcoREEK1" alt=""><figcaption></figcaption></figure>
6. <mark style="color:blue;">**Move**</mark> the new square block unit so it is in the top left corner of the quilt block.

   <div><figure><img src="/files/wvlrqvRt0ftWRFuoxusA" alt=""><figcaption></figcaption></figure> <figure><img src="/files/CtiaQk2uY5iwVIMqEp39" alt=""><figcaption></figcaption></figure></div>
7. To manipulate the square to enlarge it, <mark style="color:blue;">**grab**</mark> the square on one of the corners of the square and <mark style="color:blue;">**drag**</mark> it until the square fills the height and width of 4 grid spaces.&#x20;

   * Note: If the snap to grid is turned on (default) then the shape will automatically fill the grid space.

   <div><figure><img src="/files/FPU88afdfx0gg8zGYTk0" alt=""><figcaption></figcaption></figure> <figure><img src="/files/wKLw9lrob5sthLOmuy7m" alt=""><figcaption></figcaption></figure></div>
8. Click on the <mark style="color:blue;">**quarter circle shape**</mark> (<img src="/files/02NU8lnpowCqd1KGYr0O" alt="" data-size="line">) from the central control panel.&#x20;

   <figure><img src="/files/A2b98aIHRDT1E3LcXf35" alt=""><figcaption></figcaption></figure>
9. Click on the <mark style="color:blue;">**Link button**</mark> for a different fabric link (so that there are now 2 different fabrics being used). In this example, I am using Fabric Link B.

   <figure><img src="/files/Z9QWuvd6N7ggcmy72Grt" alt=""><figcaption><p>Circle now using Fabric Link B</p></figcaption></figure>
10. <mark style="color:blue;">**Move**</mark> the quarter circle piece into the bottom right corner of the square.

    <div><figure><img src="/files/pdoWKvZkuANRGQTopont" alt=""><figcaption></figcaption></figure> <figure><img src="/files/UnyncUQ4kbFwyFHPHyVv" alt=""><figcaption></figcaption></figure></div>
11. &#x20;To manipulate the quarter circle to enlarge it, <mark style="color:blue;">**grab**</mark> the square on the top left corner of the bounding box around the quarter circle and <mark style="color:blue;">**drag**</mark> it until the edge of the quarter circle fills the height and width of 3 grid spaces.

    <div><figure><img src="/files/k1q8lLVQ8D16rOoAMohj" alt=""><figcaption></figcaption></figure> <figure><img src="/files/BTWv6PeWamP4cCIolebF" alt=""><figcaption><p>1 x Drunkard's Path block unit</p></figcaption></figure></div>
12. <mark style="color:blue;">**Clone, rotate**</mark> and <mark style="color:blue;">**move**</mark> 3 more Drunkard's Path block units to complete the quilt block. If you'd like, you can add and use additional Fabric Links.

    <div align="left"><figure><img src="/files/Tr7v4QxqOuqS4PKQUwcF" alt="" width="375"><figcaption><p>Quilt block with 4 Drunkard's Path block units</p></figcaption></figure></div>

&#x20;   &#x20;

***

## <mark style="color:blue;">Sewing Construction Diagrams</mark>

**Please note:**

* Templates are not included in PreQuilt (at this time). You will need to create your own or buy templates to cut the curves.
* Cutting diagrams on PreQuilt are set as squares that are then trimmed into the convex and concave curves. Use your expertise to stagger templates for more efficient fabric usage.&#x20;
* Version 2.0 of Fabric Calculations will include templates and staggered cutting diagrams.

### <mark style="color:blue;">1 at a Time - Traditional Drunkard's Path</mark>

<figure><img src="/files/Bc7KOJCeqOpYRMk9ZNMU" alt=""><figcaption></figcaption></figure>

<figure><img src="/files/U8t1tWax0bgs1ICt92rj" alt=""><figcaption></figcaption></figure>

{% file src="/files/BAV0WZCCRd4Ckh0bA2Z1" %}


# Modern Drunkard's Path

Best Practices for Auto Recognition

<figure><img src="/files/8UvrMLOuUDvh2quHxpDn" alt="" width="375"><figcaption><p>Modern Drunkard's Path Block Unit</p></figcaption></figure>

## <mark style="color:blue;">Modern Drunkard's Path Block Unit in PreQuilt</mark>

There are two curved pieces that make up both versions of the **Drunkard's Path** blocks: a convex piece and a concave piece.&#x20;

In the **modern Drunkard's Path** block unit, the convex piece will extend all the way to the edge of the finished block (with the edges of the concave piece hidden in the seam allowance once pieced to its neighboring blocks).

<div align="left"><figure><img src="/files/DPNXWm5yxaTnULmCQ7cg" alt="" width="375"><figcaption><p>Modern Drunkard's Path block unit</p></figcaption></figure></div>

Since the idea behind this series is to build a block unit (not an entire block that is just a Drunkard's Path), I'm going to create a 12" finished block that has a few Drunkard's Path block units.

&#x20; &#x20;

***

### YouTube Video

*Coming soon...*

***

### Help Guide

1. Click on the <mark style="color:blue;">**BLOCKS tab**</mark> on the left side control panel.

   <div align="left"><figure><img src="/files/68Sy8IGIv0pf3slIgZAs" alt=""><figcaption></figcaption></figure></div>
2. Click on the <mark style="color:blue;">**Make Custom Block**</mark> button.

   <div align="left"><figure><img src="/files/m996ukpqAnSaJrChXBS5" alt=""><figcaption></figcaption></figure></div>
3. The **Block Editor panel** will slide out and overtake your screen. My block is set to 12" x 12" finished, but it doesn't matter, the next steps will work for all sized blocks.
4. Set your grid guidelines by changing the number for the horizontal and vertical units.

   * I'll set my gridlines to 2 horizontal and 2 vertical units.&#x20;

   <div align="left"><figure><img src="/files/oFoiUO5At26DMhpR3Q6e" alt=""><figcaption></figcaption></figure></div>

   <figure><img src="/files/RY8TqmkzLjlXlP6l0Lql" alt=""><figcaption></figcaption></figure>
5. Click on the <mark style="color:blue;">**quarter circle shape**</mark> (<img src="/files/02NU8lnpowCqd1KGYr0O" alt="" data-size="line">) from the central control panel.&#x20;

   <figure><img src="/files/w7ACEqlSRNLXjL41B4HV" alt=""><figcaption></figcaption></figure>
6. <mark style="color:blue;">**Move**</mark> the quarter square piece so it is in the top left corner of the quilt block.

   <div><figure><img src="/files/I6FhGZ7gijHZiBeUm6uu" alt=""><figcaption></figcaption></figure> <figure><img src="/files/9iUGZLW3py5iQKQc429j" alt=""><figcaption></figcaption></figure></div>
7. Click on the <mark style="color:blue;">**concave quarter circle shape**</mark> (<img src="/files/QqmeJMvK2Sv77iHmieUC" alt="" data-size="line">) from the central control panel.&#x20;

   <figure><img src="/files/qlb4KOCb7xfBzF2Fro4W" alt=""><figcaption></figcaption></figure>
8. Click on the <mark style="color:blue;">**Link button**</mark> for a different fabric link (so that there are now 2 different fabrics being used). In this example, I am using Fabric Link B.

   <figure><img src="/files/NDTGvAwK54tMFGXdidEd" alt=""><figcaption></figcaption></figure>
9. <mark style="color:blue;">**Move**</mark> the concave quarter circle piece into the left corner of the block.

   <div><figure><img src="/files/pe9YXYlHGfvQ0IxILWoP" alt=""><figcaption></figcaption></figure> <figure><img src="/files/t1FlNyXiFoxKN0W3ExVJ" alt=""><figcaption></figcaption></figure></div>
10. &#x20;<mark style="color:blue;">**Rotate**</mark> the concave quarter circle piece so that it is snug around the quarter circle block piece.

    <div><figure><img src="/files/t1FlNyXiFoxKN0W3ExVJ" alt=""><figcaption></figcaption></figure> <figure><img src="/files/QBC3YRKveaqCUIoUrecj" alt=""><figcaption><p>1 x Modern Drunkard's Path block unit</p></figcaption></figure></div>
11. <mark style="color:blue;">**Clone, rotate**</mark> and <mark style="color:blue;">**move**</mark> 3 more modern Drunkard's Path block units to complete the quilt block. If you'd like, you can add and use additional Fabric Links.

    <div align="left"><figure><img src="/files/CGbzSehNASms1GmwIgyh" alt="" width="375"><figcaption><p>Quilt block with 4 different modern Drunkard's Path block units</p></figcaption></figure></div>

&#x20;   &#x20;

***

## <mark style="color:blue;">Sewing Construction Diagrams</mark>

**Please note:**

* Templates are not included in PreQuilt (at this time). You will need to create your own or buy templates to cut the curves.
* Cutting diagrams on PreQuilt are set as squares that are then trimmed into the convex and concave curves. Use your expertise to stagger templates for more efficient fabric usage.&#x20;
* Version 2.0 of Fabric Calculations will include templates and staggered cutting diagrams.

### <mark style="color:blue;">1 at a Time - Modern Drunkard's Path</mark>

<figure><img src="/files/T5r93TgKZErRoIO0SbYu" alt=""><figcaption></figcaption></figure>

<figure><img src="/files/Uwvni3qK56cs3YJ3QwCR" alt=""><figcaption></figcaption></figure>

{% file src="/files/IVkBSXUpqJzwj65boaAP" %}


# Orange Peel

<div align="center"><figure><img src="/files/GnksHCvglNnaNVD87rHy" alt=""><figcaption><p>Appliqued Orange Peel block unit</p></figcaption></figure> <figure><img src="/files/ifZ3ibQE7pin8pPfCkiU" alt=""><figcaption><p>Pieced Orange Peel block unit</p></figcaption></figure></div>

## <mark style="color:blue;">The Two Orange Peel Block Unit in PreQuilt</mark>

**Orange Peel** block units can be constructed in a similar way to the Drunkard's Path block unit.&#x20;

For an **appliquéd Orange Peel**, construct your block as you would sew it - with a larger background fabric and a smaller orange peel shape on top.

For a **pieced Orange Peel**, construct your block unit like a Modern Drunkard's Path with the orange peel shape and the two side concave curves as all separate pieces. &#x20;

<div align="left"><figure><img src="/files/Dl7nBqKCLW5xAdSDYXlW" alt=""><figcaption><p>Appliqued Orange Peel block unit</p></figcaption></figure> <figure><img src="/files/PiXt3Ld8nBlyXWZINCzu" alt=""><figcaption><p>Pieced Orange Peel block unit</p></figcaption></figure></div>

***

## <mark style="color:blue;">Build a Orange Peel Block Unit in PreQuilt</mark>

<table data-view="cards"><thead><tr><th></th><th data-hidden></th><th data-hidden></th><th data-hidden data-card-cover data-type="files"></th><th data-hidden data-card-target data-type="content-ref"></th></tr></thead><tbody><tr><td><strong>Orange Peel (Appliquéd)</strong></td><td></td><td></td><td><a href="/files/fkp9Zlb2ENjau6uBZIDV">/files/fkp9Zlb2ENjau6uBZIDV</a></td><td><a href="/pages/2qX19918lHPBwDQcs6ff">/pages/2qX19918lHPBwDQcs6ff</a></td></tr><tr><td><strong>Orange Peel (Pieced)</strong></td><td></td><td></td><td><a href="/files/qiiyhWSCFVRBZIwEmM5W">/files/qiiyhWSCFVRBZIwEmM5W</a></td><td><a href="/pages/Oo7hNYeTfAoFjFo1LldI">/pages/Oo7hNYeTfAoFjFo1LldI</a></td></tr></tbody></table>


# Appliquéd Orange Peel

Best Practices for Auto Recognition

<figure><img src="/files/GnksHCvglNnaNVD87rHy" alt="" width="375"><figcaption><p>Appliquéd Orange Peel Block Unit</p></figcaption></figure>

## <mark style="color:blue;">**Appliquéd**</mark> <mark style="color:blue;"></mark><mark style="color:blue;">Orange Peel Block Unit in PreQuilt</mark>

For an **appliquéd Orange Peel**, construct your block as you would sew it - with a larger background fabric and a smaller orange peel shape on top.&#x20;

<div align="left"><figure><img src="/files/Dl7nBqKCLW5xAdSDYXlW" alt="" width="375"><figcaption><p>Traditional Drunkard's Path block unit</p></figcaption></figure></div>

&#x20; &#x20;

***

### YouTube Video

*Coming soon...*

***

### Help Guide

1. Click on the <mark style="color:blue;">**BLOCKS tab**</mark> on the left side control panel.

   <div align="left"><figure><img src="/files/68Sy8IGIv0pf3slIgZAs" alt=""><figcaption></figcaption></figure></div>
2. Click on the <mark style="color:blue;">**Make Custom Block**</mark> button.

   <div align="left"><figure><img src="/files/m996ukpqAnSaJrChXBS5" alt=""><figcaption></figcaption></figure></div>
3. The **Block Editor panel** will slide out and overtake your screen. My block is set to 12" x 12" finished, but it doesn't matter, the next steps will work for all sized blocks.
4. Set your grid guidelines by changing the number for the horizontal and vertical units.

   * I'll set my gridlines to 8 horizontal and 8 vertical units. I want my Orange Peel to be centered in each of the block units.

   <div align="left"><figure><img src="/files/aZ84G58Ueplhk2D1r3d1" alt=""><figcaption></figcaption></figure></div>

   <figure><img src="/files/hEpOGl7dUXEu3tynGOmz" alt=""><figcaption></figcaption></figure>
5. Click on the <mark style="color:blue;">**square shape**</mark> (<img src="/files/hy2ZsHmPdS74SBFprTv2" alt="" data-size="line">) from the central control panel. It will be our background fabric behind the circle.

   <figure><img src="/files/cx7GVqU2anRQGcoREEK1" alt=""><figcaption></figcaption></figure>
6. <mark style="color:blue;">**Move**</mark> the new square block unit so it is in the top left corner of the quilt block.

   <div><figure><img src="/files/wvlrqvRt0ftWRFuoxusA" alt=""><figcaption></figcaption></figure> <figure><img src="/files/CtiaQk2uY5iwVIMqEp39" alt=""><figcaption></figcaption></figure></div>
7. To manipulate the square to enlarge it, <mark style="color:blue;">**grab**</mark> the square on one of the corners of the square and <mark style="color:blue;">**drag**</mark> it until the square fills the height and width of 4 grid spaces.&#x20;

   * Note: If the snap to grid is turned on (default) then the shape will automatically fill the grid space.

   <div><figure><img src="/files/FPU88afdfx0gg8zGYTk0" alt=""><figcaption></figcaption></figure> <figure><img src="/files/wKLw9lrob5sthLOmuy7m" alt=""><figcaption></figcaption></figure></div>
8. Click on the <mark style="color:blue;">**orange peel shape**</mark> (<img src="/files/JVB2zkOt0rwSGToq5qgC" alt="" data-size="line">) from the central control panel.&#x20;

   <figure><img src="/files/eSAdcHNcnfVwjjDVbk50" alt=""><figcaption></figcaption></figure>
9. Click on the <mark style="color:blue;">**Link button**</mark> for a different fabric link (so that there are now 2 different fabrics being used). In this example, I am using Fabric Link B.

   <figure><img src="/files/dKaOsegRHhbEaUIUKuyS" alt=""><figcaption><p>Circle now using Fabric Link B</p></figcaption></figure>
10. <mark style="color:blue;">**Move**</mark> the orange peel piece into the center top left right corner of the square.

    <div><figure><img src="/files/9kf7yQaXkbN07ZJckzLS" alt=""><figcaption></figcaption></figure> <figure><img src="/files/z2f3su2Zreh2arAapfTp" alt=""><figcaption></figcaption></figure></div>
11. &#x20;To manipulate the orange peel to enlarge it, <mark style="color:blue;">**grab**</mark> the square on the bottom right corner of the bounding box around the orange peel and <mark style="color:blue;">**drag**</mark> it until the bottom right corner of the orange peel fills the height and width of 2 grid spaces.

    <div><figure><img src="/files/z2f3su2Zreh2arAapfTp" alt=""><figcaption></figcaption></figure> <figure><img src="/files/KYtT1syEeCuHvXjqUhCW" alt=""><figcaption><p>1 x Appliquéd Orange Peel block unit</p></figcaption></figure></div>
12. <mark style="color:blue;">**Clone, rotate**</mark> and <mark style="color:blue;">**move**</mark> 3 more Orange Peel block units to complete the quilt block. If you'd like, you can add and use additional Fabric Links.

    <div align="left"><figure><img src="/files/ccBQT7HwgN4Y6K3WLBOQ" alt="" width="375"><figcaption><p>Quilt block with 4 Appliquéd Orange Peel block units</p></figcaption></figure></div>

&#x20;   &#x20;


# Pieced Orange Peel

Best Practices for Auto Recognition

<figure><img src="/files/ifZ3ibQE7pin8pPfCkiU" alt="" width="375"><figcaption><p>Pieced Orange Peel Block Unit</p></figcaption></figure>

## <mark style="color:blue;">Pieced Orange Peel Block Unit in PreQuilt</mark>

For a **pieced Orange Peel**, construct your block unit like a Modern Drunkard's Path with 1 orange peel shape and 2 side concave curves. There will be a total of 3 separate pieces.

<div align="left"><figure><img src="/files/PiXt3Ld8nBlyXWZINCzu" alt="" width="375"><figcaption><p>Pieced Orange Peel block unit</p></figcaption></figure></div>

&#x20; &#x20;

***

### YouTube Video

*Coming soon...*

***

### Help Guide

1. Click on the <mark style="color:blue;">**BLOCKS tab**</mark> on the left side control panel.

   <div align="left"><figure><img src="/files/68Sy8IGIv0pf3slIgZAs" alt=""><figcaption></figcaption></figure></div>
2. Click on the <mark style="color:blue;">**Make Custom Block**</mark> button.

   <div align="left"><figure><img src="/files/m996ukpqAnSaJrChXBS5" alt=""><figcaption></figcaption></figure></div>
3. The **Block Editor panel** will slide out and overtake your screen. My block is set to 12" x 12" finished, but it doesn't matter, the next steps will work for all sized blocks.
4. Set your grid guidelines by changing the number for the horizontal and vertical units.

   * I'll set my gridlines to 2 horizontal and 2 vertical units.&#x20;

   <div align="left"><figure><img src="/files/oFoiUO5At26DMhpR3Q6e" alt=""><figcaption></figcaption></figure></div>

   <figure><img src="/files/RY8TqmkzLjlXlP6l0Lql" alt=""><figcaption></figcaption></figure>
5. Click on the <mark style="color:blue;">**orange peel shape**</mark> (<img src="/files/JVB2zkOt0rwSGToq5qgC" alt="" data-size="line">) from the central control panel.&#x20;

   <figure><img src="/files/0j0x9IlBxHAkKcI8n4lz" alt=""><figcaption></figcaption></figure>
6. <mark style="color:blue;">**Move**</mark> the orange peel piece so it is in the top left corner of the quilt block.

   <div><figure><img src="/files/pX85D3Pbk0ve0PXWsyVd" alt=""><figcaption></figcaption></figure> <figure><img src="/files/38KnMNkGuaAIDTSTqRuo" alt=""><figcaption></figcaption></figure></div>
7. Click on the <mark style="color:blue;">**concave quarter circle shape**</mark> (<img src="/files/QqmeJMvK2Sv77iHmieUC" alt="" data-size="line">) from the central control panel.&#x20;

   <figure><img src="/files/4UuuJ4HSQhZ15HIuWtRe" alt=""><figcaption></figcaption></figure>
8. Click on the <mark style="color:blue;">**Link button**</mark> for a different fabric link (so that there are now 2 different fabrics being used). In this example, I am using Fabric Link B.

   <figure><img src="/files/1uZ3wRelQSGMo6AHDM4Y" alt=""><figcaption></figcaption></figure>
9. <mark style="color:blue;">**Move**</mark> the concave quarter circle piece into the left corner of the block.

   <div><figure><img src="/files/crxhLA06aVoxSdq9coGy" alt=""><figcaption></figcaption></figure> <figure><img src="/files/d2dJbq0cLJSHeUCe1tWM" alt=""><figcaption></figcaption></figure></div>
10. &#x20;With the concave quarter circle piece selected, click on the <mark style="color:blue;">**Clone button**</mark> (![](/files/Uhph6iWWhRGBUn4aG6gV)) on the central control panel.

    <figure><img src="/files/2gvjHVd96idsXOkcp0fo" alt=""><figcaption></figcaption></figure>
11. <mark style="color:blue;">**Rotate**</mark> and <mark style="color:blue;">**move**</mark> the new concave quarter circle piece so that it fits snug on the other side of the orange peel piece.

    <div><figure><img src="/files/VFTetAWHRsvcbUqqGuLu" alt=""><figcaption></figcaption></figure> <figure><img src="/files/Ofja11BWPxz5rxIAAs2Y" alt=""><figcaption><p>1 x pieced Orange Peel block unit</p></figcaption></figure></div>
12. <mark style="color:blue;">**Clone, rotate**</mark> and <mark style="color:blue;">**move**</mark> 3 more pieced orange peel block units to complete the quilt block. If you'd like, you can add and use additional Fabric Links.

    <div align="left"><figure><img src="/files/iOyFU1CeALw99RCcue9K" alt="" width="375"><figcaption><p>Quilt block with 4 pieced Orange Peel block units</p></figcaption></figure></div>

&#x20;   &#x20;

***

## <mark style="color:blue;">Sewing Construction Diagrams</mark>

**Please note:**

* Templates are not included in PreQuilt (at this time). You will need to create your own or buy templates to cut the curves.
* Cutting diagrams on PreQuilt are set as squares that are then trimmed into the orange peel and concave curves. Use your expertise to stagger templates for more efficient fabric usage.&#x20;
* Version 2.0 of Fabric Calculations will include templates and staggered cutting diagrams.

### <mark style="color:blue;">1 at a Time Orange Peel - Pieced Method</mark>

<figure><img src="/files/8aTmoKkzeMJ6kzw7lb7v" alt=""><figcaption></figcaption></figure>

<figure><img src="/files/EyxblVQraWhIRC9N2vzN" alt=""><figcaption></figcaption></figure>

<figure><img src="/files/kXWLYvj2zMT77Os5iQ3x" alt=""><figcaption></figcaption></figure>

{% file src="/files/gHKGLPLbOG4aZOZ33rYY" %}


# All About Quilt Blocks


# Create a Traditional Quilt Block

Basic & Market Plan

If you'd like to use a quilt block that is not found in the preloaded block library, you can always create your own custom quilt block.

In this example, we're going to create a Sawtooth Star Block:

![](/files/wU4s9ost4XJpkmL7NYKG)

### <mark style="color:blue;">01 | Create a New Custom Block</mark>

1. Click on the <mark style="color:blue;">**BLOCKS**</mark> tab on the [*<mark style="color:blue;">left side control panel</mark>*](https://glossary.prequilt.com/pq-glossary/cs#left-side-control-panel).

   <div align="left"><figure><img src="/files/vvoIMZ9PSuZDjF0SwO8s" alt=""><figcaption><p><em>Left Side Control Panel tabs</em></p></figcaption></figure></div>
2. Click on the <mark style="color:blue;">**Make Custom Block**</mark> button.

   <div align="left"><figure><img src="/files/jNJgDL9Lqlpt9YzWlhgJ" alt=""><figcaption></figcaption></figure></div>
3. The [*<mark style="color:blue;">Block Editor</mark>*](https://glossary.prequilt.com/pq-glossary/bs#block-editor) window will open.

   <figure><img src="/files/3BTr6UAr2hOnvrEgLdmh" alt=""><figcaption><p><em>The Block Editor window</em></p></figcaption></figure>

### <mark style="color:blue;">02 | Changing the Block Settings</mark>

The Block Editor has some options in the left side control panel that will help us recreate (or reverse engineer) our desired block - The Sawtooth Star.

1. Click on the <mark style="color:blue;">**Block Info**</mark> tab.

   <div align="left"><figure><img src="/files/agIXVwXTOnnztAQEHYCr" alt=""><figcaption></figcaption></figure></div>
2. Rename the block name to <mark style="color:blue;">**Sawtooth Star**</mark>.

   <div align="left"><figure><img src="/files/oj2YkJGXUFKfbUPzcGvi" alt=""><figcaption><p><em>To stay organized, name your block</em></p></figcaption></figure></div>
3. Change both the horizontal and vertical gridlines to <mark style="color:blue;">**4**</mark>.

   * **Note:** The Sawtooth Star can be divided into 16 equal squares (4 columns and 4 rows). This information will help us know how many gridlines to set.

   <div align="left"><figure><img src="/files/VSHTLUx0dxZxl1jJuN3G" alt=""><figcaption></figcaption></figure></div>
4. Ensure snapping is on - as a default it is turned on.

   * **Note:** If the circles are outlined, snapping is on. If the circles are not outlined, simply click on the buttons to turn snapping on.

   <div align="left"><figure><img src="/files/RU65dFL8TMbpAtCXyHkN" alt=""><figcaption></figcaption></figure></div>

### <mark style="color:blue;">03 | Create Quilt Block Pieces</mark>

1. Click on the <mark style="color:blue;">**Half Square Triangle (HST) shape**</mark> found beneath the empty Block Editor Canvas  (<img src="/files/lubTveBXn5oalnA0bf5D" alt="" data-size="line">). Once you click on it, it will appear on the [*<mark style="color:blue;">Block Editor Canvas</mark>*](https://glossary.prequilt.com/pq-glossary/bs#block-editor-canvas).

   <figure><img src="/files/3KrCmONAsLOi0moFAlvt" alt=""><figcaption><p><em>Newly added HST piece</em></p></figcaption></figure>
2. Click on the <mark style="color:blue;">**Square**</mark> on the Block Editor Canvas and while still holding down on the <mark style="color:blue;">**mouse button**</mark>, <mark style="color:blue;">**move**</mark> the square into the top left corner.

   <div><figure><img src="/files/tzLuax0U6ov4zbcyFGPV" alt=""><figcaption><p><em>Originally placed square</em></p></figcaption></figure> <figure><img src="/files/eyo2pG5rnTw2KKZXWOCN" alt=""><figcaption><p><em>Moved square</em></p></figcaption></figure></div>
3. To resize the square to fill the space between gridlines, click on the <mark style="color:blue;">**bottom right box**</mark> on the outside of your square and <mark style="color:blue;">**drag**</mark> it to make the square bigger.&#x20;

   * It should snap to fit the size of the grid unit perfectly.

   <div align="left"><figure><img src="/files/BbKG3031ILOI2QvIsNTd" alt=""><figcaption><p><em>Smaller square</em></p></figcaption></figure> <figure><img src="/files/zJtwZpMSzKpLquHL7Mgr" alt=""><figcaption><p><em>Resized bigger square - fills space between gridlines</em></p></figcaption></figure></div>

#### <mark style="color:blue;">b | Create a Half Square Triangle (HST) Piece</mark>

1. Click on the <mark style="color:blue;">**Half Square Triangle (HST) shape**</mark> found beneath the empty Block Editor Canvas  (<img src="/files/qwbcpaeuAggGO89IFIyc" alt="" data-size="line">). Once you click on it, it will appear on the [*<mark style="color:blue;">Block Editor Canvas</mark>*](https://glossary.prequilt.com/pq-glossary/bs#block-editor-canvas).

   <figure><img src="/files/HT7quogtGhyGG9rFVY5m" alt=""><figcaption><p><em>Newly added HST piece</em></p></figcaption></figure>
2. On the left side control panel, click on the <mark style="color:blue;">**Link**</mark> button next to Color Tag B.&#x20;

   * This will change the color of our HST from beige to black.

   <div align="left"><figure><img src="/files/J3UzVy8hezaRdWqUgbDp" alt=""><figcaption><p><em>To change a piece's color, link a different color tag.</em></p></figcaption></figure></div>
3. Click on our black <mark style="color:blue;">**HST**</mark> piece and while still holding down on the <mark style="color:blue;">**mouse button**</mark>, <mark style="color:blue;">**move**</mark> the HST to the right of the square.&#x20;

   <div align="left"><figure><img src="/files/5VMwwrZ8a9OA1vFLzIJn" alt=""><figcaption><p><em>Color Tag B linked to HST piece</em></p></figcaption></figure> <figure><img src="/files/Ao89aw17ChzJhuNxrYJf" alt=""><figcaption><p><em>HST piece moved</em></p></figcaption></figure></div>
4. To resize the HST piece to fill the space between gridlines, click on the <mark style="color:blue;">**bottom right box**</mark> on the outside of your HST and <mark style="color:blue;">**drag**</mark> it to make the HST bigger.&#x20;

   * It should snap to fit the size of the grid unit perfectly.

   <div align="left"><figure><img src="/files/gfnvHL7sCz1Jy4NYtlqL" alt=""><figcaption><p><em>HST piece small</em></p></figcaption></figure> <figure><img src="/files/KuOBC3lUKGcywjmi7nV6" alt=""><figcaption><p><em>HST piece resized to fit between gridlines</em></p></figcaption></figure></div>

#### <mark style="color:blue;">c | Create a Flying Geese Triangle Piece</mark>

1. Click on the <mark style="color:blue;">**Isosceles Triangle shape**</mark> found beneath the empty Block Editor Canvas  (<img src="/files/FflTpTmCP3rEmXbmAtDv" alt="" data-size="line">). Once you click on it, it will appear on the [*<mark style="color:blue;">Block Editor Canvas</mark>*](https://glossary.prequilt.com/pq-glossary/bs#block-editor-canvas).
2. Click on our <mark style="color:blue;">**Isosceles Triangle**</mark> piece and while still holding down on the <mark style="color:blue;">**mouse button**</mark>, <mark style="color:blue;">**move**</mark> it to the grid box to right of the HST.

   <div align="left"><figure><img src="/files/ZFXUSLhsfPqLwVlm6viV" alt=""><figcaption><p><em>Newly added isosceles triangle piece</em></p></figcaption></figure> <figure><img src="/files/yy63f8aqnD1PRpLnxjSr" alt=""><figcaption><p><em>Moved isosceles triangle piece</em></p></figcaption></figure></div>
3. To resize the isosceles triangle piece to fill the space between gridlines, click on the <mark style="color:blue;">**top right box**</mark> on the outside of your isosceles triangle and <mark style="color:blue;">**drag**</mark> it to make it bigger.&#x20;

   * It should snap to fit the size of the grid unit perfectly.

   <figure><img src="/files/N2736bdUeiIt6gVtvnaf" alt=""><figcaption><p><em>Small isosceles triangle</em></p></figcaption></figure>

   <figure><img src="/files/on4YiAUPsMPYKH7xG5NQ" alt=""><figcaption><p><em>Isosceles triangle piece resized to fit between gridlines</em></p></figcaption></figure>
4. To change the shape (width) of the isosceles triangle piece to create the flying geese triangle, click on the <mark style="color:blue;">**middle right box**</mark> on the outside of your isosceles triangle and <mark style="color:blue;">**drag**</mark> it to the right to create the new triangle shape.&#x20;

   * It should snap to fit the size expanding **2** grid units perfectly.

   <figure><img src="/files/on4YiAUPsMPYKH7xG5NQ" alt=""><figcaption><p><em>Isosceles triangle piece before reshaping</em></p></figcaption></figure>

   <figure><img src="/files/XFKtPzCXxUtfmvPBGSKo" alt=""><figcaption><p><em>Isosceles triangle piece reshaped into a flying geese triangle</em></p></figcaption></figure>
5. Rotate the flying geese triangle by clicking on the <mark style="color:blue;">**Rotate**</mark> button <mark style="color:blue;">**4**</mark> times (<img src="/files/ULp0cqOVsN99uKKc1DVX" alt="" data-size="line">) on the vertical [*<mark style="color:blue;">Toolbar</mark>*](https://glossary.prequilt.com/pq-glossary/ts#toolbar).

   <div align="left"><figure><img src="/files/g87U26Mu5GXJ65txaHK5" alt=""><figcaption></figcaption></figure></div>

   <div align="left"><figure><img src="/files/8fSc2eTpFloGCvRlR6Tg" alt=""><figcaption><p><em>Rotated flying geese triangle</em></p></figcaption></figure></div>
6. <mark style="color:blue;">**Move**</mark> the flying geese triangle to the left so that it nests next to the black HST.

   * **Note:** It should snap seamlessly right up against the HST.

   <figure><img src="/files/PysRpoZfOv3uyKFUz8xD" alt=""><figcaption><p><em>Moved flying geese triangle</em></p></figcaption></figure>

### <mark style="color:blue;">04 | Clone Pieces to Create Sawtooth Star Block</mark>

Now we have the three different shaped pieces that make the Sawtooth Star block. We can now clone (copy) each of these pieces until we have our completed block.

1. Click on the <mark style="color:blue;">**Square**</mark> piece in the Block Editor Canvas.
2. Click the <mark style="color:blue;">**Clone**</mark> button (<img src="/files/7MpkE2PtyE96N4kiotZ0" alt="" data-size="line">)on the vertical Toolbar.

   * **Note:** A second square will be added to the canvas area.

   <div align="left"><figure><img src="/files/VBhAGJPNGi381KQiDalx" alt=""><figcaption></figcaption></figure></div>

   <div align="left"><figure><img src="/files/ee8FrL5S6OjOyM3dDSaR" alt=""><figcaption><p><em>Selected first square piece</em></p></figcaption></figure> <figure><img src="/files/MMmKV8TGRe3dIa6nkwUD" alt=""><figcaption><p><em>Cloned square piece - now there are 2</em></p></figcaption></figure></div>
3. 1. <mark style="color:blue;">**Move**</mark> the second Square piece to the top right corner of the canvas.

      <figure><img src="/files/cvMHQicjsQDrVVcUUIvB" alt=""><figcaption><p><em>Moved second (cloned) square piece</em></p></figcaption></figure>
   2. <mark style="color:blue;">**Repeat**</mark> ***Steps d.1-3*** for the remaining squares, HSTs, and flying geese triangles until you have all the outside pieces of your Sawtooth Star block.

      <figure><img src="/files/T1D6vOPYavJilHcUO0UU" alt=""><figcaption><p><em>Outside pieces of the Sawtooth Star Block</em></p></figcaption></figure>
   3. To create the last piece, the center square piece:

      1. <mark style="color:blue;">**Clone**</mark> one of the square pieces
      2. Change the color of the square to black by clicking the <mark style="color:blue;">**Link**</mark> button next to Color Tag B.

         <div align="left"><figure><img src="/files/vMVYURBFwq9N86KiogDx" alt=""><figcaption><p><em>Cloned square piece</em></p></figcaption></figure> <figure><img src="/files/4Pxqnl9WJVRqrAdB9t8w" alt=""><figcaption><p><em>Cloned square piece - now black using Color Tag B</em></p></figcaption></figure></div>
      3. <mark style="color:blue;">**Move**</mark> it to one of the center squares
      4. Resize it by clicking on the <mark style="color:blue;">**bottom right box**</mark> on the outside of the square and <mark style="color:blue;">**dragging**</mark> it to make it bigger.&#x20;
         * It should snap to fit the size of 4 grid units perfectly.

      <div><figure><img src="/files/YqdvD9zFhfpcjAnFuV56" alt=""><figcaption><p><em>Moved square piece</em></p></figcaption></figure> <figure><img src="/files/hAoiFJYeiD41y8Feut58" alt=""><figcaption><p><em>Resized square piece</em></p></figcaption></figure></div>

### <mark style="color:blue;">05 | Save Block to Quilt</mark>

Ta da! We've now created the Sawtooth Star block and need to save it to the quilt we started.

1. Click on the <mark style="color:blue;">**Save**</mark> button (<img src="/files/lGW564ni9ceN3zoNJpYb" alt="" data-size="line">) in the top right corner of the Block Editor window.

   <figure><img src="/files/EK4UqAb38fp8os4bSKS7" alt=""><figcaption></figcaption></figure>
2. Click on <mark style="color:blue;">**Save To Quilt**</mark>.

   <div align="left"><figure><img src="/files/AeSwKsvHsGGy0UU081om" alt=""><figcaption></figcaption></figure></div>
3. The Block Editor will close and you will now see our new block in the BLOCKS tab.

   <div align="left"><figure><img src="/files/4CGS9nvKLImP1lcMmCEC" alt=""><figcaption><p><em>Blocks saved in this quilt</em></p></figcaption></figure></div>


# Different Sized Quilt Blocks

## <mark style="color:blue;">Create Different Sized Blocks</mark>

The default quilt layout for PreQuilt is a quilt with the same shape and sized blocks over the entire quilt. But as you know, this is really just a starting point!&#x20;

PreQuilt can be used to create different sized blocks in a variety of different ways by:

<table data-view="cards"><thead><tr><th></th><th data-hidden data-card-cover data-type="image">Cover image</th><th data-hidden data-card-target data-type="content-ref"></th></tr></thead><tbody><tr><td><strong>Merging Block Cells</strong></td><td><a href="/files/xCOhuvSTEaZVE9FF2vMp">/files/xCOhuvSTEaZVE9FF2vMp</a></td><td><a href="/pages/FSK8VJADhmCmbBttcUPV">/pages/FSK8VJADhmCmbBttcUPV</a></td></tr><tr><td><strong>Resizing Columns &#x26; Rows</strong></td><td><a href="/files/losbJCmGkiGz0pn6kEo2">/files/losbJCmGkiGz0pn6kEo2</a></td><td><a href="/pages/XVbByRDBJHegkFzaw2jA">/pages/XVbByRDBJHegkFzaw2jA</a></td></tr></tbody></table>

## <mark style="color:blue;">Create a Quilt with Different Sized Quilt Blocks</mark>

<table data-view="cards"><thead><tr><th></th><th data-hidden data-card-cover data-type="image">Cover image</th><th data-hidden data-card-target data-type="content-ref"></th></tr></thead><tbody><tr><td><strong>Create a Quilt with Different Sized Blocks</strong></td><td><a href="/files/nBSi5qRJk2PuIYTt4a3W">/files/nBSi5qRJk2PuIYTt4a3W</a></td><td><a href="/pages/S5csPcJREPobeQfCdyoR">/pages/S5csPcJREPobeQfCdyoR</a></td></tr></tbody></table>


# Create a Quilt with Different Sized Blocks

Basic & Market Plan Feature // Rectangular Quilt Grid ONLY

<figure><img src="/files/nBSi5qRJk2PuIYTt4a3W" alt="" width="563"><figcaption><p>Quilt with 8" and 4" quilt blocks</p></figcaption></figure>

## <mark style="color:blue;">Quilts with Different Sized Blocks</mark>

{% hint style="warning" %}
Only the Rectangular Quilt Grid can have different sized quilt blocks.
{% endhint %}

In this tutorial, we'll show you how you can create a quilt that has different sized quilt blocks in it.&#x20;

It's always best to start with a quilt grid made up of smaller blocks that are combined (merged) together to create bigger blocks. You cannot breakdown or divide a larger block into smaller components, but you can always combine smaller blocks to create a bigger block.

***

### <mark style="color:blue;">01 | Determine the Common Block Size</mark>

{% hint style="success" %}
Start by finding the **largest common denominator** for the common quilt block that will fill the quilt grid.
{% endhint %}

The first step is to figure out the size of the quilt's common block size, which will be the beginning block size that can be merged together to create the larger quilt blocks. You want to use the largest common denominator, not the smallest.&#x20;

* **NOTE**: The smallest common denominator is usually 1" square, which can be a headache because the unit is so small and you'll need so many of them to create your overall quilt size. Use this size only when necessary.

So, for example, if you want to create a quilt that has 4" finished squares and 8" finished squares, then the common block size for the quilt grid would be 4" square blocks.&#x20;

* **NOTE**: However, if another example is a quilt with 2" x 4" rectangles, 4" squares, 4" x 8" rectangles, and 8" squares - then your largest common denominator would be 2" square blocks.

Once you know the size of the common quilt block, set the quilt grid to that size.

1. From the QUILT dashboard, click on the <mark style="color:blue;">**Create a Quilt**</mark> button.

   <div align="left"><figure><img src="/files/10WoooMlf8gLN0lzC4EH" alt=""><figcaption></figcaption></figure></div>
2. For the Rectangular grid, input the dimensions for the common quilt block size. For this example, we're using 4" square blocks.

   * **NOTE**: Remember to input finished quilt block dimensions in inches (not unfinished).

   <figure><img src="/files/lF7hqhuJ0eCpy928TSWz" alt=""><figcaption></figcaption></figure>
3. Click on the <mark style="color:blue;">**Use This Grid**</mark> button to create the quilt.

   <div align="left"><figure><img src="/files/KO9JnO9Yj5fuOFTOqdGL" alt=""><figcaption></figcaption></figure></div>

***

### <mark style="color:blue;">02 | Determine the Quilt Size</mark>

Now that we have our common quilt block size determined and set, we will need to determine and set the overall size of the quilt.

In this example, we set our common quilt block size to 4" finished squares. Since PreQuilt's default quilt setting is always 10 columns and 10 rows, our quilt size is 40" x 40".

But let's say we want to make a much bigger quilt - 56" x 64". We can do this by adding columns and rows. By doing the math, we know that the number of columns we need is 14 (56 ÷ 4 = 14; 64 ÷ 4 = 16).

1. Click on the <mark style="color:blue;">**GRID tab**</mark> on the left side control panel.

   <div align="left"><figure><img src="/files/RApy3IcWGDdvIYdvEi7O" alt="" width="298"><figcaption></figcaption></figure></div>
2. Input <mark style="color:blue;">**14**</mark> for the # of columns and <mark style="color:blue;">**16**</mark> for the number of rows.

   <div align="left"><figure><img src="/files/b5agAZgSjIWU3vR6E7tB" alt="" width="296"><figcaption></figcaption></figure></div>
3. Click on the <mark style="color:blue;">**Update**</mark> button to save.

   <div align="left"><figure><img src="/files/OCEuGTDJ7SQTXWcAjBlp" alt=""><figcaption></figcaption></figure></div>
4. We can now see that the overall quilt grid is set to 56" x 64" using 4" blocks.

   <div align="left"><figure><img src="/files/uUwqGfkIcPjMiJq3hCKa" alt="" width="362"><figcaption></figcaption></figure></div>

***

### <mark style="color:blue;">03a | Merge Cells to Create Larger Quilt Blocks</mark>

Now that we've determined what our largest common denominator for the quilt block is (4" squares) and we've determined the overall size of our quilt (56" x 64"), we can now start merging blocks together to create our quilt layout.

In this example, we want to have both 4" and 8" finished square blocks. A 4" quilt block is the foundation common quilt block, so we don't need to do anything to create it. To create an 8" quilt block, we will need to combine 4 individual 4" blocks together.

1. On the quilt grid (or digital design wall), click on the <mark style="color:blue;">**quilt cell blocks**</mark> that you want to merge (or combine) together to create an 8" quilt block.

   1. **NOTE**: To select a cell block, click on it. Once selected, the cell block will be outlined in blue.

   <div align="left"><figure><img src="/files/KJPI08AOq25Ozo91gcrj" alt=""><figcaption></figcaption></figure></div>
2. With the 4 cell blocks selected, click on the <mark style="color:blue;">**Merge**</mark> button (<img src="/files/YfoW6KZjkKaFRkXX03Uq" alt="" data-size="line">) on the central, vertical toolbar.

   <div align="left"><figure><img src="/files/OjE4aWFba3KcdOcriVPS" alt=""><figcaption></figcaption></figure></div>
3. Once merged, the 4 individual cell blocks will be merged into 1 larger cell block.

   <div align="left"><figure><img src="/files/PeQ4brC4AXwIS218rTx1" alt=""><figcaption></figcaption></figure></div>
4. Continue merging smaller common blocks into larger blocks until you have your desired quilt layout.&#x20;

   <div align="left"><figure><img src="/files/ATCkbGJpdRWMh8YMtam2" alt="" width="360"><figcaption></figcaption></figure></div>

***

### <mark style="color:blue;">03b | How to Unmerge Cell Blocks</mark>

If you want to undo a merged block, that's not a problem!

1. Click on the <mark style="color:blue;">**quilt**</mark> <mark style="color:blue;">**cell block**</mark> you want to unmerge back into the smaller common blocks.

   <div align="left"><figure><img src="/files/LgWQScqbf0seGs2PSuYi" alt=""><figcaption></figcaption></figure></div>
2. Click on the <mark style="color:blue;">**Merge/Unmerge**</mark> button (<img src="/files/Bi5RUH4rBlZBEGYrB20g" alt="" data-size="line">) on the central, vertical toolbar.

   <div align="left"><figure><img src="/files/RgnP3XVbisXnpLGB9DKq" alt=""><figcaption></figcaption></figure></div>
3. Now the larger block has been divided back into 4 individual cell blocks.

   <div align="left"><figure><img src="/files/IirThdZfWoJm4ZFRPoLc" alt=""><figcaption></figcaption></figure></div>


# Merging Block Cells

Basic & Market Plan Feature // Rectangular Quilt Grid ONLY

{% hint style="warning" %}
Only the Rectangular Quilt Grid can merge block cells into larger sized blocks.
{% endhint %}

<figure><img src="/files/xCOhuvSTEaZVE9FF2vMp" alt=""><figcaption><p>8" and 4" quilt blocks in the same quilt grid</p></figcaption></figure>

## <mark style="color:blue;">Merging Block Cells</mark>

In this tutorial, we'll show you how you can merge multiple block cells on the quilt grid to create a different sized quilt block.&#x20;

It's always best to start with a quilt grid made up of smaller blocks that are combined (merged) together to create bigger blocks. You cannot breakdown or divide a larger block into smaller components, but you can always combine smaller blocks to create a bigger block.

***

### <mark style="color:blue;">How to Merge Cells to Create Larger Quilt Blocks</mark>

1. On the quilt grid (or digital design wall), click on <mark style="color:blue;">**all the**</mark> <mark style="color:blue;">**quilt cell blocks**</mark> that you want to merge (or combine) together to create a larger quilt block.

   1. **NOTE**: To select a cell block, click on it. Once selected, the cell block will be outlined in blue.

   <div align="left"><figure><img src="/files/KJPI08AOq25Ozo91gcrj" alt=""><figcaption></figcaption></figure></div>
2. With the 4 cell blocks selected, click on the <mark style="color:blue;">**Merge**</mark> button (<img src="/files/YfoW6KZjkKaFRkXX03Uq" alt="" data-size="line">) on the central, vertical toolbar.

   <div align="left"><figure><img src="/files/OjE4aWFba3KcdOcriVPS" alt=""><figcaption></figcaption></figure></div>
3. Once merged, the 4 individual cell blocks will be merged into 1 larger cell block.

   <div align="left"><figure><img src="/files/PeQ4brC4AXwIS218rTx1" alt=""><figcaption></figcaption></figure></div>
4. Continue merging smaller common blocks into larger blocks until you have your desired quilt layout.&#x20;

   <div align="left"><figure><img src="/files/ATCkbGJpdRWMh8YMtam2" alt="" width="360"><figcaption></figcaption></figure></div>

***

### <mark style="color:blue;">How to Unmerge Cell Blocks</mark>

If you want to undo a merged block, that's not a problem!

1. Click on the <mark style="color:blue;">**quilt**</mark> <mark style="color:blue;">**cell block**</mark> you want to unmerge back into the smaller common blocks.

   <div align="left"><figure><img src="/files/LgWQScqbf0seGs2PSuYi" alt=""><figcaption></figcaption></figure></div>
2. Click on the <mark style="color:blue;">**Merge/Unmerge**</mark> button (<img src="/files/Bi5RUH4rBlZBEGYrB20g" alt="" data-size="line">) on the central, vertical toolbar.

   <div align="left"><figure><img src="/files/RgnP3XVbisXnpLGB9DKq" alt=""><figcaption></figcaption></figure></div>
3. Now the larger block has been divided back into 4 individual cell blocks.

   <div align="left"><figure><img src="/files/IirThdZfWoJm4ZFRPoLc" alt=""><figcaption></figcaption></figure></div>


# Resizing Columns & Rows

Basic & Market Plan Feature // Rectangular Quilt Grid ONLY

{% hint style="warning" %}
Only the Rectangular Quilt Grid can have columns and rows of different widths or heights.
{% endhint %}

<figure><img src="/files/losbJCmGkiGz0pn6kEo2" alt="" width="563"><figcaption><p>Quilt with different column widths and row heights.</p></figcaption></figure>

## <mark style="color:blue;">Resize Columns & Rows to Create Different Sized Blocks</mark>

Sometimes resizing a column or a row might be a better fit for your quilt than merging smaller blocks. This is especially true for when you want to add a border or sashing to your quilt.&#x20;

Keep in mind that if you to create sashing, you will want to change both the column width and the corresponding row's height. We have a course lesson for how to create sashing that you can check out [<mark style="color:blue;">**HERE**</mark>](https://courses.prequilt.com/youtube-courses/intro-to-prequilt-course/08-or-sashing).

***

### <mark style="color:blue;">a | Resize (Change) Column Width</mark>&#x20;

1. On the quilt grid, highlight an entire column of blocks by <mark style="color:blue;">**clicking on the number at the top of the column**</mark><mark style="color:blue;">.</mark> In this example, I've selected column <mark style="color:blue;">**2**</mark>.

   <div align="left"><figure><img src="/files/K1fA0S9DgfOm5GFiw133" alt="" width="375"><figcaption></figcaption></figure></div>
2. A red little OPTS button will appear above the selected column.

   <div align="left"><figure><img src="/files/zDhsdJxlYV6LvSSgC4Pb" alt=""><figcaption></figcaption></figure></div>
3. Click on the <mark style="color:blue;">**OPTS button**</mark> and select <mark style="color:blue;">**Resize**</mark> from the dropdown menu.

   <div align="left"><figure><img src="/files/INWvFbVPug5NgK5GTMLs" alt=""><figcaption></figcaption></figure></div>
4. Enter the <mark style="color:blue;">**desired width**</mark> for the column. In this example, I've entered <mark style="color:blue;">**1.00**</mark>. Then click the <mark style="color:blue;">**OK**</mark> button.

   <div align="left"><figure><img src="/files/hyhBUbQuHdMdpD28GXcC" alt=""><figcaption></figcaption></figure></div>
5. The width of this column is now 1 inch wide.

   <div align="left"><figure><img src="/files/nryjQObckVrAfZfZdNR3" alt="" width="357"><figcaption></figcaption></figure></div>

***

### <mark style="color:blue;">b | Resize (Change) Row Height</mark>

1. On the quilt grid, highlight an entire row of blocks by <mark style="color:blue;">**clicking on the number to the left of the row**</mark><mark style="color:blue;">.</mark> In this example, I've selected row <mark style="color:blue;">**4**</mark>.

   <div align="left"><figure><img src="/files/qgic03Uc3rF72CCUMXbD" alt="" width="375"><figcaption></figcaption></figure></div>
2. A red little OPTS button will appear beside the selected row.

   <div align="left"><figure><img src="/files/j06bZ8eaVbzThLBLZQHw" alt=""><figcaption></figcaption></figure></div>
3. Click on the <mark style="color:blue;">**OPTS button**</mark> and select <mark style="color:blue;">**Resize**</mark> from the dropdown menu.

   <div align="left"><figure><img src="/files/V2fncG2bK2WjuN3qusgE" alt=""><figcaption></figcaption></figure></div>
4. Enter the <mark style="color:blue;">**desired width**</mark> for the column. In this example, I've entered <mark style="color:blue;">**1.00**</mark>. Then click the <mark style="color:blue;">**OK**</mark> button.

   <div align="left"><figure><img src="/files/hyhBUbQuHdMdpD28GXcC" alt=""><figcaption></figcaption></figure></div>
5. The height of this row is now 1 inch tall.

   <div align="left"><figure><img src="/files/qxsUn80BV0iq5jVCqckt" alt="" width="375"><figcaption></figcaption></figure></div>


# Add a Block to Your Quilt

We'll show you 3 different Methods

## Method #1 (most common)

Click on the desired cell(s) to select. When the cell turns blue it means it is selected. The animation shows how we've selected 5 cells.

![](https://firebasestorage.googleapis.com/v0/b/prequilt.appspot.com/o/help%2Fadding_a_block_1.gif?alt=media\&token=09c0678b-4269-4536-bcc6-8cb5e8a75d68)

Expand the Block Panel to see your blocks. Let's select the HST Block by clicking the "Add To Quilt" button. This will add the HST block to the 5 selected cells.

![](https://firebasestorage.googleapis.com/v0/b/prequilt.appspot.com/o/help%2Fadding_a_block_2.gif?alt=media\&token=fa82cf46-5a62-4e97-88ed-0467f0dd9221)

## Method #2 (right clicking)

This alternative method for computer users only — Instead of using the "Add to Quilt" button, you can also add a quilt block to your selected quilt cell by right clicking on any of the selected cells.

1. Click on the desired quilt cells.
2. Right click on any of the selected cells.
3. Rollover "Add Block" on the dropdown window.
4. Images of the available blocks will become visible.
5. Click on the desired quilt block to add it.

![](https://firebasestorage.googleapis.com/v0/b/prequilt.appspot.com/o/help%2Fadding_a_block_2b.gif?alt=media\&token=09e42ac3-ae2c-47dd-ad10-b0096bfc2bee)

## Method #3&#x20;

Instead of selecting the cells first, you can select the HST block and then click on the cells to add. Press the escape key or click outside of the grid when you are done adding the HST block.

<br>


# Save Block to Block Stash

Basic & Market Plan

## <mark style="color:blue;">Block Stash</mark>

When you create a Custom Block in PreQuilt, there are two different places you can save it:

1. Inside a quilt project
2. To your Block Stash

When a custom block is saved to a quilt project, it can only be used in that quilt. However, when a custom block is saved to your Block Stash, you can import and use it any quilt.

## <mark style="color:blue;">1 | Save Custom Block to Block Stash</mark>

First, you'll need to save your custom quilt block to your Block Stash.

1. Either create a Custom Block or open a block you created previously (by clicking on the <mark style="color:blue;">**Edit Block**</mark> button).

   <div align="left"><figure><img src="/files/ps2ge4HB182jQps4D7P0" alt=""><figcaption></figcaption></figure></div>
2. Click on the <mark style="color:blue;">**Save or Exit**</mark> button (<img src="/files/KWuFxdDhVZcvx0NsieEj" alt="" data-size="line">) in the top right corner of the Block Editor.

   <div align="left"><figure><img src="/files/fxvGA2H73rEvZ1qF1eLt" alt=""><figcaption></figcaption></figure></div>
3. From the dropdown menu, click on the <mark style="color:blue;">**Save to Stash**</mark> option.

   <div align="left"><figure><img src="/files/cYloaNjnk7PnyakrXCF2" alt=""><figcaption></figcaption></figure></div>
4. You will exit back to the quilt you were working in, but it is now saved to your Block Stash.

## <mark style="color:blue;">2 | Import a Block from Your Block Stash</mark>

Now that your custom block has been saved to your Block Stash, you can now import and use it any of your quilts.

1. Create a new quilt (or open a quilt you're working on).
2. On the BLOCKS tab on the left side control panel, click on the <mark style="color:blue;">**Show More Options**</mark> dropdown button.

   <div align="left"><figure><img src="/files/pWkK4CICcMK0RmwNHTiu" alt=""><figcaption></figcaption></figure></div>
3. Click on the <mark style="color:blue;">**Load Blocks**</mark> option.

   <div align="left"><figure><img src="/files/5WAe7XXvjJekLG7ghN2y" alt=""><figcaption></figcaption></figure></div>
4. Click on the <mark style="color:blue;">**Your Block Stash tab**</mark>.

   <figure><img src="/files/sbHTi4DupveZiLAee2KC" alt=""><figcaption></figcaption></figure>
5. Click on the <mark style="color:blue;">**Add**</mark> button on the block you'd like to import.&#x20;

   <div align="left"><figure><img src="/files/YwqTpsAuOzCVQvblfPAU" alt=""><figcaption></figcaption></figure></div>
6. It has now been added to the right side column. Click on the <mark style="color:blue;">**Import**</mark> button.

   <figure><img src="/files/oWyqEerkpeHqbn5wD9h1" alt=""><figcaption></figcaption></figure>
7. It will now be added to your quilt.

   <div align="left"><figure><img src="/files/OvC2ppbBC3gkQShKTRkf" alt=""><figcaption></figcaption></figure></div>

## <mark style="color:blue;">FAQ: Why do the colors from my custom block change once I import them into a new quilt project?</mark>

As you might have noticed in the tutorial above (importing a custom block from your block stash), the fabrics used in the saved custom block (gold printed fabric & black solid) change once they were added to the new quilt project (to grey and green). Why did that happen?

Because of the Color Tags! Because the block was created using color tags (in this case Color Tag A and Color Tag C), it will automatically update and use the fabrics assigned to Color Tag A and Color Tag C in the new quilt it is imported into.&#x20;

If you want to keep the fabric as it is in the original custom block, you should edit the Color Tags to use the same fabrics in the original block.


# Use an SVG File

Use Cases // To Visualize Appliqué & Foundation Paper Piecing (FPP)

{% hint style="info" %} <mark style="color:blue;">**TIP:**</mark> Expand past the common definition of a quilt block. If you're doing an entire FPP quilt, you can even think of the quilt top as a "quilt block" and import a huge SVG file.
{% endhint %}

## <mark style="color:blue;">Create a Custom Block using an SVG File</mark>

Up until now, creating a custom block in PreQuilt was limited to the shapes that are preloaded in PreQuilt (square, HST, orange peel, etc).&#x20;

But our newest update will enable you to import an SVG file and use it to import other shapes that you are unable to create using those basic building block shapes.

#### <mark style="color:blue;">What's an SVG?</mark>

Scalable Vector Graphics (SVG) is a web-friendly vector file format. It is not pixel-based, and uses mathematical formulas based on points and lines. Programs like Illustrator, Photoshop, and Inkscape can save or export SVG files (.svg).

***

## <mark style="color:blue;">01 | Prepare your SVG File</mark>

<figure><img src="/files/lgqIiM3p1InHGLnTDFH1" alt=""><figcaption><p><em>Example SVG file that can be imported into PreQuilt</em></p></figcaption></figure>

{% hint style="info" %} <mark style="color:blue;">**BEFORE:**</mark> Make sure that you create and save your shapes as an .SVG file on your computer first. Also, very helpful to have your block already sized (1 inch = 72 pixels) so that they import at the correct scale.
{% endhint %}

There are few properties that are important to note when creating your SVG file so that it can be imported into PreQuilt. Your SVG should:

#### <mark style="color:blue;">1. SVG files are at Scale.</mark>

For best results, make sure that your SVG file is at scale. 1:1 measurements are helpful, but not necessary. Make sure that they can be resized to your desired block size.&#x20;

Use the ratio 1 inch = 72 pixels as a helpful conversion.

#### <mark style="color:blue;">2. SVG shapes are Filled.</mark>

In order for the SVG file to be usable and convertible to block shapes (patches or pieces), they need to be individual filled shapes. They cannot be outlines or line drawings.

***

## <mark style="color:blue;">02 | Import SVG File into PreQuilt</mark>

The first step is to create a custom block and then import your SVG file into the block.&#x20;

1. Click on the <mark style="color:blue;">**BLOCKS**</mark> tab on the left side control panel.

   <div align="left"><figure><img src="/files/v49hucF4g0NM3mW1CBAH" alt="" width="299"><figcaption></figcaption></figure></div>
2. Click on the <mark style="color:blue;">**Make Custom Block**</mark> button.

   <div align="left"><figure><img src="/files/rShdxheuKgqafW2tzDrG" alt=""><figcaption></figcaption></figure></div>
3. The **Block Editor** panel will slide out.&#x20;

   <figure><img src="/files/PfsJwageuHh7TSSXugzP" alt=""><figcaption><p><em>Block Editor panel</em></p></figcaption></figure>
4. Click on the <mark style="color:blue;">**SVG**</mark> button (<img src="/files/K1D6Dj6HWjUoWkDFptNN" alt="" data-size="line">) on the central vertical toolbar.

   <div align="left"><figure><img src="/files/6T354r21BD7pe1q3VG0q" alt="" width="79"><figcaption></figcaption></figure></div>
5. Your computer's file system will open. Select the <mark style="color:blue;">**SVG file**</mark> and click <mark style="color:blue;">**Open**</mark>.

   * **Note:** Wording might be different on a PC.

   <div align="left"><figure><img src="/files/CTMlIpruFtFLjA8qmzSL" alt="" width="548"><figcaption></figcaption></figure></div>
6. A pop-up message will appear once your SVG file has been successfully imported.

   <div align="left"><figure><img src="/files/C0CdA1kSsU28EzlOaSPj" alt="" width="422"><figcaption></figcaption></figure></div>

   * If the width and height of the block is correct → Click the <mark style="color:blue;">**No. Don't resize**</mark> button.
   * If the width and height of the block is not correct → Click on the <mark style="color:blue;">**Yes. Resize Block**</mark> button.&#x20;
     * **Note:** The block and all SVG shapes will scale to fit the block space.
7. You will now see our Moon shape imported into PreQuilt.

   <div align="left"><figure><img src="/files/WarETKRSem2UTzAYQ31o" alt=""><figcaption><p><em>SVG file is now a block piece in PreQuilt</em></p></figcaption></figure></div>
8. Click on the larger <mark style="color:blue;">**Save**</mark> button (<img src="/files/RErHu7FwpoEymt52qq9M" alt="" data-size="line">) in the top right corner of the Block Editor. Then click on <mark style="color:blue;">**Save to Quilt**</mark> to return to the digital quilt wall.

   <div align="left"><figure><img src="/files/PruomddBo4SesJlowX7K" alt=""><figcaption></figcaption></figure></div>
9. You will now see your new block saved in your BLOCKS tab.

   <div align="left"><figure><img src="/files/RFDTGeDBO7mJPV2VDoE0" alt=""><figcaption><p><em>Saved block using SVG shape</em></p></figcaption></figure></div>

***

## <mark style="color:blue;">03 | Modify SVG Shapes for Quilt Blocks</mark>

Now that we have our SVG shape imported into PreQuilt, you might want to manipulate it or modify it. There are a few different things you can do to your SVG shape now.

### <mark style="color:blue;">a | Add a Fabric Link to your SVG Shape</mark>

One of the huge benefits of using PreQuilt is that you can quickly link different fabrics (solids or printed) to different block pieces. And that's true for your newly imported SVG shapes!&#x20;

To learn more about Fabric Links click here.

1. Click on the <mark style="color:blue;">**Edit Block**</mark> button for the quilt block that has your SVG shape.

   <div align="left"><figure><img src="/files/CTRCFSCEoZNExzqwK4T1" alt=""><figcaption></figcaption></figure></div>

2. The Block Editor panel will slide out. Click on the <mark style="color:blue;">**SVG shape**</mark> that you would like to add a Fabric Link to. (A bounding box will appear around the shape once selected.)

   <div align="left"><figure><img src="/files/UP0IR23OSEFJTGplz4f8" alt=""><figcaption></figcaption></figure></div>

3. The FABRICS tab will appear. Click on the smaller <mark style="color:blue;">**Fabric Links**</mark> tab.

   * **Note:** SVG shapes are imported using Static Fabrics (to learn more about click [*here*](/prequilt-101/all-about-fabric/static-fabrics)).

   <div align="left"><figure><img src="/files/ogDKoHxuz22mKh3KAmuJ" alt=""><figcaption></figcaption></figure></div>

4. Click on the <mark style="color:blue;">**Link**</mark> button for the Fabric Link you'd like to use.

   1. In this example, I'm going to use Fabric Link B (currently using Kona Black).

   <div align="left"><figure><img src="/files/AjdgMAPSomBXzqyt4SlH" alt=""><figcaption></figcaption></figure></div>

5. You will now see the SVG shape is now black.

   <div align="left"><figure><img src="/files/h76tcvCNsRNRfDDhvxBu" alt=""><figcaption></figcaption></figure></div>

6. Click on the larger <mark style="color:blue;">**Save**</mark> button (<img src="/files/RErHu7FwpoEymt52qq9M" alt="" data-size="line">) in the top right corner of the Block Editor. Then click on <mark style="color:blue;">**Save to Quilt**</mark> to return to the digital quilt wall.

   <div align="left"><figure><img src="/files/DTexY3XCP8BUircKgXJg" alt=""><figcaption></figcaption></figure></div>

### <mark style="color:blue;">b | Add a Background to an Imported SVG Block</mark>

If you see a gingham print or checkerboard print around your imported SVG shape, you do not have a background fabric in place. Make sure you add one!

1. Click on the <mark style="color:blue;">**Edit Block**</mark> button for the quilt block that has your SVG shape.

   <div align="left"><figure><img src="/files/4s9uvdVXHrT19ft7m5oL" alt=""><figcaption></figcaption></figure></div>
2. The Block Editor panel will slide out. To add a background, click on the <mark style="color:blue;">**square shape**</mark> (<img src="/files/FMjIGp1pCFjtvcWz6loy" alt="" data-size="line">)on the central vertical toolbar. (Default Fabric Link A used).  A square will appear on top of our SVG shape.&#x20;

   <div align="left"><figure><img src="/files/IxpegBKQS6v24LxrpxOT" alt=""><figcaption></figcaption></figure></div>
3. Click on the <mark style="color:blue;">**Scale to Fit**</mark> button (<img src="/files/pT6zEKCmx8z8JwfJMUN8" alt="" data-size="line">) the central vertical toolbar.

   <div align="left"><figure><img src="/files/v36w0rWva0T3Y4w5lWwj" alt=""><figcaption></figcaption></figure></div>
4. Since the square is the top layer, it will expand to fill the entire block space and cover our SVG shape. To move it to the background, click on the <mark style="color:blue;">**Layers**</mark> tab.

   <div align="left"><figure><img src="/files/8IPUOdutfWUB3g6AiM4P" alt="" width="383"><figcaption></figcaption></figure></div>
5. Then <mark style="color:blue;">**click on our square shape**</mark> and while still <mark style="color:blue;">**holding down on the button, move it below**</mark> our SVG shape.

   <div><figure><img src="/files/xnr6AP0T01VHIEMaQG2S" alt=""><figcaption><p><em>Before: Square piece is on top of moon shape</em></p></figcaption></figure> <figure><img src="/files/35MpdMUAchvMDnPJvlSm" alt=""><figcaption><p><em>After: Square piece is underneath moon shape</em></p></figcaption></figure></div>
6. Now our block has a background fabric using Fabric Link A.

   * Note: That there no longer is a gingham or checkerboard transparency behind the SVG shape. This indicates that the background is no longer empty.

   <div><figure><img src="/files/WRwBIv6U0yz3ozV5uAxr" alt=""><figcaption><p><em>Before layering</em></p></figcaption></figure> <figure><img src="/files/ZQlQfo81CBIX4M9mwSpn" alt=""><figcaption><p><em>Moon shape now has a background</em></p></figcaption></figure></div>

### <mark style="color:blue;">c | Rotate Your SVG Shape</mark>

It's easy to rotate your SVG shape in PreQuilt. You will need to use the bounding box around the SVG shape to rotate it.

1. In the Block Editor, click on the <mark style="color:blue;">**SVG shape**</mark> you'd like to rotate.
   * **Note**: You will notice that there is now a bounding box around the shape. The bounding box has 8 smaller squares located in each corner and in the middle of each side of the box. There is also one square that appears above the shape.
2. Using the mouse or trackpad, <mark style="color:blue;">**click on and hold onto the square**</mark> that appears above the shape. While holding, move the square to rotate the shape in place.&#x20;

   <div align="left"><figure><img src="/files/6uw6KkVPSalZ0ABbXiJl" alt=""><figcaption><p><em>Top square circled in blue</em></p></figcaption></figure></div>
3. <mark style="color:blue;">**Release**</mark> the button once the shape is rotated as desired.

   <div align="left"><figure><img src="/files/BTQHJW0f361YNscjngni" alt=""><figcaption><p><em>Rotated SVG shape</em></p></figcaption></figure></div>

### <mark style="color:blue;">d | Resize Your SVG Shape</mark>

{% hint style="info" %} <mark style="color:blue;">**TIP:**</mark> It's a good idea to turn off the Snap to Position and Snap to Scale features when resizing your SVG shape. Those buttons are both found on the central, vertical toolbar. By turning them off, you will have more control over the size and placement of your SVG shape.
{% endhint %}

You will need to use the bounding box around the SVG shape to resize it.

1. In the Block Editor, click on the <mark style="color:blue;">**SVG shape**</mark> you'd like to resize.
   * **Note**: You will notice that there is now a bounding box around the shape. The bounding box has 8 smaller squares located in each corner and in the middle of each side of the box.&#x20;
2. Using the mouse or trackpad, <mark style="color:blue;">**click on and hold onto one of the corner squares**</mark> of the bounding box that appears around the shape. While holding, <mark style="color:blue;">**move**</mark> the square to make the shape bigger or smaller.

   <div align="left"><figure><img src="/files/mOXjaK9vJjenC4ibVxFW" alt=""><figcaption><p><em>One corner square circled in blue</em></p></figcaption></figure></div>
3. <mark style="color:blue;">**Release**</mark> the button once the shape is resized as desired.

   <div align="left"><figure><img src="/files/Tith5aUifDVKgTkFbTYi" alt=""><figcaption><p><em>Resized SVG shape</em></p></figcaption></figure></div>

### <mark style="color:blue;">e | Duplicate Your SVG Shape</mark>

Much like the other shapes in your PreQuilt built blocks, you can also duplicate (or clone) your SVG shapes.

1. In the Block Editor, click on the <mark style="color:blue;">**SVG shape**</mark> you'd like to duplicate.&#x20;

   <div align="left"><figure><img src="/files/oouyZP5y2DeXjLviOh4R" alt=""><figcaption></figcaption></figure></div>
2. Click on the <mark style="color:blue;">**Clone**</mark> button (<img src="/files/M8RXCWYgs4FAIEqujM8H" alt="" data-size="line">) on the central, vertical toolbar.

   <div align="left"><figure><img src="/files/avxKqUkmiK5VAK3orXeq" alt=""><figcaption></figcaption></figure></div>
3. Another copy of your SVG shape will appear in a staggered position to its original.

   <div align="left"><figure><img src="/files/uQuVboVZmQf767QO4fiw" alt=""><figcaption></figcaption></figure></div>
4. Move and rotate it as desired.

   <div align="left"><figure><img src="/files/d7NrROyfnDks92AOO1us" alt=""><figcaption></figcaption></figure></div>

### <mark style="color:blue;">f | Add Another SVG Shape</mark>

If you'd like to add an additional SVG shape to your block, no problem!

1. In the Block Editor, click on the SVG button (<img src="/files/MRwkAs2vkMgXfQLu8DSb" alt="" data-size="line">) on the central vertical toolbar.

   <div align="left"><figure><img src="/files/wH3UVsXDN94gshXdLkfN" alt="" width="79"><figcaption></figcaption></figure></div>
2. Your computer's file system will open. Select the <mark style="color:blue;">**SVG file**</mark> and click <mark style="color:blue;">**Open**</mark>.

   * **Note:** Wording might be different on a PC.

   <div align="left"><figure><img src="/files/OLIII7BY0apP3KDLAPb4" alt="" width="547"><figcaption></figcaption></figure></div>
3. A pop-up message will appear once your SVG file has been successfully imported. Click the <mark style="color:blue;">**No. Don't resize**</mark> button.

   <div align="left"><figure><img src="/files/h9qWSc7wwdJcDavQXiQR" alt="" width="421"><figcaption></figcaption></figure></div>
4. You will now see our new pill shape imported into this block.

   <div align="left"><figure><img src="/files/uiGR6lttT7oKYEbAkdIg" alt=""><figcaption></figcaption></figure></div>
5. Move and rotate it as desired.

   <div align="left"><figure><img src="/files/ItNLv1faGjYelwIeLG56" alt=""><figcaption></figcaption></figure></div>
6. Click on the larger <mark style="color:blue;">**Save**</mark> button (<img src="/files/RErHu7FwpoEymt52qq9M" alt="" data-size="line">) in the top right corner of the Block Editor. Then click on <mark style="color:blue;">**Save to Quilt**</mark> to return to the digital quilt wall.

   <div align="left"><figure><img src="/files/F2yw6dsixe0n4BtOiEWk" alt=""><figcaption></figcaption></figure></div>
7. You will now see your new block saved in your BLOCKS tab.

   <div align="left"><figure><img src="/files/LUyihvTIcEMcu3Az7vcR" alt=""><figcaption></figcaption></figure></div>


# Print Blocks 1:1

{% hint style="warning" %}
**ALERT:** Always print at 100%. Remember that printing is constrained to the size of your printer's paper. If you have blocks that are larger than regular standard printer paper, save the block as a PDF and print at your local print shop.
{% endhint %}

{% hint style="danger" %}
**FPP BLOCKS:** Make sure to click on the **MIRROR** button to flip an asymmetrical block when using print out for foundation paper piecing.
{% endhint %}

{% hint style="info" %}
**IDEA**: If your block is too complex to FPP all at once, consider breaking it down into its block units on another quilt. Then print those out.
{% endhint %}

## <mark style="color:blue;">Print a Block Feature</mark>

This feature is a great when you want to isolate a block and print it out.&#x20;

It's also particularly good for using as foundation paper piecing (FPP) templates for simple quilt blocks. Please note that this feature will not work for all blocks you want to FPP, because some blocks are complex and cannot be FPPed all in one go.

If your block is too complex to FPP all at once, consider breaking it down into its block units on another quilt. Then print those out.

***

## <mark style="color:blue;">How to Print a Block (in Quilt mode)</mark>

{% stepper %}
{% step %}
From the **QUILTS dashboard** - Click on the <mark style="color:blue;">**Open button**</mark> for the quilt that is using the block you want to print.

<div align="left"><figure><img src="/files/CMS1XBH2f6lM5ndj7hGK" alt=""><figcaption></figcaption></figure></div>
{% endstep %}

{% step %}
Once the quilt is opened - On the left side control panel, click on the <mark style="color:blue;">**BLOCKS tab**</mark> to expand it.

<div align="left"><figure><img src="/files/mUlmQvWZGR7x1ES8CPtD" alt=""><figcaption></figcaption></figure></div>
{% endstep %}

{% step %}
Click on the <mark style="color:blue;">**three dots button**</mark> next to the quilt block that you want to print.

<div align="left"><figure><img src="/files/k1iV06GrXmA78udtUHT3" alt=""><figcaption></figcaption></figure></div>
{% endstep %}

{% step %}
Click on the <mark style="color:blue;">**Print 1:1 button**</mark>.

<div align="left"><figure><img src="/files/7F8w1cKEc1ORuaHEW220" alt=""><figcaption></figcaption></figure></div>
{% endstep %}

{% step %}
Another tab will open with your block and control panel.&#x20;

* The default total is the number of blocks that can print on one page with a seam allowance of 0.25".

<div align="left"><figure><img src="/files/vVXC6Nm2XmREeNrkcSlj" alt=""><figcaption></figcaption></figure></div>
{% endstep %}

{% step %}
Click on the <mark style="color:blue;">**Print (dimensions x dimensions) button**</mark> to print one copy of the quilt block.

<div align="left"><figure><img src="/files/5EuTlquMNxN32Bc2GAwn" alt=""><figcaption></figcaption></figure></div>
{% endstep %}

{% step %}
A printer control panel will open. Make sure that the scale is at 100%. Then click <mark style="color:blue;">**Print**</mark>.

<figure><img src="/files/2xQlZcP4TA0evNfHkJ8C" alt=""><figcaption></figcaption></figure>
{% endstep %}
{% endstepper %}

***

## <mark style="color:blue;">How to Print a Block (Block Dashboard)</mark>

{% stepper %}
{% step %}
From the **BLOCKS dashboard** - Click on the <mark style="color:blue;">**three dots button**</mark> for the block you want to print.

<figure><img src="/files/g5Z2gxzXkhFzW3HhhWeU" alt=""><figcaption></figcaption></figure>
{% endstep %}

{% step %}
Click on the <mark style="color:blue;">**Print button**</mark>.

<div align="left"><figure><img src="/files/1pkeo03msgnlMushmR0v" alt=""><figcaption></figcaption></figure></div>
{% endstep %}

{% step %}
Another tab will open with your block and control panel.&#x20;

* The default total is the number of blocks that can print on one page with a seam allowance of 0.25".

<div align="left"><figure><img src="/files/gCa3ypRytemKLyHyb9sV" alt=""><figcaption></figcaption></figure></div>
{% endstep %}

{% step %}
Click on the <mark style="color:blue;">**Print (dimensions x dimensions) button**</mark> to print one copy of the quilt block.

<div align="left"><figure><img src="/files/5EuTlquMNxN32Bc2GAwn" alt=""><figcaption></figcaption></figure></div>
{% endstep %}

{% step %}
A printer control panel will open. Make sure that the scale is at 100%. Then click <mark style="color:blue;">**Print**</mark>.

<figure><img src="/files/2xQlZcP4TA0evNfHkJ8C" alt=""><figcaption></figcaption></figure>
{% endstep %}
{% endstepper %}

***

## <mark style="color:blue;">Print 1:1 Options</mark>

In addition to just printing a single block, you can also control:

* Quantity of blocks
* Seam allowance
* Mirror the block (for FPP templates)

You can make any or all of these changes before printing your quilt blocks.

### <mark style="color:blue;">Print Quantity</mark>

{% hint style="warning" %}
**NOTE:** If you request a quantity that is more than what can print on a single page, the program will for now ignore that request and show you the maximum number of templates that will print on that page.
{% endhint %}

{% stepper %}
{% step %} <mark style="color:blue;">**Input the total number**</mark> of templates that you would like.

<div align="left"><figure><img src="/files/wJFTe6GFR8filzSgbzCk" alt=""><figcaption></figcaption></figure></div>
{% endstep %}

{% step %}
Click on the <mark style="color:blue;">**Print (dimensions x dimensions) button**</mark> to print one copy of the quilt block.

<div align="left"><figure><img src="/files/5EuTlquMNxN32Bc2GAwn" alt=""><figcaption></figcaption></figure></div>
{% endstep %}

{% step %}
A printer control panel will open. Make sure that the scale is at 100%. Then click <mark style="color:blue;">**Print**</mark>.

* You will note that there are now 4 copies of the block template on one page.

<figure><img src="/files/YPQ4McFohnb4T5WcvsbX" alt=""><figcaption></figcaption></figure>
{% endstep %}
{% endstepper %}

### <mark style="color:blue;">Change Seam Allowance</mark>

The default seam allowance is 0.25".

{% stepper %}
{% step %} <mark style="color:blue;">**Input the desired seam allowance**</mark> for your quilt block. If you would not wish any seam allowance to appear, enter <mark style="color:blue;">**0**</mark>.

* In this example, I've changed the seam allowance to half an inch.

<div align="left"><figure><img src="/files/p76sg8m9q5tjoRSSpV4f" alt=""><figcaption></figcaption></figure></div>
{% endstep %}

{% step %}
Click on the <mark style="color:blue;">**Print (dimensions x dimensions) button**</mark> to print one copy of the quilt block.

<div align="left"><figure><img src="/files/5EuTlquMNxN32Bc2GAwn" alt=""><figcaption></figcaption></figure></div>
{% endstep %}

{% step %}
A printer control panel will open. Make sure that the scale is at 100%. Then click <mark style="color:blue;">**Print**</mark>.

* You will note that the seam allowance is now 0.5" around the block.

<figure><img src="/files/wAJxuwlSwPzqzSRFzR0u" alt=""><figcaption></figcaption></figure>
{% endstep %}
{% endstepper %}

### <mark style="color:blue;">Mirror an FPP Template</mark>

{% hint style="danger" %}
**FPP BLOCKS:** Make sure to click on the **MIRROR** button to flip an asymmetrical block when using print out for foundation paper piecing.
{% endhint %}

The default is to print the block 1:1 as it appears. If your block is symmetrical, it won't matter.

But if you'd like to use the block printout as a template for foundation paper piecing, you will need to **mirror** it. This is important to remember, since you'll be sewing on the wrong side of the printout.

{% stepper %}
{% step %}
Click on the <mark style="color:$primary;">**checkbox next to Mirror.**</mark>

<div align="left"><figure><img src="/files/TlcgVVY9KapwtP1fZQqe" alt=""><figcaption></figcaption></figure></div>
{% endstep %}

{% step %}
Click on the <mark style="color:blue;">**Print (dimensions x dimensions) button**</mark> to print one copy of the quilt block.

<div align="left"><figure><img src="/files/5EuTlquMNxN32Bc2GAwn" alt=""><figcaption></figcaption></figure></div>
{% endstep %}

{% step %}
A printer control panel will open. Make sure that the scale is at 100%. Then click <mark style="color:blue;">**Print**</mark>.

* You will note that block template has been mirrored. It's ready for FPPing!

<figure><img src="/files/Uh34ZQUzeuUhuGkVWpW3" alt=""><figcaption></figcaption></figure>

{% endstep %}
{% endstepper %}


# Starter Quilts


# First PreQuilt Quilt

New to using PreQuilt? Let's start here!

<div><figure><img src="/files/myHV9y7wsYFRmOkQfqXd" alt=""><figcaption><p><em>Ribbon Quilt - Solid fabric &#x26; printed binding</em></p></figcaption></figure> <figure><img src="/files/PpCmdT9yY6xtdQ08lqjl" alt=""><figcaption><p><em>Ribbon Quilt - Printed fabric &#x26; solid background</em></p></figcaption></figure></div>

In this tutorial, you'll learn how to create your first quilt in PreQuilt. We'll walk you through all the steps from block building to binding.

In this example, I'll be using the **Ribbon Star** block to make this quilt following these steps:

* [ ] Select your quilt grid
* [ ] Import or design your quilt block
* [ ] Choose your quilt fabric colors
* [ ] Add blocks to quilt grid
* [ ] Finessing your quilt *(optional)*
* [ ] Add sashing *(optional)*
* [ ] Add borders *(optional)*
* [ ] Add binding
* [ ] Using printed fabric swatches *(optional)*
* [ ] Download quilt map, blocks & swatches

You'll learn the following:

{% content-ref url="/pages/o0hhR5Vv7TOWkf0lHNXg" %}
[01 Creating a Quilt Grid](/prequilt-101/starter-quilts/first-prequilt-quilt/01-creating-a-quilt-grid)
{% endcontent-ref %}

{% content-ref url="/pages/PKNqYn0nX8CagOqelYBp" %}
[02 Creating Quilt Blocks](/prequilt-101/starter-quilts/first-prequilt-quilt/02-creating-quilt-blocks)
{% endcontent-ref %}

{% content-ref url="/spaces/PUFswdysHBJDPIJC9xe0/pages/YKOAvkXPSIHM5b95JXtU" %}
[03 Selecting Quilt Colors](/prequilt-101/starter-quilts/first-prequilt-quilt/03-selecting-quilt-colors)
{% endcontent-ref %}

{% content-ref url="/spaces/PUFswdysHBJDPIJC9xe0/pages/8irDPNRw1KpX1E66xO49" %}
[04 Using Blocks in Quilt](/prequilt-101/starter-quilts/first-prequilt-quilt/04-using-blocks-in-quilt)
{% endcontent-ref %}

{% content-ref url="/spaces/PUFswdysHBJDPIJC9xe0/pages/0WaOGxgOIXq2B3XHvP9n" %}
[05 Finessing Your Quilt](/prequilt-101/starter-quilts/first-prequilt-quilt/05-finessing-your-quilt)
{% endcontent-ref %}

{% content-ref url="/spaces/PUFswdysHBJDPIJC9xe0/pages/OeNMZNQWWG4FRYUYYHky" %}
[06 Adding Sashing](/prequilt-101/starter-quilts/first-prequilt-quilt/06-adding-sashing)
{% endcontent-ref %}

{% content-ref url="/spaces/PUFswdysHBJDPIJC9xe0/pages/az50Lj1aMCjlyVr4b3vM" %}
[07 Adding Borders](/prequilt-101/starter-quilts/first-prequilt-quilt/07-adding-borders)
{% endcontent-ref %}

{% content-ref url="/spaces/PUFswdysHBJDPIJC9xe0/pages/6VL1uDAklwotpoWYYszi" %}
[08 Adding Binding](/prequilt-101/starter-quilts/first-prequilt-quilt/08-adding-binding)
{% endcontent-ref %}

{% content-ref url="/spaces/PUFswdysHBJDPIJC9xe0/pages/XZ9fuyaGy3MF1Y2l4rf2" %}
[09 Using Printed Fabric](/prequilt-101/starter-quilts/first-prequilt-quilt/09-using-printed-fabric)
{% endcontent-ref %}

{% content-ref url="/spaces/PUFswdysHBJDPIJC9xe0/pages/V1n4N1Fzgn2gqTlS3HSy" %}
[10 Downloading Quilt Map](/prequilt-101/starter-quilts/first-prequilt-quilt/10-downloading-quilt-map)
{% endcontent-ref %}


# 01 Creating a Quilt Grid

// First PreQuilt Quilt //

{% hint style="danger" %} <mark style="color:red;">**ALERT:**</mark> Once you select a quilt grid, you cannot change it. You'll need to start a new quilt if you want to change to a different grid.
{% endhint %}

The first thing to do when creating a new quilt on PreQuilt is to choose and build out your quilt grid.

## <mark style="color:blue;">01 Getting Started</mark>

1. From the dashboard - click on the '<mark style="color:blue;">**QUILTS**</mark>' tab.

   <figure><img src="/files/E2nyeajP0CXFmGIWnqt3" alt=""><figcaption></figcaption></figure>
2. Click on the '<mark style="color:blue;">**Create Quilt**</mark>' button.

   <div align="left"><figure><img src="/files/EAl2bei3jjc3nlnhbanH" alt=""><figcaption></figcaption></figure></div>

## <mark style="color:blue;">02 Choose Your Grid Type & Block Size</mark>

{% hint style="info" %} <mark style="color:blue;">**PreQuilt Grids:**</mark> We currently have 3 different grids - Rectangle, On-Point and Equilateral Triangle.&#x20;
{% endhint %}

1. Once you click on '<mark style="color:blue;">**Create Quilt**</mark>' a pop-up window will appear.&#x20;

   <div align="left"><figure><img src="/files/oQiTezs5Q1M0atnY3u5J" alt=""><figcaption></figcaption></figure></div>
2. Choose the grid that works for your quilt idea - rectangular, on-point (2 options) or equilateral triangle.
3. Enter the quilt block's <mark style="color:blue;">**width**</mark> and <mark style="color:blue;">**height**</mark> for your quilt for your selected grid. Measurements are in inches and can always be changed later.&#x20;

   <div align="left"><figure><img src="/files/5Hz0CEtuvVc8TbrPjzf1" alt=""><figcaption></figcaption></figure></div>
4. Click on the '<mark style="color:blue;">**Use This Grid**</mark>' button.

   <div align="left"><figure><img src="/files/0iKAFSfVKRrZQpfFH6qf" alt=""><figcaption></figcaption></figure></div>

## <mark style="color:blue;">03 Input Rows & Columns</mark>

Now that you have your grid selected and the default quilt block chosen, you can now input the number of rows and columns for your quilt.

The number of columns in the quilt will impact the overall width of the quilt, while the number of rows will impact the overall height.

1. Click on the '<mark style="color:blue;">**GRID**</mark>' tab on the left-side control panel.&#x20;

   <div align="left"><figure><img src="/files/1qGQ1sAzZIe855Ht7dSZ" alt=""><figcaption></figcaption></figure></div>
2. The 'GRID' information will expand.

   * ***NOTE:*** In this expanded section, you can change the block dimensions, number of columns/rows OR control the overall width/height of the quilt.
   * The overall width and height of the quilt will automatically change according to the block size and number of columns and rows are in the quilt.

   <div align="left"><figure><img src="/files/x4v2BtQPKMyq2Np0Ff0U" alt=""><figcaption></figcaption></figure></div>
3. Change the number of <mark style="color:blue;">**columns**</mark> (width of quilt) and number of <mark style="color:blue;">**rows**</mark> (height of quilt) to your desired quilt dimensions. Keep in mind that these dimensions can easily be changed at any time.

   <div align="left"><figure><img src="/files/Zs48LIjP9DF3zexxsoNz" alt=""><figcaption></figcaption></figure></div>
4. To save, click on the '<mark style="color:blue;">**Update**</mark>' button.

   <div align="left"><figure><img src="/files/ZHFnmZllspPdTpqodqiE" alt=""><figcaption></figcaption></figure></div>


# 02 Creating Quilt Blocks

// First PreQuilt Quilt //

Our Ribbon Star quilt progress:

* [x] Select your quilt grid
* [ ] Import or design your quilt block
* [ ] Choose your quilt fabric colors
* [ ] Add blocks to quilt grid
* [ ] Finessing your quilt *(optional)*
* [ ] Add sashing *(optional)*
* [ ] Add borders *(optional)*
* [ ] Add binding
* [ ] Using printed fabric swatches *(optional)*
* [ ] Download quilt map, blocks & swatches

{% hint style="info" %}
[<mark style="color:blue;">**Block Library**</mark>](/welcome-to-prequilt/about-this-help-guide/glossary#block-library)<mark style="color:blue;">**:**</mark> PreQuilt has a selection of common quilt blocks. Feel free to grab one any of your quilt designs!
{% endhint %}

Now that the foundation of your quilt has been created (*see* '[*Quilt Grid*](/prequilt-101/starter-quilts/first-prequilt-quilt/01-creating-a-quilt-grid)*'* *tutorial*), it's now time to start placing blocks into your quilt. First, we'll need to import or create our quilt block. Then, we'll need to add it to the quilt.

As a default, a Half-Square Triangle (HST) block is preloaded. For this tutorial, we will ignore it. You can also delete it, if you'd like.

## <mark style="color:blue;">A | Import Block from Library</mark>

If you're using a common, traditional quilt block, there's a good chance it's available in the built-in [*<mark style="color:blue;">Block Library</mark>*](/welcome-to-prequilt/about-this-help-guide/glossary#block-library). To import a block from the library:

1. Click on the '<mark style="color:blue;">**BLOCKS**</mark>' tab on the [*Left-Side Control Panel*](/welcome-to-prequilt/about-this-help-guide/glossary#control-panel). It'll automatically expand and will have 1 HST default block.

   <div align="left"><figure><img src="/files/5wf4YoMozgrEeN2042wk" alt=""><figcaption></figcaption></figure></div>
2. Click on the dropdown arrow on '<mark style="color:blue;">**Show More Options**</mark>' and click on '<mark style="color:blue;">**Load Blocks**</mark>**'**.

   <div align="left"><figure><img src="/files/j4RFIha0lYMNXBC0i2Hu" alt=""><figcaption></figcaption></figure></div>
3. A pop-up will appear with 3 tabs: PreQuilt Blocks (Block Library), Your Block Stash, and Collaborators. To use any of the blocks in these tabs, follow the same instructions.

   * ***NOTE:*** Collaborator Block Libraries are additional one-time purchased Add-On products.

   <figure><img src="/files/LgxcyJ3yyTfUOf0qbfNV" alt=""><figcaption></figcaption></figure>
4. Find the block you'd like to import (*example: Churn Dasher*). Hover over it and an 'Add' button should appear inside the block. Click on the '<mark style="color:blue;">**Add**</mark>' button. It will appear on the right side, indicating that it's ready to be imported.

   <div align="left"><figure><img src="/files/CKaROXveRvSfmhIqpGa8" alt=""><figcaption></figcaption></figure></div>
5. Click on the '<mark style="color:blue;">**Import**</mark>' button on the top right side to add the block to your current quilt project.

   <div align="left"><figure><img src="/files/rEdAoP6pWrxV55jx3ghT" alt=""><figcaption></figcaption></figure></div>
6. The *Churn Dasher* block is now in your '**BLOCKS**' tab control panel. It's now ready to be added to the quilt. --> [*<mark style="color:blue;">Proceed to 04 Using Blocks in Quilt</mark>*](/prequilt-101/starter-quilts/first-prequilt-quilt/04-using-blocks-in-quilt)*.*

   <div align="left"><figure><img src="/files/oFM5n87muwm45iSr7ZaJ" alt=""><figcaption></figcaption></figure></div>

## <mark style="color:blue;">B | Create a Block</mark>

If the block you want to use is not in the [*<mark style="color:blue;">Block Library</mark>*](/welcome-to-prequilt/about-this-help-guide/glossary#block-library), you can create a block yourself to use! For this help guide, I'll go through the steps to create a **Ribbon Star** block.

![](/files/oJ0bFlRd825gvd4rbcrM)

* This block is pieced together on a 4 x 4 grid
* For this 12" block example, each pieced component is 3" finished
* The block is made up out of squares and half-square triangles

1. Click on the '<mark style="color:blue;">**BLOCKS**</mark>' tab on the [*Left-Side Control Panel*](/welcome-to-prequilt/about-this-help-guide/glossary#control-panel). It'll automatically expand and will have 1 HST default block.

   <div align="left"><figure><img src="/files/9cNX0oR8GyK5xFDdoTOV" alt=""><figcaption></figcaption></figure></div>
2. Click on the '<mark style="color:blue;">**Make Custom Block**</mark>' button.&#x20;

   <div align="left"><figure><img src="/files/DGawg7TOjwqzOKJhSt13" alt=""><figcaption></figcaption></figure></div>
3. The [*Block Editor*](/welcome-to-prequilt/about-this-help-guide/glossary#block-editor) panel will open, ready to create a new block.

   <div align="left"><figure><img src="/files/3uvLjLV5SeZ5BtxnbbXM" alt=""><figcaption></figcaption></figure></div>
4. On the left side control panel, change the **Block Info**:

   * Name your block
   * Change the block width and height (if necessary)
   * Change the [*<mark style="color:blue;">Gridlines</mark>*](/welcome-to-prequilt/about-this-help-guide/glossary#grid-lines) to 4 for both the horizontal and vertical units (This will divide our block into 16 equal sized units).
   * Make sure the gridlines are on (visible) by toggling it as seen below

   <div align="left"><figure><img src="/files/dp9sKngemsJLwEeHgCL0" alt=""><figcaption></figcaption></figure></div>
5. To create this block in PreQuilt, we will use the shapes (in black below the [*<mark style="color:blue;">Block Editor Canvas</mark>*](/welcome-to-prequilt/about-this-help-guide/glossary#block-editor-canvas) area). Click on the <mark style="color:blue;">**square shape**</mark> underneath the blank block.
   * ![](/files/jtLJSfNUcXnDNlGp8rod)
6. One square will appear in the block area. Click on the <mark style="color:blue;">**square**</mark> and while still holding down on the <mark style="color:blue;">**mouse button**</mark>, <mark style="color:blue;">**move**</mark> the square into the top left corner.

   <div><figure><img src="/files/pAAodDSoF9nyptNskkvx" alt=""><figcaption></figcaption></figure> <figure><img src="/files/8nl7WLaIE494bkwcoJKA" alt=""><figcaption></figcaption></figure></div>
7. Then click on the <mark style="color:blue;">**bottom right box**</mark> on the outside of your square and <mark style="color:blue;">**drag**</mark> it to make the square bigger. It should snap to fit the size of the grid unit perfectly.

   <div align="left"><figure><img src="/files/3wYPn6RoGnmeejWW4i4L" alt=""><figcaption></figcaption></figure> <figure><img src="/files/rtc0EXcjakJs0bJTBSY3" alt=""><figcaption></figcaption></figure></div>
8. Since we'll need 4 of these squares, click on the [*<mark style="color:blue;">**Clone**</mark>*](/fixes-faqs/block-editor-buttons/clone) button on the central [*<mark style="color:blue;">Toolbar</mark>*](/welcome-to-prequilt/about-this-help-guide/glossary#toolbar). This will duplicate our first square.

   <div><figure><img src="/files/jJ8arHD0WEXdtQ1r9myq" alt=""><figcaption></figcaption></figure> <figure><img src="/files/MitvvHGWBNhSTRqr10PV" alt=""><figcaption></figcaption></figure></div>
9. Move the newly created square into the top right corner of the block area.
10. Repeat ***Steps B.8-9*** till all 4 corners are filled.

    <figure><img src="/files/KK7IJn0FXJJzE6GtJvgj" alt=""><figcaption></figcaption></figure>
11. Repeat ***Steps B.5-9*** using the half-square triangle (HST) shape to create the background pieces of the Ribbon Star block.&#x20;

    <figure><img src="/files/I8eWLyXLYMpHYK8fG8VC" alt=""><figcaption></figcaption></figure>
12. Now, we'll want to create the foreground HST shapes that create the Ribbon star block. Click on the <mark style="color:blue;">**HST shape**</mark> on the bottom. It will be beige, like the background color. With the shape selected, click on the '<mark style="color:blue;">**Link**</mark>' button on Color Tag (B). Now the HST piece is black.

    * **REMINDER:** Don't forget to create both the background (*step B.11*) and star HST pieces to create a square unit. If you only do the foreground, the block will not be complete.

    <div><figure><img src="/files/9HAaDnOvMPfyUiSxDUAR" alt=""><figcaption></figcaption></figure> <figure><img src="/files/m6Kn6TfrWrVpNYUQXIx5" alt=""><figcaption></figcaption></figure></div>
13. <mark style="color:blue;">**Move**</mark> the black HST into place in order to create the Ribbon Star block. [<mark style="color:blue;">**Clone**</mark>](/fixes-faqs/block-editor-buttons/clone) the black HST and move it until you have the entire Ribbon Star block created.

    <div><figure><img src="/files/zWuFNSYg6DNqoKMuEJZq" alt=""><figcaption></figcaption></figure> <figure><img src="/files/O7XxcPvabnZ1ZqBXWNYl" alt=""><figcaption></figcaption></figure></div>
14. <mark style="color:blue;">**Save**</mark> the block to the quilt.

    <div align="left"><figure><img src="/files/Ld50jNTUxk4wiZCrMx4e" alt=""><figcaption></figcaption></figure></div>


# 03 Selecting Quilt Colors

// First PreQuilt Quilt //

Our Ribbon Star quilt progress:

* [x] Select your quilt grid
* [x] Import or design your quilt block
* [ ] Choose your quilt fabric colors
* [ ] Add blocks to quilt grid
* [ ] Finessing your quilt *(optional)*
* [ ] Add sashing *(optional)*
* [ ] Add borders *(optional)*
* [ ] Add binding
* [ ] Using printed fabric swatches *(optional)*
* [ ] Download quilt map, blocks & swatches

Now that you've done some of the groundwork of creating the overall size of our quilt and deciding what block we'll be using, now let's color it in! Since this is an introduction, let's explain the easiest way to manipulate color in PreQuilt - [*<mark style="color:blue;">Color Tags</mark>*](/welcome-to-prequilt/about-this-help-guide/glossary#color-tags).

## <mark style="color:blue;">What is a Color Tag?</mark>

{% hint style="warning" %} <mark style="color:orange;">**ALERT:**</mark> When a Color Tag is changed (either from a solid to another solid - or from a solid to a printed fabric swatch), everything that is linked to that Color Tag will also change.
{% endhint %}

A [*<mark style="color:blue;">color tag</mark>*](/welcome-to-prequilt/about-this-help-guide/glossary#color-tags) is a labeling device that allows you to tag and associate block pieces with a particular color. If you change the color of a color tag, all the pieces linked to that color tag will also change.&#x20;

### <mark style="color:blue;">01 Setting Color Tags</mark>

{% hint style="info" %} <mark style="color:blue;">**TIP:**</mark> You can rename the Color Tags to any name you like. A, B, and C are defaults.
{% endhint %}

In [*<mark style="color:blue;">02 Creating Quilt Blocks</mark>*](/prequilt-101/starter-quilts/first-prequilt-quilt/02-creating-quilt-blocks), we used 2 different color tags - A & B for our Ribbon Block, which are defaulted at Kona Haze and Kona Black, respectively. But say we want to use different colors, how would we change them?

1. Click on the '<mark style="color:blue;">**COLOR TAGS**</mark>' tab on the [*<mark style="color:blue;">Left Side Control Panel</mark>*](/welcome-to-prequilt/about-this-help-guide/glossary#control-panel) (it will expand).![](/files/0tISJtjPQsEFhYlejPgV)
2. To change the color associated with Color Tag A, click on its '<mark style="color:blue;">**Edit**</mark>' button.

   ![](/files/AkJOa6sAuJxOENShTKKb)
3. Using the dropdown panel (down arrow), select your preferred <mark style="color:blue;">**fabric manufacturer**</mark>. We have the solid fabric libraries loaded for most of the major fabric manufacturers. For this example, I'll use the Free Spirit line.

   ![](/files/fpfpZAeczXxH35nlmOBU)
4. Click on the <mark style="color:blue;">**square of color**</mark> you'd like to link to Color Tag A. For this example, I'd like to select Marigold.

   ![](/files/5ggrl6bbxO3UtwZvfn1I)
5. The window will automatically close once you select your new color for Color Tag A.
6. Repeat ***Steps 01.2-4*** for Color Tag B and C (optional - if you'd like a third color).

   ![](/files/XvQUgvMs2bgg49eoOlge)

### <mark style="color:blue;">02 Using Color Tags</mark>

{% hint style="info" %} <mark style="color:blue;">**Explained:**</mark> When the color of a Color Tag changes, all the block pieces that are linked to that Color Tag will automatically change to that color as well.
{% endhint %}

<div><figure><img src="/files/y7BuUMKiRw3IM9FwVm7X" alt=""><figcaption><p>Block using default Color Tags A &#x26; B</p></figcaption></figure> <figure><img src="/files/Hd9mDamBHxYpazQkibf1" alt=""><figcaption><p>Block using updated Color Tags A &#x26; B</p></figcaption></figure></div>

Now that we've selected the overall quilt colors for this quilt and set them as color tags, let's use them by linking our color tags to the patchwork pieces in the Ribbon Star quilt block.

1. Click on the '<mark style="color:blue;">**Edit Block**</mark>' button next to our Ribbon Star block.

   <div align="left"><figure><img src="/files/QiZiLfwRh4VOxyroNfWE" alt=""><figcaption></figcaption></figure></div>
2. Imagine that we'd like to have 2 different colored ribbon corners. To do this, we'll need to change the colors in 2 of the diagonal corners.
   * ***Note*****:** Because the block patches were linked to color tags A and B, the colors of our block have automatically been updated to Free Spirit 'Marigold' and Free Spirit 'Stargazer'.
3. Click on <mark style="color:blue;">**1 of the 3 pink (Stargazer) HSTs**</mark> that make up the ribbon patches in the top right corner of the block.
4. Click on the '<mark style="color:blue;">**Link**</mark>' button next to Color Tag C (Snapdragon).

   * ***Note*****:** Now, the selected HST is now orange (Snapdragon)

   <div><figure><img src="/files/Cmh0U1c7N1yzFC8auM4s" alt=""><figcaption></figcaption></figure> <figure><img src="/files/q2EaJytxdzqabI1q9XCT" alt=""><figcaption></figcaption></figure></div>
5. Repeat steps 3 and 4 until the 2 diagonal ribbon corners are relinked to Color Tag C.

   * ***TIP*****:** If you want to change the Color Tag on all the remaining 5 HSTs at once, hold the shift button as you click on all the pieces.

   <figure><img src="/files/KWmP7ALgbc1basAAyYMQ" alt=""><figcaption></figcaption></figure>


# 04 Using Blocks in Quilt

// First PreQuilt Quilt //

Our Ribbon Star quilt progress:

* [x] Select your quilt grid
* [x] Import or design your quilt block
* [x] Choose your quilt fabric colors
* [ ] Add blocks to quilt grid
* [ ] Finessing your quilt *(optional)*
* [ ] Add sashing *(optional)*
* [ ] Add borders *(optional)*
* [ ] Add binding
* [ ] Using printed fabric swatches *(optional)*
* [ ] Download quilt map, blocks & swatches

Now that we have our block designed and colored the way we'd like, let's add the block to our quilt and see what it looks like!

## <mark style="color:blue;">01 Adding The Same Block to Entire Quilt</mark>

The easiest and fastest way to create our quilt is to add the same block to the entire quilt.

1. Click on the <mark style="color:blue;">**infinity symbol**</mark> (![\infty](https://wikimedia.org/api/rest_v1/media/math/render/svg/c26c105004f30c27aa7c2a9c601550a4183b1f21))  in the top left corner of the quilt grid.&#x20;

   * **Note:** All the [*<mark style="color:blue;">cell blocks</mark>*](/welcome-to-prequilt/about-this-help-guide/glossary#cell-block) on the quilt grid will be selected and highlighted and outlined in blue.

   <figure><img src="/files/5ki6svzvgfED90idJ5Q3" alt=""><figcaption></figcaption></figure>
2. Click on the '<mark style="color:blue;">**BLOCK**</mark>' tab on the left side control panel. It will expand to show our quilt blocks. Then click on the '<mark style="color:blue;">**Add To Quilt**</mark>' button next to our Ribbon Star block.

   <div align="left"><figure><img src="/files/pWz3WIFq78Frk8mvsW1M" alt=""><figcaption></figcaption></figure></div>
3. Now, the entire quilt grid is filled with the same Ribbon Star block.&#x20;

   * ***Note*****:** You can see that the Ribbon Star block is used 25 times in this quilt.

   <div align="left"><figure><img src="/files/tHD92hUcladGxcsNcG3o" alt=""><figcaption></figcaption></figure></div>

   <div align="left"><figure><img src="/files/5Nd3oIq1QmCdoof0alVN" alt=""><figcaption></figcaption></figure></div>

## <mark style="color:blue;">02 Creating an Additional Block Variation</mark>

Now that we have a nice starting point with our quilt. Let's imagine that we wanted to add another block to this quilt. In this example, I'd like to add the same block design, but using different colors.

1. First, we'll need to [*<mark style="color:blue;">clone</mark>*](/welcome-to-prequilt/about-this-help-guide/glossary#clone) (duplicate/copy) the quilt block. To do this, click on the three dots beside the Ribbon Star block and click on '<mark style="color:blue;">**Clone**</mark>' from the dropdown menu.

   <div align="left"><figure><img src="/files/dSWouJxMDeSYUeL0PsBN" alt=""><figcaption></figcaption></figure></div>

2. Now, you'll see a second block, called 'Ribbon Star (2)'. Click on the '<mark style="color:blue;">**Edit Block**</mark>' button next to this cloned block. The [*<mark style="color:blue;">Block Editor</mark>*](/welcome-to-prequilt/about-this-help-guide/glossary#block-editor) window will expand.

   <div align="left"><figure><img src="/files/Voj6s24DS7YAnYEsoibX" alt=""><figcaption></figcaption></figure></div>

3. Click on <mark style="color:blue;">**one of the pink HSTs**</mark> to select it. The Color Tag panel will reveal itself.
   * ***Alert*****:** In this example, I'm going to change the color of the pink pieces to blue pieces. **BUT** I'm **not** going to change the color of Color Tag A -- I'm going to add a new Color Tag that will be blue.

4. Click on the '<mark style="color:blue;">**Create Color Tag**</mark>' button. A new color tag, Color Tag D (baby pink) will be created.

   <div align="left"><figure><img src="/files/sZcgvJqqNkgVKhH37GFX" alt=""><figcaption></figcaption></figure></div>

   <div align="left"><figure><img src="/files/S0rgdbMPqD0iolirmLLI" alt=""><figcaption></figcaption></figure></div>

5. Click on the '<mark style="color:blue;">**Edit**</mark>' button next to Color Tag D and select the new color for Color Tag D (in this example, I chose Free Spirit Cloud). The new color will automatically be saved and the panel will collapse and close.

   <div align="left"><figure><img src="/files/mkQLynjjyx60BMMYpDDf" alt=""><figcaption></figcaption></figure></div>

   <div align="left"><figure><img src="/files/VlYiVl5RvGmtnxp9Kwyz" alt=""><figcaption></figcaption></figure></div>

6. Now let's change all the color on all the remaining pink HSTs -- While holding down on the shift button on your keyboard, select all the remaining pink HSTs by clicking on them. Then click on the '<mark style="color:blue;">**Link**</mark>' button next to Color Tag D.

   * ***Note***: All the remaining pink HSTs will now be colored using Color Tag D.

   <div><figure><img src="/files/7mYoXSvWw2LJdqdC2fqG" alt=""><figcaption></figcaption></figure> <figure><img src="/files/sEEybUX9JEtPNU3LsSVw" alt=""><figcaption></figcaption></figure></div>

7. Then '<mark style="color:blue;">**Save to Quilt**</mark>'.

   <div align="left"><figure><img src="/files/YJQ0adDaHmxpBAxN8PJp" alt=""><figcaption></figcaption></figure></div>

8. Now we have 2 different Ribbon Star blocks. But as of now, only the pink and orange Ribbon Star is being used in the quilt grid.

   <div align="left"><figure><img src="/files/aLA11PdOqTg434uZ4zUu" alt=""><figcaption></figcaption></figure></div>

## <mark style="color:blue;">03 Adding Additional Block to the Quilt</mark>

{% hint style="info" %} <mark style="color:blue;">**TIP:**</mark> Use the 'Select Option' button ( ![](/files/Xt1AZNv6KoCzjUaZrIMh) ) on the central control panel to quickly select certain cell blocks.
{% endhint %}

There are lots of different ways to add blocks to the quilt grid. You can add blocks one at a time by selecting a cell block and then adding a quilt block to it. As in step 01, you can select all cell blocks and then add a block to every cell block. Or you can use the quick selection tool to select certain blocks and then add a block to only those cells.

1. Click on the '<mark style="color:blue;">**Select Option**</mark>' (![](/files/jZss16xiwRzvahfNfQzK) ) button on the central [*<mark style="color:blue;">Toolbar</mark>*](/welcome-to-prequilt/about-this-help-guide/glossary#toolbar).&#x20;

   <div align="left"><figure><img src="/files/jb4C9Ztdp9qaSMB9Nknh" alt=""><figcaption></figcaption></figure></div>
2. In this example, I'm going to click on the '<mark style="color:blue;">**Checker Odd**</mark>' option from the dropdown menu.

   <div align="left"><figure><img src="/files/B5SlUxcBZS3xMQciMTRC" alt=""><figcaption></figcaption></figure></div>
3. To add a new block to the selected cell blocks, click on the '<mark style="color:blue;">**Add To Quilt**</mark>' button next to the Ribbon Star (2) block.

   * ***Note*****:** Now every other block now has the orange and blue Ribbon Star block.

   <div align="left"><figure><img src="/files/UscKLpBNV0k7Rq0uDcwJ" alt=""><figcaption></figcaption></figure></div>

   <div><figure><img src="/files/4eTi56fPOs2ElifZASN8" alt=""><figcaption></figcaption></figure> <figure><img src="/files/DppMkOqB7GlcM467L5yj" alt=""><figcaption></figcaption></figure></div>
4. Save your work! Click on the '<mark style="color:blue;">**Save**</mark>' button on the central Toolbar. If you're still working on your quilt, click on '<mark style="color:blue;">**Save**</mark>' on the dropdown menu.

   <div align="left"><figure><img src="/files/1eTGht49bOkaRVgQQcOB" alt=""><figcaption></figcaption></figure></div>

   <div align="left"><figure><img src="/files/hY4XkfFOJyKkAD4wsOl1" alt=""><figcaption></figcaption></figure></div>


# 05 Finessing Your Quilt

// First PreQuilt Quilt //

Our Ribbon Star quilt progress:

* [x] Select your quilt grid
* [x] Import or design your quilt block
* [x] Choose your quilt fabric colors
* [x] Add blocks to quilt grid
* [ ] Finessing your quilt (*optional*)
  * [ ] Color
  * [ ] Rotation
* [ ] Add sashing *(optional)*
* [ ] Add borders *(optional)*
* [ ] Add binding
* [ ] Using printed fabric swatches *(optional)*
* [ ] Download quilt map, blocks & swatches

Now that we have something to visualize, you might notice that you might want to change the colors a little or change the size of your quilt. In this module, I'll show you how you can easily make these changes!

## <mark style="color:blue;">01 Revising Color Tags</mark>

The great thing about PreQuilt is you can quickly and easily visualize ALL the color options. You can either revise the color tags intentionally by editing the color of a Color Tag. Or you can try the 'Randomize' button and see what happens!

### <mark style="color:blue;">a | Edit a Color Tag</mark>

1. Click on the '<mark style="color:blue;">**COLOR TAG**</mark>' tab on the left side control panel.&#x20;

   <div align="left"><figure><img src="/files/q2ZTe7EmWq2CPNJVun69" alt=""><figcaption></figcaption></figure></div>
2. Click on the '<mark style="color:blue;">**Edit**</mark>' button next to the color tag you'd like to change. In this example, I'm going to change Color Tag A, which I'm using as the background color.

   <div align="left"><figure><img src="/files/kFP9JYMri8RtZ4mZ8L2m" alt=""><figcaption></figcaption></figure></div>
3. Click on the <mark style="color:blue;">**color swatch**</mark> for your new color selection.&#x20;

   <div align="left"><figure><img src="/files/L6o8tvzF6IdZq6KNeJKF" alt=""><figcaption></figcaption></figure></div>
4. The window will automatically close and the new colors are updated on the quilt.

   <div><figure><img src="/files/uiRNLpYTS9iw2GjSAYGH" alt=""><figcaption></figcaption></figure> <figure><img src="/files/R7PwPNk3mvKwBQThLNvs" alt=""><figcaption></figcaption></figure></div>

### <mark style="color:blue;">b | Randomizing Color Tags</mark>

If you're not sure about one (or all) your fabric colors, you can use the **Randomize** button to randomly generate color combinations for your Color Tags. As you find colors you like, you can also lock them so that they will not randomly change.

1. Click on the '<mark style="color:blue;">**COLOR TAG**</mark>' tab on the left side control panel.&#x20;

   <div align="left"><figure><img src="/files/B3i53pL4MkCHTK0xkFOZ" alt=""><figcaption></figcaption></figure></div>
2. Click on the <mark style="color:blue;">**Randomize**</mark> button (![](/files/1RHdzlYIQWJbV0Ln5guV)) on the central Toolbar. You can push this as many times until you find at least one color you like.

   <div align="left"><figure><img src="/files/eVec2E9mi1xyaYmkFI3q" alt=""><figcaption></figcaption></figure></div>
3. Now there are 4 new colors for each of the Color Tags (A-D).

   <div align="left"><figure><img src="/files/6od2eW10aFpVZWcfEnSJ" alt=""><figcaption></figcaption></figure> <figure><img src="/files/u4KltPhaG6ho6MayFVQV" alt=""><figcaption></figcaption></figure></div>

   <div><figure><img src="/files/0191bHWmm3S4ULmSg00n" alt=""><figcaption></figcaption></figure> <figure><img src="/files/SmtADgyrQcV1xo2RdeqW" alt=""><figcaption></figcaption></figure></div>
4. To keep a Color Tag from changing, it can be locked. To lock a Color Tag, click on its <mark style="color:blue;">**lock button**</mark> (![](/files/6vP82k0W7T1I0mDHcD9s)) next to the Edit button.

   * Once locked, it will not change when the Randomize button is used.&#x20;
   * In the example below, Color Tags B & C are locked.

   <div align="left"><figure><img src="/files/U6g7MuyhPUFFAg5k9kQ0" alt=""><figcaption></figcaption></figure></div>
5. Continue using the Randomize button or intentionally edit the Color Tags until you have your ideal color palette for your quilt design.

   <div align="left"><figure><img src="/files/CcEdWcJziOqERtr2LUAS" alt=""><figcaption></figcaption></figure> <figure><img src="/files/BZZpl0nNlE2Xnf1BJm8D" alt=""><figcaption></figcaption></figure></div>

## <mark style="color:blue;">02 Rotating Blocks</mark>

Just like Color Tags, we can be both intentional about block rotation and use the built in randomizing features to randomly rotate the blocks.

### <mark style="color:blue;">a | Intentional Block Rotation</mark>

To control the rotation of a block (or a selection of blocks):

1. On the quilt grid, select the <mark style="color:blue;">**blocks**</mark> to rotate by clicking on them. To select multiple blocks, keep clicking on them. Selected blocks will be outlined in blue.
   * ![](/files/xSURYzk9f2jbJwrIEFSB)
2. Click on the <mark style="color:blue;">**Rotate**</mark> button (![](/files/KTq9XiQfkke6zGdJ18Et)) on the central Toolbar.

   <div align="left"><figure><img src="/files/DF2phecTjsX0cK0l1NPP" alt=""><figcaption></figcaption></figure></div>
3. The selected blocks have now been rotated by 90 degrees.
   * ![](/files/sIf59r8olqM4YPtL2dmB)

### <mark style="color:blue;">b | Randomly Rotate Blocks</mark>

To randomly rotate all (or selected blocks):

1. On the quilt grid, select the blocks to rotate. Selected blocks will be outlined in blue. In this example, I've selected all cell blocks.
   * &#x20;![](/files/Judu7dQO46Gbnq1ytq6H)
2. Click on the **RANDOMIZE** tab on the left side control panel.

   <div align="left"><figure><img src="/files/EjCmYx9PBQMglJtnlZ9C" alt=""><figcaption></figcaption></figure></div>
3. Click on the Rotate button on that tab.

   <div align="left"><figure><img src="/files/k8YLZqhebCKYR1z6AIBw" alt=""><figcaption></figcaption></figure></div>
4. The blocks will now be randomly rotated. This example is kind of subtle.

   <div><figure><img src="/files/5aL2UjKyfuw91B6Titmz" alt=""><figcaption></figcaption></figure> <figure><img src="/files/re8swyYen2bvUod3ZXHi" alt=""><figcaption></figcaption></figure></div>

### <mark style="color:blue;">c | Resetting Block Rotation</mark>

To reset all the blocks to their original rotation:

1. Select all the blocks by clicking on the <mark style="color:blue;">**infinity symbol**</mark> in the top left hand corner of the quilt grid.
   * ![](/files/UkLpbmvOKPwGeuN1TcIq)
2. Click on the <mark style="color:blue;">**ROTATE/MIRROR**</mark> tab on the left side control panel.

   <div align="left"><figure><img src="/files/i0YgJ3mZJHXuxL4V88Xc" alt=""><figcaption></figcaption></figure></div>
3. Click on the <mark style="color:blue;">**Rotate Reset**</mark> button. This will reset all the blocks to their original rotation.

   <div align="left"><figure><img src="/files/SW7fAiMkVwBSYXwObbFx" alt=""><figcaption></figcaption></figure></div>


# 06 Adding Sashing

// First PreQuilt Quilt //

Our Ribbon Star quilt progress:

* [x] Select your quilt grid
* [x] Import or design your quilt block
* [x] Choose your quilt fabric colors
* [x] Add blocks to quilt grid
* [x] Finessing your quilt *(optional)*
* [ ] Add sashing *(optional)*
* [ ] Add borders *(optional)*
* [ ] Add binding
* [ ] Using printed fabric swatches *(optional)*
* [ ] Download quilt map, blocks & swatches

Once you've loaded your blocks, you might want to add some sashing between your blocks. It's quick and easy to do in PreQuilt! To add sashing inbetween each block, we will need to insert rows and columns between each row and column of cell blocks.&#x20;

Below there are directions on how to add sashing with and without cornerstones.

## <mark style="color:blue;">01 Sashing with Cornerstones</mark>

1. To select all the blocks in the first column of the quilt, click on the number 1 at the top of the column. This will highlight all the blocks in the column as well as activate an **Options** button.
   * ![](/files/y6RaRd3STcsSplCsmVvr)
2. Click on the <mark style="color:blue;">**Options**</mark> button and then select <mark style="color:blue;">**Insert After**</mark>.
   * ![](/files/RIK2tHriImhS0eDXpbHa)
3. Select all the cell blocks in Column 2 by clicking on the number <mark style="color:blue;">**2**</mark> at the top of the column. Click on the <mark style="color:blue;">**Options**</mark> button and then select <mark style="color:blue;">**Resize**</mark>.
   * ![](/files/Gu9iSVlaDRsrBYM4Sby8)
4. Enter the desired <mark style="color:blue;">**finished width**</mark> of your sashing and click <mark style="color:blue;">**OK**</mark>.

   * In this example, the finished width of the sashing is 2 inches.
   * There is now an empty 2 inch wide column between the first column and second column of blocks.
   * ![](/files/SshA9jEG2JU8I1BEKavB)

   <figure><img src="/files/61x9DskYCQBB7NewHogO" alt=""><figcaption></figcaption></figure>
5. Repeat ***Steps 01:1-4*** for all remaining sashing for both the columns and rows (as desired).&#x20;

   * In this example, sashing was added between all blocks.

   <figure><img src="/files/i9IUNBmuIekbgqoWDt8P" alt=""><figcaption></figcaption></figure>
6. Now we can fill in the sashing and cornerstones with the fabric of our choice. In this example, I'm going to use existing Color Tags, but new Color Tags can also be created.&#x20;
7. Click on all the <mark style="color:blue;">**sashing rows/columns**</mark> between blocks. Once they are selected, they will be outlined in blue.

   <figure><img src="/files/JzF05oVDZuvq1cQCctJn" alt=""><figcaption></figcaption></figure>
8. Click on the <mark style="color:blue;">**1 PATCH BLOCKS**</mark> tab(nested inside the **BLOCKS** tab). It will expand.

   <div align="left"><figure><img src="/files/XxQzeYTonSLLUINqRgoZ" alt=""><figcaption></figcaption></figure></div>
9. Click on the '<mark style="color:blue;">**Add To Quilt**</mark>' button next to Color Tag A (I want to use the background fabric for my sashing).

   <div align="left"><figure><img src="/files/CiHrSxk1rHkl7IBMSoHd" alt=""><figcaption></figcaption></figure></div>
10. Now all the sashing is the same color as the background fabric.

    <figure><img src="/files/ORSWt8ILTAZmy1j8yLdG" alt=""><figcaption></figcaption></figure>
11. To add Color Tag C to the cornerstones, click on the <mark style="color:blue;">**cell blocks for all the cornerstones**</mark> and <mark style="color:blue;">**add**</mark> the Color Tag C 1 Patch Blocks to them (***Steps 01:7-9***).

    <figure><img src="/files/30xkNGGC6s9TwiR9h2S3" alt=""><figcaption><p><em>Quilt with sashing &#x26; cornerstones</em></p></figcaption></figure>

## <mark style="color:blue;">02 Sashing without Cornerstones</mark>

1. To select all the blocks in the first column of the quilt, click on the number <mark style="color:blue;">**1**</mark> at the top of the column. This will highlight all the blocks in the column as well as activate an **Options** button.
   * ![](/files/7q9mIfsMJGanKUFjG0hK)
2. Click on the <mark style="color:blue;">**Options**</mark> button and then select <mark style="color:blue;">**Insert After**</mark>.
   * ![](/files/F3JyKbfto72foCjSBy9W)
3. Select all the cell blocks in Column 2 by clicking on the number <mark style="color:blue;">**2**</mark> at the top of the column. Click on the <mark style="color:blue;">**Options**</mark> button and then select <mark style="color:blue;">**Resize**</mark>.
   * ![](/files/xH64qI8LcH1bXFPLE4He)
4. Enter the desired <mark style="color:blue;">**finished width**</mark> of your sashing and click <mark style="color:blue;">**OK**</mark>.

   * In this example, the finished width of the sashing is 2 inches.
   * There is now an empty 2 inch wide column between the first column and second column of blocks.
   * ![](/files/P1XMJ05lVpRHWWOVe0LC)

   <figure><img src="/files/ritHrmH8nXbMBtUz0GY8" alt=""><figcaption></figcaption></figure>
5. Repeat ***Steps 02:1-4*** for all remaining sashing for both the columns and rows (as desired).&#x20;

   * In this sashing was added between all blocks.

   <figure><img src="/files/ywAZ1xTFl4V0L6KWKKe2" alt=""><figcaption></figcaption></figure>
6. To remove the cornerstones, select all the cell blocks in Row 2 by clicking on the number <mark style="color:blue;">**2**</mark> to the left of the row.

   <figure><img src="/files/n7yTv7jJXXNfoMSWUiCq" alt=""><figcaption></figcaption></figure>
7. Click on the <mark style="color:blue;">**Merge**</mark> button (<img src="/files/HGz30xpm54DjtF9IsFMi" alt="" data-size="line">)on the central Toolbar.

   <div align="left"><figure><img src="/files/TD2qDLKfauFLEU8pq39d" alt=""><figcaption></figcaption></figure></div>
8. Now we have one complete row of sashing.&#x20;

   <figure><img src="/files/6pkbzJxYjyaqhWGP6Suy" alt=""><figcaption></figcaption></figure>
9. Repeat ***Steps 02:7-8*** for to create the remaining rows of sashing.

   <figure><img src="/files/jHVJkUxfFdH8RD7ZXxwC" alt=""><figcaption></figcaption></figure>
10. Now we can fill in the sashing with the fabric of our choice. In this example, I'm going to use an existing Color Tag, but new Color Tags can also be created.&#x20;
11. Click on all the <mark style="color:blue;">**sashing**</mark> between blocks. Once they are selected, they will be outlined in blue.

    <figure><img src="/files/HeIFvDldniz5MOom0LYQ" alt=""><figcaption></figcaption></figure>
12. Click on the <mark style="color:blue;">**1 PATCH BLOCKS**</mark> tab (nested inside the **BLOCKS** tab). It will expand.

    <div align="left"><figure><img src="/files/7tHZ0j0TKN5ewGRttObi" alt=""><figcaption></figcaption></figure></div>
13. Click on the '<mark style="color:blue;">**Add To Quilt**</mark>' button next to Color Tag A (I want to use the background fabric for my sashing).

    <div align="left"><figure><img src="/files/h64mVsBcYaV4AgkLf9uO" alt=""><figcaption></figcaption></figure></div>
14. Now all the sashing is the same color as the background fabric.

    <figure><img src="/files/x1CRLHAsPQETIdXRsRq9" alt=""><figcaption></figcaption></figure>


---

[Next Page](/llms-full.txt/1)